VUE版手写日历组件

开发背景
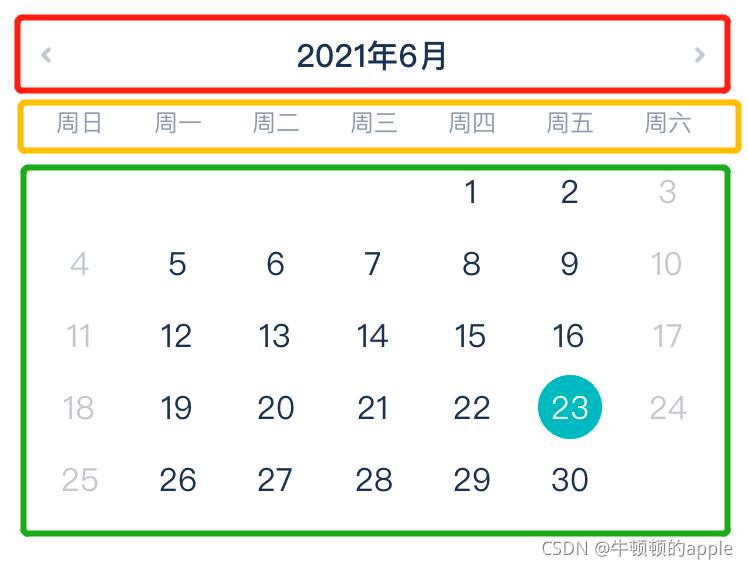
常用日历组件可能满足不了我们自定义的多种需求(比如样式),因此通常情况下我们可能需要自己手动开发款日历,先上图

在这里插入图片描述

开发流程
1. 根据常用日历样式,我们template部分可以分为三部分(上下月及当前月份展示;周日至周六展示;主体日期展示三部分)

在这里插入图片描述

1) template部分代码
<div class="date">
	<div class="header">
		<span class="pre_month" @click="onPreMonth"></span>
		<span v-cloak>{{ date.year }}{{ date.month }}</span>
		<span class="next_month" @click="onNextMonth"></span>
	</div>
	<div class="days">
		<table v-cloak border="0" cellspacing="0" cellpadding="0">
			<tr class="label">
				<td>周日</td>
				<td>周一</td>
				<td>周二</td>
				<td>周三</td>
				<td>周四</td>
				<td>周五</td>
				<td>周六</td>
			</tr>
			<tr class="row" v-for="week in weeks" :key="week[0].date">
				<td
					class="column"
					v-for="day in week"
					:key="day.date"
					v-bind:day="day.date"
					@click="onSelectDay(day)"
				>
            <span
				v-bind:class="[{
				   checked: selectedDate == day.date,
				   weekend: day.isWeekend,
         		}]"
					v-if="day.month == date.month">{{ day.v }}</span>
				</td>
			</tr>
		</table>
	</div>
</div>
2)js部分代码
// 生成日历函数
initDate(month) {
	var weeks = [] // template中用来渲染日历的数组
	var firstDay = this.moment(month, 'YYYY-MM') // 当月1号
	var week = firstDay.format('d') // 当月1号是周几 (比如周五则week = 5)
	var start = firstDay.subtract(week, 'days') // 日历上展示的第一个数(上个月的二十几号之类的,用于补齐日历)
	for (var i = 0; i < 6; i++) { // 通常日历为6行7排 42天,因此两个for循环
		var days = []
		for (var j = 0; j < 7; j++) {
			var day = {}
			day.num = start.toObject().date // 当前号数 22
			day.date = start.format('YYYY-MM-DD') // 返回值为2021-10-22
			day.month = start.format('MM') // 当前号数对应的月份,比如日历上个月27号则day.month = 9;这个月1号day.month = 10
			day.isWeekend = (start.format('E') === '6' || start.format('E') === '7') ? true : false // 是否是周末,用于UI区分周末和平时的颜色
			start.add(1, 'days')  // 没循环一次日期加一天
			days.push(day)
		}
		weeks.push(days)
	}
	this.date.year = this.moment(month).year()
	this.date.month = this.moment(month, 'YYYY-MM').add(0, 'month').format('MM')
	this.date.preMonth = this.moment(month, 'YYYY-MM').add(-1, 'month').format('YYYY-MM')
	this.date.nextMonth = this.moment(month, 'YYYY-MM').add(1, 'month').format('YYYY-MM')
	return weeks
}
初始化完成后调用(用于template中渲染)
mounted() {
	const currDate = new Date()
	this.weeks = this.initDate(this.moment(currDate).format('YYYY-MM'))
}
上个月、下个月处理
// 上一个月
onPreMonth() {
	const month = this.date.preMonth
	this.weeks = this.getCalendar(this.moment(month).format('YYYY-MM'))
},

// 下一个月
onNextMonth() {
	const month = this.date.nextMonth
	this.weeks = this.getCalendar(this.moment(month).format('YYYY-MM'))
}
选中某一天
onSelectDay(day) {
	if (!this.isSelectDay) return false
	if (day.month === this.date.month) {
		this.selectedDate = day.date
	}
}

在这里插入图片描述

点个赞吧^^
  • 8
    点赞
  • 20
    收藏
    觉得还不错? 一键收藏
  • 9
    评论
下面是一个简单的Uni-app手写日历组件的实现步骤: 1. 创建一个日历组件,可以使用uni-calendar或者自己手写一个日历组件。 2. 在data中定义一个calendarData对象,用于存储日历相关的数据,比如当前年月、当前月有多少天等。 ``` data() { return { calendarData: { year: 2021, month: 9, days: [] } } } ``` 3. 在created生命周期中,初始化日历数据。 ``` created() { this.initCalendarData(); }, methods: { initCalendarData() { const date = new Date(); const year = date.getFullYear(); const month = date.getMonth() + 1; const days = this.getDaysOfMonth(year, month); this.calendarData = { year, month, days }; }, getDaysOfMonth(year, month) { const days = []; const date = new Date(year, month - 1, 1); const weekDay = date.getDay(); const lastMonthDays = this.getDaysOfLastMonth(year, month); const thisMonthDays = this.getDaysOfMonth(year, month); const nextMonthDays = 42 - thisMonthDays - weekDay; for (let i = weekDay - 1; i >= 0; i--) { days.push({ day: lastMonthDays - i, type: 'lastMonth' }); } for (let i = 1; i <= thisMonthDays; i++) { days.push({ day: i, type: 'thisMonth' }); } for (let i = 1; i <= nextMonthDays; i++) { days.push({ day: i, type: 'nextMonth' }); } return days; }, getDaysOfMonth(year, month) { return new Date(year, month, 0).getDate(); }, getDaysOfLastMonth(year, month) { if (month === 1) { year--; month = 12; } else { month--; } return this.getDaysOfMonth(year, month); } } ``` 4. 在日历组件中,使用v-for循环渲染日历。 ``` <template> <view class="calendar"> <view class="calendar-header">{{ calendarData.year }}年{{ calendarData.month }}月</view> <view class="calendar-body"> <view class="calendar-week"> <view class="calendar-day">日</view> <view class="calendar-day">一</view> <view class="calendar-day">二</view> <view class="calendar-day">三</view> <view class="calendar-day">四</view> <view class="calendar-day">五</view> <view class="calendar-day">六</view> </view> <view class="calendar-days"> <view class="calendar-day" v-for="(day, index) in calendarData.days" :key="index"> <view class="day-text" :class="day.type">{{ day.day }}</view> </view> </view> </view> </view> </template> ``` 5. 根据需要,可以为不同日期设置不同的样式。 ``` .day-text { width: 50px; height: 50px; line-height: 50px; text-align: center; } .lastMonth { color: #999; } .thisMonth { color: #333; } .nextMonth { color: #999; } ``` 6. 最后,可以为日历组件添加一些交互事件,比如点击某个日期时,弹出该日期对应的课程安排等。 以上就是一个简单的Uni-app手写日历组件的实现步骤,具体实现可以根据需求进行优化和改进。

“相关推荐”对你有帮助么?

  • 非常没帮助
  • 没帮助
  • 一般
  • 有帮助
  • 非常有帮助
提交
评论 9
添加红包

请填写红包祝福语或标题

红包个数最小为10个

红包金额最低5元

当前余额3.43前往充值 >
需支付:10.00
成就一亿技术人!
领取后你会自动成为博主和红包主的粉丝 规则
hope_wisdom
发出的红包
实付
使用余额支付
点击重新获取
扫码支付
钱包余额 0

抵扣说明:

1.余额是钱包充值的虚拟货币,按照1:1的比例进行支付金额的抵扣。
2.余额无法直接购买下载,可以购买VIP、付费专栏及课程。

余额充值