


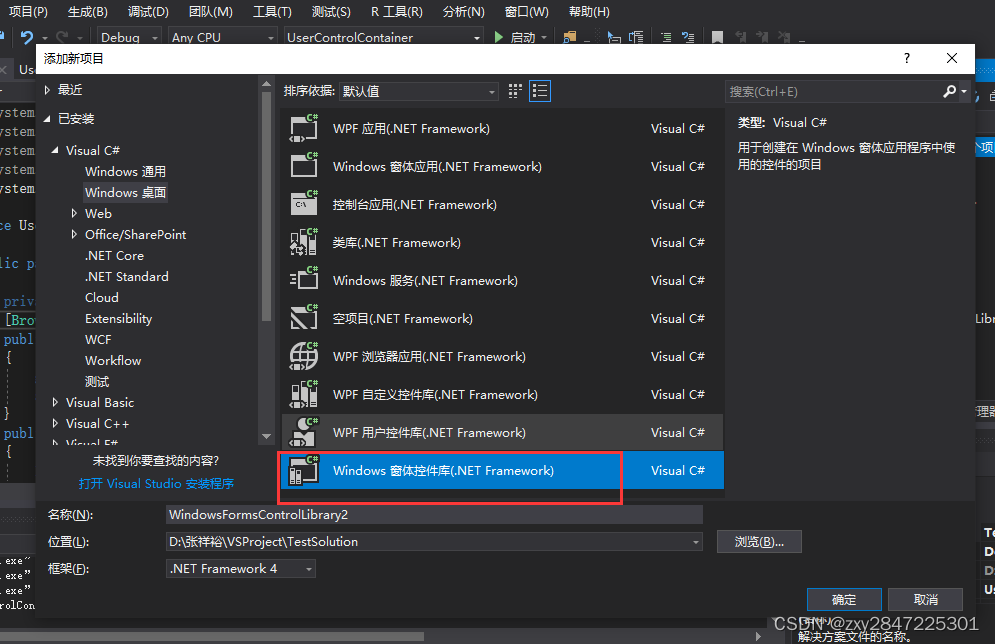
上周在看别人写的上位机demo代码时,发现创建的项目模板是"Windows 窗体控件库"(如下图)
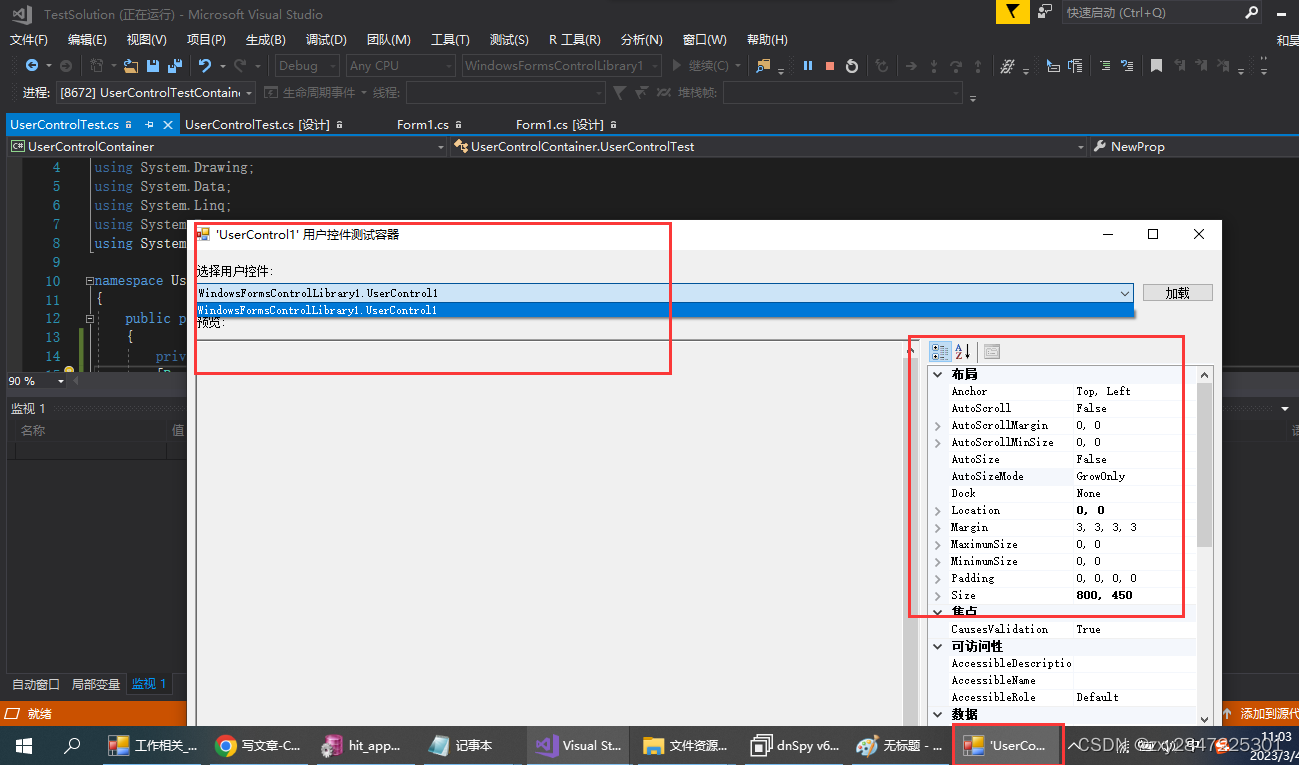
生成的项目结构像自定义控件库,没有程序入口方法Main,但却很神奇能调试,最后发现原来Vistual Studio启动了一个外挂程序UserControl TestContainer.exe,运行效果如下图:
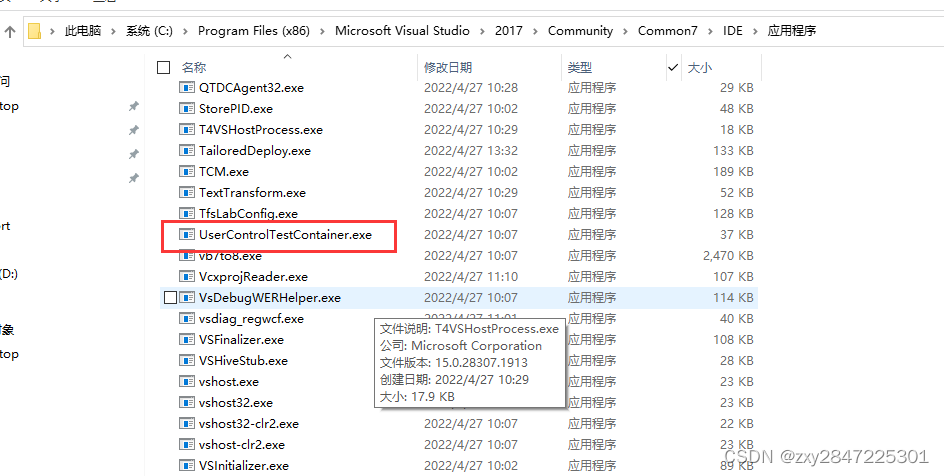
最后发现该exe在目录C:\Program Files (x86)\Microsoft Visual Studio\2017\Community\Common7\IDE下,这个目录和安装的vistual studio的版本有关,如下图:
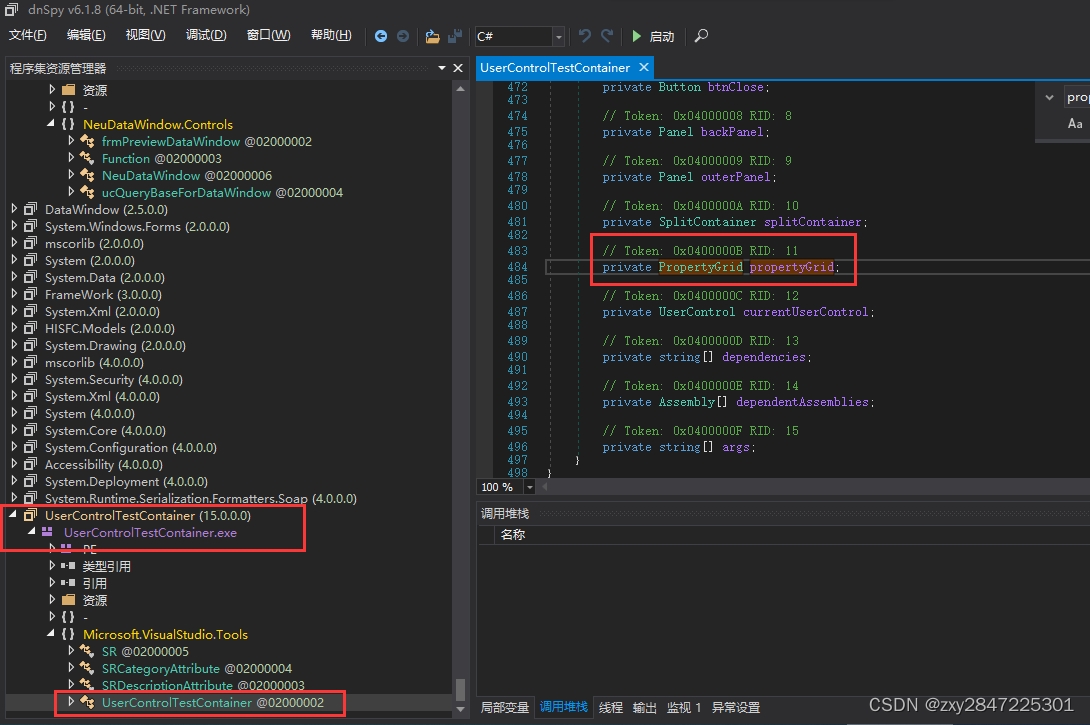
通过反编译看到了PropertyGrid控件,如下图,然后查阅相关的博客就知道怎样使用了
而最近发现我们公司的项目发现也用到了该控件,所以学习它就提上了日程。像有些卡业务流程或者调用第三方的接口的业务逻辑,某些机器因某种原因需要临时关闭该功能,就可以使用该控件实现个性化控制了,我上一家公司是用一个表来存储这种个性化设置参数,这样就要向数据库中查询一次,有点浪费性能了。
好了,下面就和我一起体验一下该控件吧,当然网上也有很多博客教程了,本文就简单意思一下就行,核心就是设置PropertyGrid控件的SelectedObject属性为对应的Control控件
步骤如下:
1 新增winfrom项目,项目名称为:UserControlContainer,生成的项目结构默认有一个Form1,就用它了
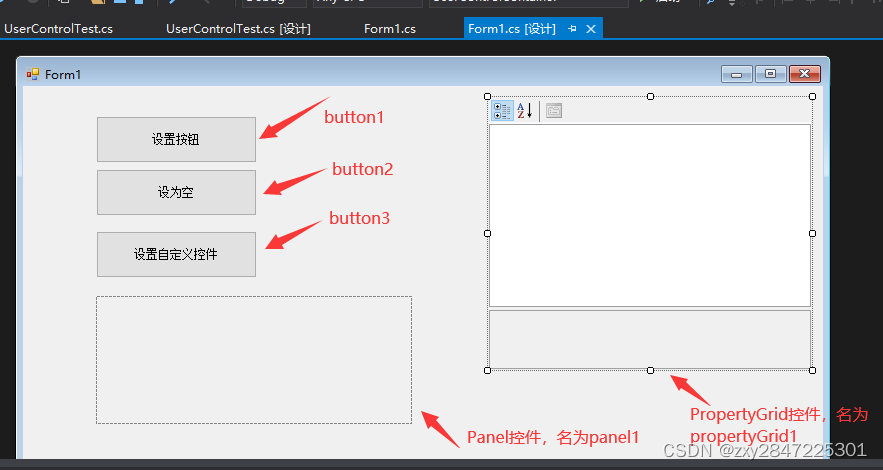
2 在工具箱中向Form1窗体拖入Button、Panel和PropertyGrid控件,布局如下:
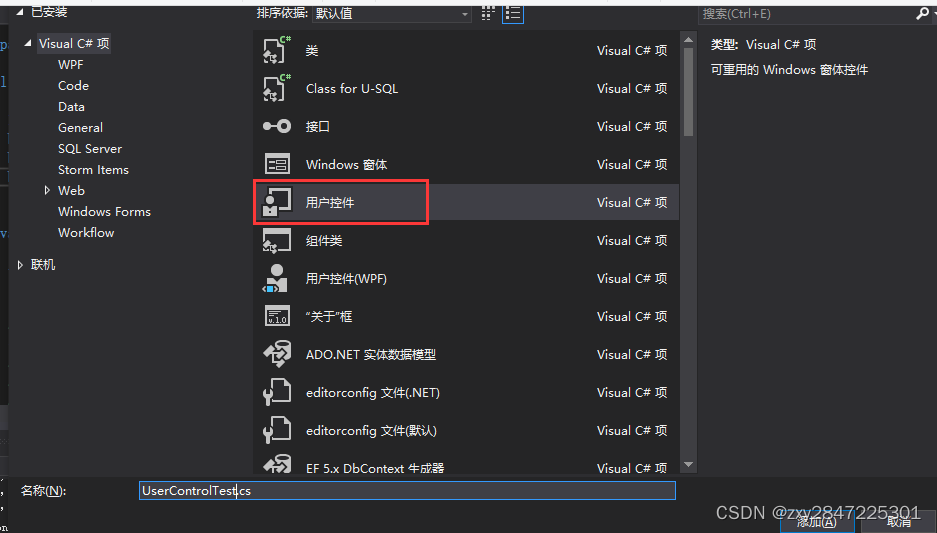
3 新增自定义控件,名为:UserControlTest,如下图:
详细代码如下:
using System;
using System.Collections.Generic;
using System.ComponentModel;
using System.Drawing;
using System.Data;
using System.Linq;
using System.Text;
using System.Windows.Forms;

namespace UserControlContainer
{
    public partial class UserControlTest : UserControl
    {
        private string _newProp;
        [Browsable(true), Category("自定义属性"), Description("测试描述")]
        public string NewProp
        {
            get { return _newProp; }
            set { this._newProp = value; }
        }
        public UserControlTest()
        {
            InitializeComponent();
        }

    }
}
代码中添加了自定义属性NewProp,属性上的标记信息用于程序在运行时显示的属性信息
4 在Form1编写的代码如下:
using System;
using System.Collections.Generic;
using System.ComponentModel;
using System.Data;
using System.Drawing;
using System.Linq;
using System.Text;
using System.Windows.Forms;

namespace UserControlContainer
{
    public partial class Form1 : Form
    {
        UserControlTest userControlTest;
        public Form1()
        {
            InitializeComponent();
            button1.Click += button1_Click;
            button2.Click += Button2_Click;
            button3.Click += Button3_Click;
            userControlTest = new UserControlTest();
            userControlTest.Dock = DockStyle.Fill;
            userControlTest.BackColor = Color.Black;
            this.panel1.Controls.Add(userControlTest);
        }
        /// <summary>
        /// 鼠标点击事件
        /// </summary>
        /// <param name="sender"></param>
        /// <param name="e"></param>
        private void button1_Click(object sender, EventArgs e)
        {
            this.propertyGrid1.SelectedObject = this.button1;
        }
        /// <summary>
        /// 设为空按钮点击事件
        /// </summary>
        /// <param name="sender"></param>
        /// <param name="e"></param>
        private void Button2_Click(object sender, EventArgs e)
        {
            this.propertyGrid1.SelectedObject = null;
        }
        private void Button3_Click(object sender, EventArgs e)
        {
            this.propertyGrid1.SelectedObject = this.userControlTest;
        }
    }
}
代码太简单了,就不解释了
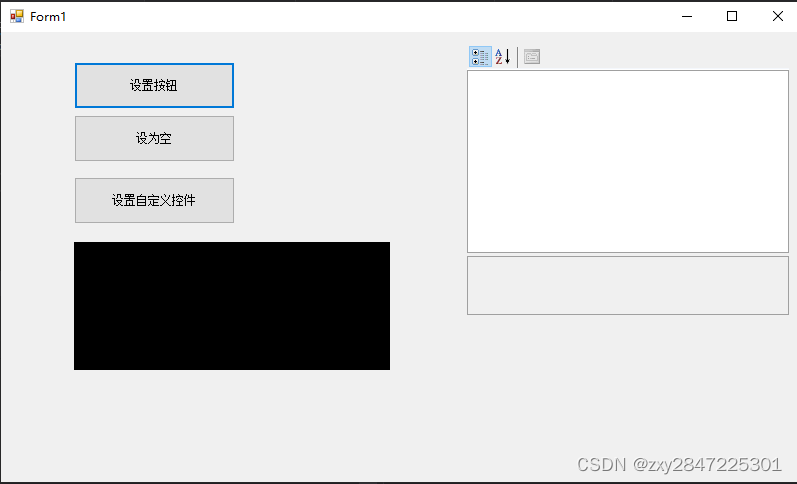
5 运行测试效果如下图:
刚启动的效果图:
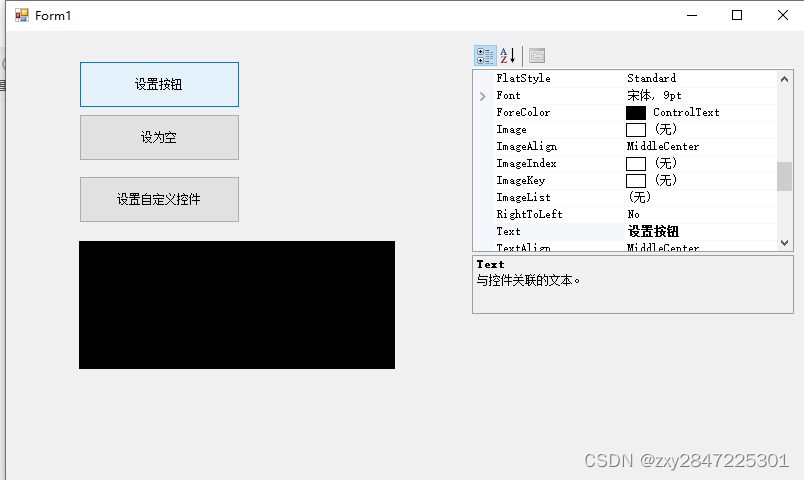
点击"设置按钮",按钮,可以看到右边的属性框信息,如下图:
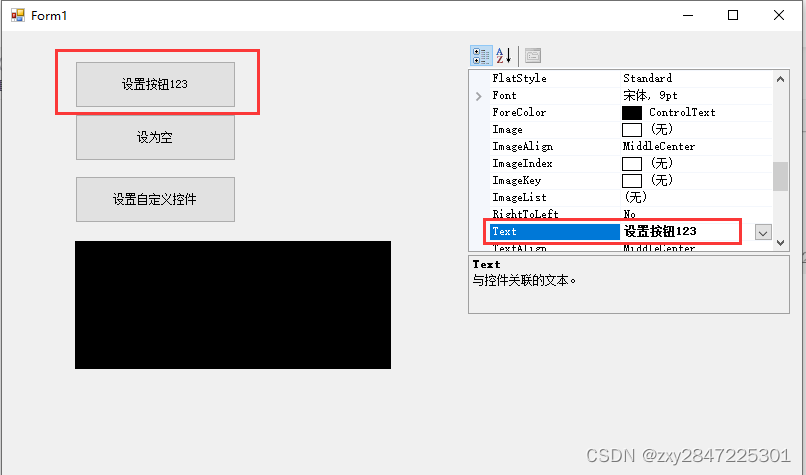
通过右边的属性框 修改"设置按钮"的按钮名称为"设置按钮123",效果如下图:
点击"设为空"按钮,效果如下图:

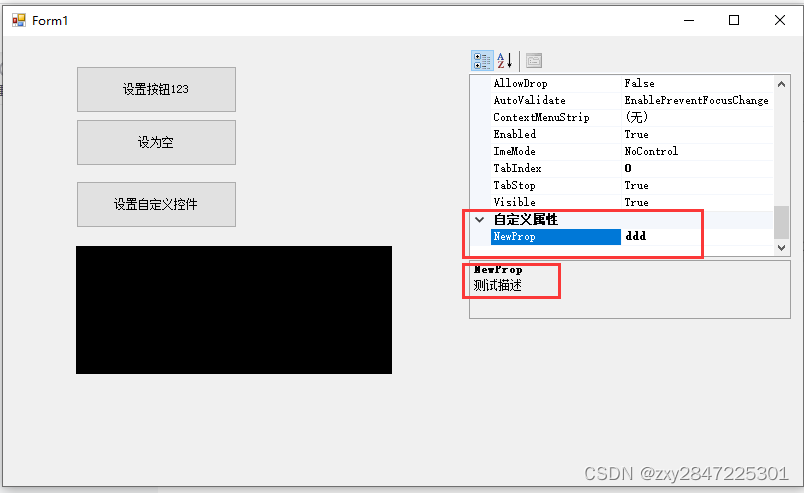
点击"设置自定义控件"按钮,可以看到自定义的属性NewProp,效果如下图:
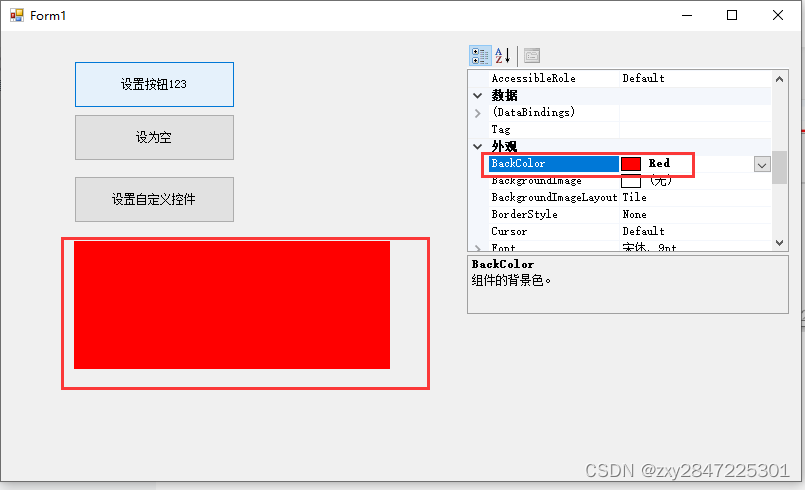
然后在右边的属性框中修改自定义控件的背景颜色为红色,效果如下图:
好了,本文到此结束。


 1万+
1万+


 被折叠的 条评论
为什么被折叠?
被折叠的 条评论
为什么被折叠?
 到【灌水乐园】发言


