


1.什么是CIFS协议
CIFS 使用客户/服务器模式。客户程序请求远在服务器上的服务器程序为它提供服务,服务器获得请求并返回响应。CIFS是公共的或开放的SMB协议版本,像SMB协议一样,CIFS在高层运行,而不像TCP/IP协议那样运行在底层。CIFS可以看做是应用程序协议如文件传输协议和超文本传输协议的一个实现。
2.CIFS的功能
1.访问服务器本地文件并读写这些文件
2.与其它用户一起共享一些文件块
3.服务端的配置
我们在服务至直接新建lvm类型的分区,然欧建立一个lv,若是之后存在容量不够的情况,我们可以再进行扩容,lvm的内容可以详见我的LVM的管理这篇博客
(1)新建LVM类型的分区
[root@server ~]# fdisk /dev/vda   #进入磁盘进行分区,读者可以用fdisk -l 查看自己主机上的磁盘名称
Welcome to fdisk (util-linux 2.23.2).

Changes will remain in memory only, until you decide to write them.
Be careful before using the write command.

Command (m for help): n           #新建一个分区
Partition type:
   p   primary (2 primary, 0 extended, 2 free)
   e   extended
Select (default p):               #默认是主分区
Using default response p
Partition number (3,4, default 3):  #由于前面已经有两个分区,所以默认是分区3
First sector (14483456-16777215, default 14483456):
Using default value 14483456
Last sector, +sectors or +size{K,M,G} (14483456-16777215, default 16777215): +1G
Partition 3 of type Linux and of size 1 GiB is set

Command (m for help): t            #修改标签
Partition number (1-3, default 3):
Hex code (type L to list all codes): 8e   #LVM类型的分区标签是8e
Changed type of partition 'Linux' to 'Linux LVM'

Command (m for help): p           #列出该磁盘上的所有分区信息

Disk /dev/vda: 8589 MB, 8589934592 bytes, 16777216 sectors
Units = sectors of 1 * 512 = 512 bytes
Sector size (logical/physical): 512 bytes / 512 bytes
I/O size (minimum/optimal): 512 bytes / 512 bytes
Disk label type: dos
Disk identifier: 0x0000c9f5

   Device Boot      Start         End      Blocks   Id  System
/dev/vda1   *        2048      411647      204800   83  Linux
/dev/vda2          411648    14483455     7035904   83  Linux
/dev/vda3        14483456    16580607     1048576   8e  Linux LVM

Command (m for help): wq        #保存退出
The partition table has been altered!

Calling ioctl() to re-read partition table.

WARNING: Re-reading the partition table failed with error 16: Device or resource busy.
The kernel still uses the old table. The new table will be used at
the next reboot or after you run partprobe(8) or kpartx(8)
Syncing disks.
[root@server ~]# partprobe    #同步分区表
(2)创建一个lv
[root@server ~]# pvcreate /dev/vda3
WARNING: swap signature detected on /dev/vda3 at offset 4086. Wipe it? [y/n]: y
  Wiping swap signature on /dev/vda3.
  Physical volume "/dev/vda3" successfully created
[root@server ~]# vgcreate iscsi_vg /dev/vda3
  Volume group "iscsi_vg" successfully created
[root@server ~]# lvcreate -l 255 -n iscsi_lv iscsi_vg
  Logical volume "iscsi_lv" created.
(3)安装targetcli
[root@server ~]# yum install targetcli -y
(4)添加共享硬盘
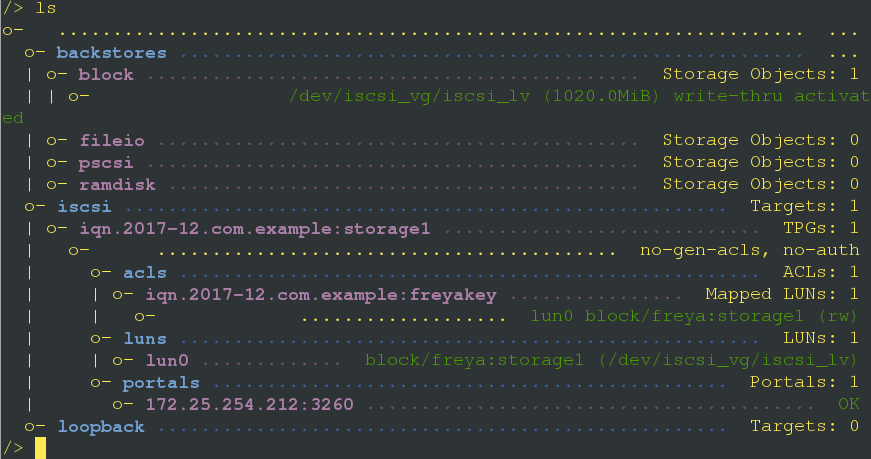
[root@server ~]# targetcli   ##进入iscsi目标交互式配置模式
targetcli shell version 2.1.fb41
Copyright 2011-2013 by Datera, Inc and others.
For help on commands, type 'help'.
/> /backstores/block create freya:storage1 /dev/iscsi_vg/iscsi_lv
 #步骤1建立一个叫freya的硬盘,利用之前创建的lv
 Created block storage object freya:storage1 using /dev/iscsi_vg/iscsi_lv.
/> /iscsi create iqn.2017-12.com.example:storage1
 #步骤2创建iqn服务的名称
Created target
iqn.2017-12.com.example:storage1.
Created TPG 1.
Global pref auto_add_default_portal=true
Created default portal listening on all IPs (0.0.0.0), port 3260.
/> /iscsi/iqn.2017-12.com.example:storage1/tpg1/acls create iqn.2017-12.com.example:freyakey
 #步骤3创建客户端启动服务密钥
Created Node ACL for iqn.2017-12.com.example:freyakey
/> /iscsi/iqn.2017-12.com.example:storage1/tpg1/luns create /backstores/block/freya:storage1
 #步骤4将iqn服务和先前的freya的硬盘绑定在一起
Created LUN 0.
Created LUN 0->0 mapping in node ACL iqn.2017-12.com.example:freyakey
/> iscsi/iqn.2017-12.com.example:storage1/tpg1/portals/ create 172.25.254.212
Using default IP port 3260
Could not create NetworkPortal in configFS       #若是读者出现该错误
/> /iscsi/iqn.2017-12.com.example:storage1/tpg1/portals/ delete 0.0.0.0 ip_port=3260
 #可以用该方法解决上面错误
Deleted network portal 0.0.0.0:3260
/> iscsi/iqn.2017-12.com.example:storage1/tpg1/portals/ create 172.25.254.212
 #步骤5创建目标门户
Using default IP port 3260
Created network portal 172.25.254.212:3260.
/> exit     #退出
成功创建
(5)设置防火墙,打开3260端口
[root@server ~]# firewall-cmd --permanent --add-port=3260/tcp
success
[root@server ~]# firewall-cmd --reload
success
4.客户端的使用配置
(1)安装和启动iscsi-initiator-utils.x86_64
[root@client1 ~]# yum install iscsi-initiator-utils.x86_64 -y
[root@client1 ~]# systemctl start iscsi
(2)编辑iscsi/initiatorname.iscsi文件
[root@client1 ~]# vim /etc/iscsi/initiatorname.iscsi
InitiatorName=iqn.2017-12.com.example:freyakey   #为服务端创建的共享磁盘及钥匙的名字
(3)将该磁盘投入使用
[root@client1 ~]# iscsiadm -m discovery -t st -p 172.25.254.212
172.25.254.212:3260,1 iqn.2017-12.com.example:storage1
[root@client1 ~]# iscsiadm -m node -T iqn.2017-12.com.example:storage1 -p 172.25.254.212 -l
发现客户端多了一块磁盘
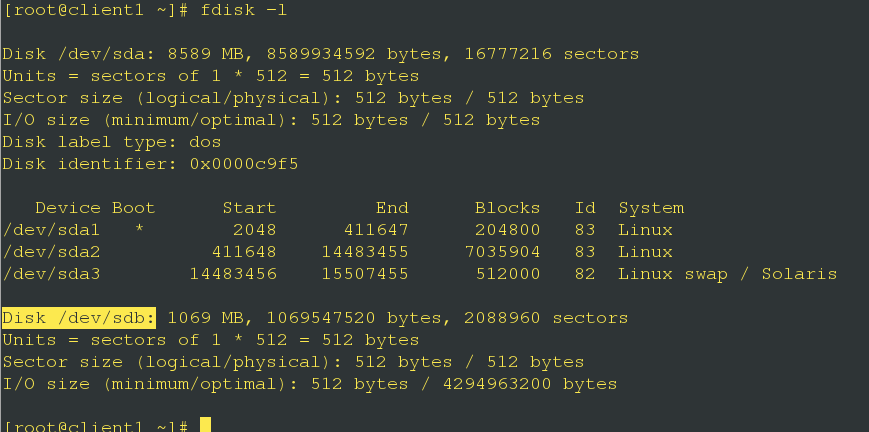
(4)为该磁盘分区
[root@client1 ~]# fdisk /dev/sdb
Welcome to fdisk (util-linux 2.23.2).

Changes will remain in memory only, until you decide to write them.
Be careful before using the write command.

Device does not contain a recognized partition table
Building a new DOS disklabel with disk identifier 0x69d1fe6d.

Command (m for help): n
Partition type:
   p   primary (0 primary, 0 extended, 4 free)
   e   extended
Select (default p):
Using default response p
Partition number (1-4, default 1):
First sector (1-2088959, default 1):
Using default value 1
Last sector, +sectors or +size{K,M,G} (1-2088959, default 2088959):
Using default value 2088959
Partition 1 of type Linux and of size 1020 MiB is set

Command (m for help): p

Disk /dev/sdb: 1069 MB, 1069547520 bytes, 2088960 sectors
Units = sectors of 1 * 512 = 512 bytes
Sector size (logical/physical): 512 bytes / 512 bytes
I/O size (minimum/optimal): 512 bytes / 4294963200 bytes
Disk label type: dos
Disk identifier: 0x69d1fe6d

   Device Boot      Start         End      Blocks   Id  System
/dev/sdb1               1     2088959     1044479+  83  Linux

Command (m for help): wq
The partition table has been altered!

Calling ioctl() to re-read partition table.
Syncing disks.
(5)为该设备格式化文件系统
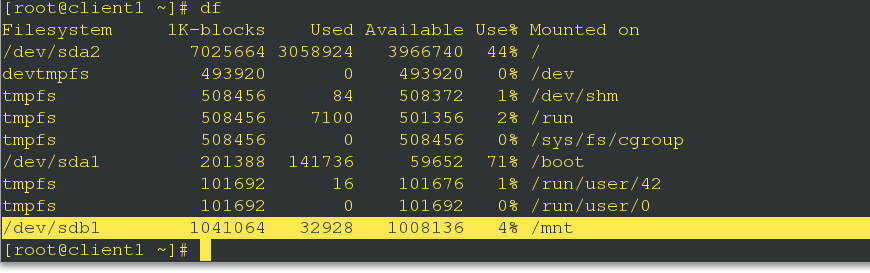
[root@client1 ~]# mkfs.xfs /dev/sdb1(6)挂载使用该新建设备
[root@client1 ~]# mount /dev/sdb1 /mnt成功挂载
也可以永久性挂载,编辑/etc下的fstab文件即可,但是由于开机先读取该文件,再是开启网络服务,所以再没有网络服务开启的情况下,客户端和服务端是不通的,自然也无法读取fatsb文件里的远程磁盘,所以我们需要在配置文件里做下面设置

[root@client1 ~]# mount -a #令永久性挂载生效使用blkid命令可以查看设备的UUID,defaults,_netdev表示先开启网络服务,这样就解决了上述的问题,这样就实现了永久性挂载。
可以reboot后再检测
6.服务端对于lv的扩容
当我们遇到设备容量不够使用的情况下,我们可以通过新添lvm类型的磁盘分区,再一系列操作后令lv扩容,下面就算是关于这些操作具体步骤
(1)新添lvm类型的磁盘分区,方法同上,根据需要扩容的大小,适当添加,比如我们添加50M叫做/dev/vda4的设备
[root@server ~]# pvcreate /dev/vda4
Physical volume "/dev/vda4" successfully created
[root@server ~]# vgextend iscsi_vg /dev/vda4
Volume group "iscsi_vg" successfully extended
[root@server ~]# lvextend -l +12 /dev/iscsi_vg/iscsi_lv
Size of logical volume iscsi_vg/iscsi_lv changed from 1020.00 MiB (255 extents) to 1.04 GiB (267 extents).
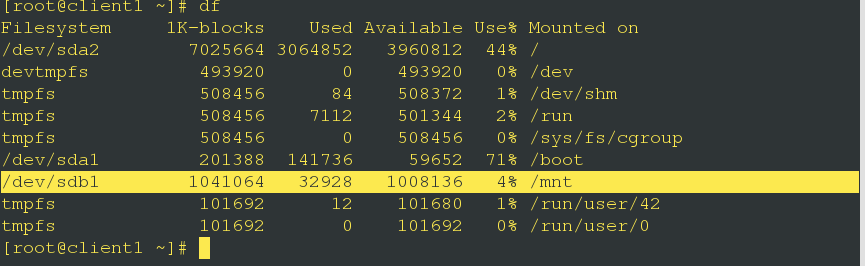
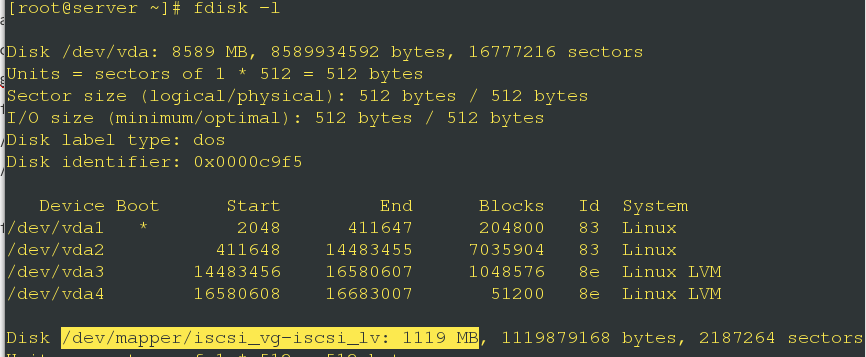
Logical volume iscsi_lv successfully resized.(2)下图是服务端磁盘分区的大小
下图是客户端远程登陆的服务端的磁盘分区的大小
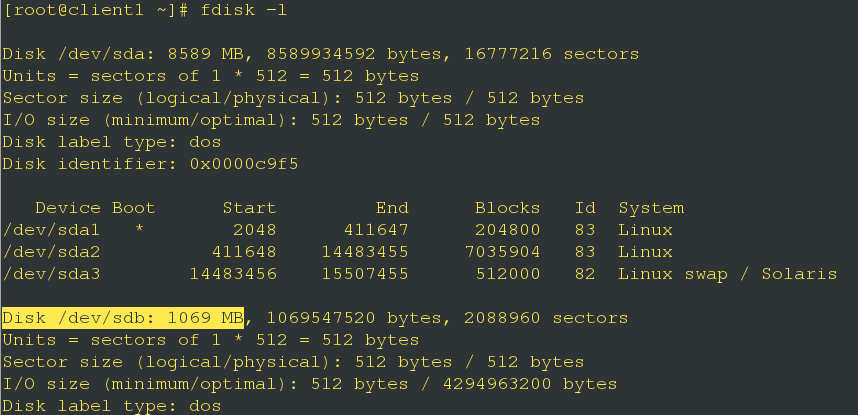
可以看到这个时候,服务端扩容,但是客户端的该设备打大小号性并没有发生变化,这是为什么呢~
因为还客户端还没有刷新啦~
(3)所以我们可以执行下条命令,令客户端先退出登录
[root@client1 ~]# iscsiadm -m node -T iqn.2017-12.com.example:storage1 -p 172.25.254.212 -u
再重新登录
[root@client1 ~]# iscsiadm -m node -T iqn.2017-12.com.example:storage1 -p 172.25.254.212 -l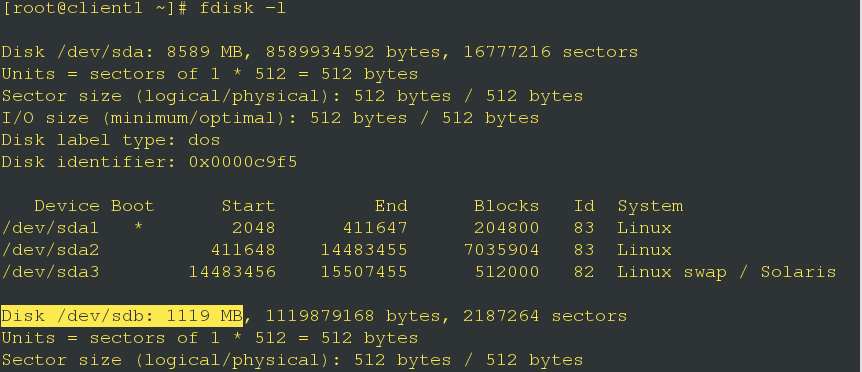
哒哒~这个时候就和服务端磁盘分区的大小一致了!!!
7.共享磁盘分区的删除
(1)客户端的退出登录以及删除
[root@client1 ~]# iscsiadm -m node -T iqn.2017-12.com.example:storage1 -p 172.25.254.212 -u
[root@client1 ~]# iscsiadm -m node -T iqn.2017-12.com.example:storage1 -p 172.25.254.212 -o delete
(2)服务端的删除
[root@server ~]# targetcli
targetcli shell version 2.1.fb41
Copyright 2011-2013 by Datera, Inc and others.
For help on commands, type 'help'.
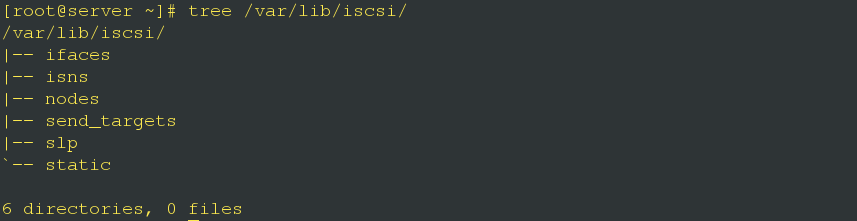
/> clearconfig confirm=true
All configuration cleared
如下图,成功删除
ok,这篇博客就到此结束了


 2863
2863

 被折叠的 条评论
为什么被折叠?
被折叠的 条评论
为什么被折叠?
 到【灌水乐园】发言


