


IOC
一 、把 \Spring.Net\Spring.NET-2.0.0-M1\Spring.NET\bin\net\4.0\release下的 三个核心文件 Spring.Core.dll Spring.Core.xml Spring.Core.pdb 以及错误日志文件Common.Logging.dll 放在解决方案根目录下的lib文件夹,并在项目中添加两个dll文件的引用。
注意:1、configSections 节点必须是configuration节点中的第一个节点
2、object节点必须在objects节点中
3、如果在一个控制器中配置了多余的 属性 当访问到这个控制器的时候会因为多余的属性在控制器中找不到对应的变量或属性而报'ActionInfoService' node cannot be resolved for the specified context [Core.ProjectOA.WebApp.Controllers.HomeController]. 这时候把提示中的控制器中的对应节点在xml config文件中删除即可(或者在程序中对应的控制器下添加对应的属性) 所以 在写代码过程中 xml文件中控制器下节点要随着用到随着添加,一旦对应属性被删除了 要记得去config文件中删节点
配置文件app.config :
<?xml version="1.0" encoding="utf-8"?>
<configuration>

  <configSections> //   添加这个节点以及里面的内容,固定不用改(<span style="font-size:24px;color:#ff0000;">注意这个节点必须是configuration中的第一个节点  否则会报错</span>)
    <sectionGroup name="spring">
      <section name="context" type="Spring.Context.Support.ContextHandler, Spring.Core"/>
      <section name="objects" type="Spring.Context.Support.DefaultSectionHandler, Spring.Core"/>
    </sectionGroup>
  </configSections>
   <startup> //这个节点本来是默认 的第一个节点   要让位给configSections
    <supportedRuntime version="v4.0" sku=".NETFramework,Version=v4.5.2"/>
  </startup>
  <spring>  //添加这个节点
    <context>
      <resource uri="config://spring/objects"/>
    </context>
    <objects xmlns="http://www.springframework.net">
      <description>An  example that demonstrates simple IoC features.</description>
      <object name="节点名(不一定但最好是类名,<span style="color:#ff0000;">跟后面程序中GetObject(object节点名)方法的参数必须一致</span>)" type="命名空间.要创建的类名,程序集">    </object>
    </objects>  //<span style="color:#ff0000;">注意object 在objects节点里</span>
  </spring>
</configuration>
程序中创建类的实例
 IApplicationContext ctx = ContextRegistry.GetContext();//创建容器
 IUserInfoService userInfoService = (IUserInfoService)ctx.GetObject(object节点名); //创建实例
DI
步骤:
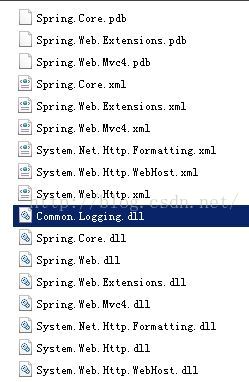
1先导入dll文件 (主要是Spring开头的,其他的可能会缺少,少哪个引哪个) 如图
2 拷贝案例中config文件夹到项目中
3 修改config文件夹中controllers.xml相关配置信息
<?xml version="1.0" encoding="utf-8" ?>
<objects xmlns="http://www.springframework.net">

  <object type="Core.ProjectOA.WebApp.Controllers.UserInfoController, Core.ProjectOA.WebApp" singleton="false" >
    <property name="UserInfoService" ref="UserInfoService" />
  </object>
  <!--intentionally do NOT register the AccountController or the ValuesController with the container; demonstrates that the underlying
  default controller factory will properly (attempt to!) resolve all controllers not registered with Spring.NET
  using its default controller resolution behavoir-->
  <!--<object type="Spring.Mvc4QuickStart.Controllers.AccountController, Spring.Mvc4QuickStart" singleton="false" />-->
  <!--<object type="Spring.Mvc4QuickStart.Controllers.ValuesController, Spring.Mvc4QuickStart" singleton="false" />-->
</objects>
<?xml version="1.0" encoding="utf-8" ?>
<objects xmlns="http://www.springframework.net">
  <object name="UserInfoService" type="Core.ProjectOA.BLL.UserInfoService, Core.ProjectOA.BLL" singleton="false" >
  </object>
</objects>
<configSections>
    <!-- For more information on Entity Framework configuration, visit http://go.microsoft.com/fwlink/?LinkID=237468 -->
    <section name="entityFramework" type="System.Data.Entity.Internal.ConfigFile.EntityFrameworkSection, EntityFramework, Version=6.0.0.0, Culture=neutral, PublicKeyToken=b77a5c561934e089" requirePermission="false"/>
    <sectionGroup name="spring">
      <section name="context" type="Spring.Context.Support.MvcContextHandler, Spring.Web.Mvc4"/>
    </sectionGroup>
  </configSections>
  <spring>
    <context>
      <resource uri="file://~/Config/controllers.xml"/>
      <resource uri="file://~/Config/services.xml"/>
    </context>
  </spring>
6 修改Global文件 继承 SpringMvcApplication
public class MvcApplication : SpringMvcApplication


 118
118

 被折叠的 条评论
为什么被折叠?
被折叠的 条评论
为什么被折叠?
 到【灌水乐园】发言


