


上篇文章,写到大部分情况,我们都是希望cxf的发布和访问是在同一个容器,那么,在同一个容器是如何配置呢?
1.我们需要Spring定义文件
web.xml的配置:
<?xml version="1.0" encoding="UTF-8"?>
<web-app xmlns:xsi="http://www.w3.org/2001/XMLSchema-instance"
	xmlns="http://java.sun.com/xml/ns/javaee" xmlns:web="http://java.sun.com/xml/ns/javaee/web-app_2_5.xsd"
	xsi:schemaLocation="http://java.sun.com/xml/ns/javaee http://java.sun.com/xml/ns/javaee/web-app_3_0.xsd"
	id="WebApp_ID" version="3.0">

	<context-param>
		<param-name>contextConfigLocation</param-name>
		<!-- spring的存放目录 -->
		<param-value>classpath*:applicationContext_cxf.xml</param-value>
	</context-param>

	<listener>
		<!-- spring监听器,容器启动时,装配 applicationContext_cxf.xml-->
		<listener-class>org.springframework.web.context.ContextLoaderListener</listener-class>
	</listener>

	<servlet>
		<servlet-name>CXFServlet</servlet-name>
		<!-- CXFServlet,cxf的请求拦截处理 -->
		<servlet-class>org.apache.cxf.transport.servlet.CXFServlet</servlet-class>
		<load-on-startup>1</load-on-startup>
	</servlet>
	<servlet-mapping>
		<servlet-name>CXFServlet</servlet-name>
		<!-- cxf的拦截筛选 -->
		<url-pattern>/webservice/*</url-pattern>
	</servlet-mapping>
</web-app>接下来看看applicationContext_cxf.xml:
<?xml version="1.0" encoding="UTF-8"?>
<beans xmlns="http://www.springframework.org/schema/beans"
	xmlns:xsi="http://www.w3.org/2001/XMLSchema-instance" xmlns:jaxws="http://cxf.apache.org/jaxws"
	xsi:schemaLocation="
	    http://www.springframework.org/schema/beans
	    http://www.springframework.org/schema/beans/spring-beans.xsd
	    http://cxf.apache.org/jaxws
	    http://cxf.apache.org/schemas/jaxws.xsd">

	<import resource="classpath:META-INF/cxf/cxf.xml" />
	<import resource="classpath:META-INF/cxf/cxf-extension-soap.xml" />
	<import resource="classpath:META-INF/cxf/cxf-servlet.xml" />

	<jaxws:endpoint id="readerServicce2" implementor="com.zy.service.ReaderServiceImp" address="/readerService2" />
</beans>
通过jaxws:endpoint定义了一个webservice,implementor是webservice的处理类,而address是它的访问路径,跟我们前面写的readerService类似。这时我们可以把它部署到tomcat中,通过http://localhost:8080/TestCXF/webservice/readerService2?wsdl可以直接访问。
效果图:
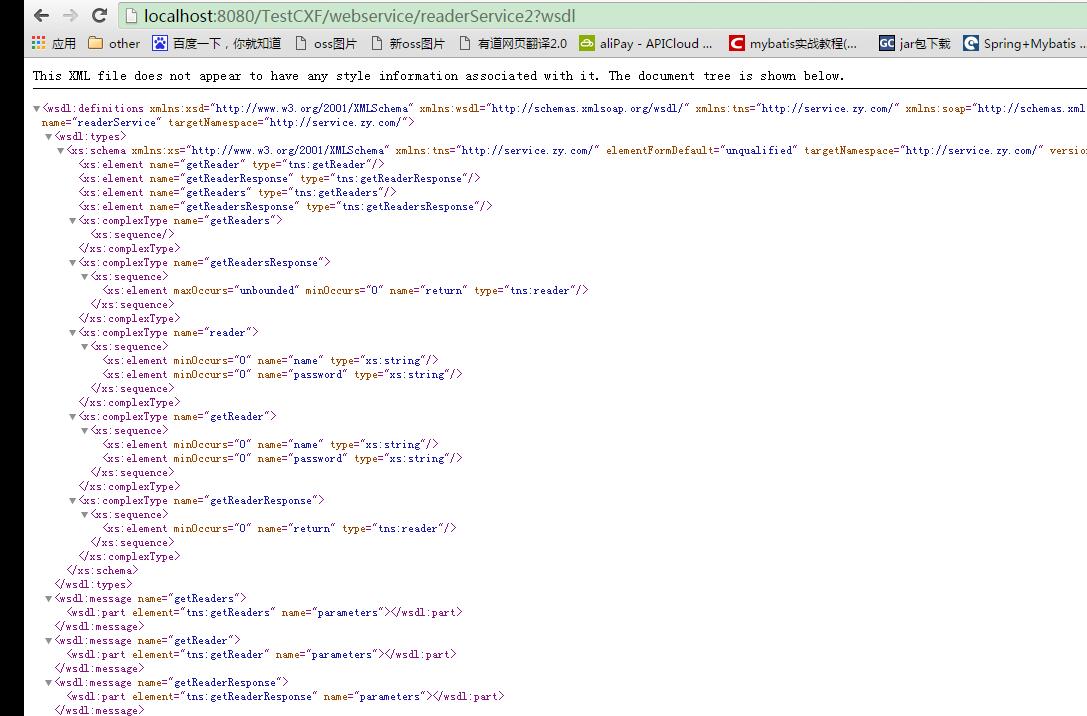
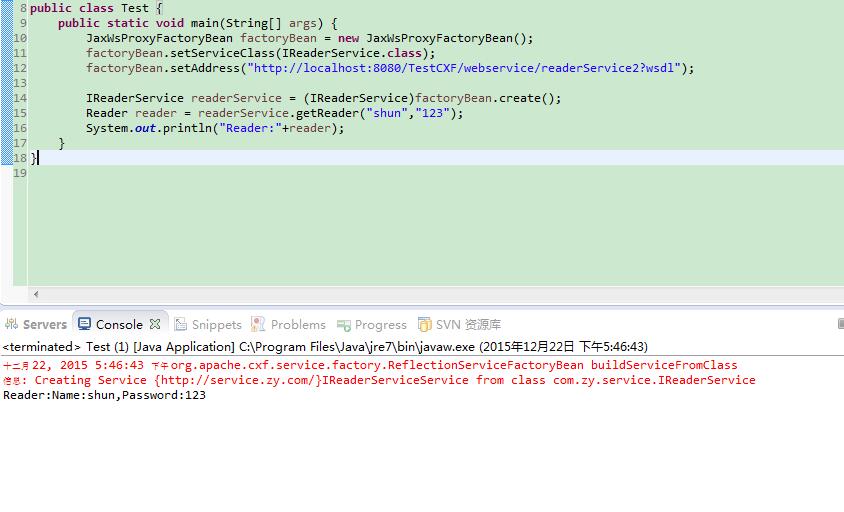
可以再次用前面的测试类测试一下,注意,需要把address修改成我们发布后的URL。
tips:
1.beans.xml文件的完善写法:
<bean id="readerServicce2Service"class="com.cxf.servlet.ReaderService" />

<!--endpoint 方式发布web服务和 server方式一样 -->

<!--

<jaxws:endpointid="readerServicce2" address="/readerServicce2" implementor="#readerServicce2Service"/>

-->


<!--

     另一种写法,建议不要用这种方法 ,如果实现类有的属性要通过spring依赖注入的话,

     这种方法只是简单的new个实现类,他的属性没有通过spring依赖注入给注入值

-->

<!--

<jaxws:endpointid="readerServicce2" address="/readerServicce2" implementor="com.cxf.servlet.ReaderService"/>

-->
2.动态的调用webservice方法
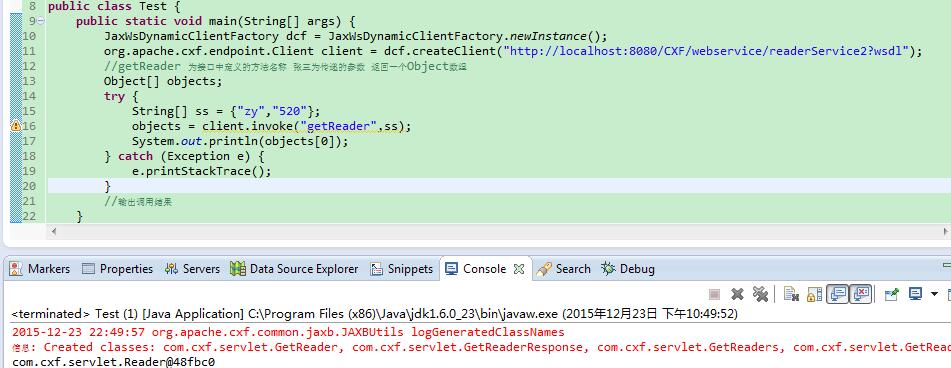
一般情况,动态调用,返回值是map,我们直接根据key值来获取value


 267
267

 被折叠的 条评论
为什么被折叠?
被折叠的 条评论
为什么被折叠?
 到【灌水乐园】发言


