


EhCache 是一个纯Java的进程内缓存框架,具有快速、精干等特点,是Hibernate中默认的CacheProvider,同时在项目开发中也被广泛使用到。接下来就以用户缓存为例,基于javaweb项目来搭建ehcache缓存系统。
主要涉及核心原理和实现要点:项目是基于spring框架来统一管理和配置bean的,所以在spring中配置缓存,定义EhCacheManagerFactoryBean,同时指向其ehcache配置文件ehcache.xml,ehcache.xml则有我们自己根据项目情况来定义一些缓存策略,如:cache中元素的生存时间、cache 中最多可以存放的元素的数量和内存存储与释放策略等等。java代码中则可以定义一个统一的缓存管理类去持有net.sf.ehcache.CacheManager实例,来代理往数据库中操作数据的行为。关于CacheManager实例的获取,则可以通过实现ApplicationContextAware, DisposableBean接口,分别重写其setApplicationContext()方法,注入ApplicationContext到静态变量中和destroy()方法,在ApplicationContext关闭时清理静态变量。这样以静态变量保存Spring ApplicationContext, 可在任何代码任何地方任何时候取出ApplicaitonContext,进而调用其getBean()方法来获得CacheManager实例。拿数据是先getByCache(),若缓存中存在数据则直接返回该数据,若缓存中不存在数据,再执行getByDb(),从数据库中拿数据,同时将数据存进缓存中。
1、首先从web.xml部署文件入口进行配置
<!-- 应用程序Spring上下文配置 -->
	<context-param>
		<param-name>contextConfigLocation</param-name>
		<param-value>
			classpath*:applicationContext*.xml,
		</param-value>
	</context-param>
<!-- 自定义监听器 继承自spring上下文加载监听器 -->
        <listener>
           <listener-class>com.schoolnet.sys.listener.WebContextListener</listener-class>
</listener>WebContextListener .java
public class WebContextListener extends org.springframework.web.context.ContextLoaderListener {

	@Override
	public WebApplicationContext initWebApplicationContext(ServletContext servletContext) {
		if (!printKeyLoadMessage()){
			return null;
		}
		return super.initWebApplicationContext(servletContext);
	}
	private static boolean printKeyLoadMessage(){
		StringBuilder sb = new StringBuilder();
		sb.append("\r\n======================================================================\r\n");
		sb.append("\r\n    欢迎使用 校园网  - EhCache缓存系统搭建\r\n");
		sb.append("\r\n======================================================================\r\n");
		System.out.println(sb.toString());
		return true;
	}
}<!-- 加载配置属性文件 -->
<bean id="propertyConfigurer"
class="org.springframework.beans.factory.config.PropertyPlaceholderConfigurer">
<property name="fileEncoding" value="UTF-8" />
<property name="locations">
<list>
<value>classpath:schoolnet.properties</value>
</list>
</property>
</bean>
<!-- 缓存配置 -->
<bean id="cacheManager" class="org.springframework.cache.ehcache.EhCacheManagerFactoryBean">
<property name="configLocation" value="classpath:${ehcache.configFile}" />
</bean>ehcache.configFile=cache/ehcache.xml(源码包下的cache文件夹中)<?xml version="1.0" encoding="UTF-8"?>
<ehcache updateCheck="false" name="defaultCache">
<diskStore path="C:/tmpdirs" />
<!-- 默认缓存配置. -->
<defaultCache maxEntriesLocalHeap="100" eternal="false" timeToIdleSeconds="300" timeToLiveSeconds="600"
overflowToDisk="true" maxEntriesLocalDisk="100000" />
<!-- 系统缓存 -->
<cache name="sysCache" maxEntriesLocalHeap="100" eternal="true" overflowToDisk="true"/>
<!-- 用户缓存 -->
<cache name="userCache" maxEntriesLocalHeap="100" eternal="true" overflowToDisk="true"/>
<!-- 系统活动会话缓存 -->
<cache name="activeSessionsCache" maxEntriesLocalHeap="10000" overflowToDisk="true"
eternal="true" timeToLiveSeconds="0" timeToIdleSeconds="0"
diskPersistent="true" diskExpiryThreadIntervalSeconds="600"/>
<!-- 简单页面缓存
<cache name="SimplePageCachingFilter" maxEntriesLocalHeap="100" eternal="false" overflowToDisk="true"
timeToIdleSeconds="120" timeToLiveSeconds="120" memoryStoreEvictionPolicy="LFU"/> -->
</ehcache>
上面的配置中,overflowToDisk="true"的情况下,当内存缓存数据超过maxElementsInMemory设置的值时,会将数据写进<diskStore path="C:/tmpdirs" />,一般用得多的是设置成java.io.tmpdir,java.io.tmpdir – 获取系统临时目录。可以是window的temp,linux的临时目录等。System.getProperty("java.io.tmpdir")
On Windows: java.io.tmpdir:[C:/DOCUME~1/xx/LOCALS~1/Temp/]
On Solaris: java.io.tmpdir:[/var/tmp/]
On Linux: java.io.tmpdir: [/tmp]
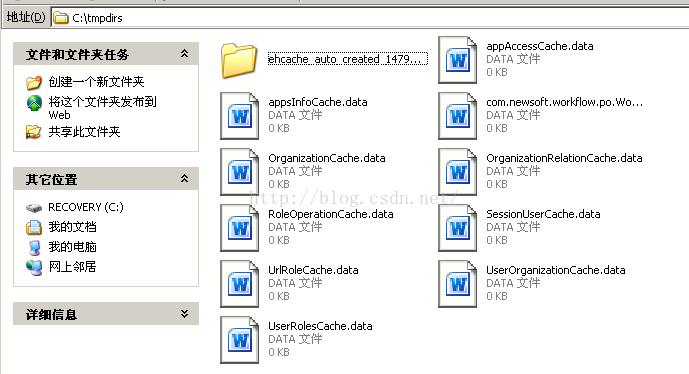
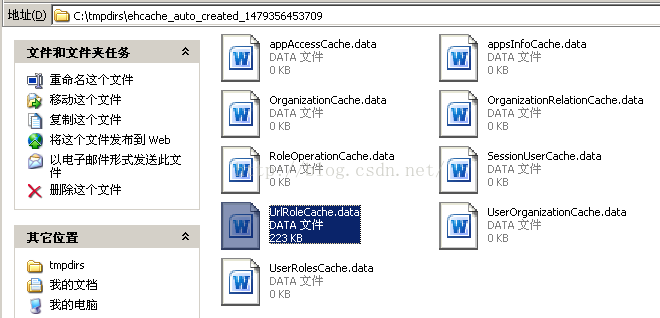
运行后C盘下会生成tmpdirs缓存目录文件
一些配置参数的说明
maxElementsInMemory :cache 中最多可以存放的元素的数量。如果放入cache中的元素超过这个数值,有两种情况:1、若overflowToDisk的属性值为true,会将cache中多出的元素放入磁盘文件中。2、若overflowToDisk的属性值为false,会根据memoryStoreEvictionPolicy的策略替换cache中原有的元素。
eternal :意思是是否永驻内存。如果值是true,cache中的元素将一直保存在内存中,不会因为时间超时而丢失,所以在这个值为true的时候,timeToIdleSeconds和timeToLiveSeconds两个属性的值就不起作用了。
timeToIdleSeconds :就是访问这个cache中元素的最大间隔时间。如果超过这个时间没有访问这个cache中的某个元素,那么这个元素将被从cache中清除。
timeToLiveSeconds : 这是cache中元素的生存时间。意思是从cache中的某个元素从创建到消亡的时间,从创建开始计时,当超过这个时间,这个元素将被从cache中清除。
overflowToDisk :溢出是否写入磁盘。系统会根据标签<diskStore path="java.io.tmpdir"/> 中path的值查找对应的属性值,如果系统的java.io.tmpdir的值是 D:/temp,写入磁盘的文件就会放在这个文件夹下。文件的名称是cache的名称,后缀名的data。如:CACHE_FUNC.data。这个属性在解释maxElementsInMemory的时候也已经说过了。
diskExpiryThreadIntervalSeconds :磁盘缓存的清理线程运行间隔
memoryStoreEvictionPolicy :内存存储与释放策略。有三个值:
LRU -least recently used
LFU -least frequently used
FIFO-first in first out, the oldest element by creation time
diskPersistent : 是否持久化磁盘缓存。当这个属性的值为true时,系统在初始化的时候会在磁盘中查找文件名为cache名称,后缀名为index的的文件,如CACHE_FUNC.index 。这个文件中存放了已经持久化在磁盘中的cache的index,找到后把cache加载到内存。要想把cache真正持久化到磁盘,写程序时必须注意,在是用net.sf.ehcache.Cache的void put (Element element)方法后要使用void flush()方法。\
/**
 * Cache工具类
 */
public class CacheUtils {

	private static CacheManager cacheManager = ((CacheManager)SpringContext.getBean("cacheManager"));

	private static final String SYS_CACHE = "sysCache";

	/**
	 * 获取SYS_CACHE缓存
	 * @param key
	 * @return
	 */
	public static Object get(String key) {
		return get(SYS_CACHE, key);
	}

	/**
	 * 写入SYS_CACHE缓存
	 * @param key
	 * @return
	 */
	public static void put(String key, Object value) {
		put(SYS_CACHE, key, value);
	}

	/**
	 * 从SYS_CACHE缓存中移除
	 * @param key
	 * @return
	 */
	public static void remove(String key) {
		remove(SYS_CACHE, key);
	}

	/**
	 * 获取缓存
	 * @param cacheName
	 * @param key
	 * @return
	 */
	public static Object get(String cacheName, String key) {
		Element element = getCache(cacheName).get(key);
		return element==null?null:element.getObjectValue();
	}

	/**
	 * 写入缓存
	 * @param cacheName
	 * @param key
	 * @param value
	 */
	public static void put(String cacheName, String key, Object value) {
		Element element = new Element(key, value);
		getCache(cacheName).put(element);
	}

	/**
	 * 从缓存中移除
	 * @param cacheName
	 * @param key
	 */
	public static void remove(String cacheName, String key) {
		getCache(cacheName).remove(key);
	}

	/**
	 * 获得一个Cache,没有则创建一个。
	 * @param cacheName
	 * @return
	 */
	private static Cache getCache(String cacheName){
		Cache cache = cacheManager.getCache(cacheName);
		if (cache == null){
			cacheManager.addCache(cacheName);
			cache = cacheManager.getCache(cacheName);
			cache.getCacheConfiguration().setEternal(true);
		}
		return cache;
	}

	public static CacheManager getCacheManager() {
		return cacheManager;
	}

}@Component
public class SpringContext implements ApplicationContextAware,DisposableBean{
private static ApplicationContext applicationContext;
/**
* 取得存储在静态变量中的ApplicationContext.
*/
@Override
public void setApplicationContext(ApplicationContext context)
throws BeansException {
try {
applicationContext=context;
} catch (Exception e) {
e.printStackTrace();
}
}
/**
* 从静态变量applicationContext中取得Bean, 自动转型为所赋值对象的类型.
*/
public static <T> T getBean(String name){
return (T) applicationContext.getBean(name);
}
public static String[] getBeanNamesForType(Class<?> type){
return applicationContext.getBeanNamesForType(type);
}
/**
* 实现DisposableBean接口, 在Context关闭时清理静态变量.
*/
@Override
public void destroy() throws Exception {
applicationContext = null;
}
}
/**
 * 用户工具类
 */
public class UserUtils {


	private static UserDao userDao = SpringContextHolder.getBean(UserDao.class);
	private static Map<String, Object> cacheMap;
	/**
	 * 根据ID获取用户
	 * @param id
	 * @return 取不到返回null
	 */
	public static User getUser(String id){
		User user = (User)CacheUtils.get("userCache", "id_" + id);
		if (user ==  null){
			user = userDao.get(id);
			if (user == null){
				return null;
			}
			CacheUtils.put("userCache", "id_" + user.getId(), user);
			CacheUtils.put("userCache", "ln" + user.getLoginName(), user);
		}
		return user;
	}

	/**
	 * 根据登录名获取用户
	 * @param loginName
	 * @return 取不到返回null
	 */
	public static User getByLoginName(String loginName){
		User user = (User)CacheUtils.get("userCache", "ln" + loginName);
		if (user == null){
			user = userDao.getByLoginName(new User(null, loginName));
			if (user == null){
				return null;
			}
			CacheUtils.put("userCache", "id_" + user.getId(), user);
			CacheUtils.put("userCache", "ln" + user.getLoginName(), user);
		}
		return user;
	}


	/**
	 * 清除用户缓存
	 * @param user
	 */
	public static void clearCache(User user){
		CacheUtils.remove("userCache", "id_" + user.getId());
		CacheUtils.remove("userCache", "ln" + user.getLoginName());
		CacheUtils.remove("userCache", "ln" + user.getOldLoginName());
	}
}


 1781
1781


 被折叠的 条评论
为什么被折叠?
被折叠的 条评论
为什么被折叠?
 到【灌水乐园】发言


