


前言
QML是一种语言,而Qt Qucik是QML写出来的类库,就和C++是一种语言,STL是用C++开发的库是一个道理,以Qt5.7为例,进入首页,点击C++就进入类似QPushButton的类,而进入API,再进入ALL QML Types,就能看到QML的类,把Qt Qucik链接里面的东西看的差不多就能知道Qt Quick的作用了,QML是一种语言


例程
推荐一篇好的博客:Qt Qucik专栏写的挺好的,看看这2篇博客有助于理解源程序,作者是CSDN Qt专栏的版主
Qt Quick 布局介绍:http://blog.csdn.net/foruok/article/details/33738227
Qt Quick 事件处理之信号与槽:http://blog.csdn.net/foruok/article/details/30028711
新建一个Qt Quick Application,先看一下提前定义好的东西
main.qml
import QtQuick 2.5
import QtQuick.Window 2.2

Window {
    //设置window对象为可见,如果不写这一句是不可见的,所以要想看见必须得写
    visible: true
    //设置窗体的宽度
    width: 640
    //设置窗体的宽度
    height: 480
    //设置窗体的名字
    title: qsTr("Hello World")

    //主窗口
    MainForm {

        //从Item类继承下来的属性
        //官方解释为anchors.fill provides a convenient way for one item to have
        //the same geometry as another item, and is equivalent to connecting all
        //four directional anchors.
        //大致意思就是锚(mao)布局,充满父窗口,parent指的就是上一级,即MainForm
        anchors.fill: parent

        //这个是附加属性和附加处理器,看上面的博客,鼠标一点击控件就会退出
        mouseArea.onClicked: {
            Qt.quit();
        }
    }
}
作品
connections的使用
点击按钮,字体发生变化

建立的是Qt Quick Controls 2 Application项目,所以按钮显示有点特别
main.qml
import QtQuick 2.7
import QtQuick.Controls 2.0
import QtQuick.Layouts 1.0

ApplicationWindow {
    visible: true
    width: 640
    height: 480
    title: qsTr("Hello World")

    Text {
        id: text1
        text: qsTr("text");
        anchors.horizontalCenter: parent.horizontalCenter;
        anchors.top: parent.top;
        //QML的基础类型font,设置字体的大小
        font.pixelSize: 20
    }

    Button {
        id: btn;
        text:"changeText";
        anchors.bottom: parent.bottom;
        anchors.horizontalCenter: parent.horizontalCenter;
    }

    Connections {
        target: btn;
        onClicked: {
            //定义红绿蓝三原色和透明度
            text1.color = Qt.rgba(Math.random(),Math.random(),Math.random(),1);
        }
    }
}
Connections和Loader的使用
点击左下角的控件,大小是由colorPicker定义的,点击哪个控件文本上的颜色就变为哪个控件
main.qml

import QtQuick 2.7
import QtQuick.Controls 2.0
import QtQuick.Layouts 1.0

ApplicationWindow {
    visible: true
    width: 640
    height: 480
    title: qsTr("Hello World")

    Text {
        id : colorText;
        anchors.horizontalCenter : parent.horizontalCenter;
        anchors.top : parent.top;
        text : "hello world";
        font.pixelSize: 32;
    }

    Component {
        id : colorComponent;
        Rectangle {
            id : colorPicker;
            width : 50;
            height: 30;
            signal colorPicked(color col);
            MouseArea {
                anchors.fill: parent;
                onPressed: colorPicker.colorPicked(colorPicker.color);
            }
        }
    }

    Loader {
        id : redLoader;
        anchors.left : parent.left;
        anchors.bottom: parent.bottom;
        sourceComponent: colorComponent;
        onLoaded: {
            item.color = "red";
        }
    }

    Loader {
        id : blueLoader;
        anchors.left : redLoader.right;
        anchors.bottom: parent.bottom;
        sourceComponent: colorComponent;
        onLoaded: {
            item.color = "blue";
        }
    }

    Connections {
        target: redLoader.item
        onColorPicked : {
            colorText.color = col;
        }
    }

    Connections {
        target: blueLoader.item
        onColorPicked : {
            colorText.color = col;
        }
    }

}
鼠标事件
点击鼠标左键一次背景发生变化,连点鼠标2次背景变为灰色,点击鼠标右键退出程序

main.qml
import QtQuick 2.7
import QtQuick.Controls 2.0
import QtQuick.Layouts 1.0

ApplicationWindow {
    visible: true
    width: 640
    height: 480
    title: qsTr("Hello World")

    MouseArea {
        anchors.fill: parent;
        acceptedButtons: Qt.LeftButton | Qt.RightButton;
        onClicked: {
            if(mouse.button == Qt.RightButton) {
                Qt.quit();
            } else if( mouse.button == Qt.LeftButton) {
                //通过QML基础类型color进行设置
                color = Qt.rgba(Math.random(),Math.random(),Math.random());
            }
        }
        onDoubleClicked: {
            color = "gray";
        }
    }
}
键盘事件
按上下左右移动字体,按空格或者鼠标点击选中复选框

main.qml
import QtQuick 2.7
import QtQuick.Controls 2.0
import QtQuick.Layouts 1.0

ApplicationWindow {
    visible: true
    width: 640
    height: 480
    title: qsTr("Hello World")

    Rectangle {
        anchors.fill: parent;
        focus: true;
        Keys.enabled: true;
        Keys.onEscapePressed: {
            Qt.quit();
        }
        Keys.forwardTo: [moveText,likeQt];

        Text {
            id: moveText;
            //设置相对于窗口的坐标
            x: 20;
            y: 20;
            width: 200;
            height: 30;
            text: "Moving Text";
            //设置粗体,字体大小为20
            font {bold : true;pixelSize: 20}
            Keys.enabled: true;
            Keys.onPressed: {
                switch(event.key) {
                case Qt.Key_Left:
                    x -= 10;
                    break;
                case Qt.Key_Right:
                    x += 10;
                    break;
                case Qt.Key_Up:
                    y -= 10;
                    break;
                case Qt.Key_Down:
                    y += 10;
                    break;
                default:
                    return;
                }
                event.accepted = true;
            }
        }

        CheckBox {
            id: likeQt;
            text: "like qt quick";
            anchors.left: parent.left;
            anchors.bottom: parent.bottom;
        }
    }

}
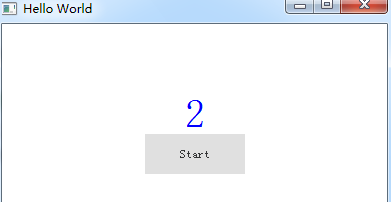
Timer的使用
点击按钮,从10开始倒计时
main.qml
import QtQuick 2.7
import QtQuick.Controls 2.0
import QtQuick.Layouts 1.0
ApplicationWindow {
visible: true
width: 640
height: 480
title: qsTr("Hello World")
QtObject {
id: attrs;
property int counter;
//不能直接赋值,只能用组件赋值
Component.onCompleted: {
attrs.counter = 10;
}
}
Text {
id: countShow;
anchors.centerIn: parent;
color: "blue";
font.pixelSize: 40;
}
Timer {
id: countDown;
interval: 1000;
repeat: true;
triggeredOnStart: true;
onTriggered: {
countShow.text = attrs.counter;
attrs.counter -= 1;
if(attrs.counter < 0) {
countDown.stop();
countShow.text = "Clap now";
}
}
}
Button {
id: startBtn;
anchors.top: countShow.bottom;
anchors.horizontalCenter: countShow.horizontalCenter;
text : "Start";
onClicked: {
attrs.counter = 10;
countDown.start();
}
}
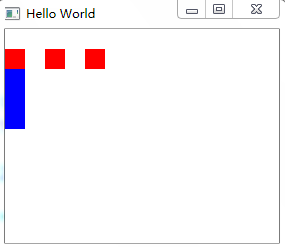
}行布局和列布局
main.qml
import QtQuick 2.7
import QtQuick.Controls 2.0
import QtQuick.Layouts 1.0

ApplicationWindow {
    visible: true
    width: 300
    height: 300
    title: qsTr("Hello World")

    Row {
        id: row;
        anchors.top: parent.top;
        anchors.left: parent.left;
        anchors.topMargin: 20
        spacing: 20;//间距

        Rectangle {
            width: 20;
            height: 20
            color: "red";
        }

        Rectangle {
            width: 20;
            height: 20
            color: "red";
        }

        Rectangle {
            width: 20;
            height: 20
            color: "red";
        }
    }

    Column {
        anchors.top: row.bottom;
        anchors.left: parent.left;
        Rectangle {
            width: 20;
            height: 20
            color: "blue";
        }

        Rectangle {
            width: 20;
            height: 20
            color: "blue";
        }

        Rectangle {
            width: 20;
            height: 20
            color: "blue";
        }
    }
}
表格布局

main.qml
import QtQuick 2.7
import QtQuick.Controls 2.0
import QtQuick.Layouts 1.0

ApplicationWindow {
    visible: true
    width: 300
    height: 300
    title: qsTr("Hello World")

    Grid {
        anchors.left: parent.left
        anchors.bottom: parent.bottom
        flow: Grid.TopToBottom
        //默认是 flow: Grid.LeftToRight
        rows: 3
        columns: 3
        rowSpacing: 20
        columnSpacing: 20

        Rectangle {
            width: 20
            height: 20
            color: "red"
        }
        Rectangle {
            width: 20
            height: 20
            color: "red"
        }
        Rectangle {
            width: 20
            height: 20
            color: "red"
        }
        Rectangle {
            width: 20
            height: 20
            color: "red"
        }
        Rectangle {
            width: 20
            height: 20
            color: "red"
        }
        Rectangle {
            width: 20
            height: 20
            color: "red"
        }
        Rectangle {
            width: 20
            height: 20
            color: "red"
        }
    }

}
QML和C++混合编程
推荐博客:http://blog.csdn.net/foruok/article/details/32698603
上手敲一下,很快就能理解

点击开始,中间的图形开始变化,上面显示时间,点击停止,不再变化,点击RGB,应用这个算法,按钮显示为下一个算法,退出按钮退出程序
QML中使用C++对象
(1)实现可以导出的C++类
colormaker.h
#ifndef COLORMAKER_H
#define COLORMAKER_H

#include <QObject>
#include <QColor>
#include <QTimerEvent>

class ColorMaker : public QObject
{
    Q_OBJECT
    Q_ENUMS(generate);
    Q_PROPERTY(QColor color READ color WRITE setColor NOTIFY colorChanged);
    Q_PROPERTY(QColor timeColor READ timeColor);

public:
    explicit ColorMaker(QObject *parent = 0);
    ~ColorMaker();

    //枚举参数
    enum generate{
        randomRGB,
        randomRed,
        randomGreen,
        randomBlue,
        increase,
    };

    QColor color() const;
    void setColor(const QColor &color);
    QColor timeColor() const;

    Q_INVOKABLE generate algorithm() const;
    Q_INVOKABLE void setAlgorithm(generate algorithm);

signals:
    void colorChanged(const QColor &color);
    void currentTimer(const QString &strTime);
public slots:
    void start();
    void stop();
protected:
    //从QObject上继承下来的虚函数
    void timerEvent(QTimerEvent *event);
private:
    generate myGenerate;
    QColor myColor;
    int colorTimer;//定时器的标识符
};

#endif // COLORMAKER_H
colormaker.cpp
#include "colormaker.h"
#include <QDateTime>
#include <QColor>

ColorMaker::ColorMaker(QObject *parent) : QObject(parent)
  ,myGenerate(randomRGB)
  ,myColor(Qt::black)
  ,colorTimer(0)
{
//    qsrand在QtGlobal中定义,具体作用如下
//    qsrand(QTime::currentTime().msec());
//    是取时间作为产生随机数的种子.
//    qrand()%5000+1000是产生一个在 1000-6000间的数,
//    timer->start是根据上述产生的数值来启动定时器.
    //以当前时间距1970-01-01T00:00:00的秒数来作为种子
    qsrand(QDateTime::currentDateTime().toTime_t());
}
ColorMaker::~ColorMaker()
{

}
QColor ColorMaker::color() const
{
    return myColor;
}
void ColorMaker::setColor(const QColor &color)
{
    myColor = color;
    emit colorChanged(myColor);
}
QColor ColorMaker::timeColor() const
{
    QTime time = QTime::currentTime();
    int r = time.hour();
    int g = time.minute();
    int b = time.second();
    return QColor::fromRgb(r,g,b);
}
ColorMaker::generate ColorMaker::algorithm() const
{
    return myGenerate;
}
void ColorMaker::setAlgorithm(generate algorithm)
{
    myGenerate = algorithm;
}
void ColorMaker::start()
{
    if(colorTimer == 0)
    {
        //从QObject继承下来的方法,返回的是定时器的标示
        colorTimer = startTimer(1000);
    }
}
void ColorMaker::stop()
{
    if(colorTimer > 0)
    {
        //关闭定时器
        killTimer(colorTimer);
        //记得把定时器的标示重新定义为0
        colorTimer = 0;
    }
}
void ColorMaker::timerEvent(QTimerEvent *event)
{
    //qrand()在QtGlobal中定义
    if(event->timerId() == colorTimer)
    {
        switch (myGenerate)
        {
        case randomRGB:
            myColor.setRgb(qrand()%255,qrand()%255,qrand()%255);
            break;
        case randomRed:
            myColor.setRed(qrand()%255);
            break;
        case randomGreen:
            myColor.setGreen(qrand()%255);
            break;
        case randomBlue:
            myColor.setBlue(qrand()%255);
            break;
        default:
            int r = myColor.red() + 10;
            int g = myColor.green() + 10;
            int b = myColor.blue() + 10;
            myColor.setRgb(r % 255, g % 255, b % 255);
            break;
        }
        emit colorChanged(myColor);
        emit currentTimer(QDateTime::currentDateTime().toString("yyyy-MM-dd hh:mm:ss"));
    }
    else
    {
       timerEvent(event);
    }
}
main.cpp
#include <QGuiApplication>
#include <QQmlApplicationEngine>
#include <colormaker.h>

int main(int argc, char *argv[])
{
    QGuiApplication app(argc, argv);
    qmlRegisterType<ColorMaker>("my.qt.ColorMaker",1,0,"ColorMaker");
    QQmlApplicationEngine engine;
    engine.load(QUrl(QStringLiteral("qrc:/main.qml")));

    return app.exec();
}
main.qml
import QtQuick 2.5
import QtQuick.Window 2.2
import my.qt.ColorMaker 1.0
import QtQuick.Controls 1.4

Window {
    visible: true
    width: 360
    height: 360
    title: qsTr("Hello World")

    //显示时间
    Text {
        id: timerLabel
        anchors.left: parent.left
        anchors.top: parent.top
    }
    ColorMaker {
        id : colorMaker
        color: Qt.green
    }

    Rectangle{
        id: colorRect;
        anchors.centerIn: parent
        width:200
        height:200
        color:"blue"
    }
    Button{
        id:start;
        anchors.left: parent.left
        anchors.bottom: parent.bottom
        text:"开始"
        onClicked: {
            colorMaker.start();
        }
    }

    Button{
        id:stop;
        anchors.left: start.right
        anchors.bottom: parent.bottom
        text:"停止"
        onClicked: {
            colorMaker.stop();
        }
    }

    Button{
        id:colorAlgorithm;
        anchors.left: stop.right
        anchors.bottom: parent.bottom
        text:"RGB"
        onClicked: {
           var algorithm = (colorMaker.algorithm() + 1) % 5;
            changetAlgorithm(colorAlgorithm,algorithm);
            colorMaker.setAlgorithm(algorithm);
        }
    }

    //javascript函数
    function changetAlgorithm(button,algorithm){
        switch(algorithm) {
        case 0:
            button.text="RGB";
            break;
        case 1:
            button.text="red";
            break;
        case 2:
            button.text="green";
            break;
        case 3:
            button.text="blue";
        default:
            button.text="increase";
            break;
        }
    }

    Button{
        id:quit;
        anchors.left: colorAlgorithm.right
        anchors.bottom: parent.bottom
        text:"退出"
        onClicked: {
            Qt.quit();
        }
    }

    Connections {
        //接收事件的对象
        target: colorMaker
        //收到事件时的处理函数
        onCurrentTimer:{
            //strTime从currentTimer里发送过来的
            timerLabel.text = strTime
            timerLabel.color = colorMaker.timeColor;
        }
    }

    Connections {
        target: colorMaker
        onColorChanged:{
            colorRect.color = color;
        }
    }

}
(2)导出一个C++对象为QML的属性
在上一个的基础上改动的地方不多
main.cpp
#include <QGuiApplication>
#include <QQmlApplicationEngine>
#include <colormaker.h>
#include <QQmlContext>

int main(int argc, char *argv[])
{
    QGuiApplication app(argc, argv);
    //qmlRegisterType<ColorMaker>("my.qt.ColorMaker",1,0,"ColorMaker");
    QQmlApplicationEngine engine;
    //这一句是新加的,从QQmlEngine上继承下来的方法,返回QQmlContext
    engine.rootContext()->setContextProperty("colorMaker",new ColorMaker);
    engine.load(QUrl(QStringLiteral("qrc:/main.qml")));

    return app.exec();
}
main.qml
import QtQuick 2.5
import QtQuick.Window 2.2
//不用导入了
//import my.qt.ColorMaker 1.0
import QtQuick.Controls 1.4

Window {
    visible: true
    width: 360
    height: 360
    title: qsTr("Hello World")

    //显示时间
    Text {
        id: timerLabel
        anchors.left: parent.left
        anchors.top: parent.top
    }
//    不用定义
//    ColorMaker {
//        id : colorMaker
//        color: Qt.green
//    }

    Rectangle{
        id: colorRect;
        anchors.centerIn: parent
        width:200
        height:200
        color:"blue"
    }
    Button{
        id:start;
        anchors.left: parent.left
        anchors.bottom: parent.bottom
        text:"开始"
        onClicked: {
            colorMaker.start();
        }
    }

    Button{
        id:stop
        anchors.left: start.right
        anchors.bottom: parent.bottom
        text:"停止"
        onClicked: {
            colorMaker.stop();
        }
    }

    Button{
        id:colorAlgorithm;
        anchors.left: stop.right
        anchors.bottom: parent.bottom
        text:"RGB"
        onClicked: {
           var algorithm = (colorMaker.algorithm() + 1) % 5;
            changetAlgorithm(colorAlgorithm,algorithm);
            colorMaker.setAlgorithm(algorithm);
        }
    }

    //javascript函数
    function changetAlgorithm(button,algorithm){
        switch(algorithm) {
        case 0:
            button.text="RGB";
            break;
        case 1:
            button.text="red";
            break;
        case 2:
            button.text="green";
            break;
        case 3:
            button.text="blue";
        default:
            button.text="increase";
            break;
        }
    }

    Button{
        id:quit;
        anchors.left: colorAlgorithm.right
        anchors.bottom: parent.bottom
        text:"退出"
        onClicked: {
            Qt.quit();
        }
    }

    //这个是在上一个的基础上增加的,感觉component的作用有点初始化的意思
    Component.onCompleted: {
        //设置红绿蓝三原色和透明度
        colorMaker.color = Qt.rgba(0,0,0,1);
        colorMaker.setAlgorithm(2);
        changetAlgorithm(colorAlgorithm,colorMaker.algorithm());
    }

    Connections {
        //接收事件的对象
        target: colorMaker
        //收到事件时的处理函数
        onCurrentTimer:{
            //strTime从currentTimer里发送过来的
            timerLabel.text = strTime
            timerLabel.color = colorMaker.timeColor;
        }
    }

    Connections {
        target: colorMaker
        onColorChanged:{
            colorRect.color = color;
        }
    }

}
C++中使用QML对象
每隔一秒改变一下背景颜色,点击退出程序关闭

main.cpp
#include <QGuiApplication>
#include <QQmlApplicationEngine>
#include <QQuickItem>
#include <QList>
#include <QDebug>
#include <changeqmlcolor.h>

int main(int argc, char *argv[])
{
    QGuiApplication app(argc, argv);

    QQmlApplicationEngine engine;
    engine.load(QUrl(QStringLiteral("qrc:/main.qml")));
    //找到文档的父节点,为什么有好几个父节点不太理解
    QList<QObject*> rootObjects = engine.rootObjects();
    QObject *root = NULL;
    for(int i=0;i <rootObjects.size(); i++)
    {
        if(rootObjects[i]->objectName() == "rootObject")
        {
            root = rootObjects[i];
            break;
        }
    }
    QObject *quitBtn = root->findChild<QObject*>("quitBtn");
    //quitBtn找到了
    //改变背景颜色
    new ChangeQmlColor(root);
    if(quitBtn)
    {
        QObject::connect(quitBtn,SIGNAL(clicked()),&app,SLOT(quit()));
    }
    QObject *textLabel = root->findChild<QObject*>("textLabel");
    if(textLabel)
    {
        bool flag = QMetaObject::invokeMethod(textLabel,"doLayout");
        //显示true说明调用成功
        qDebug()<<flag;
    }
    return app.exec();
}
main.qml
import QtQuick 2.7
import QtQuick.Window 2.2
import QtQuick.Controls 1.4

Window {
    objectName: "rootObject"
    visible: true
    width: 640
    height: 480
    title: qsTr("Hello World")

    Text {
        objectName: "textLabel"
        anchors.centerIn: parent
        text:"Hello World"
    }

    Button {
        objectName: "quitBtn"
        anchors.right: parent.right
        anchors.bottom: parent.bottom
        anchors.bottomMargin: 4
        anchors.rightMargin: 4
        text:"退出"
    }
}
changeqmlcolor.h
#ifndef CHANGEQMLCOLOR_H
#define CHANGEQMLCOLOR_H

#include <QObject>
#include <QTimer>

class ChangeQmlColor : public QObject
{
    Q_OBJECT
public:
    ChangeQmlColor(QObject *target,QObject *parent = 0);

protected slots:
    void onTimeOut();
private:
    QTimer *timer;
    QObject *target;
};

#endif // CHANGEQMLCOLOR_H
changeqmlcolor.cpp
#include "changeqmlcolor.h"
#include <QDebug>
#include <QDateTime>
#include <QColor>

ChangeQmlColor::ChangeQmlColor(QObject *target,QObject *parent)
    : QObject(parent)
    ,target(target)
{
    timer = new QTimer(this);
    qsrand(QDateTime::currentDateTime().toTime_t());
    connect(timer,SIGNAL(timeout()),this,SLOT(onTimeOut()));
    timer->start(1000);
}
void ChangeQmlColor::onTimeOut()
{
    QColor color = QColor::fromRgb(qrand()%256,qrand()%256,qrand()%256);
    target->setProperty("color",color);
}
欢迎关注
喜欢本文的朋友们,欢迎关注公众号Kruskal,收看更多精彩内容


 1万+
1万+

 被折叠的 条评论
为什么被折叠?
被折叠的 条评论
为什么被折叠?
 到【灌水乐园】发言


