


前言
相信大家都觉得使用block会给开发带来很大的便利,block可以轻松实现控件之间的数据传递,对于代理/通知/block三者之中,我个人也是非常倾向于使用block,但是使用block需要注意内存管理问题,不然很容易造成循环引用,造成内存泄露,对于block的知识请自行百度,我今天给大家演示:**1)**controller之间的block传值,**2)**controller 与 view 之间的block传值;希望此文章会给大家一些启发,由于水平有限,如有错误望指正.废话不多说,直接上代码.
项目目录
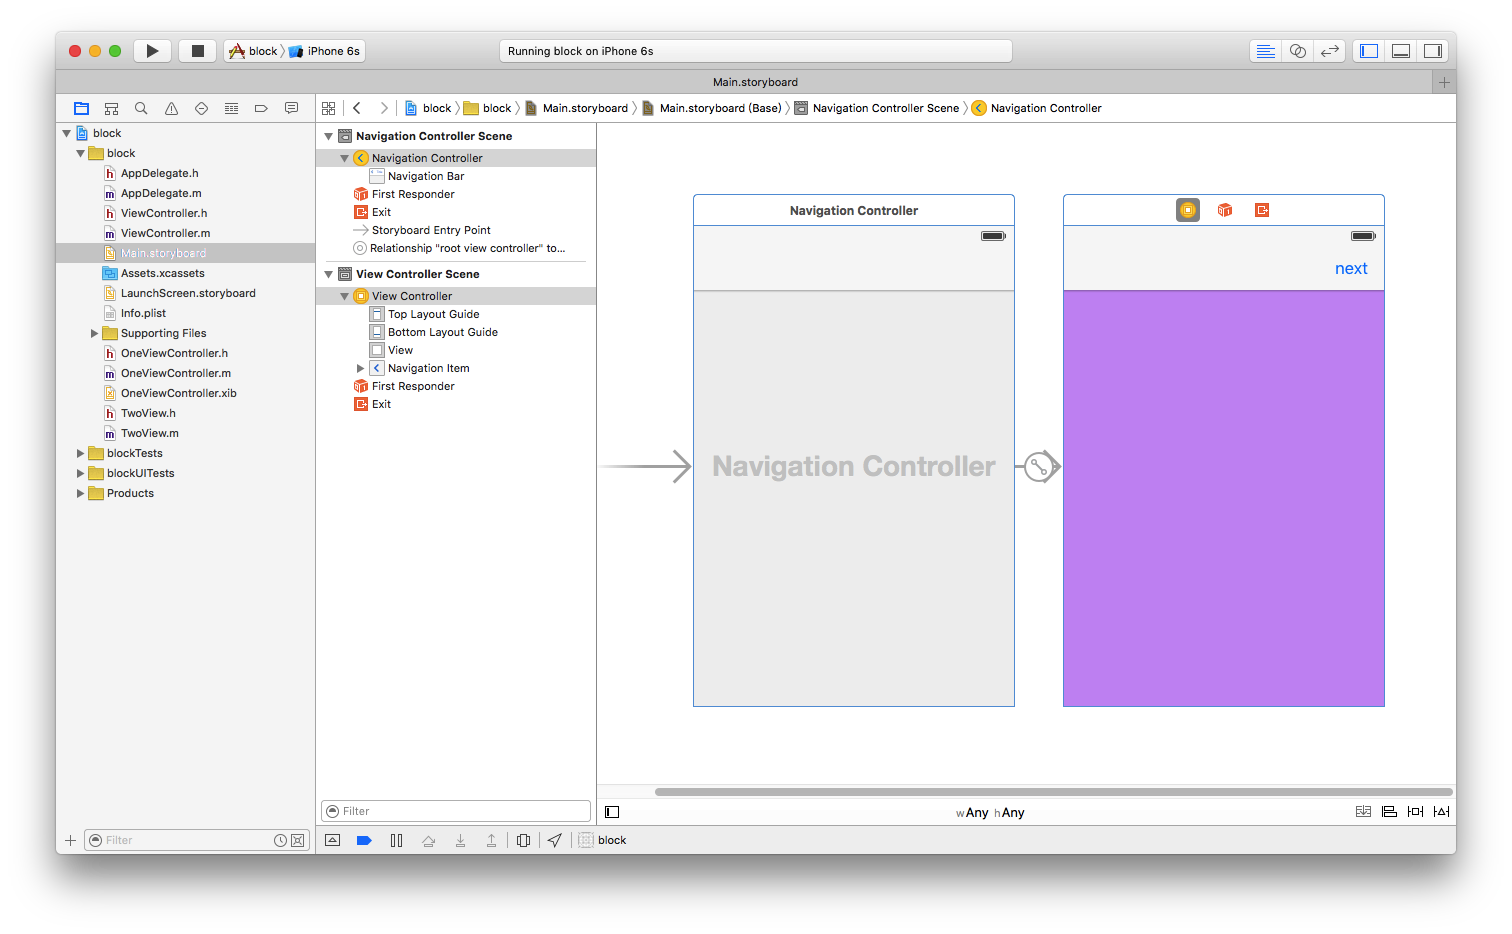
场景一 controller之间的block传值
首先创建两个控制器类 ViewController 与 oneViewController,其中ViewController中有一个next按钮,点击会push到oneViewController.
先看oneViewController
//
//  OneViewController.h
//  block
//
//  Created by zzyong on 16/2/27.
//  Copyright © 2016年 zzyong. All rights reserved.
//

#import <UIKit/UIKit.h>

typedef NSString* (^OneCallBackBlock)();

@interface OneViewController : UIViewController

- (instancetype) initCallBack:(OneCallBackBlock)callbackBlock;

@end

//
//  OneViewController.m
//  block
//
//  Created by zzyong on 16/2/27.
//  Copyright © 2016年 zzyong. All rights reserved.
//

#import "OneViewController.h"
#import "TwoView.h"

@interface OneViewController ()

@property (nonatomic,copy) OneCallBackBlock callbackBlock;
@property (weak, nonatomic ) IBOutlet UILabel  *titleView;

@end

@implementation OneViewController

- (void)viewDidLoad {
    [super viewDidLoad];
    //0.初始化设置
    self.title = @"One";
    _titleView.textColor = [UIColor blackColor];
    _titleView.text = nil;

    //1.添加twoView
    __weak typeof(self) weafSelf = self;
    TwoView *two = [[TwoView alloc] initWithBlock:^() {
        // block 实现controller 与 view 之间的数据传递
        UIViewController *three = [[UIViewController alloc] init];
        three.view.backgroundColor = [UIColor grayColor];
        three.title = @"TwoViewControll";
        [weafSelf.navigationController pushViewController:three animated:YES];
    }];

    two.frame = CGRectMake(0, CGRectGetMaxY(_titleView.frame) + 10, self.view.bounds.size.width, 40);
    two.backgroundColor = [UIColor whiteColor];
    [self.view addSubview:two];

    //2.添加rightBarButtonItem
    UIBarButtonItem  *rightItem = [[UIBarButtonItem alloc] initWithTitle:@"获取" style:UIBarButtonItemStyleDone target:self action:@selector(getViewControllerTitle)];
    self.navigationItem.rightBarButtonItem = rightItem;

    //3.如不自动获取ViewController的标题,则3秒后自动获取
    [self AutoGetViewControllerTitle];
}

#pragma mark - 私有方法
//类似于AFNetworking
- (void) AutoGetViewControllerTitle{

    dispatch_after(dispatch_time(DISPATCH_TIME_NOW, (int64_t)(3.0 * NSEC_PER_SEC)), dispatch_get_main_queue(), ^{
        if (_titleView.text.length) {
            return ;
        }
        _titleView.text =  _callbackBlock();
        self.navigationItem.rightBarButtonItem.enabled = NO;
        NSLog(@"自动返回ViewControllerTitle");
    });
}

//获取ViewController的标题
- (void) getViewControllerTitle{
    if (_titleView.text.length) {
        return ;
    }
    _titleView.text =  _callbackBlock();
    NSLog(@"%@",_callbackBlock());
}

- (instancetype)initCallBack:(OneCallBackBlock)callbackBlock{
    if (callbackBlock) {
        _callbackBlock = callbackBlock;
    }
    return self;
}

@end
现在看ViewController的代码
//
//  ViewController.h
//  block
//
//  Created by zzyong on 16/2/27.
//  Copyright © 2016年 zzyong. All rights reserved.
//

#import <UIKit/UIKit.h>

@interface ViewController : UIViewController


@end

//
//  ViewController.m
//  block
//
//  Created by zzyong on 16/2/27.
//  Copyright © 2016年 zzyong. All rights reserved.
//

#import "ViewController.h"
#import "OneViewController.h"

@interface ViewController ()

@end

@implementation ViewController
- (IBAction)next:(UIBarButtonItem *)sender {

    __weak typeof(self) weakSelf = self;
    OneViewController *one = [[OneViewController alloc] initCallBack:^NSString *{
        return [NSString stringWithFormat:@"返回第一个控制器的标题:%@",weakSelf.title];
    }];

    [self.navigationController pushViewController:one animated:YES];
}


- (void)viewDidLoad {
    [super viewDidLoad];
    self.title = @"VC";
}

- (void)viewDidAppear:(BOOL)animated{
    [super viewDidAppear:animated];
    NSLog(@"进入--ViewController");
}

- (void)dealloc {
    NSLog(@"ViewController--dealloc");
}

@end
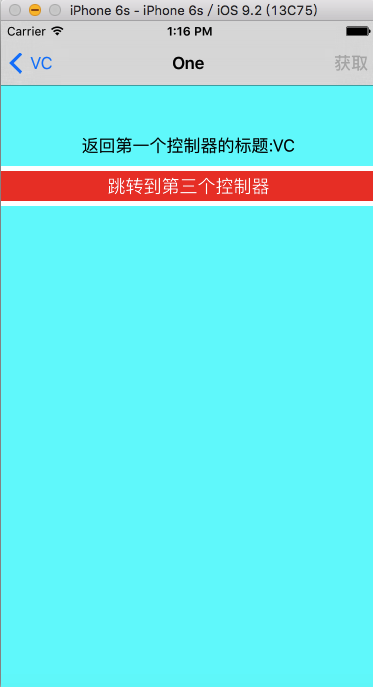
控制器之间传值中,我使用一个item主动获取 和 采用延时来自动获取ViewController的标题,OneViewController不依赖ViewController也可以轻松获取其title,具体请看注释.
场景二 controller 与 view 之间的block传值
首先先定义一个TwoView继承与UIView,用于跟控制器之间进行交互,当点击view的按钮时,就会通过block回调给OneViewController,也就是反馈到控制器了,此时OneViewController将会push控制器three,假如读者想传递模型数据给控制器,可以创建带参数的block,,然后在控制器中定义一个模型属性.下面请看TwoView类里面的代码
//
//  TwoView.h
//  block
//
//  Created by zzyong on 16/2/27.
//  Copyright © 2016年 zzyong. All rights reserved.
//

#import <UIKit/UIKit.h>
typedef void (^TwoFeedBack)();

@interface TwoView : UIView

- (instancetype) initWithBlock:(TwoFeedBack)block;

@end

//
//  TwoView.m
//  block
//
//  Created by zzyong on 16/2/27.
//  Copyright © 2016年 zzyong. All rights reserved.
//

#import "TwoView.h"

@interface TwoView ()

@property (nonatomic,copy) TwoFeedBack block;
@property (nonatomic,weak) UIButton *button;

@end

@implementation TwoView

- (instancetype) initWithBlock:(TwoFeedBack)block{
    if (self = [super init]) {

        _block = block;
        UIButton *button = [UIButton buttonWithType:UIButtonTypeCustom];
        [button setTitle:@"跳转到第三个控制器" forState:UIControlStateNormal];
        [button addTarget:self action:@selector(feedBack) forControlEvents:UIControlEventTouchUpInside];
        [button setBackgroundColor:[UIColor redColor]];
        [self addSubview:button];
        _button = button;
    }
    return self;
}

- (void) feedBack{
    if (_block) {
        _block();
    }
}

- (void)layoutSubviews{
    [super layoutSubviews];
    _button.frame = CGRectMake(0, 5, self.bounds.size.width, 30);
}

- (void)dealloc{
    NSLog(@"TwoView--dealloc");
}

@end


 3343
3343

 被折叠的 条评论
为什么被折叠?
被折叠的 条评论
为什么被折叠?
 到【灌水乐园】发言


