


SpringSecurity的东西还是比较多的,为了尽可能的把项目中用得到的知识都列举出来,近期应该会持续更新SpringBoot-SpringSecurity相关知识
首先我们说一下SpringBoot-SpringSecurity的简单集成
这节我们使用SpringSecurity自带的登陆验证页面
本节代码根据SpringBoot初始化项目 : Maven构建SpringBoot项目 为基础
一,项目目录
先看一下项目目录
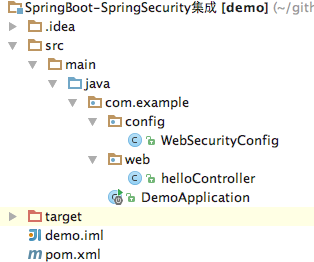
WebSecurityConfig.java Security配置文件
HelloController.java 设置了一个路由/home 当登陆成功后跳转至此页面
二,为项目pom.xml添加SpringSecurity依赖
<dependencies>

   <!-- 核心模块,包括自动配置支持、日志和YAML -->
   <dependency>
      <groupId>org.springframework.boot</groupId>
      <artifactId>spring-boot-starter</artifactId>
   </dependency>

   <!-- 测试模块,包括JUnit、Hamcrest、Mockito -->
   <dependency>
      <groupId>org.springframework.boot</groupId>
      <artifactId>spring-boot-starter-test</artifactId>
      <scope>test</scope>
   </dependency>

   <!-- 引入Web模块 -->
   <dependency>
      <groupId>org.springframework.boot</groupId>
      <artifactId>spring-boot-starter-web</artifactId>
   </dependency>

   <!-- SpringSecurity依赖 -->
   <dependency>
      <groupId>org.springframework.boot</groupId>
      <artifactId>spring-boot-starter-security</artifactId>
   </dependency>

</dependencies>
三,配置SpringSecurity
WebSecurityConfig.java
@Configuration          // 配置文件
@EnableWebSecurity      // 开启Security
@EnableGlobalMethodSecurity(prePostEnabled = true)  //AOP
public class WebSecurityConfig extends WebSecurityConfigurerAdapter {

    @Override
    protected void configure(HttpSecurity http) throws Exception {

        //路由策略和访问权限的简单配置
        http
            .formLogin()                        //启用默认登陆页面
            .failureUrl("/login?error")         //登陆失败返回URL:/login?error
            .defaultSuccessUrl("/home")         //登陆成功跳转URL
            .permitAll();                       //登陆页面全部权限可访问

        super.configure(http);
    }
//
//    /**
//     * 配置内存用户
//     */
//    @Autowired
//    public void configureGlobal(AuthenticationManagerBuilder auth) throws Exception {
//        auth
//            .inMemoryAuthentication()
//            .withUser("Brave").password("123").roles("USER");
//    }

}
四,配置路由
helloController.java
/**
* Created by Brave on 16/11/4.
*/
@RestController
public class helloController {
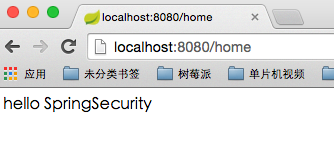
@RequestMapping(value = "/home", method = RequestMethod.GET)
public String viewHome() {
return "hello SpringSecurity";
}
}五,测试SpringSecurity
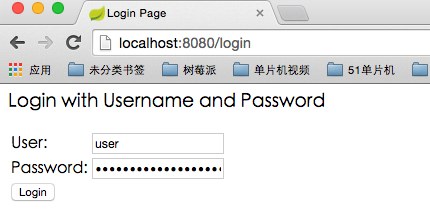
开启服务,访问http://localhost:8080/login
(若直接访问其他路径,会因未登陆鉴权被重定向至http://localhost:8080/login)
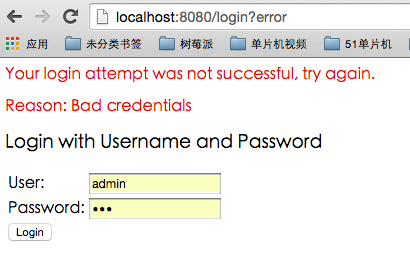
输入错误的用户名和密码,跳转到 http://localhost:8080/login?error
输入正确的用户名和密码:
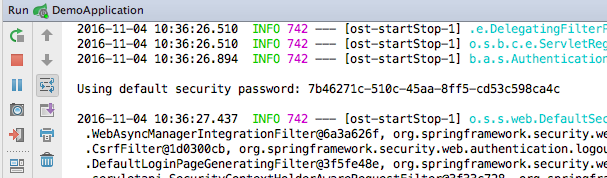
注意:
     使用默认的SpringSecurity配置,当服务启动时会自动生成登陆密码,用户名为user
填写正确的用户名和密码后点击登陆,跳转至http://localhost:8080/home
当然,我们也可以自己设定用户名,密码,角色(在内存中创建一个用户并授权角色)
WebSecurityConfig.java中打开注释部分重写configureGlobal方法实现
@Configuration          // 配置文件
@EnableWebSecurity      // 开启Security
@EnableGlobalMethodSecurity(prePostEnabled = true)  //AOP
public class WebSecurityConfig extends WebSecurityConfigurerAdapter {

    @Override
    protected void configure(HttpSecurity http) throws Exception {

        //路由策略和访问权限的简单配置
        http
            .formLogin()                        //启用默认登陆页面
            .failureUrl("/login?error")         //登陆失败返回URL:/login?error
            .defaultSuccessUrl("/home")         //登陆成功跳转URL
            .permitAll();                       //登陆页面全部权限可访问

        super.configure(http);
    }

    /**
     * 配置内存用户
     */
    @Autowired
    public void configureGlobal(AuthenticationManagerBuilder auth) throws Exception {
        auth
            .inMemoryAuthentication()
            .withUser("Brave").password("123").roles("USER");
    }

}
再次开启服务,我们可以使用用户名Brave,密码123进行登陆,账号的角色是ROLE_USER
至此,SpringSecurity集成完成
六,代码下载
维护历史:
20170405:修改了有歧义的描述语句,添加了内存中创建用户的描述


 1万+
1万+

 被折叠的 条评论
为什么被折叠?
被折叠的 条评论
为什么被折叠?
 到【灌水乐园】发言


