


TCP
传输控制协议。与UDP不同,他是面向连接和数据流的可靠传输协议。也就是,他能够使一台计算机上的数据无差错的发往网络的其他计算机,所以当药传输大量数据时,我们选用TCP协议。
- TCP协议的程序使用的是客户端/服务器模式
- 在Qt中提供了QTcpSocket类来编写客户端程序,使用QTcpServer类编写服务器程序
QTcpServer的基本操作:
1、调用listen监听端口。
2、连接信号newConnection,在槽函数里调用nextPendingConnection获取连接进来的socket。
QTcpSocket的基本能操作:
1、调用connectToHost连接服务器。
2、调用waitForConnected判断是否连接成功。
3、连接信号readyRead槽函数,异步读取数据。
4、调用waitForReadyRead,阻塞读取数据。
我们在服务器端进行端口的监听,一旦发现客户端的连接请求,就会发出newConnection()信号。
而在客户端,一点有数据到来就会发出readyRead()信号
#include "tcp_client.h"
#include "ui_tcp_client.h"
#include <QHostAddress>
#include <QHostInfo>
#include <QMessageBox>
#include <QTextCodec>
TCP_Client::TCP_Client(QWidget *parent) :
    QWidget(parent),
    ui(new Ui::TCP_Client)
{
    ui->setupUi(this);
    QTextCodec *codec = QTextCodec::codecForName("UTF-8");
    QTextCodec::setCodecForLocale(codec);

    client = new QTcpSocket(this);
    client->connectToHost(QHostAddress("192.168.43.21"),8080);
    connect(client,SIGNAL(connected()),this,SLOT(on_pushButton_2_clicked()));
    connect(client, SIGNAL(readyRead()), this, SLOT(readMessage()));//当有消息接受时会触发接收
}

TCP_Client::~TCP_Client()
{
    delete ui;
}

void TCP_Client::on_pushButton_clicked()
{
    //获取主机名称
    QString s=QHostInfo::localHostName();
    //根据主机名获取主机其他信息
    QHostInfo info=QHostInfo::fromName(s);
    /*获取主机所有的网络地址,IP地址跟网卡有关系,一个主机可能存在多个网卡或者虚拟机网卡*/
    QList<QHostAddress> list=info.addresses();
    if(!list.isEmpty())
    {
        /*设置一个迭代器*/
        QList<QHostAddress>::iterator i;
        for(i=list.begin();i!=list.end();i++)
        {
            QMessageBox::information(this,"主机地址",(*i).toString());
        }
    }
    ui->messageLabel->setText(s);
}

void TCP_Client::on_pushButton_2_clicked()
{
    char *data="hello qt!";
    client->write(data);
}
void TCP_Client::readMessage()
{
    QDataStream in(client);
    // 设置数据流版本,这里要和服务器端相同
    in.setVersion(QDataStream::Qt_5_6);
    // 如果没有得到全部的数据,则返回,继续接收数据
    if(client->bytesAvailable() < blockSize) return;
    // 将接收到的数据存放到变量中
    in >> message;
    // 显示接收到的数据*/
    qDebug() << message;
    ui->messageLabel->setText(message);

}
服务器端
在服务器端的程序中,我们监听本地主机的一个端口,这里用8080
#include "tcp_srver.h"
#include "ui_tcp_srver.h"
#include <QMessageBox>
#include <QDebug>
TCP_Srver::TCP_Srver(QWidget *parent) :
    QWidget(parent),
    ui(new Ui::TCP_Srver)
{
    ui->setupUi(this);
    init();
}
TCP_Srver::~TCP_Srver()
{
    delete ui;
}
//初始化QTcpServer,监听本机指定的端口
void TCP_Srver::init()
{
    m_server = new QTcpServer();
    //设置最大允许连接数,不设置的话默认为30
    m_server->setMaxPendingConnections(2000);
    //先做一个QTcpServer作为监听socket,监听后如果出发newConnection信号,说明有连接进来
    //且对任何来访者监听
    if(m_server->listen(QHostAddress::Any, 8080)) {
        qDebug()<<"tcpServer init";
        connect(m_server, SIGNAL(newConnection()), this, SLOT(acceptConnection()));
    } else {
        QMessageBox::warning(this, "提示", "监听端口失败。", QMessageBox::Yes);
        qDebug()<<m_server->errorString();
    }
  connect(ui->pushButton, SIGNAL(clicked()), this, SLOT(sendMessage()));
}

//处理客户端连接
void TCP_Srver::acceptConnection()
{
     qDebug() << "signal!";
    //通过nextPendingConnection()可以得到一个QTcpSocket,这就是用来和客户端进行通信用的套接字。
    m_clientConnection = m_server->nextPendingConnection();
    //连接信号readyRead槽函数,异步读取数据。
    connect(m_clientConnection, SIGNAL(readyRead()), this, SLOT(readClient()));
}
void TCP_Srver::readClient()
{
    QString str = m_clientConnection->readAll();
    //或者
    char buf[1024];
    m_clientConnection->read(buf,1024);
    ui->label_2->setText(str);
    qDebug() << "buf!"<<str;
}
void TCP_Srver::sendMessage()
{
    // 用于暂存我们要发送的数据
    QByteArray block;
    QDataStream out(&block, QIODevice::WriteOnly);
    // 设置数据流的版本,客户端和服务器端使用的版本要相同
    out.setVersion(QDataStream::Qt_5_6);

    out << tr("hello TCP!!!");

    // 获取已经建立的连接的套接字
    // 发送数据成功后,显示提示
    m_clientConnection->write(block);
    ui->label->setText("send message successful!!!");
}
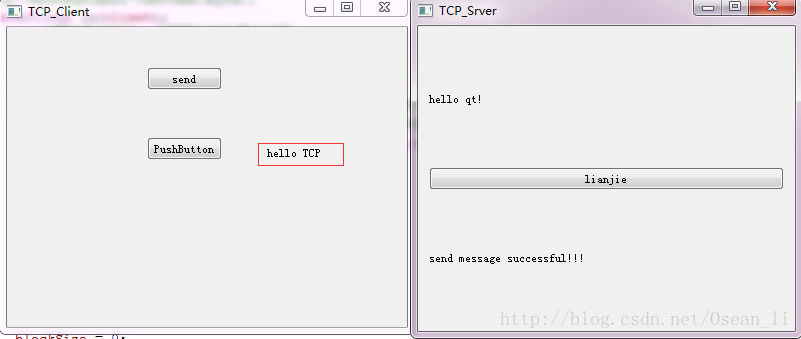
下面分别使用网络调试助手和自己编写的客户端与服务端收发的截图

源码
由于想要免费的分享出去,所以需要源码的请在评论区留下邮箱。
当然也可以以最低的积分下载
http://download.csdn.net/download/osean_li/10118814


 286
286

 被折叠的 条评论
为什么被折叠?
被折叠的 条评论
为什么被折叠?
 到【灌水乐园】发言


