


一:介绍
接着上次的课程,今天我们学习JUnit4的新特性 assertThat()方法,这种方式和其余的assert方法比起来,更加接进英语.
二:分析API
API中的例子:
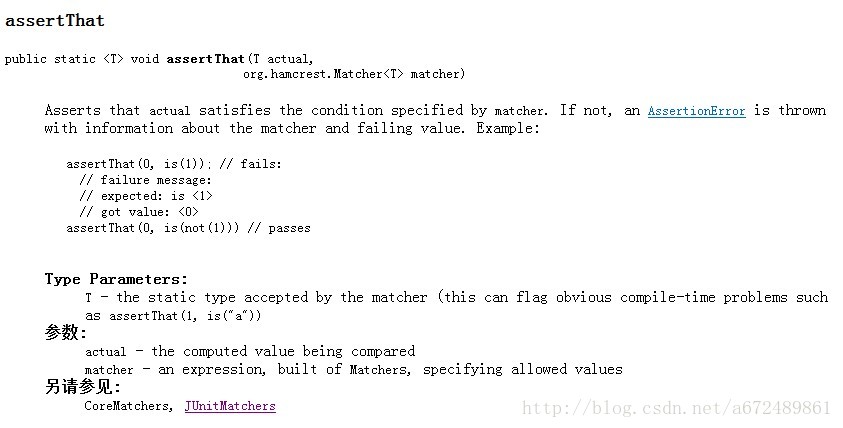
参数
T Actual:你要计算比较的值
org.hamcrest.Matcher<T> matcher:规则匹配器
这个匹配器类是org.hamcrest.Matcher,该类下有许多用于比较计算的静态方法,这个包JUnit中是没有的,要去Hamcrest官网下载,具体链接可以自己百度或者看我上篇文章的链接。
三:使用AssertThat()测试四则运算
Calculator类代码:
package com.ksjl.junit4;

/**
 * @author 旷世绝伦
 *
 *
 * */

public class Calculator { // 四则运算

	public int plus(int x, int y) {
		return x + y;
	}

	public int subtraction(int x, int y) {
		return x - y;
	}

	public int multiplication(int x, int y) {
		return x * y;
	}

	public double division(double x, double y) {
		return x / y;
	}

}
测试类:
package com.ksjl.junit4.test;

import org.junit.BeforeClass;
import org.junit.Test;
import static org.junit.Assert.*;	//注意这边是静态引入
import static org.hamcrest.Matchers.*;
import com.ksjl.junit4.Calculator;

/**
 * @author 旷世绝伦
 *
 *
 * */

public class CalculatorTest {

	private static Calculator cal = null;

	@BeforeClass
	public static void beforeClass() {
		cal = new Calculator();
	}

	@Test
	public void testAll() {
		int result = cal.plus(5, 5); // 加法
		assertThat(result, is(10));
		result = cal.subtraction(5, 5);// 减法
		assertThat(result, greaterThanOrEqualTo(0));
		result = cal.multiplication(5, 5);// 乘法
		assertThat(result, allOf(lessThan(30), greaterThan(20))); // 满足两个条件
		double result2 = cal.division(10.0, 3.0);// 除法
		assertThat(result2, closeTo(3.3, 0.3)); //判断是否在3.3 左右 误差不超过正负0.3
	}

}
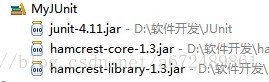
工程目录,大家看下,一共要导3个包,如下:
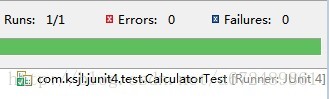
运行测试,看到绿色就OK了,是不是So Easy?
四:添加一个Student类(同时测试多个类,体现使用JUnit的好处)
Student代码:
package com.ksjl.junit4;

/**
 * @author 旷世绝伦
 *
 * */
public class Student {

	private String name="tom";

	public String getName() {
		return name;
	}

}
测试类代码:
package com.ksjl.junit4.test;

import org.junit.BeforeClass;
import org.junit.Test;
import static org.hamcrest.Matchers.*;
import static org.junit.Assert.*;
import com.ksjl.junit4.Student;

/**
 * @author 旷世绝伦
 *
 * */

public class StudentTest {

	private static Student student = null;

	@BeforeClass
	public static void beforeClass() {
		student = new Student();
	}

	@Test
	public void testAll() {
		String name = student.getName();
		assertThat(name, is("tom"));
		assertThat(name, not("to"));
		assertThat(name, containsString("to"));// 是否包含to
		assertThat(name, startsWith("t"));
		assertThat(name, endsWith("m"));
		assertThat(name, equalTo("tom"));
		assertThat(name, equalToIgnoringCase("Tom"));
		assertThat(name, equalToIgnoringWhiteSpace("tom"));//忽略空格是否等于tom
	}

}
工程目录如下:
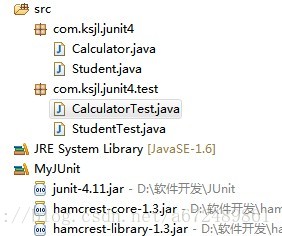
这时候我们点击com.ksjl.junit.test包Run As Junit Test 就能同时测试两个类,没问题,全部正确。
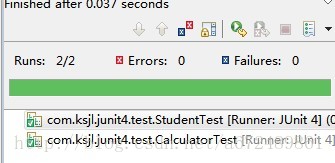
大家是否感到了新特性的好处呢?
五:其他
1. org.hamcrest.Matchers类中有很多方法,我就不一一说了,例如能测试Map和List ,大家自己看API,自己做实验,API在哪看?
找到hamcrest-library-1.3-javadoc.jar 解压 ,目录下index.html就是API
2. 如果遇到ClassLoader的错误,这是因为类加载器不同的原因,请将jar包像我一样布置,就没问题了.
六:总结
更详细的资料请自己查阅API,入门教程到此结束,算是带大家粗略的认识了下JUnit,谢谢大家!


 4276
4276

 被折叠的 条评论
为什么被折叠?
被折叠的 条评论
为什么被折叠?
 到【灌水乐园】发言


