


尊重原创,转载请标明出处 http://blog.csdn.net/abcdef314159
上一篇讲到paint的一些常用方法,其中遗留了一些,这篇先讲解其中的一个Shader渲染,我们知道Shader渲染Android提供了5个子类,有BitmapShader,ComposeShader,LinearGradient,RadialGradient,SweepGradient。Shader中有一个TileMode,共有3种模式,
CLAMP:当图片小于绘制尺寸时要进行边界拉伸来填充
REPEAT:当图片小于绘制尺寸时重复平铺
MIRROR:当图片小于绘制尺寸时镜像平铺
我们先来看一下BitmapShader,
public class ShaderView extends View {
	private Bitmap mBitmap;
	private Shader mBitmapShader = null;
	private Paint mPaint;

	public ShaderView(Context context, AttributeSet attrs) {
		super(context, attrs);
		init();
	}

	private void init() {
		mPaint = new Paint(Paint.ANTI_ALIAS_FLAG);
		mBitmap = BitmapFactory.decodeResource(getResources(), R.drawable.icon);
		mBitmapShader = new BitmapShader(mBitmap, Shader.TileMode.REPEAT,
				Shader.TileMode.MIRROR);
	}

	@Override
	protected void onDraw(Canvas canvas) {
		super.onDraw(canvas);
		mPaint.setShader(mBitmapShader);
		canvas.drawRect(0, 0, mBitmap.getWidth() * 4, mBitmap.getHeight() * 4,
				mPaint);
	}

}
我们看到左右平铺,上下镜像,在来改一下,只需要把上面的mBitmapShader改一下就可

		mBitmapShader = new BitmapShader(mBitmap, Shader.TileMode.CLAMP,
				Shader.TileMode.MIRROR);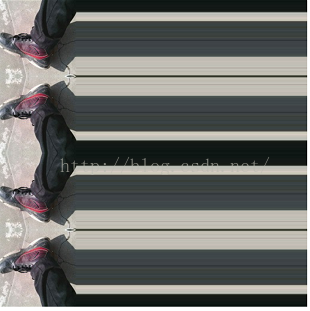
看到上下镜像,左右拉伸,再来看一下LinearGradient
	public LinearGradient(float x0, float y0, float x1, float y1, int colors[], float positions[],
            TileMode tile)
float y0 :渐变的y坐标起点
float x1 :渐变的x坐标终点
float y1 :渐变的y坐标终点
int colors[]:渐变的颜色数组
float positions[]:颜色的相对位置
TileMode tile:上面的3种模式
public class ShaderView extends View {
	private Shader mLinearGradient = null;
	private Paint mPaint;

	public ShaderView(Context context, AttributeSet attrs) {
		super(context, attrs);
		init();
	}

	private void init() {
		mPaint = new Paint(Paint.ANTI_ALIAS_FLAG);
		mLinearGradient = new LinearGradient(0, 0, 100, 100, new int[] {
				Color.RED, Color.YELLOW, Color.BLACK, Color.WHITE },
				new float[] { 0, .1F, .8F, .9F }, Shader.TileMode.REPEAT);
	}

	@Override
	protected void onDraw(Canvas canvas) {
		super.onDraw(canvas);
		mPaint.setShader(mLinearGradient);
		canvas.drawRect(0, 0, 900, 1000, mPaint);
	}
}
我们看到上面的小数数组是渐变的相对位置,如果positions为空,这均匀分布,修改一下
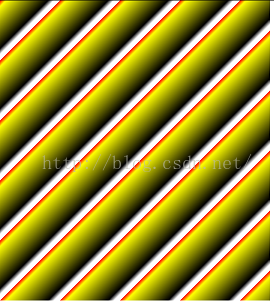
		mLinearGradient = new LinearGradient(0, 0, 100, 100, new int[] {
				Color.RED, Color.YELLOW, Color.BLACK, Color.WHITE }, null,
				Shader.TileMode.REPEAT);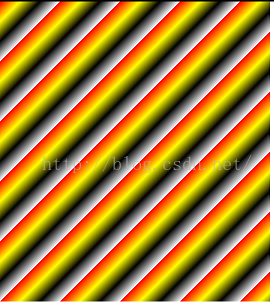
再来修改一下模式,因为最后一个是白色容易和手机屏幕混淆,所以添加了一个绿色
		mLinearGradient = new LinearGradient(0, 0, 100, 100,
				new int[] { Color.RED, Color.YELLOW, Color.BLACK, Color.WHITE,
						Color.GREEN }, null, Shader.TileMode.CLAMP);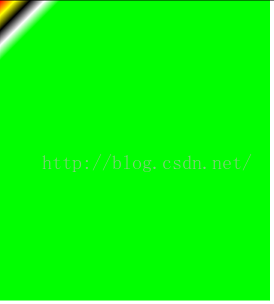
我们看到最后一个颜色是拉伸,再修改一下
		mLinearGradient = new LinearGradient(0, 0, 100, 100,
				new int[] { Color.RED, Color.YELLOW, Color.BLACK, Color.WHITE,
						Color.GREEN }, null, Shader.TileMode.MIRROR);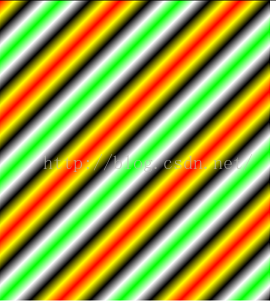
镜像模式,所以感觉有点对称。在看一下LinearGradient的另一个构造方法,
LinearGradient(float x0, float y0, float x1, float y1, int color0, int color1,
TileMode tile) mLinearGradient = new LinearGradient(0, 0, 100, 100, Color.RED,
Color.YELLOW, Shader.TileMode.MIRROR);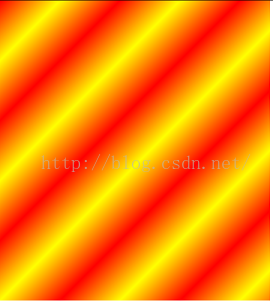
再来看一下RadialGradient
RadialGradient(float x, float y, float radius,
int colors[], float positions[], TileMode tile)x:渐变的中心x坐标
y:渐变的中心y坐标
radius:渐变的半径
colors:梯度渐变的颜色数组
positions:和LinearGradient类似,用来指定颜色数组的相对位置
public class ShaderView extends View {
	private Shader mRadialGradient = null;
	private Paint mPaint;

	public ShaderView(Context context, AttributeSet attrs) {
		super(context, attrs);
		init();
	}

	private void init() {
		mPaint = new Paint(Paint.ANTI_ALIAS_FLAG);
		mRadialGradient = new RadialGradient(200, 400, 100, new int[] {
				Color.YELLOW, Color.RED, Color.BLUE, Color.GREEN }, null,
				Shader.TileMode.REPEAT);
	}

	@Override
	protected void onDraw(Canvas canvas) {
		super.onDraw(canvas);
		mPaint.setShader(mRadialGradient);
		canvas.drawRect(0, 0, 900, 1000, mPaint);
	}
}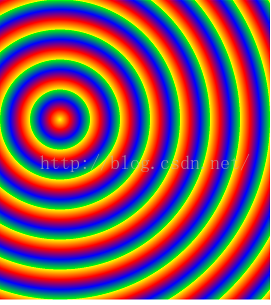
运行结果如上,再来修改一下
		mRadialGradient = new RadialGradient(200, 400, 100, new int[] {
				Color.YELLOW, Color.RED, Color.BLUE, Color.GREEN }, null,
				Shader.TileMode.CLAMP);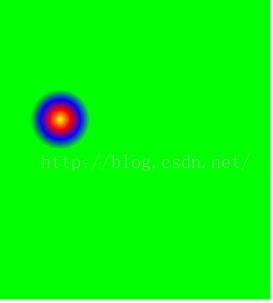
再来修改一下
		mRadialGradient = new RadialGradient(200, 400, 100, new int[] {
				Color.YELLOW, Color.RED, Color.BLUE, Color.GREEN }, null,
				Shader.TileMode.MIRROR);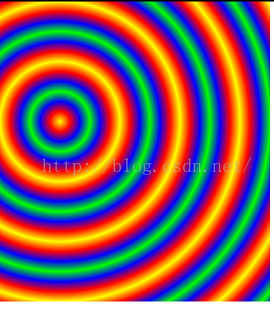
还有个构造方法,这里就不在演示
RadialGradient(float x, float y, float radius,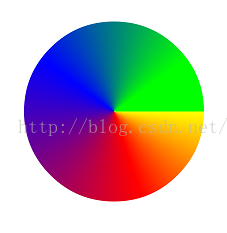
int color0, int color1, TileMode tile)SweepGradient(float cx, float cy,
int colors[], float positions[])colors:渐变的数组颜色
positions:渐变的相对位置
public class ShaderView extends View {
	private Shader mSweepGradient = null;
	private Paint mPaint;

	public ShaderView(Context context, AttributeSet attrs) {
		super(context, attrs);
		init();
	}

	private void init() {
		mPaint = new Paint(Paint.ANTI_ALIAS_FLAG);
		mSweepGradient = new SweepGradient(400, 400, new int[] { Color.YELLOW,
				Color.RED, Color.BLUE, Color.GREEN }, new float[] { 0, .2F,
				.6F, .9F });
	}

	@Override
	protected void onDraw(Canvas canvas) {
		super.onDraw(canvas);
		mPaint.setShader(mSweepGradient);
		canvas.drawCircle(400, 400, 300, mPaint);
	}
}
还有最后一个ComposeShader,这个是组合的Shader
public class ShaderView extends View {
	private Shader mSweepGradient = null;
	private Shader mBitmapShader = null;
	private Shader mComposeShader = null;
	private Paint mPaint;
	private Bitmap mBitmap;

	public ShaderView(Context context, AttributeSet attrs) {
		super(context, attrs);
		init();
	}

	private void init() {
		mPaint = new Paint(Paint.ANTI_ALIAS_FLAG);
		mBitmap = BitmapFactory.decodeResource(getResources(), R.drawable.icon);
		mBitmapShader = new BitmapShader(mBitmap, Shader.TileMode.REPEAT,
				Shader.TileMode.MIRROR);
		mSweepGradient = new SweepGradient(mBitmap.getWidth() * 2,
				mBitmap.getWidth() * 2, new int[] { Color.YELLOW,
				Color.RED, Color.BLUE, Color.GREEN }, new float[] { 0, .2F,
				.6F, .9F });
		mComposeShader = new ComposeShader(mBitmapShader, mSweepGradient,
				PorterDuff.Mode.DARKEN);
	}

	@Override
	protected void onDraw(Canvas canvas) {
		super.onDraw(canvas);
		mPaint.setShader(mComposeShader);
		canvas.drawRect(0, 0, mBitmap.getWidth() * 4, mBitmap.getHeight() * 4,
				mPaint);
	}
}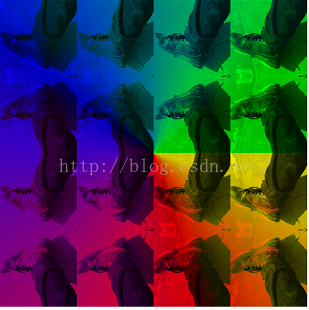
在上一篇讲到Paint的时候讲到PorterDuff.Mode有18种模式,这里只是随便使用了其中的一种。OK,Paint的setShader(Shader shader)方法到此先告一段落。


 706
706

 被折叠的 条评论
为什么被折叠?
被折叠的 条评论
为什么被折叠?
 到【灌水乐园】发言


