


来了,无非先开场白诉说一下。自己做android项目很长时间了,一直在忙,没有抽出时间写博客。现在总结下关于android项目中那些奇葩的需求吧,技术哥,从来都是废话少的,下面就直接进入主题。
博客地址:http://blog.csdn.net/alovebtoc/article/details/9104569
其实看到好多那些技术讲解的,有图片的往往最先吸引人的瞩目,这里先上几张效果图吧,附上一点简单的讲解。下面的代码部分会详细的讲解实现的过程。
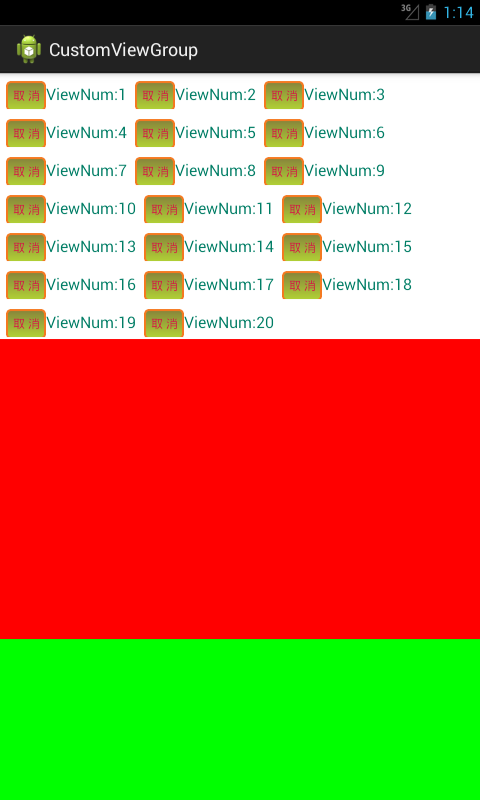
这个自定义的布局样式跟效果就是这样,当初封装的时候是模仿的ListView来做的,下面的颜色部分是为了突出自定义的ViewGroup组可以在布局中实现滑动效果而特意添加的,项目开发的时候不尽然的数据大小决定了不能特定的做出不能移动的控件,毕竟手机屏幕又是那么的小,显示的位置就更加宝贵了。
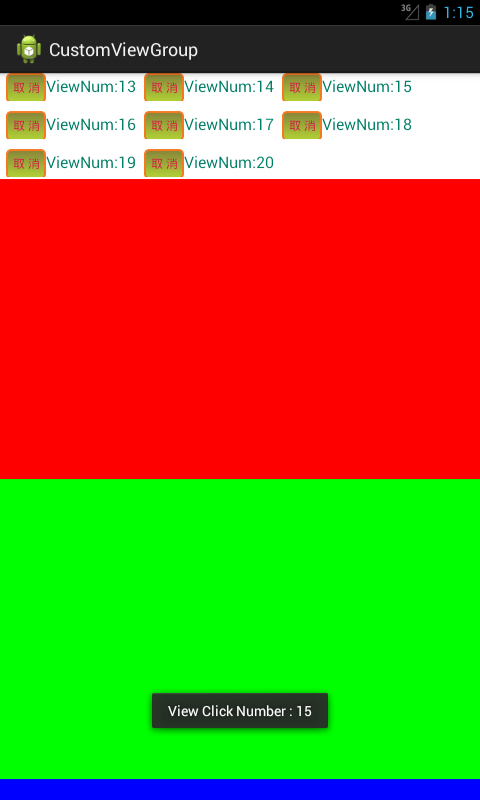
这张图片是展示了它的滑动效果,跟单个控件点击事件响应。同时说明下,这个响应事件不是里面那个Button。button效果是在下面图中
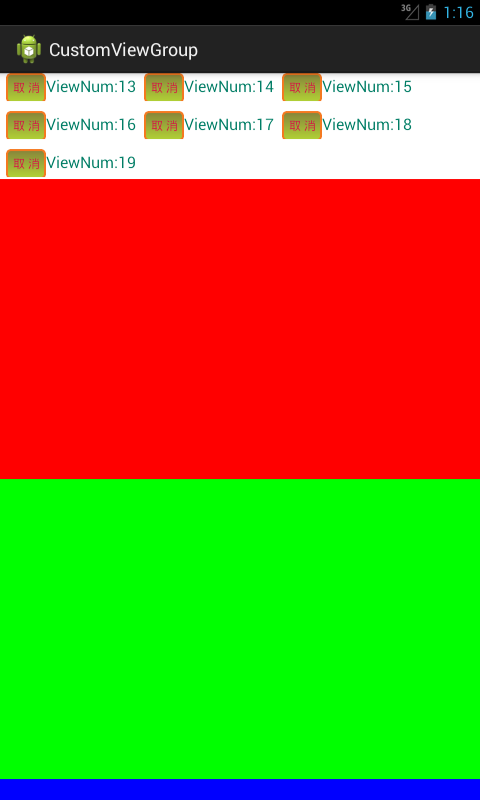
图片的最后一项,是点击取消button按钮移除掉了。
简单的做了这些介绍,里面的一些基本功能应该能满足平常项目开发的需求。
1、首先来介绍布局样式:activity_main.xml
<RelativeLayout xmlns:android="http://schemas.android.com/apk/res/android"
    xmlns:tools="http://schemas.android.com/tools"
    android:layout_width="match_parent"
    android:layout_height="match_parent"
    tools:context=".MainActivity" >

    <ScrollView
        android:layout_width="match_parent"
        android:layout_height="match_parent"
        android:background="#FFF"
        android:fadingEdge="none"
        android:fillViewport="true"
        android:scrollbars="none" >

        <LinearLayout
            android:layout_width="match_parent"
            android:layout_height="wrap_content"
            android:gravity="top|left"
            android:orientation="vertical" >

            <com.custom.view.group.MyCustomViewGroup
                android:id="@+id/MyCustomViewGroup"
                android:layout_width="match_parent"
                android:layout_height="wrap_content" />

            <TextView
                android:layout_width="match_parent"
                android:layout_height="300dp"
                android:background="#F00"/>

            <TextView
                android:layout_width="match_parent"
                android:layout_height="300dp"
                android:background="#0F0"/>

            <TextView
                android:layout_width="match_parent"
                android:layout_height="300dp"
                android:background="#00F"/>

            <TextView
                android:layout_width="match_parent"
                android:layout_height="300dp"
                android:background="#FF0"/>

            <TextView
                android:layout_width="match_parent"
                android:layout_height="300dp"
                android:background="#F0F"/>
        </LinearLayout>
    </ScrollView>

</RelativeLayout>
<RelativeLayout xmlns:android="http://schemas.android.com/apk/res/android"
xmlns:tools="http://schemas.android.com/tools"
android:layout_width="match_parent"
android:layout_height="match_parent"
tools:context=".MainActivity" >
<ScrollView
android:layout_width="match_parent"
android:layout_height="match_parent"
android:background="#FFF"
android:fadingEdge="none"
android:fillViewport="true"
android:scrollbars="none" >
<LinearLayout
android:layout_width="match_parent"
android:layout_height="wrap_content"
android:gravity="top|left"
android:orientation="vertical" >
<com.custom.view.group.MyCustomViewGroup
android:id="@+id/MyCustomViewGroup"
android:layout_width="match_parent"
android:layout_height="wrap_content" />
<TextView
android:layout_width="match_parent"
android:layout_height="300dp"
android:background="#F00"/>
<TextView
android:layout_width="match_parent"
android:layout_height="300dp"
android:background="#0F0"/>
<TextView
android:layout_width="match_parent"
android:layout_height="300dp"
android:background="#00F"/>
<TextView
android:layout_width="match_parent"
android:layout_height="300dp"
android:background="#FF0"/>
<TextView
android:layout_width="match_parent"
android:layout_height="300dp"
android:background="#F0F"/>
</LinearLayout>
</ScrollView>
</RelativeLayout>
注:红色字体部分是自定义viewgroup布局,这里引用的是一个android-custom-vg.jar架包,稍后再末尾我会上传。
2、自定义ViewGroup的Item布局样式:adapter_custom_view_item.xml
<LinearLayout xmlns:android="http://schemas.android.com/apk/res/android"
    xmlns:tools="http://schemas.android.com/tools"
    android:layout_width="wrap_content"
    android:layout_height="wrap_content"
    android:orientation="horizontal"
    android:padding="2dp"
    android:layout_margin="2dp" >

    <Button
        android:id="@+id/StyleCustomViewGroupBtn"
        android:layout_width="40dp"
        android:layout_height="30dp"
        android:background="@xml/style_custom_view_group_item"
        android:text="取 消"
        android:textSize="12sp"
        android:focusable="false"
        android:textColor="#d71345" />

    <TextView
        android:id="@+id/StyleCustomViewGroupText"
        android:layout_width="wrap_content"
        android:layout_height="30dp"
        android:text="ViewGroupText"
        android:textColor="#007d65"
        android:textSize="16sp"
        android:gravity="center_vertical"
        android:singleLine="true"/>

</LinearLayout>
3、首页代码实现:MainActivity.java
public class MainActivity extends Activity {

 private MyCustomViewGroup myCustomViewGroup;
 private MainCustomViewGroupAdapter adapter;

 @Override
 protected void onCreate(Bundle savedInstanceState) {
  super.onCreate(savedInstanceState);
  setContentView(R.layout.activity_main);

  myCustomViewGroup = (MyCustomViewGroup) findViewById(R.id.MyCustomViewGroup);
 }
注:这里获取MyCustomViewGroup的ID值
 private void bindCustomViewGroup(){

  adapter = new MainCustomViewGroupAdapter(this, myCustomViewGroup, list, handler);
  adapter.notifyDataSetChanged();

  adapter.setOnItemClickListener(new CustomInterfaceAdapter() {

   @Override
   public void getItemView(View arg0, int arg1, long arg2) {
    Toast.makeText(MainActivity.this, "View Click Number : "+arg1, 500).show();
   }
  });
 }
注:整个jar包的封装实现功能都集成在这个Adapter上了,一是为了封装的便利性,二是为了能更好的处理事件响应。MainCustomViewGroup继承CustomViewAdapter
里面有几个方法需要注重讲解一下:
1> 构造方法中需要传自定义控件MyCustomViewGroup,必须要穿的参数,内部获取它来加载view。
2>getCount();这个方法熟悉吧,只需要return 数据的数量
3>getCustomAllView();这个方法是加载View,不需要改动,直接继承使用就行了。
这里的adapter模拟适配器过程将会帮助你去实例整个viewgroup,adapter.notifyDataSetChanged();是刷新布局。
adapter调用setOnItemClickListener方法实现CustomInterfaceAdapter接口,监听处理事件
     list.remove(position);
     adapter.notifyDataSetChanged();
注:这里是移除某项的操作,同ListView移除后的方式相同,更便于使用于理解。
4、Adapter适配器:MainCustomViewGroupAdapter.java
public class MainCustomViewGroupAdapter extends CustomViewAdapter {

 private Context con;
 private List<String> list;
 private Handler handler;

 public MainCustomViewGroupAdapter(Context context,MyCustomViewGroup myView,List<String> list,Handler handler) {
  super(context, myView);

  this.con = context;
  this.list = list;
  this.handler = handler;

  getCount();
  getCustomAllView();
 }

 @Override
 public int getCount() {
  return list.size();
 }

 @Override
 public void getCustomAllView() {
  super.getCustomAllView();
 }

 @Override
 public View getItemView(final int position, View convertView) {

  viewHolder vh = null;
  if(convertView == null){
   vh = new viewHolder();
   convertView = LayoutInflater.from(con).inflate(R.layout.adapter_custom_view_item, null);

   vh.btn = (Button) convertView.findViewById(R.id.StyleCustomViewGroupBtn);
   vh.tv = (TextView) convertView.findViewById(R.id.StyleCustomViewGroupText);

   convertView.setTag(vh);
  }else{
   vh = (viewHolder) convertView.getTag();
  }

  vh.tv.setText(list.get(position));

  vh.btn.setOnClickListener(new OnClickListener() {

   @Override
   public void onClick(View v) {
    Bundle b = new Bundle();
    b.putBoolean("AdapterCustomViewGroupItem", true);
    b.putInt("position", position);
    Message msg = handler.obtainMessage();
    msg.setData(b);
    handler.sendMessage(msg);
   }
  });

  return super.getItemView(position, convertView);
 }

 public class viewHolder{
  public Button btn;
  public TextView tv;
 }

}
注:红色代码那部分一定要注意顺序哦,必须要保留的。如果没有Item的点击事件,getItemView()方法中可以直接return covertView或者其他自己定义的布局View。
结尾:详细讲解到这里了,预祝各位工作愉快!


 1169
1169

 被折叠的 条评论
为什么被折叠?
被折叠的 条评论
为什么被折叠?
 到【灌水乐园】发言


