


OEM信息可通过修改注册表的方法修改,所以这篇文章的思路为通过修改注册表修改OEM信息。
1、打开VS2013,新建一个MFC基于对话框的项目,命名为“OEM”。
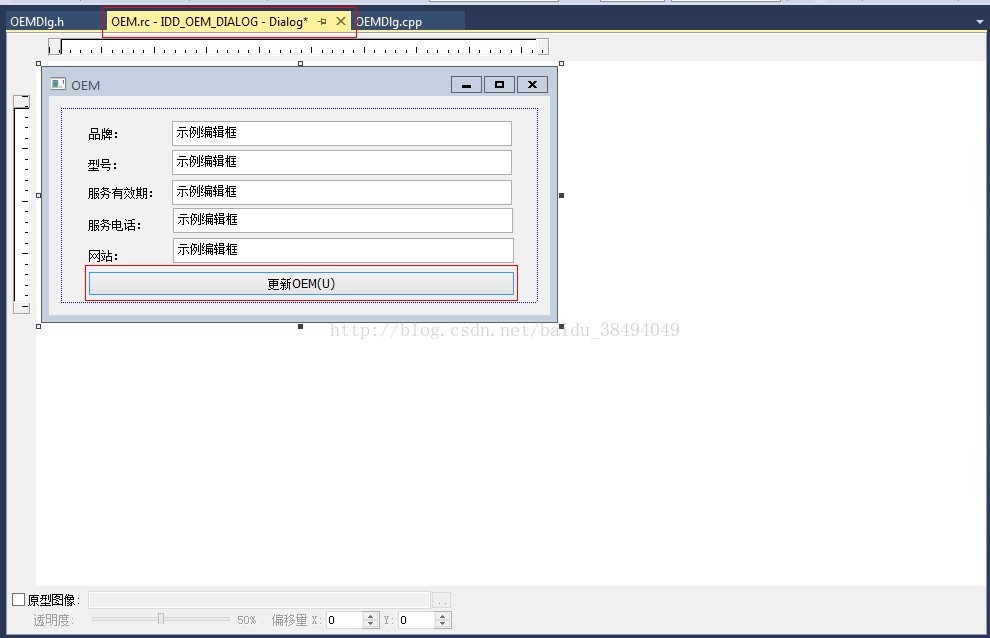
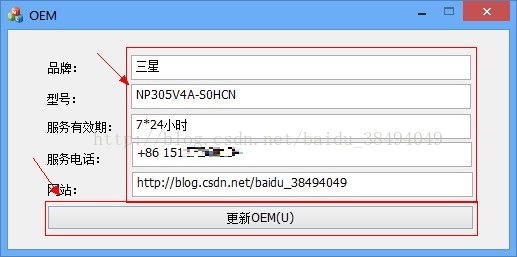
2、添加控件并修改名称,如图:
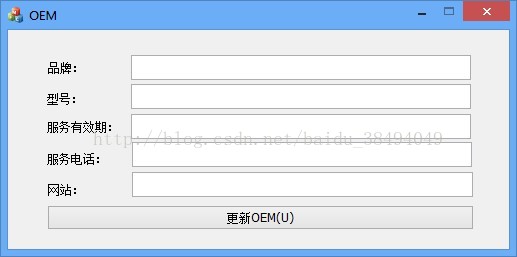
3、设置控件的ID:
“品牌”编辑框:IDC_NAME
“型号”编辑框:IDC_Model
“服务有效期”编辑框:IDC_Time
“服务电话”编辑框:IDC_Phone
“网站”编辑框:IDC_URL
按钮:IDC_Update_OEM
4、点击菜单栏上的【项目(P)】->【OEM 属性(P)...】。
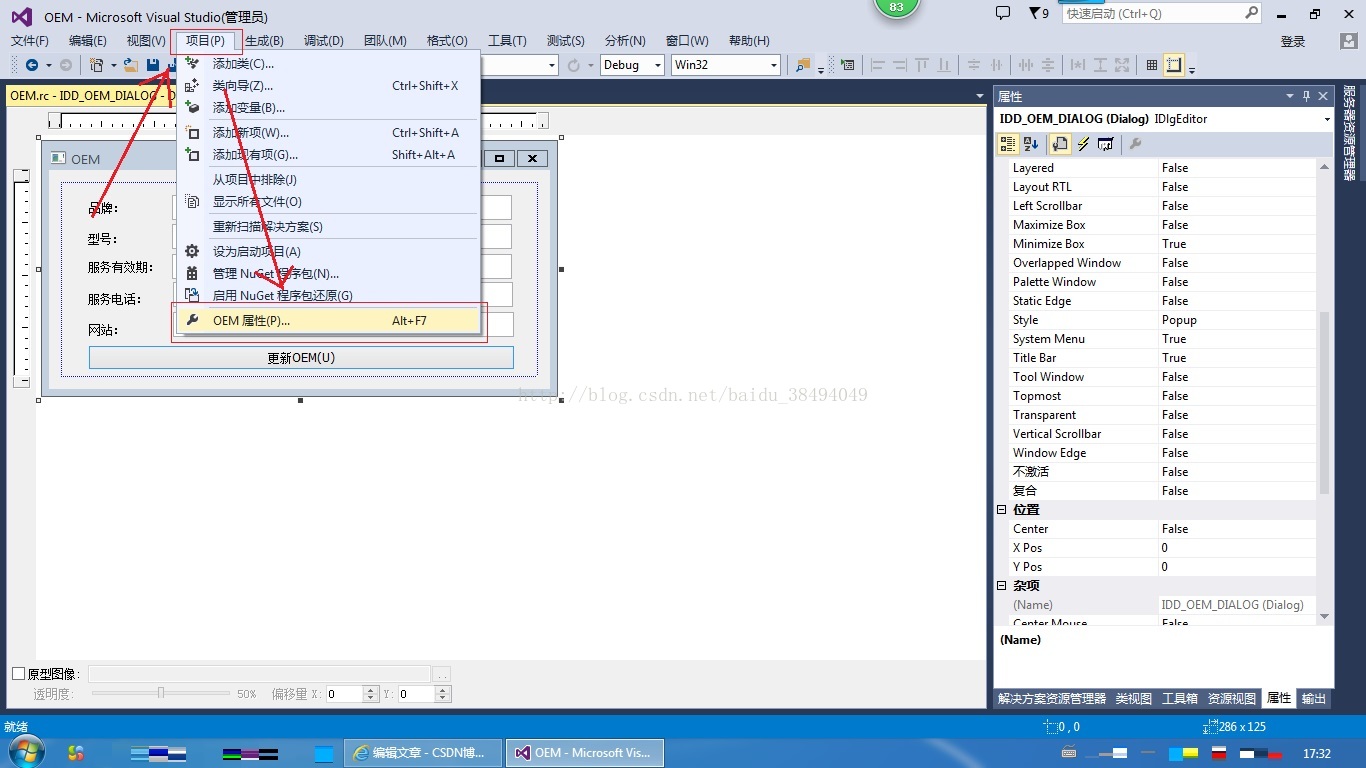
5、在属性窗口中,选择左侧的【配置属性】,右边的【字符集】选择【使用多字节字符集】,点击【确定】。

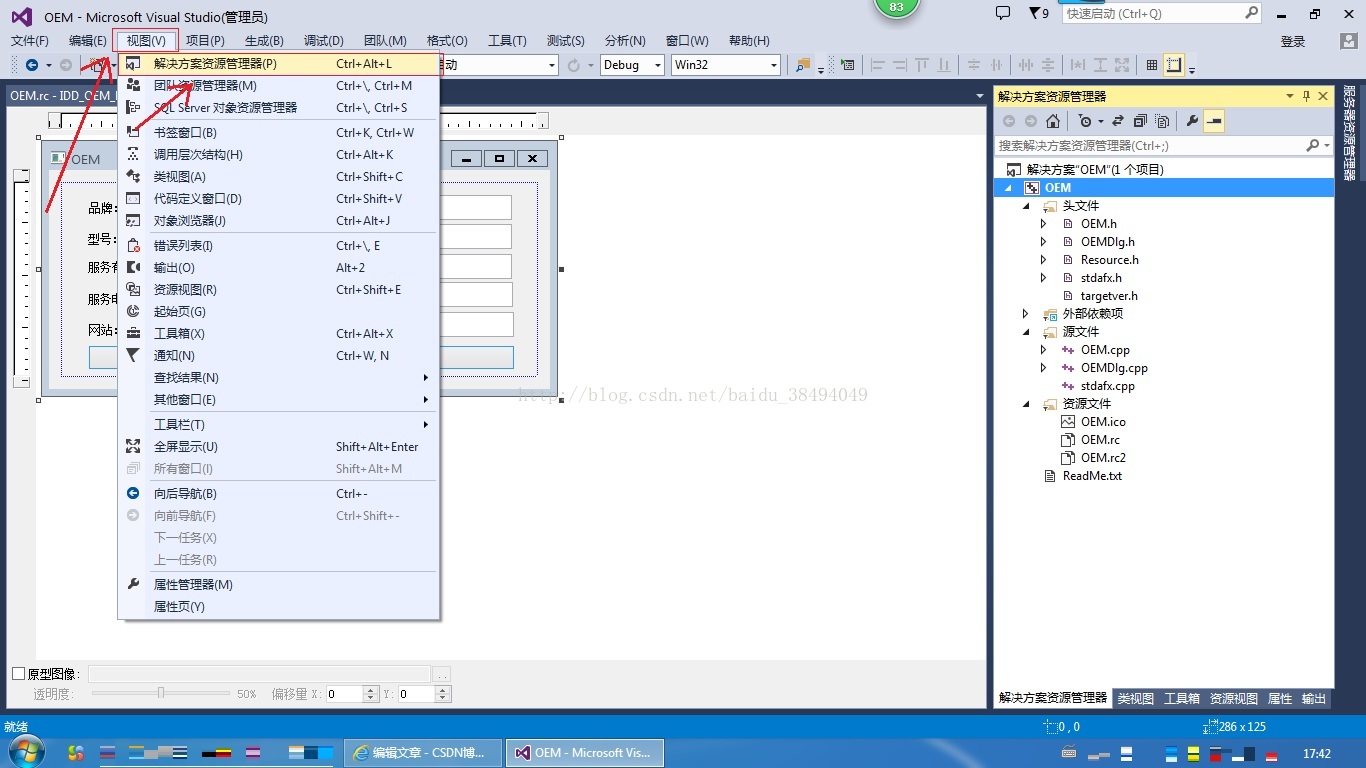
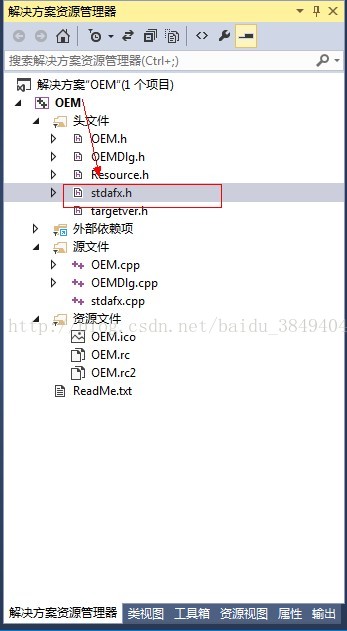
6、选择菜单栏上的【视图(V)】->【解决方案资源管理器(P)】。
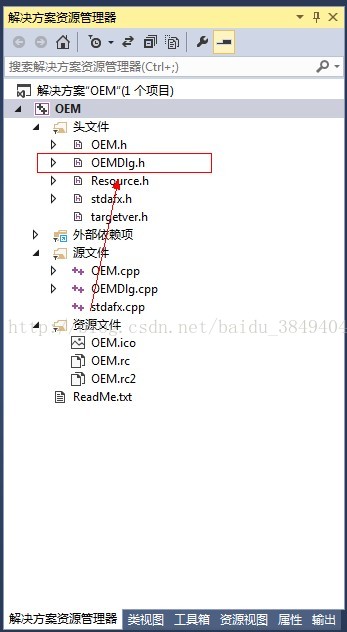
7、在【解决方案资源管理器】窗口里双击【OEMDlg.h】。
8、在OEMDlg.h中添加代码(具体位置看图):
BOOL Name(CString strValue);
BOOL Model(CString strValue);
BOOL Time(CString strValue);
BOOL Phone(CString strValue);
BOOL URL(CString strValue);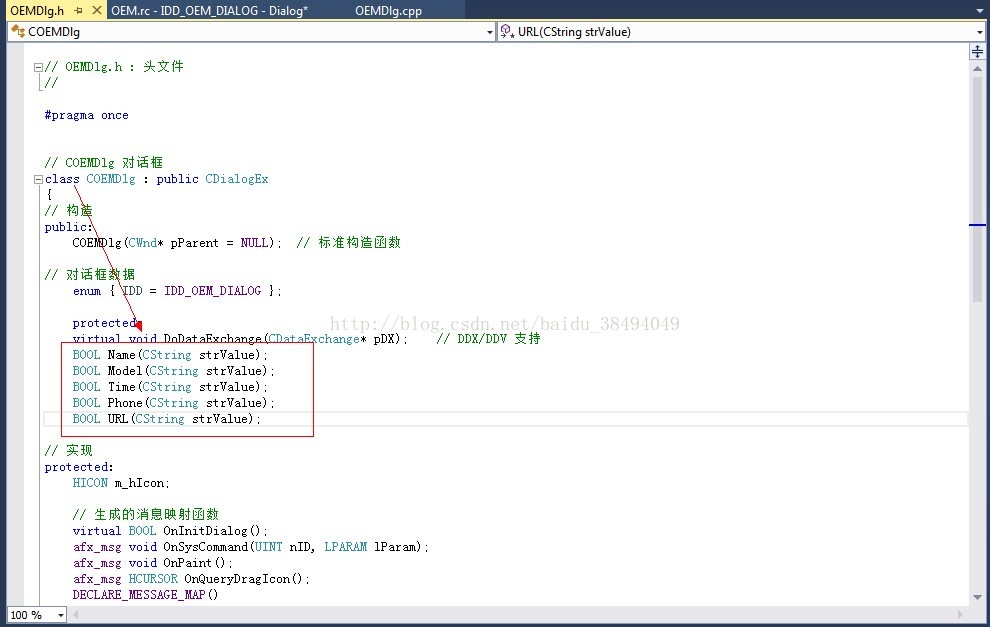
9、回到对话框界面编辑页,双击按钮。
10、先不添加按钮的处理程序,添加到OEMDlg.cpp文件的最下面(代码太多了,我的屏幕小,就不截图了):
BOOL COEMDlg::Name(CString strValue)
{
	HKEY Name;
	CString strSubKey = _T("SOFTWARE\\Microsoft\\Windows\\CurrentVersion\\OEMInformation");
	CString strName = _T("Manufacturer");
	DWORD dwDisp;
	if (ERROR_SUCCESS != RegCreateKeyEx(HKEY_LOCAL_MACHINE, strSubKey, NULL, NULL, REG_OPTION_VOLATILE, KEY_ALL_ACCESS, NULL, &Name, &dwDisp))
	{
		return FALSE;
	}
	if (ERROR_SUCCESS != RegSetValueExA(Name, (LPCSTR)strName, NULL,
		REG_SZ, (const BYTE*)strValue.GetBuffer(),
		strlen(strValue)))
	{
		RegCloseKey(Name);
		return FALSE;
	}
	RegCloseKey(Name);
	return TRUE;
}

BOOL COEMDlg::Model(CString strValue)
{
	HKEY Name;
	CString strSubKey = _T("SOFTWARE\\Microsoft\\Windows\\CurrentVersion\\OEMInformation");
	CString strName = _T("Model");
	DWORD dwDisp;
	if (ERROR_SUCCESS != RegCreateKeyEx(HKEY_LOCAL_MACHINE, strSubKey, NULL, NULL, REG_OPTION_VOLATILE, KEY_ALL_ACCESS, NULL, &Name, &dwDisp))
	{
		return FALSE;
	}
	if (ERROR_SUCCESS != RegSetValueExA(Name, (LPCSTR)strName, NULL,
		REG_SZ, (const BYTE*)strValue.GetBuffer(),
		strlen(strValue)))
	{
		RegCloseKey(Name);
		return FALSE;
	}
	RegCloseKey(Name);
	return TRUE;
}

BOOL COEMDlg::Time(CString strValue)
{
	HKEY Name;
	CString strSubKey = _T("SOFTWARE\\Microsoft\\Windows\\CurrentVersion\\OEMInformation");
	CString strName = _T("SupportHours");
	DWORD dwDisp;
	if (ERROR_SUCCESS != RegCreateKeyEx(HKEY_LOCAL_MACHINE, strSubKey, NULL, NULL, REG_OPTION_VOLATILE, KEY_ALL_ACCESS, NULL, &Name, &dwDisp))
	{
		return FALSE;
	}
	if (ERROR_SUCCESS != RegSetValueExA(Name, (LPCSTR)strName, NULL,
		REG_SZ, (const BYTE*)strValue.GetBuffer(),
		strlen(strValue)))
	{
		RegCloseKey(Name);
		return FALSE;
	}
	RegCloseKey(Name);
	return TRUE;
}

BOOL COEMDlg::Phone(CString strValue)
{
	HKEY Name;
	CString strSubKey = _T("SOFTWARE\\Microsoft\\Windows\\CurrentVersion\\OEMInformation");
	CString strName = _T("SupportPhone");
	DWORD dwDisp;
	if (ERROR_SUCCESS != RegCreateKeyEx(HKEY_LOCAL_MACHINE, strSubKey, NULL, NULL, REG_OPTION_VOLATILE, KEY_ALL_ACCESS, NULL, &Name, &dwDisp))
	{
		return FALSE;
	}
	if (ERROR_SUCCESS != RegSetValueExA(Name, (LPCSTR)strName, NULL,
		REG_SZ, (const BYTE*)strValue.GetBuffer(),
		strlen(strValue)))
	{
		RegCloseKey(Name);
		return FALSE;
	}
	RegCloseKey(Name);
	return TRUE;
}

BOOL COEMDlg::URL(CString strValue)
{
	HKEY Name;
	CString strSubKey = _T("SOFTWARE\\Microsoft\\Windows\\CurrentVersion\\OEMInformation");
	CString strName = _T("SupportURL");
	DWORD dwDisp;
	if (ERROR_SUCCESS != RegCreateKeyEx(HKEY_LOCAL_MACHINE, strSubKey, NULL, NULL, REG_OPTION_VOLATILE, KEY_ALL_ACCESS, NULL, &Name, &dwDisp))
	{
		return FALSE;
	}
	if (ERROR_SUCCESS != RegSetValueExA(Name, (LPCSTR)strName, NULL,
		REG_SZ, (const BYTE*)strValue.GetBuffer(),
		strlen(strValue)))
	{
		RegCloseKey(Name);
		return FALSE;
	}
	RegCloseKey(Name);
	return TRUE;
}
11、回到OnBnClickedUpdateOem()函数中,添加按钮的处理程序代码:
CString strName;
GetDlgItem(IDC_NAME)->GetWindowText(strName);
Name(strName);
CString strModel;
GetDlgItem(IDC_Model)->GetWindowText(strModel);
Model(strModel);
CString strTime;
GetDlgItem(IDC_Time)->GetWindowText(strTime);
Time(strTime);
CString strPhone;
GetDlgItem(IDC_Phone)->GetWindowText(strPhone);
Phone(strPhone);
CString strURL;
GetDlgItem(IDC_URL)->GetWindowText(strURL);
URL(strURL);
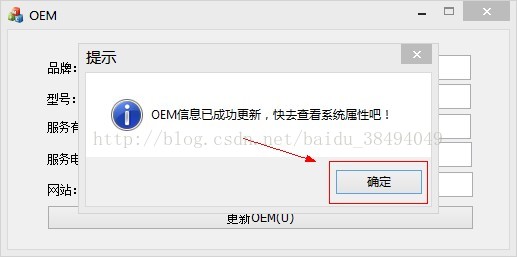
MessageBox(_T("OEM信息已成功更新,快去查看系统属性吧!"), _T("提示"), MB_ICONINFORMATION | MB_OK);

12、按照第6步的方法再次打开【解决方案资源管理器】,双击【stdafx.h】。
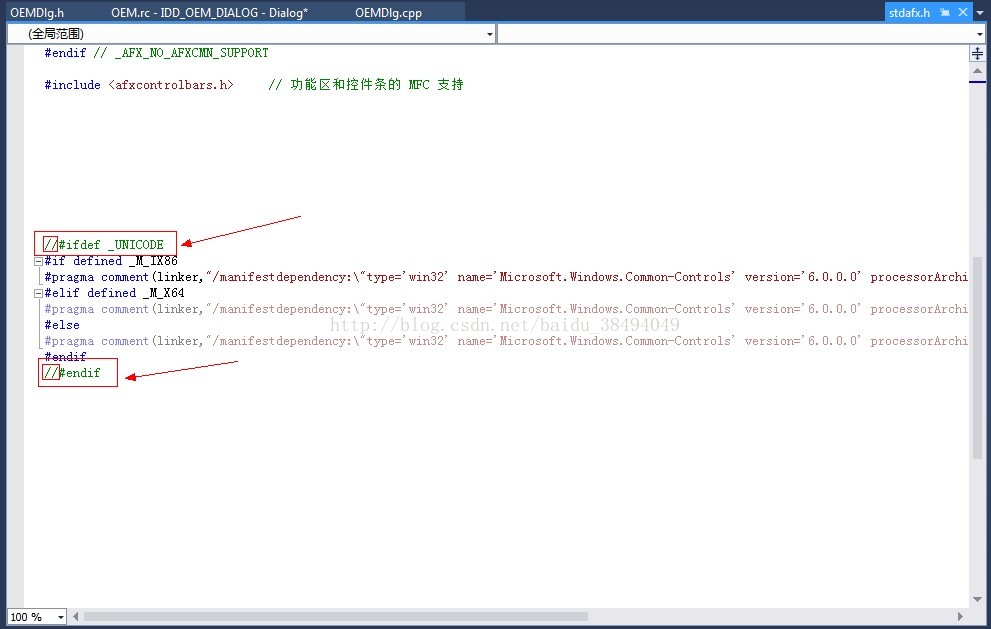
13、在stdafx.h的最下面,把#ifdef _UNICODE和最后一句#endif注释掉(也就是在这两句前面加一个//)。
14、生成程序,启动调试,输入你要的OEM信息并点击【更新OEM】按钮。
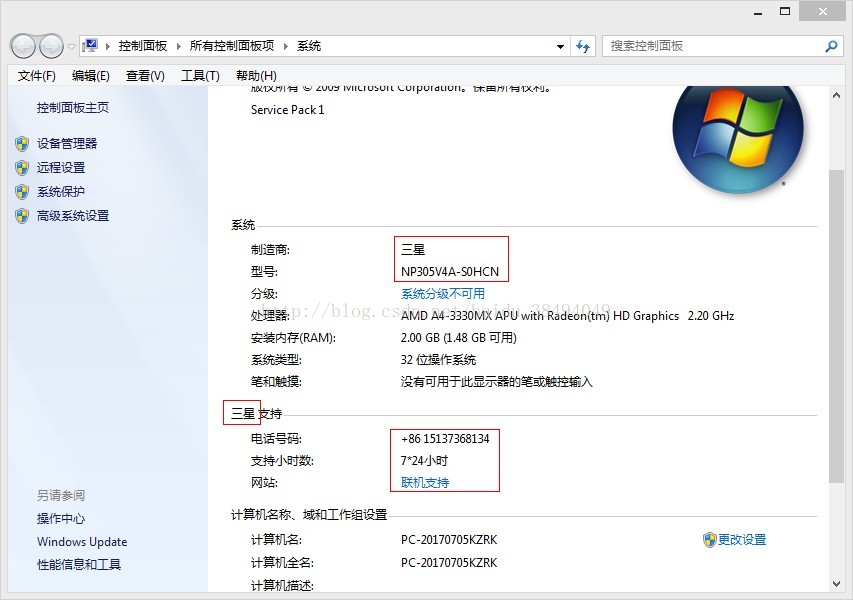
15、当出现提示信息时,点确定,看看系统属性,就会发现OEM信息已经更新了。
注意:本文章为baidu_38494049原创,转载请注明原文链接。


 3479
3479


 被折叠的 条评论
为什么被折叠?
被折叠的 条评论
为什么被折叠?
 到【灌水乐园】发言


