高德地图(百度地图,Google地图)中自定义Annotation&CallOutView

本篇介绍如何在高德地图中自定义Annotation的CallOutView

本文最后会附上App的Github地址。

之前在网上看到一篇百度地图的自定义CallOutView的方法,但是应用在高德上,一直出现这样那样的问题,下面介绍一种方法,非常的简单,因为官方Demo中已经将自定义方法告诉大家了。

废话不多说,直接上一张自定义后的截图


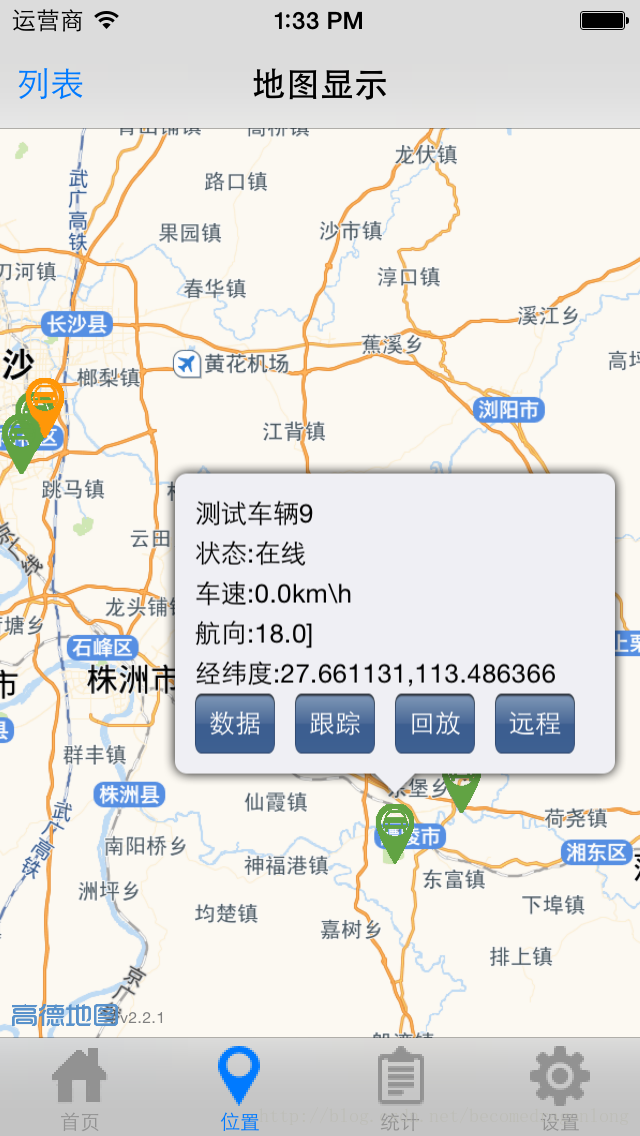
下面介绍用高德地图如果来做,百度地图和Google地图方法类似

1.将官方Demo中得文件拷贝到自己的项目中


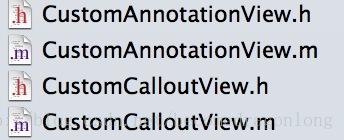
CustomeAnnotationView和CustomCalloutView是对应地图中的地标和弹出框
这里简答介绍一下原理,这两个view其实是绑定在一个coordinate(坐标)上的,只是在点击时,才显示calloutView。

2.深入了解这两个view

下面这个是CustomeAnnotationView中得部分代码,也是自定义CalloutView的部分,中间注释部分就是需要自定义的代码段
- (void)setSelected:(BOOL)selected animated:(BOOL)animated
{
    if (self.selected == selected)
    {
        return;
    }
    
    if (selected)
    {
        if (self.calloutView == nil)
        {
            /* Construct custom callout. */
            self.calloutView = [[CustomCalloutView alloc] initWithFrame:CGRectMake(0, 0, kCalloutWidth, kCalloutHeight)];
            self.calloutView.center = CGPointMake(CGRectGetWidth(self.bounds) / 2.f + self.calloutOffset.x,
                                                  -CGRectGetHeight(self.calloutView.bounds) / 2.f + self.calloutOffset.y);
 }
        //add view to calloutView将需要添加的label,button等view add到calloutView上。

        [self addSubview:self.calloutView];
}
    else
    {
        [self.calloutView removeFromSuperview];
    }
    
    [super setSelected:selected animated:animated];
}


上面说了自定义calloutView的关键代码段,下面介绍下自定义annotation的代码段
该段代码是在调用地图时使用的,是MAMapView的delegate方法
//customer annotation
- (MAAnnotationView *)mapView:(MAMapView *)mapView viewForAnnotation:(id<MAAnnotation>)annotation
{
    if ([annotation isKindOfClass:[MAPointAnnotation class]])
    {
        static NSString *customReuseIndetifier = @"customReuseIndetifier";
        
        CustomAnnotationView *annotationView = (CustomAnnotationView*)[mapView dequeueReusableAnnotationViewWithIdentifier:customReuseIndetifier];
        
        if (annotationView == nil)
        {
            annotationView = [[CustomAnnotationView alloc] initWithAnnotation:annotation reuseIdentifier:customReuseIndetifier];
            // must set to NO, so we can show the custom callout view.
            annotationView.canShowCallout = NO;   //注意这个地方一定要设置成NO,不然就是Callout出系统的calloutview。
            annotationView.draggable = YES;
            annotationView.calloutOffset = CGPointMake(0, -5);
        }
   
            annotationView.portrait = [UIImage imageNamed:@"write_p.png"]; //这个是annotation的image,可以在这里进行设置
        }
      
        return annotationView;
    }
    
    return nil;
}


下面这部分代码基本不需要做改变,它的主要功能是设置calloutView显示位置等。
- (void)mapView:(MAMapView *)mapView didSelectAnnotationView:(MAAnnotationView *)view
{
    /* Adjust the map center in order to show the callout view completely. */
    if ([view isKindOfClass:[CustomAnnotationView class]]) {
        CustomAnnotationView *cusView = (CustomAnnotationView *)view;
        CGRect frame = [cusView convertRect:cusView.calloutView.frame toView:self.mapView];
        
        frame = UIEdgeInsetsInsetRect(frame, UIEdgeInsetsMake(kCalloutViewMargin, kCalloutViewMargin, kCalloutViewMargin, kCalloutViewMargin));
        
        if (!CGRectContainsRect(self.mapView.frame, frame))
        {
            /* Calculate the offset to make the callout view show up. */
            CGSize offset = [self offsetToContainRect:frame inRect:self.mapView.frame];
            
            CGPoint theCenter = self.mapView.center;
            theCenter = CGPointMake(theCenter.x - offset.width, theCenter.y - offset.height);
            
            CLLocationCoordinate2D coordinate = [self.mapView convertPoint:theCenter toCoordinateFromView:self.mapView];
            
            [self.mapView setCenterCoordinate:coordinate animated:YES];
        }
         
       
    }
}


CsutomeCalloutView文件中,设置了CalloutView的背景色,形状等,一般也不需要修改。
我在该项目中,只是对背景色进行的修改。


3.小结
本教程非常简单,稍微仔细看看官方的Demo就会知道该如何去做。

该项目中,我还根据每个annotation的不同状态显示不同的image,包括CalloutView里的button处理事件等。

点击 这里获取App的源码


如果有任何问题欢迎再下面留言,或者扫描二维码


  • 0
    点赞
  • 2
    收藏
    觉得还不错? 一键收藏
  • 2
    评论
你好!下面是使用 Kotlin 开发一个基于高德地图的定位功能的示例代码: ```kotlin import android.Manifest import android.annotation.SuppressLint import android.content.Context import android.content.pm.PackageManager import android.location.Location import android.location.LocationListener import android.location.LocationManager import android.os.Bundle import androidx.appcompat.app.AppCompatActivity import androidx.core.app.ActivityCompat class MainActivity : AppCompatActivity() { // 定位权限请求码 private val LOCATION_PERMISSION_REQUEST_CODE = 100 // 定位管理器 private var locationManager: LocationManager? = null override fun onCreate(savedInstanceState: Bundle?) { super.onCreate(savedInstanceState) setContentView(R.layout.activity_main) // 初始化定位管理器 locationManager = getSystemService(Context.LOCATION_SERVICE) as LocationManager // 检查定位权限 checkLocationPermission() } @SuppressLint("MissingPermission") private fun startLocationUpdates() { // 设置位置监听器 locationManager?.requestLocationUpdates( LocationManager.GPS_PROVIDER, 0, 0f, locationListener ) } private fun checkLocationPermission() { if (ActivityCompat.checkSelfPermission( this, Manifest.permission.ACCESS_FINE_LOCATION ) != PackageManager.PERMISSION_GRANTED && ActivityCompat.checkSelfPermission( this, Manifest.permission.ACCESS_COARSE_LOCATION ) != PackageManager.PERMISSION_GRANTED ) { // 请求定位权限 ActivityCompat.requestPermissions( this, arrayOf( Manifest.permission.ACCESS_FINE_LOCATION, Manifest.permission.ACCESS_COARSE_LOCATION ), LOCATION_PERMISSION_REQUEST_CODE ) } else { // 已经获得定位权限,开始定位 startLocationUpdates() } } private val locationListener: LocationListener = object : LocationListener { override fun onLocationChanged(location: Location) { // 获取到位置信息 val latitude = location.latitude val longitude = location.longitude // 根据经纬度进行相关操作,例如显示在地图上或者发送给服务器等 } override fun onStatusChanged(provider: String?, status: Int, extras: Bundle?) {} override fun onProviderEnabled(provider: String?) {} override fun onProviderDisabled(provider: String?) {} } override fun onRequestPermissionsResult( requestCode: Int, permissions: Array<out String>, grantResults: IntArray ) { super.onRequestPermissionsResult(requestCode, permissions, grantResults) if (requestCode == LOCATION_PERMISSION_REQUEST_CODE) { if (grantResults.isNotEmpty() && grantResults[0] == PackageManager.PERMISSION_GRANTED) { // 用户授予了定位权限,开始定位 startLocationUpdates() } else { // 用户拒绝了定位权限,可以给出相应的提示信息 } } } } ``` 这是一个简单的示例,它使用了 `LocationManager` 和 `LocationListener` 来实现地理位置的获取和监听。在 `checkLocationPermission()` 方法,我们首先检查定位权限,如果用户尚未授予权限,则请求权限。如果用户已经授予权限,则调用 `startLocationUpdates()` 方法开始进行定位。 请确保在 AndroidManifest.xml 文件添加相应的权限声明: ```xml <uses-permission android:name="android.permission.ACCESS_FINE_LOCATION" /> <uses-permission android:name="android.permission.ACCESS_COARSE_LOCATION" /> ``` 另外,还需要注意在真机或模拟器上测试时,要确保设备已经打开了位置服务,否则无法获取到位置信息。 希望这能帮到你!如果有其他问题,请随时提问。

“相关推荐”对你有帮助么?

  • 非常没帮助
  • 没帮助
  • 一般
  • 有帮助
  • 非常有帮助
提交
评论 2
添加红包

请填写红包祝福语或标题

红包个数最小为10个

红包金额最低5元

当前余额3.43前往充值 >
需支付:10.00
成就一亿技术人!
领取后你会自动成为博主和红包主的粉丝 规则
hope_wisdom
发出的红包
实付
使用余额支付
点击重新获取
扫码支付
钱包余额 0

抵扣说明:

1.余额是钱包充值的虚拟货币,按照1:1的比例进行支付金额的抵扣。
2.余额无法直接购买下载,可以购买VIP、付费专栏及课程。

余额充值