


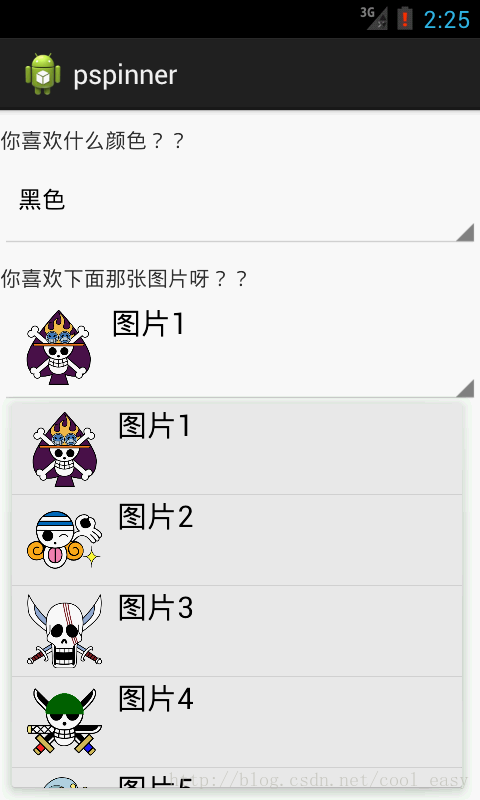
 本文详细介绍了使用Android开发中如何通过LinearLayout布局实现垂直排列的TextView和Spinner,以及如何在Spinner中使用ArrayAdapter进行颜色数组的显示,并通过自定义SimpleAdapter将图片与文字数据绑定至另一个Spinner,实现用户对颜色和图片的选择。
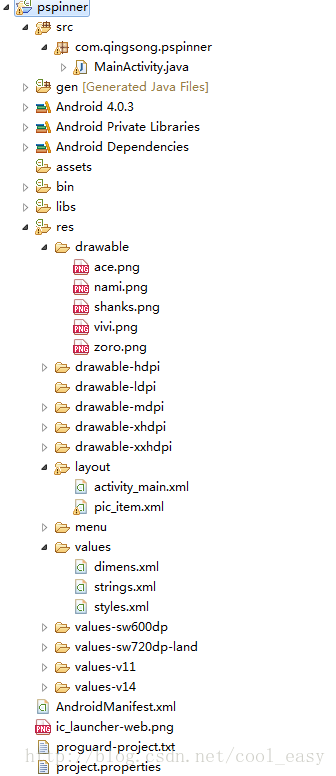
项目结构:
实现的效果:
layout的主要配置文件activity_main.xml:
<LinearLayout xmlns:android="http://schemas.android.com/apk/res/android"
    android:layout_width="fill_parent"
    android:layout_height="fill_parent"
    android:orientation="vertical" >

        <TextView
        android:id="@+id/text"
        android:layout_width="fill_parent"
        android:layout_height="wrap_content"
        android:layout_marginTop="10dip"
        android:text="@string/favor_color"
        />

        <Spinner
            android:id="@+id/spinner01"
            android:layout_width="match_parent"
            android:layout_height="wrap_content" />

        <TextView
        android:id="@+id/text02"
        android:layout_width="fill_parent"
        android:layout_height="wrap_content"
        android:layout_marginTop="10dip"
        android:text="@string/favor_pic"
        />
            <Spinner
            android:id="@+id/spinner02"
            android:layout_width="match_parent"
            android:layout_height="wrap_content" />


</LinearLayout>
pic_item.xml文件:
<?xml version="1.0" encoding="utf-8"?>
<LinearLayout
     xmlns:android="http://schemas.android.com/apk/res/android"
    android:layout_width="match_parent"
    android:layout_height="wrap_content"
    android:orientation="horizontal" >

    <ImageView
        android:id="@+id/imageview"
        android:layout_width="60dp"
        android:layout_height="60dp"
        android:paddingLeft="10dp"
      />


    <TextView
        android:id="@+id/textview"
        android:layout_width="match_parent"
        android:layout_height="wrap_content"
        android:gravity="center_vertical"
        android:paddingLeft="10dp"
        android:textColor="#000"
        android:textSize="20sp" />

</LinearLayout>
字符设置配置文件string.xml:
<?xml version="1.0" encoding="utf-8"?>
<resources>
    <string name="app_name">pspinner</string>
    <string name="action_settings">设置</string>
    <string name="favor_color">你喜欢什么颜色??</string>
    <string-array name="color">
        <item>黑色</item>
        <item>白色</item>
        <item>黄色</item>
        <item>蓝色</item>
        <item>红色</item>
    </string-array>
    <string name="favor_pic">你喜欢下面那张图片呀??</string>
</resources>
主界面的实现acitivity的java文件MainActivity:
package com.qingsong.pspinner;

import java.util.ArrayList;
import java.util.HashMap;
import java.util.List;
import java.util.Map;

import android.os.Bundle;
import android.app.Activity;

import android.view.View;
import android.widget.AdapterView;
import android.widget.AdapterView.OnItemSelectedListener;
import android.widget.ArrayAdapter;
import android.widget.SimpleAdapter;
import android.widget.Spinner;
import android.widget.Toast;

public class MainActivity extends Activity {

	Spinner sp01;
	Spinner sp02;

	protected void onCreate(Bundle savedInstanceState) {
		super.onCreate(savedInstanceState);
		setContentView(R.layout.activity_main);

		//扎到控件spinner
		sp01=(Spinner) findViewById(R.id.spinner01);
		sp02 = (Spinner) findViewById(R.id.spinner02);

		//获取颜色数组
		final String[] colors = getResources().getStringArray(R.array.color);

		//设置sp01的adapter
		ArrayAdapter<CharSequence> adapter =ArrayAdapter.createFromResource
				(this, R.array.color, android.R.layout.simple_spinner_dropdown_item);

		sp01.setAdapter(adapter);

		//设置团出列表标题
		sp01.setPrompt("自选颜色");

		//设置默认选项不弹出提示
		sp01.setSelection(0, true);

		//监听spinner选项按钮
		sp01.setOnItemSelectedListener(new OnItemSelectedListener(){


			public void onItemSelected(AdapterView<?> arg0, View arg1,
					int arg2, long arg3) {
				// TODO Auto-generated method stub

				//给出提示选择的选项
				Toast.makeText(MainActivity.this, "你选择的颜色是:" + colors[arg2], Toast.LENGTH_SHORT).show();
			}

			public void onNothingSelected(AdapterView<?> arg0) {
				// TODO Auto-generated method stub

			}

		});


		//声明一个简单simpleAdapter
		SimpleAdapter simpleAdapter =new SimpleAdapter(this, getListData(), R.layout.pic_item,
				new String[]{"npic","namepic"}, new int[]{R.id.imageview,R.id.textview});

		//绑定到sp02
		sp02.setAdapter(simpleAdapter);

		sp02.setOnItemSelectedListener(new OnItemSelectedListener(){

			@Override
			public void onItemSelected(AdapterView<?> parent, View view,
					int position, long id) {
				 //parent为一个Map结构的和数据
				Map<String, Object> map = (Map<String, Object>) parent.getItemAtPosition(position);

				 Toast.makeText(MainActivity.this,
	                        map.get("namepic").toString(),Toast.LENGTH_SHORT).show();

			}

			public void onNothingSelected(AdapterView<?> arg0) {
				// TODO Auto-generated method stub

			}

		});


	}

	public List<Map<String, Object>> getListData() {

		List<Map<String, Object>> list = new ArrayList<Map<String, Object>>();

        //每个Map结构为一条数据,key与Adapter中定义的String数组中定义的一一对应。

		HashMap<String, Object> map = new HashMap<String, Object>();
        map.put("npic", R.drawable.ace);
        map.put("namepic", "图片1");
        list.add(map);

        HashMap<String, Object> map2 = new HashMap<String, Object>();
        map2.put("npic", R.drawable.nami);
        map2.put("namepic", "图片2");
        list.add(map2);

        HashMap<String, Object> map3 = new HashMap<String, Object>();
        map3.put("npic", R.drawable.shanks);
        map3.put("namepic", "图片3");
        list.add(map3);

        HashMap<String, Object> map4 = new HashMap<String, Object>();
        map4.put("npic", R.drawable.zoro);
        map4.put("namepic", "图片4");
        list.add(map4);

        HashMap<String, Object> map5 = new HashMap<String, Object>();
        map5.put("npic", R.drawable.vivi);
        map5.put("namepic", "图片5");
        list.add(map5);


		return list;
	}

}
使用的图片文件都是自己去网上下载的,随便下载几个就行。
自学第一篇文章吧,还有很多没搞明白,慢慢学习吧。
有疑问的可以参考一下这篇文章:http://blog.csdn.net/itde1/article/details/7408526
应该是高手写的,讲述的不错


 4055
4055

 被折叠的 条评论
为什么被折叠?
被折叠的 条评论
为什么被折叠?
 到【灌水乐园】发言


