


由于毕业设计是做一个android的手机任务管理器,比较简单,现在做个总结:
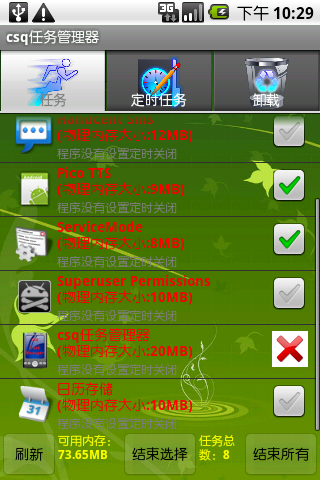
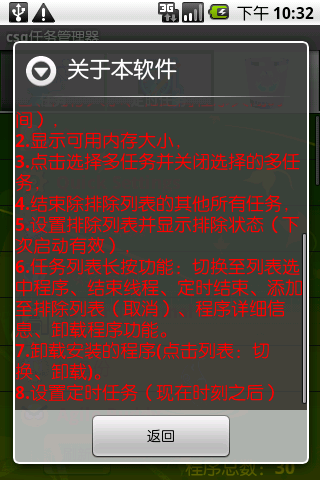
最终效果图:


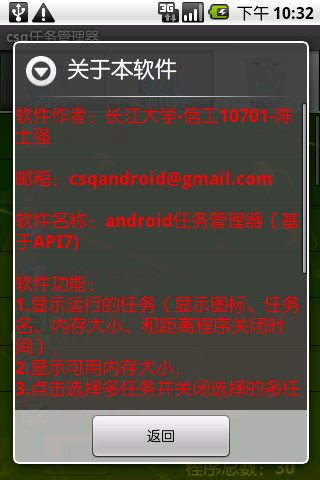
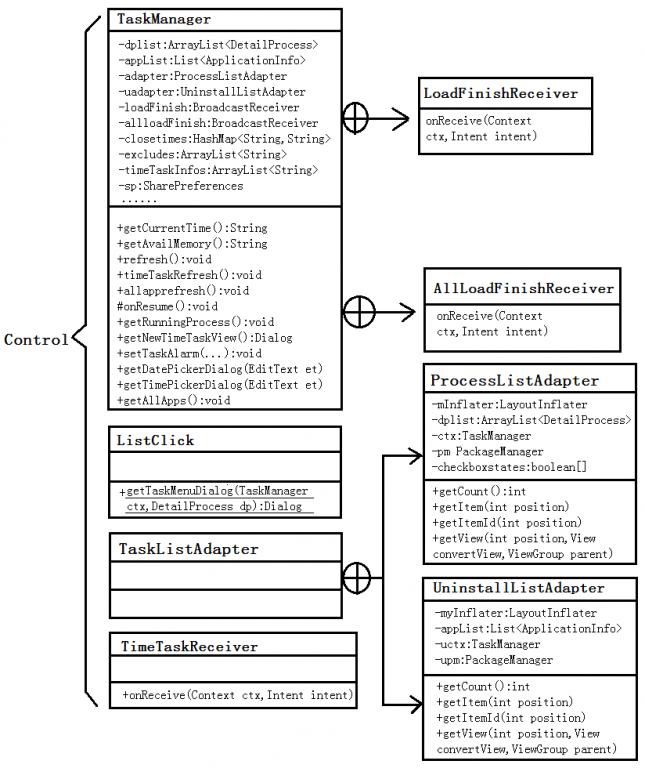
软件文件设定:
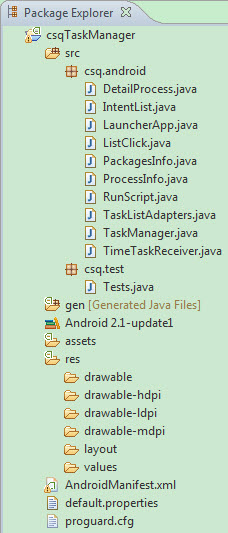
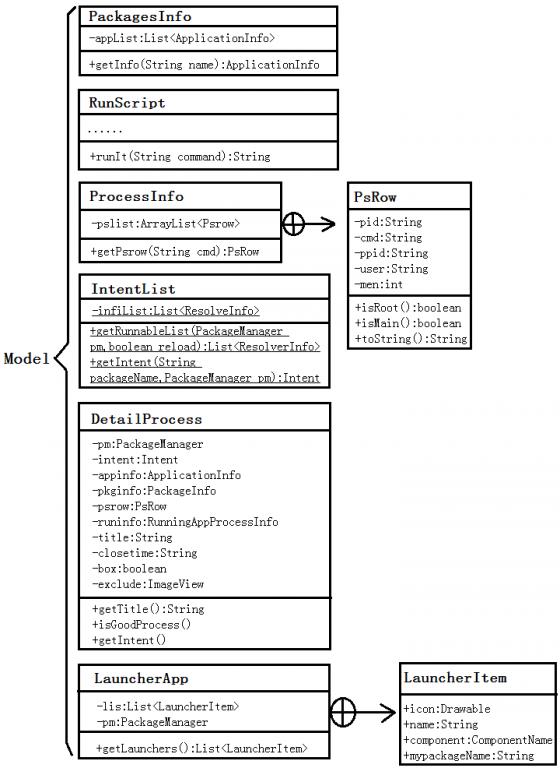
Model(模块层):共设置6个模块类
Control(控制层):包含4个控制类
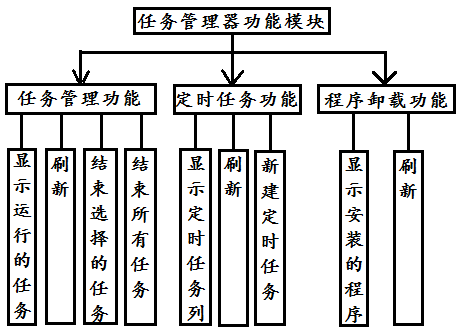
系统总体结构图:
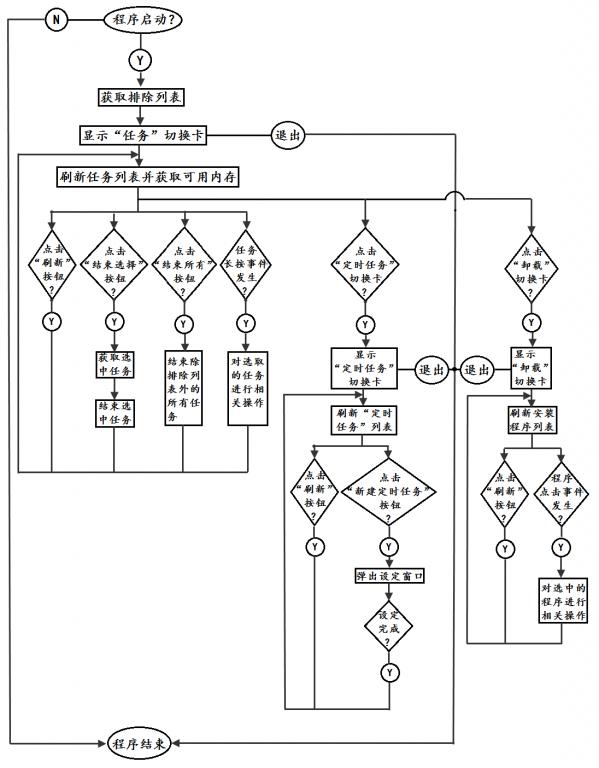
程序运行流程图:
4.4.1 获取正在运行的程序:
ActivityManager对象向系统取得ACTIVITY_SERVICE:
am = (ActivityManager) getSystemService(Context.ACTIVITY_SERVIC E);
获取正在运行的进程列表:
List<RunningAppProcessInfo> list = am.getRunningAppProcesses();
通过RunningAppProcessInfo获取任务的详细信息:(将所有信息封装到一个类DetailProcess中)
1).获取ApplicationInfo
获取所以安装了的程序,得到List<ApplicationInfo>:
PackageManager pm = Context().getPackageManager();
List<ApplicationInfo> appList = pm.getInstalledApplications(PackageManager.GET_UNINSTALLED_PACKAGES);
在通过程序名RunningAppProcessInfo .processName与appList中的ApplicationInfo .processName是否相符来获取此运行任务的ApplicationInfo。
2).获取PackageInfo
pm.getPackageInfo(RunningAppProcessInfo.processName, PackageManag er.GET_ACTIVITIES)
3).获取任务名:
ApplicationInfo. loadLabel(pm).toString()
4).获取任务图标:
ApplicationInfo .loadIcon(pm)
5).获取任务其他信息:
通过在终端运行执行命令“ps”来获取当前所有任务的user 、 pid、ppid 、cmd 、mem等信息,mem即为物理内存大小,单位KB,cmd为processName。再通过RunningAppProcessInfo.processName筛选获取此任务的其他信息。
4.4.2 获取系统可用内存大小:
ActivityManager.MemoryInfo outInfo = new ActivityManager.MemoryIn fo();
am.getMemoryInfo(outInfo);
可用内存(String): Formatter.formatFileSize(getBaseContext(),outI nfo.availMem);
4.4.3获取用户安装的程序(供卸载):
判定非系统程序:
(ApplicationInfo.flags & ApplicationIn-fo.FLAG_SYSTEM)<=0
通过这个条件筛选List<ApplicationInfo> appList中的非系统程序,然后列表显示相关信息。
4.4.4 获取Launcher程序列表(供定时选择用):
Intent it = new Intent(Intent.ACTION_MAIN);
it.addCategory(Intent.CATEGORY_LAUNCHER);
(在指定的intent中获取所有可能执行的activity列表,该函数通过获取飞信运行消息列表,放在intent中List<ResolveInfo>的形式,这是指该函数可以加标志位,该标志位可以有MATCH_DEFAULT_ONLY、GET_INTENT_FILTERS、GET_RESOLVED_FILTER三种形式)
List<ResolveInfo> riList =pm.queryIntentActivities(it,0);
获取Launcher图标:
ResolveInfo .loadIcon(pm)
获取Launcher名称:
ResolveInfo .loadLabel(pm).toString()
获取ComponentName:
ActivityInfo ai = ResolveInfo.activityInfo;
new ComponentName(ai.applicationInfo.packageName,ai.name)得到 ComponentName。
ai.packageName得到packageName
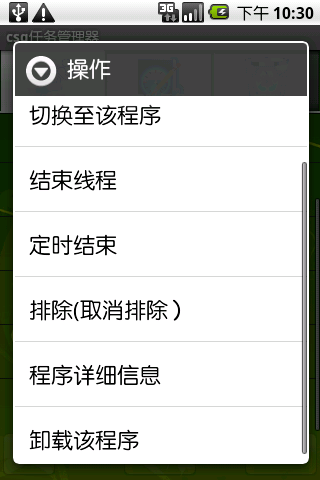
4.4.5切换至选定程序方法:
Intent intent = PackageManager.getLaunchIntentForPackage(Applicat ionInfo.packageName);
Context.startActivity(intent);
4.4.6结束任务方法:
关闭应用程序的权限 :
<uses-permission android:name="android.permission.RESTART_PACKAGE S" />
API7及以下:
ActivityManager. restartPackage(PackageName)
(restartPackage会关掉于这个进程有关联的所有资源)
API8及以上:
ActivityManager. killbackgroundprocesses
(alarms会被关掉,service会重启,如果是用户可见的activity,将不会 被kill,该方法只能重启应用程序)
另一种方法:forceStopPackage()
使用Java反射调用:
ActivityManager sd = (ActivityManager) this.getSystemService(ACTI VITY_SERVICE);
Method method = Class.forName("android.app.ActivityManager").getM ethod("forceStopPackage", String.class);
method.invoke(sd, "com.h3c.ServiceAuto");
forceStopPackage并不能被第三方程序调用,只能随系统build。使用条件:
1)权限:<uses-permission an-droid:name="android.permission.FORCE_STOP_PACKAGES"/>
2)只能运行在系统进程:android:sharedUserId="android.uid.system"
3)android.uid.system属性的进程 须要在android.mk里这样设置:
LOCAL_CERTIFICATE := platform
4.4.7获取程序详细信息方法:
Intent detailsIntent = new Intent();
detailsIntent.setClassName("com.android.settings", com.android.se ttings.InstalledAppDetails");
detailsIntent.putExtra("com.android.settings.ApplicationPakgName", dp.getPackageName());
Context.startActivity(detailsIntent);
4.4.8卸载程序方法:
Uri uri = Uri.fromParts("package", PackageName, null);
Intent it = new Intent(Intent.ACTION_DELETE, uri);
Context.startActivity(it);
4.4.9排除列表实现:
在列表选中排除任务后,将任务名(title)放入ArrayList<String> excludes,然后通过SharedPreferences简单保存:
SharedPreferences sp = getSharedPreferences("excludes", Activity. MODE_PRIVATE);
sp.edit().putString(dp.getTitle(), dp.getTitle()).commit();
每次开机启动时,读取sp内容(取key值)并添加进excludes:
Map<String, ?> allexcludes = sp.getAll();
Iterator<String> it = allexcludes.keySet().iterator();
while(it.hasNext())
{
excludes.add(it.next());
}
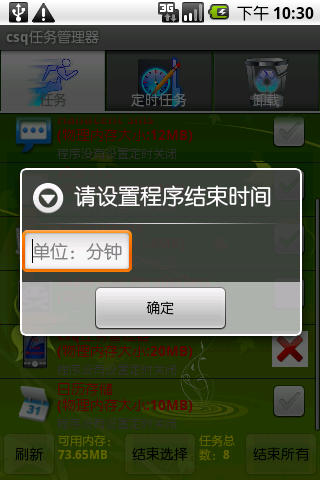
4.4.10任务定时结束实现:
通过HashMap<String, String> closetimes存储设置了定时关闭程序的关闭时间,key=DetailProcess.title,value=DetailProcess.closetime。通过任务名来匹配关机时间。
倒计时通过CountDownTimer (long millisInFuture, long countDownInterval)抽象方法来实现。
4.4.11 ListView每项自定义较复杂布局实现:
对于ListView里面布局较复杂的情况,可以自定义一个继承自BaseAdapter的类,来逐条绘制ListView.
继承BaseAdapter(抽象类)之后,需要重写以下四个方法:getCount,getItem,getItemId,getView。
getItem和getItemId方法将会在调用ListView的响应方法的时候被调用到,这两个方法对于android来讲是没有用的,单纯是为了客户端调用的方便。所以我们可以返回任何对我们有用的值,而不需要顾及android对它们的使用(因为根本就没有使用)。
getCount()获取Item的个数,必须。
getView(final int position, View convertView, ViewGroup parent)方法根据getCount(),用来逐条绘制,每绘制一个Item就调用一次这个方法,必须。position表示将显示的是第几行,covertView是从布局文 件中inflate来的布局。
在getView方法里可以为convertView添加各种监听事件。
关于ListView自定义背景后滚动出现背景变黑的问题的解决方法:
滚动时,列表里面的view重绘时,用的依旧是系统默认的透明色,颜色值为#FF191919,要改变这种情况,只需要调用listView的setCacheColorHint(0),颜色值设置为0 。
或者xml文件中listView的属性 Anroid:cacheColorHint="#00000000"即可,滚动时,重绘View的时候就不会有背景颜色。
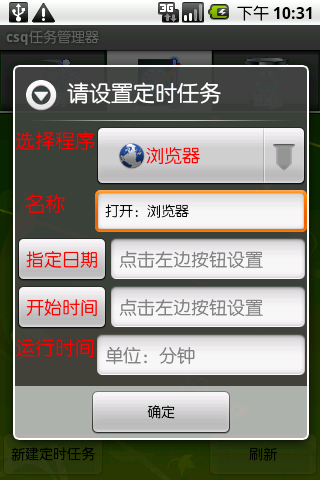
4.4.12 定时任务实现:
日期设定通过DatePickerDialog来设定,时间设定通过TimePickerDialog来设定。
判定日期在当前日期或当前日期之后条件:
year>=_date.get(Calendar.YEAR)
| year>=_date.get(Calendar.YEAR)&&monthOfYear>=_date.get(Calendar. MONTH)
| year>=_date.get(Calendar.YEAR)&&monthOfYear>=_date.get(Calendar. MONTH)&&dayOfMonth>=_date.get(Calendar.DAY_OF_MONTH)
判定时间在当前时间之后条件:
((!( getdata.equals("设置日期已过,请重新设置") ))
&&(!(getdata.equals(currentData))) )
| ((!( getdata.equals("设置日期已过,请重新设置") ))
&&( (getdata.equals(currentData)))
&&hourOfDay>_date.get(Calendar.HOUR_OF_DAY))
| ((!( getdata.equals("设置日期已过,请重新设置") ))
&&( (getdata.equals(currentData)))
&&hourOfDay==_date.get(Calendar.HOUR_OF_DAY) &&minute>_date.get(Calendar.MINUTE))
设置AlarmManager,对设置的时间到了做出相应的响应:
AlarmManager alarmManager = (AlarmManager) getSystemService(ALARM _SERVICE);
通过getSystemService获得AlarmManager使Activity关闭AlarmManager 仍执行。
Intent intent = new Intent(TaskManager.this, TimeTaskReceiver.cla ss);
PendingIntent pendingIntent = PendingIntent.getBroadcast(TaskMana ger.this, 0,intent, 0);
alarmManager.set(AlarmManager.RTC_WAKEUP, c.getTimeInMillis(), pe ndingIntent);
通过PendingIntent来发送广播,再定义一个BroadcastReceiver类来接受定时任务发送的广播,并在BroadcastReceiver里编写到时事件。
4.4.13 加载自定义布局:LayoutInflater
在实际工作中,事先写好的布局文件往往不能满足我们的需求,有时会根据情况在代码中自定义控件,这就需要用到LayoutInflater。
LayoutInflater在Android中是“扩展”的意思,作用类似于findViewById(),不同的是LayoutInflater是用来获得布局文件对象的,而findViewById()是用来获得具体控件的。LayoutInflater经常在BaseAdapter的getView方法中用到,用来获取整个View并返回。
LayoutInflater的用法有三种:
第一种方法:
LayoutInflater inflater = LayoutInflat-er.from(this);
View layout = inflater.inflate(R.layout.main, null);
LayoutInflater inflater = LayoutInflater.from(this);
View layout = inflater.inflate(R.layout.main, null);
第二种方法:
LayoutInflater inflater = getLayoutInflater();
View layout = inflater.inflate(R.layout.main, null);
LayoutInflater inflater = getLayoutInflater();
View layout = inflater.inflate(R.layout.main, null);
第三种方法:
LayoutInflater inflater = (LayoutInflater) getSystemService(LAYOU T_INFLATER_SERVICE);
View layout = inflater.inflate(R.layout.main, null);


 1058
1058


 被折叠的 条评论
为什么被折叠?
被折叠的 条评论
为什么被折叠?
 到【灌水乐园】发言


