


本篇文章是我对自定义下拉刷新组件的优化思路。github中有很多优秀的框架为什么还要自己写呢? 学习技术不仅仅在于会用,还要会写。自己动手撸一遍,才会发现其中的乐趣。
本篇还包括下面两个扩展内容
- SwipeRefreshLayout源码解析
- 深入了解自定义属性
好了下面和我一起撸代码吧。
优化
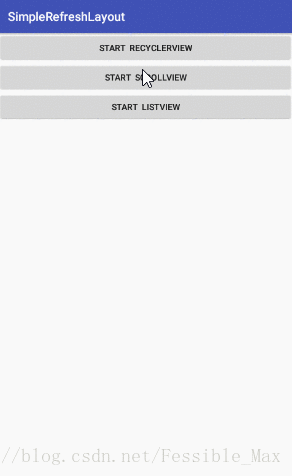
首先我们来看下效果图:

相较于上一篇,我们添加了箭头变化的效果,以及文字变化效果。
箭头动画
如果不了解ObjectAnimator,可以参看这篇文章ObjectAnimator详解
为了实现箭头变化效果我们添加下面的代码。 我们的箭头初始化时为0,在下拉过程中,我们让箭头旋转180度。
public void rotateArrow() {
        ObjectAnimator objectAnimator = ObjectAnimator.ofFloat(ivArrowPullDown, "rotation", ivArrowPullDown.getRotation(), ivArrowPullDown.getRotation() + 180);
        objectAnimator.setDuration(135);
        objectAnimator.start();
    }
首先我们要滑动起来才能根据 getScrollerY判断是上拉还是下拉。在下拉的过程中,我们还可以上滑,同理在上拉的过程中,我们可以下滑。因此我们需要根据这些情况,修改目前的状态。
首先定义如下状态:
    static final int PULL_IDLE = -1;//无状态
    static final int PULL_DOWN_NORMAL = 0;//下拉刷新
    static final int PULL_DOWN_RELEASE = 1;//释放刷新
    static final int PULL_DOWN_REFRESH = 2;//正在刷新
    static final int PULL_UP_NORMAL = 3;//上拉加载更多
    static final int PULL_UP_RELEASE = 4;//上拉释放
    static final int PULL_UP_REFRESH = 5;//正在加载
根据不同的滑动方式,更新当前状态
 //滑动过程中的变化
    private void doScroll(int deltaY) {
        if (Math.abs(deltaY) > mTouchSlop) {//超过最小滑动距离
            if (deltaY < 0) {//下拉
                if (getScrollY() < 0) {//顶部向下拉
                    if (!pullDownEnable) {
                        return;
                    }
                    isPullDown = true;
                    if (Math.abs(getScrollY()) <= mPullHeader.getMeasuredHeight() / 2) {
                        if (Math.abs(getScrollY()) >= mEffectiveScrollY) {
                            deltaY /= SCROLL_RESISTANCE;//滑动阻力
                            updateState(PULL_DOWN_RELEASE);
                        } else {
                            updateState(PULL_DOWN_NORMAL);
                        }
                    }
                } else { //底部向下滑动时
                    if (Math.abs(getScrollY()) < mEffectiveScrollY) {
                        updateState(PULL_UP_NORMAL);
                    }
                }
            } else {//上拉
                if (getScrollY() < 0) {//顶部向上滑动
                    if (Math.abs(getScrollY()) < mEffectiveScrollY) {
                        updateState(PULL_DOWN_NORMAL);
                    }
                } else {//底部上拉
                    if (!pullUpEnable) {
                        return;
                    }
                    isPullDown = false;
                    if (Math.abs(getScrollY()) + Math.abs(deltaY) < mPullFooter.getMeasuredHeight() / 2) {
                        if (Math.abs(getScrollY()) >= mEffectiveScrollY) {
                            updateState(PULL_UP_RELEASE);
                            deltaY /= SCROLL_RESISTANCE;//添加滑动阻力
                        } else {
                            updateState(PULL_UP_NORMAL);
                        }
                    }
                }
            }
            scrollBy(0, deltaY);
        }
    }
在解决滑动冲突时,我们用了大量的代码判断内部代码是否为ListView,RecycleView,ScrollView以及是否到达顶部和底部。那么有没有简单的判断的方式呢? SwipeRefreshLayout是Android系统提供我们的原生刷新框架,我们首先来了解下SwipeRefreshLayout的使用,然后在看看SwipeRefreshLayout的源码,我们再进一步修改我们的代码。
SwipeRefreshLayout的使用
SwipeRefreshLayout是Google官方推出的一款下拉刷新组件,位于v4兼容包下,android.support.v4.widget.SwipeRefreshLayout,Support Library 必须19.1以上。
<?xml version="1.0" encoding="utf-8"?>
<android.support.v4.widget.SwipeRefreshLayout xmlns:android="http://schemas.android.com/apk/res/android"
    android:id="@+id/refresh_layout"
    android:layout_width="match_parent"
    android:layout_height="match_parent">

    <ListView
        android:id="@+id/list_view"
        android:layout_width="match_parent"
        android:layout_height="match_parent" />

</android.support.v4.widget.SwipeRefreshLayout>
主要代码如下,。通过设置OnRefreshListener来监听界面的滑动从而实现刷新。,在刷新监听中处理我们的刷新数据 和 刷新进度的关闭。
其中:
setRefreshing(true),展开刷新动画。
setRefreshing(false),取消刷新动画。
public class RefreshActivity extends AppCompatActivity {
    private List<String> data = new ArrayList<>();
    private boolean isRefresh = false;
    private SwipeRefreshLayout swipeRefreshLayout;
    private ArrayAdapter<String> arrayAdapter;

    @Override
    protected void onCreate(@Nullable Bundle savedInstanceState) {
        super.onCreate(savedInstanceState);
        setContentView(R.layout.activity_refresh_layout);
        initListView();
        swipeRefreshLayout = findViewById(R.id.refresh_layout);
        swipeRefreshLayout.setColorSchemeColors(Color.BLUE, Color.GREEN, Color.RED);//设置刷新动画的颜色
        swipeRefreshLayout.setOnRefreshListener(refreshListener);//设置刷新监听
    }

    private SwipeRefreshLayout.OnRefreshListener refreshListener = new SwipeRefreshLayout.OnRefreshListener() {
        @Override
        public void onRefresh() {
            if (!isRefresh) {
                isRefresh = true;
                //3秒后刷新内容,并关闭动画
                new Handler().postDelayed(new Runnable() {
                    @Override
                    public void run() {
                        swipeRefreshLayout.setRefreshing(false); //关闭动画
                        data.add("这是新的数据");
                        arrayAdapter.notifyDataSetChanged();
                        isRefresh = false;
                    }
                }, 3000);
            }
        }
    };

    private void initListView() {
        initData();
        ListView listView = findViewById(R.id.list_view);
        arrayAdapter = new ArrayAdapter<String>(this, android.R.layout.simple_expandable_list_item_1, data);
        listView.setAdapter(arrayAdapter);
    }

    private void initData() {
        for (int i = 0; i < 20; i++) {
            data.add("hehe->" + i);
        }
    }
}
SwipeRefreshLayout 提供的方法
isRefreshing(): 判断当前的状态是否是刷新状态。
setColorSchemeResources(int… colorResIds):设置下拉进度条的颜色主题,参数为可变参数,并且是资源id,可以设置多种不同的颜色,每转一圈就显示一种颜色。
setOnRefreshListener(SwipeRefreshLayout.OnRefreshListener listener): 设置监听,需要重写onRefresh()方法,顶部下拉时会调用这个方法,在里面实现请求数据的逻辑,设置下拉进度条消失等等。
setProgressBackgroundColorSchemeResource(int colorRes):设置下拉进度条的背景颜色,默认白色。
setRefreshing(boolean refreshing): 设置刷新状态,true表示正在刷新,false表示取消刷新。
SwipeRefreshLayout 源码解析
这篇文章对 SwipeRefreshLayout进行了源码解析
在解析源码的过程中,我们的关注点放在,SwipeRefreshLayout是如何解决滑动冲突的。我们直接锁定在了OnInterceptTouchEvent的源码中
 @Override
    public boolean onInterceptTouchEvent(MotionEvent ev) {
        ensureTarget();

        final int action = ev.getActionMasked();
        int pointerIndex;

        if (mReturningToStart && action == MotionEvent.ACTION_DOWN) {
            mReturningToStart = false;
        }

        if (!isEnabled() || mReturningToStart || canChildScrollUp()
                || mRefreshing || mNestedScrollInProgress) { //不可用,子类可滑动,正在刷新
            // Fail fast if we're not in a state where a swipe is possible
            return false;
        }

        switch (action) {
            case MotionEvent.ACTION_DOWN:
                setTargetOffsetTopAndBottom(mOriginalOffsetTop - mCircleView.getTop());
                mActivePointerId = ev.getPointerId(0);
                mIsBeingDragged = false;

                pointerIndex = ev.findPointerIndex(mActivePointerId);
                if (pointerIndex < 0) {
                    return false;
                }
                mInitialDownY = ev.getY(pointerIndex);
                break;

            case MotionEvent.ACTION_MOVE:
                if (mActivePointerId == INVALID_POINTER) {
                    Log.e(LOG_TAG, "Got ACTION_MOVE event but don't have an active pointer id.");
                    return false;
                }

                pointerIndex = ev.findPointerIndex(mActivePointerId);
                if (pointerIndex < 0) {
                    return false;
                }
                final float y = ev.getY(pointerIndex);
                startDragging(y);
                break;

            case MotionEvent.ACTION_POINTER_UP:
                onSecondaryPointerUp(ev);
                break;

            case MotionEvent.ACTION_UP:
            case MotionEvent.ACTION_CANCEL:
                mIsBeingDragged = false;
                mActivePointerId = INVALID_POINTER;
                break;
        }

        return mIsBeingDragged;
    }
来看这几行代码
     if (!isEnabled() || mReturningToStart || canChildScrollUp()
                || mRefreshing || mNestedScrollInProgress) { //不可用,子类可滑动,正在刷新
            // Fail fast if we're not in a state where a swipe is possible
            return false;
        }
在不可用,以及子类可滑动和正在刷新的过程中,不拦截。
再看这句代码
ensureTarget();一开始使用ensureTarget是什么意思呢?我们看下这个函数
  private void ensureTarget() {
        // Don't bother getting the parent height if the parent hasn't been laid
        // out yet.
        if (mTarget == null) {
            for (int i = 0; i < getChildCount(); i++) {
                View child = getChildAt(i);
                if (!child.equals(mCircleView)) {
                    mTarget = child; //只获取第一个不为CircleView的Child,并让他全屏显示
                    break;
                }
            }
        }
    }
注意到break,获取到我们内容布局中第一个布局就结束循环了。为什么只获取第一个布局呢?再来看看 onMeasure方法
 @Override
    public void onMeasure(int widthMeasureSpec, int heightMeasureSpec) {
        super.onMeasure(widthMeasureSpec, heightMeasureSpec);
        if (mTarget == null) {
            ensureTarget();
        }
        if (mTarget == null) {
            return;
        }
        //全屏显示
        mTarget.measure(MeasureSpec.makeMeasureSpec(
                getMeasuredWidth() - getPaddingLeft() - getPaddingRight(),
                MeasureSpec.EXACTLY), MeasureSpec.makeMeasureSpec(
                getMeasuredHeight() - getPaddingTop() - getPaddingBottom(), MeasureSpec.EXACTLY));
        mCircleView.measure(MeasureSpec.makeMeasureSpec(mCircleDiameter, MeasureSpec.EXACTLY),
                MeasureSpec.makeMeasureSpec(mCircleDiameter, MeasureSpec.EXACTLY));
        mCircleViewIndex = -1;
        // Get the index of the circleview.
        for (int index = 0; index < getChildCount(); index++) {
            if (getChildAt(index) == mCircleView) {
                mCircleViewIndex = index;
                break;
            }
        }
    }
注意这几行代码,将我们的mTarget设置为了铺满全屏
    //全屏显示
        mTarget.measure(MeasureSpec.makeMeasureSpec(
                getMeasuredWidth() - getPaddingLeft() - getPaddingRight(),
                MeasureSpec.EXACTLY), MeasureSpec.makeMeasureSpec(
                getMeasuredHeight() - getPaddingTop() - getPaddingBottom(), MeasureSpec.EXACTLY));
综上,我们终于明白了,为什么只获取得一个内容布局了。因为SwipeRefreshLayout只针对获取到的第一个布局,并让他铺满全屏。
回到正题,如何进行拦截呢?再来看看这几行代码
if (!isEnabled() || mReturningToStart || canChildScrollUp()
                || mRefreshing || mNestedScrollInProgress) { //不可用,子类可滑动,正在刷新
            // Fail fast if we're not in a state where a swipe is possible
            return false;
        }
关注到 cnChildScrollUp(),并来看下这个函数的代码
 /**
     * @return Whether it is possible for the child view of this layout to
     *         scroll up. Override this if the child view is a custom view.
     */
    public boolean canChildScrollUp() {
        if (mChildScrollUpCallback != null) {
            return mChildScrollUpCallback.canChildScrollUp(this, mTarget);
        }
        if (mTarget instanceof ListView) {
            return ListViewCompat.canScrollList((ListView) mTarget, -1);
        }
        return mTarget.canScrollVertically(-1);
    }
在上一篇我们判断RecycleView的时候,用到了View.canScrollVertically()的方法来判断是否到达顶部和底部,这里直接使用了这个方式。
-1表示向上滑动,1表示向下滑动。由于SwipeRefreshLayout中只使用到下拉刷新,所以这里仅需判断子类是否能够向上滑动即可。
注意到ListView单独列出来了吗?为什么要把ListView单独列出来呢?
在ListViewCompat中我们看到,ListView存在不同版本,在低版本(API<19)时,需要根据firstVisiblePosition否到达顶部,而高版本进行改进后调用canScrollList()。
public static boolean canScrollList(@NonNull ListView listView, int direction) {
        if (Build.VERSION.SDK_INT >= 19) {
            // Call the framework version directly
            return listView.canScrollList(direction);
        } else {
            // provide backport on earlier versions
            final int childCount = listView.getChildCount();
            if (childCount == 0) {
                return false;
            }

            final int firstPosition = listView.getFirstVisiblePosition();
            if (direction > 0) {
                final int lastBottom = listView.getChildAt(childCount - 1).getBottom();
                final int lastPosition = firstPosition + childCount;
                return lastPosition < listView.getCount()
                        || (lastBottom > listView.getHeight() - listView.getListPaddingBottom());
            } else {
                final int firstTop = listView.getChildAt(0).getTop();
                return firstPosition > 0 || firstTop < listView.getListPaddingTop();
            }
        }
    }
通过上面的解析,我们基本掌握SwipeRefreshLayout的工作原理,那么我们就可以这样修改拦截机制。
优化onInterceptTouchEvent
   @Override
    public boolean onInterceptTouchEvent(MotionEvent ev) {
        boolean intercept = false;
        int y = (int) ev.getY();
        switch (ev.getAction()) {
            case MotionEvent.ACTION_DOWN:
                mLastMoveY = y;
                intercept = false;
                break;
            case MotionEvent.ACTION_MOVE:
                int deltaY = mLastMoveY - y;
                //下拉
                if (deltaY < 0) {
                    if (!canChildScrollUp()) {
                        return true;
                    }
                } else {//上拉
                    if (!canChildScrollDown()) {
                        return true;
                    }
                }
                break;
            case MotionEvent.ACTION_UP:
                intercept = false;
                break;
        }
        return intercept;
    }
      private boolean canChildScrollUp() {//子类上滑
        if (mTarget instanceof ListView) {
            return ListViewCompat.canScrollList((ListView) mTarget, -1);
        }
        return mTarget.canScrollVertically(-1);
    }

    private boolean canChildScrollDown() {//子类下滑
        if (mTarget instanceof ListView) {
            return ListViewCompat.canScrollList((ListView) mTarget, 1);
        }
        return mTarget.canScrollVertically(1);
    }
为了安全性,使用mTarget时需要判断是否为null。并且设置我们的mTarget为铺面全屏,且只获取第一个mTarget
 @Override
    protected void onMeasure(int widthMeasureSpec, int heightMeasureSpec) {
        super.onMeasure(widthMeasureSpec, heightMeasureSpec);
        if (mTarget == null) {
            return;
        }
        //测量子类,设置为铺满全屏
        for (int i = 0; i < getChildCount(); i++) {
            getChildAt(i).measure(
                    MeasureSpec.makeMeasureSpec(
                            getMeasuredWidth() - getPaddingLeft() - getPaddingRight(),
                            MeasureSpec.EXACTLY),
                    MeasureSpec.makeMeasureSpec(
                            getMeasuredHeight() - getPaddingTop() - getPaddingBottom(),
                            MeasureSpec.EXACTLY));
        }
    }
添加头部或底部可选
我们默认情况下是头部和底部可用的,有些时候我们只需要用到下拉刷新或者上拉加载,为了灵活性,我们给自定义刷新组件中添加 布局文件更改的方式以及代码更改的方式。
在布局中选择 头部或底部 是否可用,就需要用到自定义属性文件。那么我们好好了解下属性文件到底是什么?
自定义属性
可以看这篇文章 鸿洋 深入理解自定义属性 以及 自定义属性文件,属性文件
对此方面的知识大概总结一下
自定义属性的使用步骤为:
- 自定义View
- 在values/attrs.xml文件中编写styleable和item 标签元素
- 在布局文件中使用自定义属性
- 在自定义View的构造中 通过TypedArray获取,使用完毕后需要回收recycle。
注意
我们自定义View的时候一定要有构造函数,一定要有参数AttributeSet
 public SimpleRefreshLayout(Context context, AttributeSet attrs) {
        super(context, attrs);
        }
为了了解AttributeSet的作用我们举个小例子
1.在values/attrs.xml中添加下面内容
<declare-styleable name="test_style">
        <attr name="test_name" format="string" />
        <attr name="test_color" format="color" />
    </declare-styleable>
2.自定义View
    public TestView(Context context, @Nullable AttributeSet attrs) {
        super(context, attrs);
        int count = attrs.getAttributeCount();
        for (int i = 0; i < count; i++) {
            String attrName = attrs.getAttributeName(i);
            String attrValue = attrs.getAttributeValue(i);
            Log.d(TAG, "TestView: attrName"+attrName+" : attrValue "+ attrValue);
        }
3.在布局文件中共添加自定义属性
<com.example.com.myapplication.view.TestView
        app:test_color="#007825"
        app:test_name="呵呵"
        android:layout_width="300dp"
        android:layout_height="200dp" />
打印结果如下

可以从这里了解到,当我们的XML布局创建视图的时候,XML中的属性会通过AttributeSet传递到 构造器中。
LayoutInflater在inflater布局时会通过反射去调用View的(Context context, AttributeSet attrs)构造器。
因此我们自定义View时一定要添加这个构造函数。
public TestView(Context context, @Nullable AttributeSet attrs) {}如果不添加 会导致属性资源无法解析,样式不可用。最直观的表现是程序崩了。
一般地,我们使用TypedArray来获取属性值,TypedArray帮我们做了很多事,他相当于一个工具类,通过context.obtainStyledAttributes方法,将AttributeSet的属性加工成对象的属性封装到TypedArray中。
使用方式一
        TypedArray typedArray = context.obtainStyledAttributes(attrs, R.styleable.test_style);
        int color = typedArray.getColor(R.styleable.test_style_test_color, Color.BLACK);
        String name = typedArray.getString(R.styleable.test_style_test_name);
        typedArray.recycle();
        Log.d(TAG, "TestView: name "+name+" : color "+color);
使用方式二
 TypedArray typedArray = context.obtainStyledAttributes(attrs, R.styleable.test_style);
        int count = typedArray.getIndexCount();
        for (int i = 0; i < count; i++) {
            int attr = typedArray.getIndex(i);
            switch (attr) {
                case R.styleable.test_style_test_color:
                    int color = typedArray.getColor(attr, Color.BLACK);
                    Log.d(TAG, "TestView: color " + color);
                    break;
                case R.styleable.test_style_test_name:
                    String name = typedArray.getString(attr);
                    Log.d(TAG, "TestView: name " + name);
                    break;
            }
        }
        typedArray.recycle();
结果
TestView: name 呵呵 : color -16746459为什么要调用recycle呢?
[这篇文章][9]讲解了使用recycle的原因
实际上当我们调用ObtainAttributeSet()的方法时,调用了TypeArray的Obtain方法,这个方法是静态的,TypedArray是在array pool中获取到的。下面就是源码
 static TypedArray obtain(Resources res, int len) {
        TypedArray attrs = res.mTypedArrayPool.acquire();
        if (attrs == null) {
            attrs = new TypedArray(res);
        }

        attrs.mRecycled = false;
        // Reset the assets, which may have changed due to configuration changes
        // or further resource loading.
        attrs.mAssets = res.getAssets();
        attrs.mMetrics = res.getDisplayMetrics();
        attrs.resize(len);
        return attrs;
    }
通过这段代码可以得到结论:程序在运行时维护了一个 TypedArray的池,程序调用时,会向该池中请求一个实例,用完之后,调用 recycle() 方法来释放该实例,从而使其可被其他模块复用。
添加可选属性
了解的自定义属性的方式,那么来为我们自定义View添加这部分内容吧
attr文件
<declare-styleable name="SimpleRefreshLayout" >
        <attr name="upEnable" format="boolean" />
        <attr name="downEnable" format="boolean" />
    </declare-styleable>
获取自定义属性
    public SimpleRefreshLayout(Context context, AttributeSet attrs) {
        super(context, attrs);
        //获取自定义属性
        TypedArray typedArray = context.obtainStyledAttributes(attrs, R.styleable.SimpleRefreshLayout
        );
        pullUpEnable = typedArray.getBoolean(R.styleable.SimpleRefreshLayout_upEnable, true);
        pullDownEnable = typedArray.getBoolean(R.styleable.SimpleRefreshLayout_downEnable, true);
        typedArray.recycle();
        }
动态代码设置
  //动态设置下拉刷新是否可用
    public void setPullDownEnable(boolean pullDownEnable) {
        this.pullDownEnable = pullDownEnable;
    }

    //动态设置上拉加载是否可用
    public void setPullUpEnable(boolean pullUpEnable) {
        this.pullUpEnable = pullUpEnable;
    }
我们来看下设置下拉不可用的效果图
好了,下拉刷新上拉加载方式已经优化的差不多了。github上优秀的SmartRefreshLayout,实现了许多炫酷的效果。后续还会参考优秀项目进行优化修改。
完整代码下载github,以后会不断修改代码
csdn下载,现阶段代码。
参考文章:


 被折叠的 条评论
为什么被折叠?
被折叠的 条评论
为什么被折叠?
 到【灌水乐园】发言


