


 本文将介绍如何在Android应用中创建并使用Service,包括Service的基本概念、创建步骤、与用户交互的方式以及配置文件的调整。通过实例演示了如何在Activity中启动和停止Service,并展示了后台进程的运行情况。
Service正如其名服务,我们之前了解过Activity表示的是一个页面,但是如果我们某些操作,不需要展示页面,值需要进行后台的一个操作,这时候我们可以创建一个Service,一般进行socket通信、http请求等操作。
1、我们创建一个Android的工程
2、增加一个Service,代码如下
package com.example.learnservice;

import android.app.Service;
import android.content.Intent;
import android.os.IBinder;

public class MyService extends Service {

    @Override
    public IBinder onBind(Intent intent) {
        // TODO Auto-generated method stub
        return null;
    }

    @Override
    public int onStartCommand(Intent intent, int flags, int startId) {

        new Thread() {
            @Override
            public void run() {
                super.run();
                //while (true) {
                    System.out.println("后台运行...");
                    try {
                        Thread.sleep(1000);
                    } catch (InterruptedException e) {
                        e.printStackTrace();
                    }
                //}
            }
        }.start();

        return super.onStartCommand(intent, flags, startId);
    }

}
继承Service并且重写onStartCommand,此方法在启用此Service的时候执行。
3、我们在空的activity页面增加2个按钮,分别为启动和停止Service的操作,代码如下
package com.example.learnservice;

import android.app.Activity;
import android.content.Intent;
import android.os.Bundle;
import android.view.Menu;
import android.view.View;

public class MainActivity extends Activity {
    private Intent intent;

    @Override
    protected void onCreate(Bundle savedInstanceState) {
        super.onCreate(savedInstanceState);
        setContentView(R.layout.activity_main);

        intent = new Intent(MainActivity.this, MyService.class);

        findViewById(R.id.button1).setOnClickListener(new View.OnClickListener() {

            @Override
            public void onClick(View v) {
                // TODO Auto-generated method stub
                startService(intent);
            }
        });

        findViewById(R.id.button2).setOnClickListener(new View.OnClickListener() {

            @Override
            public void onClick(View v) {
                System.out.println("关闭后台服务....");
                stopService(intent);
            }
        });
    }


    @Override
    public boolean onCreateOptionsMenu(Menu menu) {
        // Inflate the menu; this adds items to the action bar if it is present.
        getMenuInflater().inflate(R.menu.main, menu);
        return true;
    }

}
通过startService和stopService操作。
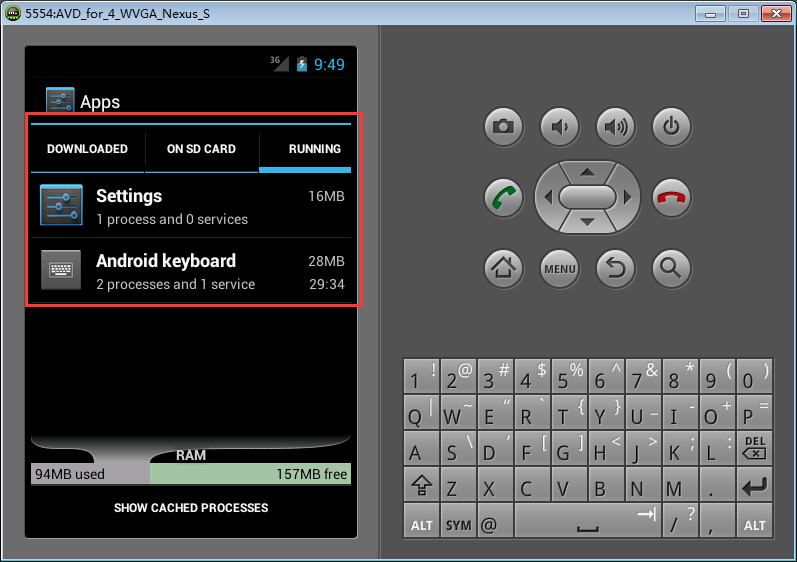
4、我们看下Android的后台运行进程,如图
5、我们先点击启动Service按钮,再查看后台进程
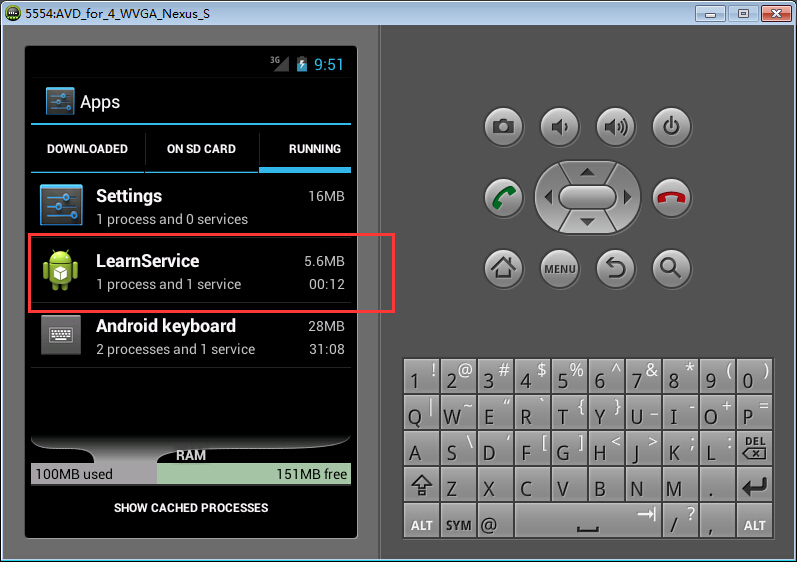
看到了吗,这个是我启动的Service,它在后台被启动起来啦 。
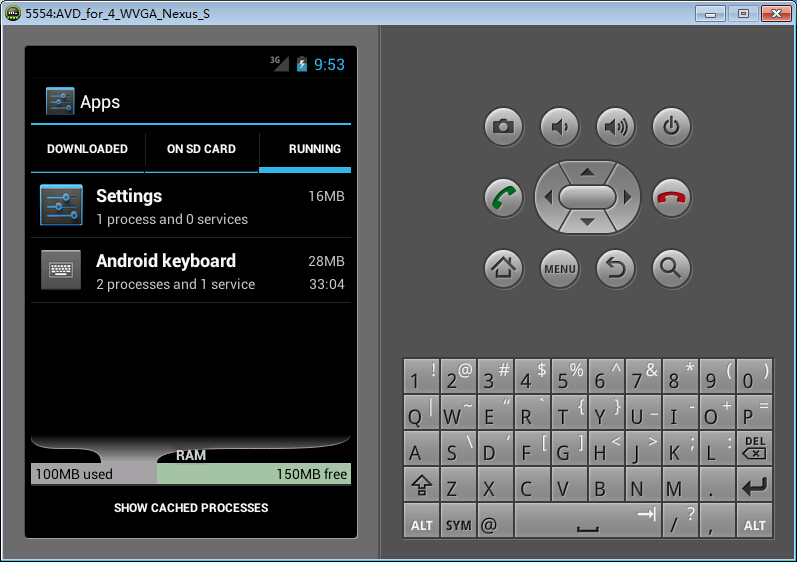
6、我们调用stopService方法停止Service,如图
7、补充配置文件,需要增加service的配置在AndroidManifest.xml中
<?xml version="1.0" encoding="utf-8"?>
<manifest xmlns:android="http://schemas.android.com/apk/res/android"
    package="com.example.learnservice"
    android:versionCode="1"
    android:versionName="1.0" android:installLocation="preferExternal">

    <uses-sdk
        android:minSdkVersion="8"
        android:targetSdkVersion="21" />

    <application
        android:allowBackup="true"
        android:icon="@drawable/ic_launcher"
        android:label="@string/app_name"
        android:theme="@style/AppTheme" >
        <activity
            android:name=".MainActivity"
            android:label="@string/app_name" >
            <intent-filter>
                <action android:name="android.intent.action.MAIN" />

                <category android:name="android.intent.category.LAUNCHER" />
            </intent-filter>
        </activity>

        <service
            android:name=".MyService"
            android:enabled="true"
            android:exported="true">
        </service>
    </application>

</manifest>


 2668
2668

 被折叠的 条评论
为什么被折叠?
被折叠的 条评论
为什么被折叠?
 到【灌水乐园】发言


