


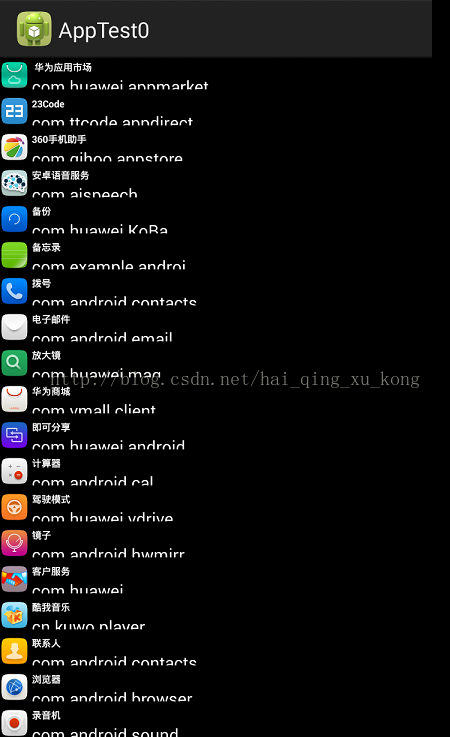
效果图:
程序列表:
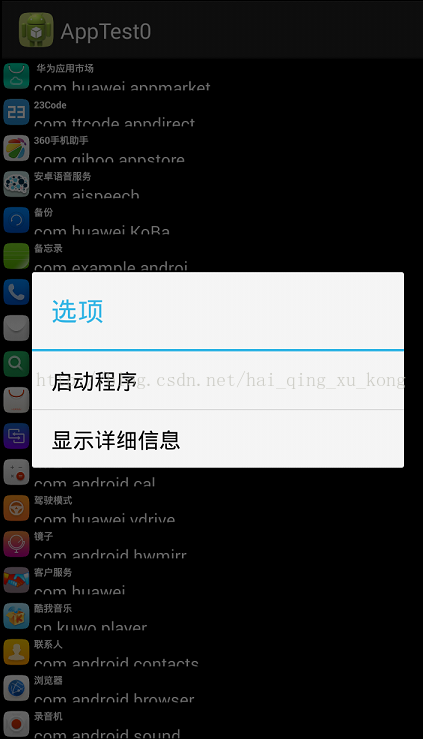
启动程序,获取程序信息:
代码如下:
创建一个AppInfo类来表示应用程序
<pre name="code" class="java">public class AppInfo {
	public CharSequence title;// 程序名
	public CharSequence packageName; // 程序包名
	Intent intent;// 启动Intent
	public Drawable icon;// 程序图标

	/*
	 * 设置启动该程序的Intent
	 */
	final void setActivity(ComponentName className, int launchFlags) {
		intent = new Intent(Intent.ACTION_MAIN);
		intent.addCategory(Intent.CATEGORY_LAUNCHER);
		intent.setComponent(className);
		intent.setFlags(launchFlags);
	}

}
创建程序列表的适配器:
/**
 * 程序列表适配器
 * @author bill
 *
 */
public class ShowAppListAdapter extends BaseAdapter {
	private ArrayList<AppInfo> appList;
	private LayoutInflater inflater;

	public ShowAppListAdapter(Context context,ArrayList<AppInfo> appList,
			PackageManager pm) {
		this.appList = appList;
		inflater = LayoutInflater.from(context);
	}

	public int getCount() {
		return appList.size();
	}


	public Object getItem(int position) {
		return appList.get(position);
	}


	public long getItemId(int position) {
		return position;
	}


	public View getView(int position, View convertView, ViewGroup parent) {
		final AppInfo info = appList.get(position);
		ViewHolder holder = null;
		if(null == convertView){
			convertView = inflater.inflate(R.layout.app_list_item, null);
			holder = new ViewHolder();
			holder.lv_image = (ImageView) convertView.findViewById(R.id.lv_icon);
			holder.lv_name = (TextView) convertView.findViewById(R.id.lv_item_appname);
			holder.lv_packname = (TextView) convertView.findViewById(R.id.lv_item_packageame);
			convertView.setTag(holder);
		}
		else {
			holder = (ViewHolder) convertView.getTag();
		}
		holder.lv_image.setImageDrawable(info.icon);
		final CharSequence name = info.title;
		final CharSequence packName = info.packageName;
		holder.lv_name.setText(name);
		holder.lv_packname.setText(packName);
		return convertView;
	}
	private final static  class ViewHolder{
		ImageView lv_image;
		 TextView lv_name;
		 TextView lv_packname;
	}


}
public class MainActivity extends Activity {
/*
* 应用程序集合
*/
private ArrayList<AppInfo> appInfos;
private ListView lv_app;
/*
* 管理应用程序包,并通过它获取程序信息
*/
private PackageManager pm;
@Override
protected void onCreate(Bundle savedInstanceState) {
super.onCreate(savedInstanceState);
setContentView(R.layout.app_list);
pm = getPackageManager();
initView();
new Thread(runable).start();
}
private void initView(){
lv_app = (ListView) findViewById(R.id.app_list_view);
lv_app.setOnItemClickListener(new AppDetailLinster());
}
private final Runnable runable = new Runnable() {
public void run() {
loadApplications();
myHandler.obtainMessage().sendToTarget();
}
};
private Handler myHandler = new Handler() {
@Override
public void handleMessage(Message msg) {
lv_app.setAdapter(new ShowAppListAdapter(MainActivity.this,
appInfos, pm));
}
};
/**
* 加载应用列表
*/
private void loadApplications() {
PackageManager manager = this.getPackageManager();
Intent mainIntent = new Intent(Intent.ACTION_MAIN, null);
mainIntent.addCategory(Intent.CATEGORY_LAUNCHER);
final List<ResolveInfo> apps = manager.queryIntentActivities(
mainIntent, 0);
Collections.sort(apps, new ResolveInfo.DisplayNameComparator(manager));
if (apps != null) {
final int count = apps.size();
if (appInfos == null) {
appInfos = new ArrayList<AppInfo>(count);
}
appInfos.clear();
for (int i = 0; i < count; i++) {
AppInfo application = new AppInfo();
ResolveInfo info = apps.get(i);
application.title = info.loadLabel(manager);
application.setActivity(new ComponentName(
info.activityInfo.applicationInfo.packageName,
info.activityInfo.name), Intent.FLAG_ACTIVITY_NEW_TASK
| Intent.FLAG_ACTIVITY_RESET_TASK_IF_NEEDED);
application.icon = info.activityInfo.loadIcon(manager);
application.packageName = info.activityInfo.applicationInfo.packageName;
appInfos.add(application);
}
}
}
/**
* 列表监听类
* @author bill
*
*/
public final class AppDetailLinster implements OnItemClickListener {
AlertDialog dialog;
public void onItemClick(AdapterView<?> view, View arg1,
final int position, long arg3) {
AlertDialog.Builder builder = new AlertDialog.Builder(
MainActivity.this);
builder.setTitle("选项");
builder.setItems(R.array.choice, new OnClickListener() {
public void onClick(DialogInterface dialog, int which) {
final AppInfo appInfo = appInfos.get(position);
switch (which) {
case 0: // 启动程序
try {
startApp(appInfo);
} catch (Exception e) {
}
break;
case 1: // 详细信息
try {
showAppDetail(appInfo);
} catch (Exception e) {
}
break;
}
dialog.dismiss();
}
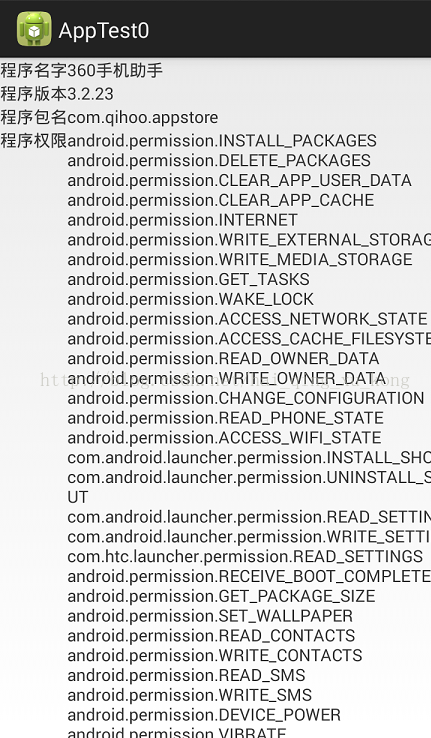
private void showAppDetail(AppInfo appInfo)
throws Exception {
final String packName = appInfo.packageName.toString();
final PackageInfo packInfo = getAppPackinfo(packName);
final String versionName = packInfo.versionName;
final String[] apppremissions = packInfo.requestedPermissions;
final String appName = appInfo.title.toString();
Intent showDetailIntent = new Intent(MainActivity.this,
ShowAppDetailActivity.class);
Bundle bundle = new Bundle();
bundle.putString("packagename", packName);
bundle.putString("appversion", versionName);
bundle.putStringArray("apppremissions", apppremissions);
bundle.putString("appname", appName);
showDetailIntent.putExtras(bundle);
startActivity(showDetailIntent);
}
private void startApp(AppInfo appInfo)
throws Exception {
final String packName = appInfo.packageName.toString();
final String activityName = getActivityName(packName);
if (null == activityName) {
Toast.makeText(MainActivity.this, "程序无法启动",
Toast.LENGTH_SHORT);
return;
}
Intent intent = new Intent();
intent.setComponent(new ComponentName(packName,
activityName));
startActivity(intent);
}
});
dialog = builder.create();
dialog.show();
}
}
/**
* 获取程序信息
* @param packName
* @return
* @throws Exception
*/
public PackageInfo getAppPackinfo(String packName) throws Exception {
return pm.getPackageInfo(packName, PackageManager.GET_ACTIVITIES
| PackageManager.GET_PERMISSIONS);
}
/**
* 获取启动相关程序的Activity
* @param packName
* @return
* @throws Exception
*/
public String getActivityName(String packName) throws Exception {
final PackageInfo packInfo = pm.getPackageInfo(packName,
PackageManager.GET_ACTIVITIES);
final ActivityInfo[] activitys = packInfo.activities;
if (null == activitys || activitys.length <= 0) {
return null;
}
return activitys[0].name;
}
}
app_list.xml:
<?xml version="1.0" encoding="utf-8"?>
<RelativeLayout xmlns:android="http://schemas.android.com/apk/res/android"
    android:layout_width="fill_parent"
    android:layout_height="fill_parent"
    android:orientation="vertical"
    android:background="@android:color/black" >


    <ListView
        android:id="@+id/app_list_view"
        android:layout_width="fill_parent"
        android:layout_height="fill_parent"
      >
    </ListView>

</RelativeLayout>
app_list_item.xml:
<?xml version="1.0" encoding="utf-8"?>
<LinearLayout xmlns:android="http://schemas.android.com/apk/res/android"
	android:orientation="horizontal" android:layout_width="fill_parent"
	android:layout_height="wrap_content" android:gravity="center_vertical">

	<ImageView
		android:id="@+id/lv_icon"
		android:layout_width="48px"
		android:layout_height="48px"
		android:layout_marginTop="5px"
		android:layout_marginBottom="5px"
	></ImageView>
	<LinearLayout
		android:orientation="vertical"
		android:layout_width="wrap_content"
		android:layout_height="48px"
		android:paddingLeft="5px"
		>
		<TextView
			android:id="@+id/lv_item_appname"
			android:layout_width="fill_parent"
			android:layout_height="wrap_content"
			android:singleLine="true"
			android:textSize="16px"
			android:textStyle="bold"
			android:textColor="#fff"
		></TextView>

		<TextView
			android:id="@+id/lv_item_packageame"
			android:layout_width="fill_parent"
			android:layout_height="wrap_content"
			android:singleLine="true"
			android:textColor="#fff"
		></TextView>


	</LinearLayout>
</LinearLayout>
/**
 * 查看应用信息
 * @author bill
 *
 */
public class ShowAppDetailActivity extends Activity {

	private TextView tv_appname;
	private TextView tv_appversion;
	private TextView tv_packagename;
	private TextView tv_permission;
	@Override
	protected void onCreate(Bundle savedInstanceState) {
		// TODO Auto-generated method stub
		super.onCreate(savedInstanceState);
		setContentView(R.layout.app_detial);
		tv_appname = (TextView) findViewById(R.id.detail_app_name);
		tv_appversion = (TextView) findViewById(R.id.detail_app_version);
		tv_packagename = (TextView) findViewById(R.id.detail_app_packname);
		tv_permission = (TextView) findViewById(R.id.detail_app_permissions);
		Bundle bundle = this.getIntent().getExtras();
		String packagename=  bundle.getString("packagename");
		String appversion = bundle.getString("appversion");
		String appname = bundle.getString("appname");
		String[] appPremissions = bundle.getStringArray("apppremissions");
		StringBuilder sb = new StringBuilder();
		for(String s : appPremissions){
			sb.append(s);
			sb.append("\n");
		}
		tv_appname.setText(appname);
		tv_appversion.setText(appversion);
		tv_packagename.setText(packagename);
		tv_permission.setText(sb.toString());
	}
}
app_detial.xml:
<?xml version="1.0" encoding="utf-8"?>
<LinearLayout xmlns:android="http://schemas.android.com/apk/res/android"
    android:orientation="vertical"
    android:layout_width="fill_parent"
    android:layout_height="fill_parent"
    >
    <TableLayout
        android:id="@+id/app_table"
        android:layout_width="fill_parent"
        android:layout_height="wrap_content">
        <TableRow
              android:id="@+id/tableRow1"
      		  android:layout_width="wrap_content"
      		  android:layout_height="wrap_content"
            >
            <TextView
                android:layout_width="wrap_content"
    			android:layout_height="wrap_content"
    			android:text="程序名字"
	    	/>
	    	<TextView
	    	    android:layout_width="wrap_content"
	    		android:layout_height="wrap_content"
	    		android:id="@+id/detail_app_name"
	    	/>
        </TableRow>

        <TableRow
	        android:id="@+id/tableRow2"
	        android:layout_width="wrap_content"
	        android:layout_height="wrap_content">
	    	 <TextView
	    	     android:layout_width="wrap_content"
    			 android:layout_height="wrap_content"
    			 android:text="程序版本"
	    	/>
	    	<TextView
	    	    android:layout_width="wrap_content"
	    		android:layout_height="wrap_content"
	    		android:id="@+id/detail_app_version"
	    	/>
	    </TableRow>
         <TableRow
	         android:id="@+id/tableRow3"
	         android:layout_width="wrap_content"
	         android:layout_height="wrap_content">
	    	 <TextView
	    	     android:layout_width="wrap_content"
    			 android:layout_height="wrap_content"
    			 android:text="程序包名"
	    	/>
	    	<TextView
	    	    android:layout_width="wrap_content"
	    		android:layout_height="wrap_content"
	    		android:id="@+id/detail_app_packname"
	    	/>
	    </TableRow>
	     <TableRow
	         android:id="@+id/tableRow4"
	         android:layout_width="wrap_content"
	         android:layout_height="wrap_content">
             <TextView
                 android:layout_width="wrap_content"
    			 android:layout_height="wrap_content"
    			 android:text="程序权限"
		    />
		    <TextView
		        android:layout_width="wrap_content"
		    	android:layout_height="wrap_content"
		        android:id="@+id/detail_app_permissions"
		    	/>
         </TableRow>
    </TableLayout>

</LinearLayout>
最后别忘了配置AndroidManifest。
转载请注明出处:http://blog.csdn.net/hai_qing_xu_kong/article/details/44274387 情绪控_


 6258
6258


 被折叠的 条评论
为什么被折叠?
被折叠的 条评论
为什么被折叠?
 到【灌水乐园】发言


