


前段时间在一个公司做兼职,做的就是滤镜的效果,起初我并没有太怎么思考,想着很简单的事情,所以一直拖着没有完成,结果到了快交任务的时候有点着急了,因为我调了两天的效果,发现事情根本不是我想象中的那样简单,并且也参考了很多文章,始终没有找到我的理想的效果方法。最后在公司两位美工同事的帮助下顺利完成了任务,最重要的是我找到了一种非常好的方法!老规矩先上代码,再讲原理,其实原理灰常简单!
#include <opencv/cv.h>
#include <opencv2/contrib/contrib.hpp>
#include <opencv/highgui.h>
float layerOverlay(float A, float B)//叠加
{
return (A < 128) ? (2 * A * B / 255) : (255 - 2 * (255 - A) * (255 - B) / 255);
}
float layerMultiply(float A,float B)//正片叠底
{
return A*B/255;
}
Mat FanYNew(Mat src,Mat src2)//泛黄
{
int width = src.cols;
int height = src.rows;
int width1 = src2.cols;
int height1 = src2.rows;
std::cout<<width<<std::endl<<width1<<std::endl<<height<<std::endl<<height1<<std::endl;
Mat dst(src.size(),CV_8UC3);
for(int i=0;i<height;i++)
{
for(int j=0;j<width;j++)
{
dst.ptr<uchar>(i)[3*j] = layerMultiply(src.ptr<uchar>(i)[3*j],src2.ptr<uchar>(i)[3*(j)]);
dst.ptr<uchar>(i)[3*j+1] = layerMultiply(src.ptr<uchar>(i)[3*j+1],src2.ptr<uchar>(i)[3*(j)+1]);
dst.ptr<uchar>(i)[3*j+2] = layerMultiply(src.ptr<uchar>(i)[3*j+2],src2.ptr<uchar>(i)[3*(j)+2]);
}
}
return dst;
}
Mat cold(Mat src,Mat src2)//冷色调
{
int width = src.cols;
int height = src.rows;
int width1 = src2.cols;
int height1 = src2.rows;
std::cout<<width<<std::endl<<width1<<std::endl<<height<<std::endl<<height1<<std::endl;
Mat dst(src.size(),CV_8UC3);
for(int i=0;i<height;i++)
{
for(int j=0;j<width;j++)
{
dst.ptr<uchar>(i)[3*j] = layerOverlay(src.ptr<uchar>(i)[3*j],src2.ptr<uchar>(i)[3*(j)]);
dst.ptr<uchar>(i)[3*j+1] = layerOverlay(src.ptr<uchar>(i)[3*j+1],src2.ptr<uchar>(i)[3*(j)+1]);
dst.ptr<uchar>(i)[3*j+2] = layerOverlay(src.ptr<uchar>(i)[3*j+2],src2.ptr<uchar>(i)[3*(j)+2]);
}
}
return dst;
}
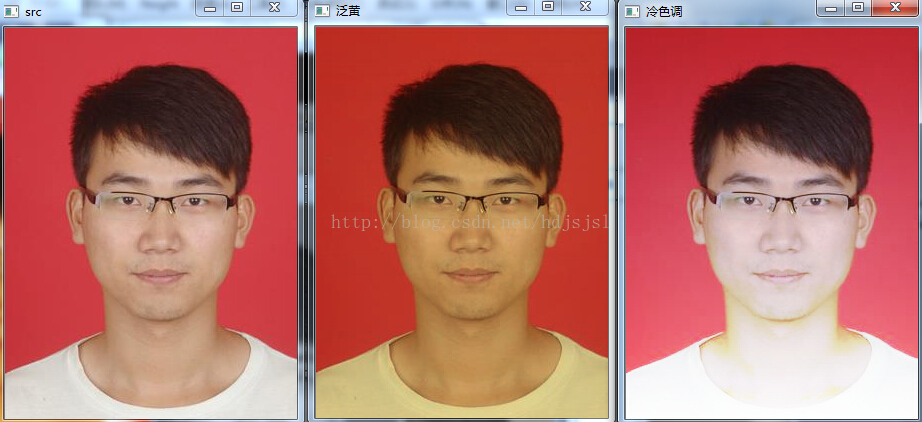
冷色调和泛黄的渐变图:

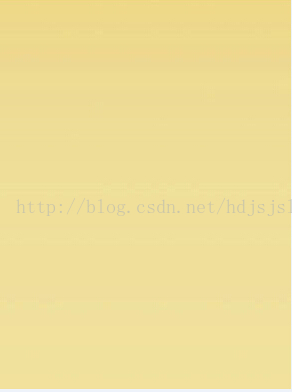
这就是我所说的好方法中最终要的一环,渐变图。起初我不知道叫什么,和我的两个美工的朋友弄了一天,主要他们有事情忙,总是挤出时间来帮我。
图像的滤镜效果,虽然大体上的效果称呼不多,比如:黑白,怀旧,冷色调,暖色调等等,但是要想调出自己心中的滤镜效果着实挺费劲的,因此,我采用了仿照Photoshop的方式,将两张图片用photoshop的方法,比如正片叠底,或者叠加等等方法,一共大致16种,反正我只写了16种。所以总结,美工和程序员实在是不可分家呀!有没有!


 6376
6376


 被折叠的 条评论
为什么被折叠?
被折叠的 条评论
为什么被折叠?
 到【灌水乐园】发言


