Confirm the current active zsh version:
zsh --version
zsh 5.0.5 (x86_64-apple-darwin14.0)
Confirm the location of zsh:
which zsh
/bin/zsh
OS X’s dscl command is a command line utility for performing operations on the Directory Services database.
Confirm the shell that’s set for your user:
dscl . -read /Users/$USER UserShell
UserShell: /bin/zsh
The . is short for localhost, and the $USER variable expands to your username.
In a previous iteration of this post, I mentioned looking into /etc/shells to find out what shells your OS X knows about. It’s not necessary to view or append this file, if you’re setting your shell with dscl like we’ll do below. It seems that /etc/shells is used to specify allowable user shells for users connecting via FTP , and it used to need to be edited to include any new shells, that you were going to change to using chsh.
Upgrade zsh with brew
BashAssuming you have brew installed, use brew install zsh to install.
brew install zsh
==> Installing zsh dependency: gdbm
==> Downloading https://homebrew.bintray.com/bottles/gdbm-1.11.yosemite.bottle.2.tar.gz
==> Pouring gdbm-1.11.yosemite.bottle.2.tar.gz
�� /usr/local/Cellar/gdbm/1.11: 17 files, 532K
==> Installing zsh
==> Downloading https://homebrew.bintray.com/bottles/zsh-5.0.7.yosemite.bottle.tar.gz
==> Pouring zsh-5.0.7.yosemite.bottle.tar.gz
==> Caveats
Add the following to your zshrc to access the online help:
unalias run-help
autoload run-help
HELPDIR=/usr/local/share/zsh/help
==> Summary
�� /usr/local/Cellar/zsh/5.0.7: 1084 files, 11M
brew install zsh 3.27s user 2.47s system 43% cpu 13.173 total
Confirm brew’s zsh location
Apple provides /usr/local for OS X users to install packages to and it’s already in your system path, so that’s where brew installs. Confirm it:
ls -la /usr/local/bin/zs*
  lrwxr-xr-x  1 rcogley  wheel  27 May 16 10:54 /usr/local/bin/zsh@ -> ../Cellar/zsh/5.0.7/bin/zsh
  lrwxr-xr-x  1 rcogley  wheel  33 May 16 10:54 /usr/local/bin/zsh-5.0.7@ -> ../Cellar/zsh/5.0.7/bin/zsh-5.0.7
But you can also use brew commands to confirm the details about the package:
brew list
  aspell		automake	enscript	gettext		gsl114		libgpg-error	mtr		rsync
  autoconf	bazaar		gdbm		go		jenv		libksba		pcre		zsh
brew list zsh
  /usr/local/Cellar/zsh/5.0.7/bin/zsh
  /usr/local/Cellar/zsh/5.0.7/bin/zsh-5.0.7
  /usr/local/Cellar/zsh/5.0.7/lib/zsh/ (35 files)
  /usr/local/Cellar/zsh/5.0.7/share/info/ (7 files)
  /usr/local/Cellar/zsh/5.0.7/share/man/ (17 files)
  /usr/local/Cellar/zsh/5.0.7/share/zsh/ (1036 files)
And…
brew info zsh
  zsh: stable 5.0.7 (bottled)
  http://www.zsh.org/
  /usr/local/Cellar/zsh/5.0.7 (1084 files, 11M) *
  Poured from bottle
  From: https://github.com/Homebrew/homebrew/blob/master/Library/Formula/zsh.rb
  ==> Dependencies
  Required: gdbm ✔, pcre ✔
  ==> Options
  --disable-etcdir
	Disable the reading of Zsh rc files in /etc
  ==> Caveats
  Add the following to your zshrc to access the online help:
    unalias run-help
    autoload run-help
    HELPDIR=/usr/local/share/zsh/help
Use the brew zsh
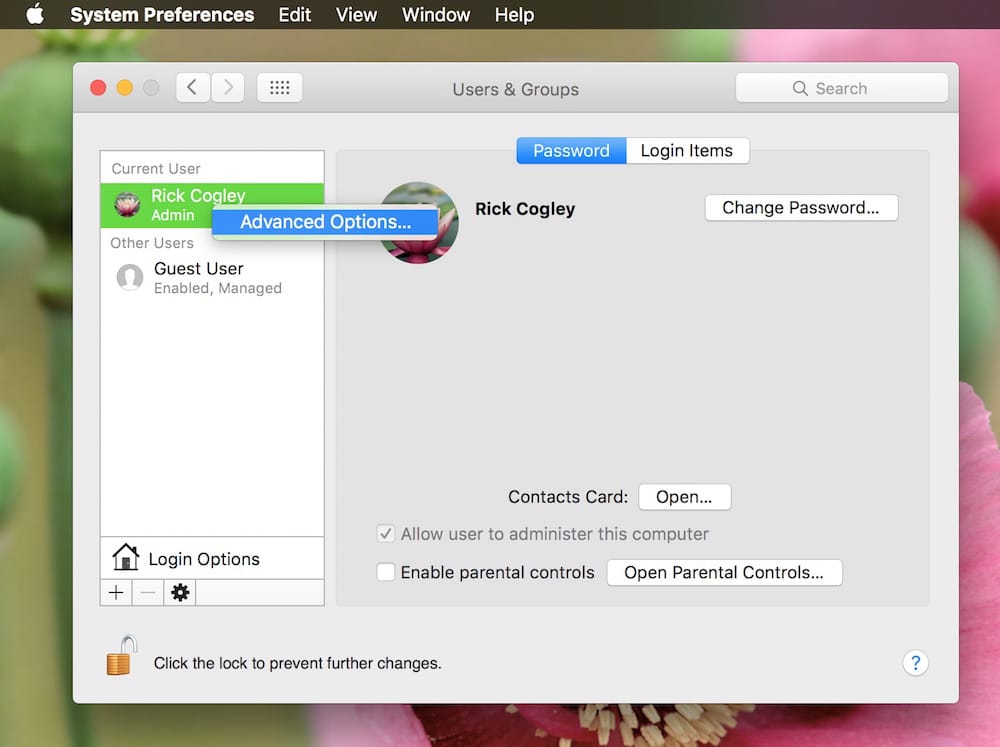
 Screenshot: Ctrl-click your username to get Advanced Options, to select your shell.
To use the zsh that brew installed, use dscl.
sudo dscl . -create /Users/$USER UserShell /usr/local/bin/zsh
Password: *********
After that, restart your Terminal to have it take effect. You can also use System Preferences. Open Users & Groups, ctrl-click your username, then select “Advanced Options”. You can select your shell in there.
Now if you run which again, you’ll see the system is recognizing the one you installed:
which zsh
  /usr/local/bin/zsh
And confirming the version again shows:
zsh --version
  zsh 5.0.7 (x86_64-apple-darwin14.0.0)
In standard linux, and in previous versions of Mac OS X, you would add a new shell like/usr/local/bin/zshto /etc/shells, then use chsh -s /usr/local/bin/zshto change to it.
Et voilà! The zsh that is first in your path is now the upgraded version from brew.
Confirm You’re Running Brew zsh
Now you can confirm which shell you are running with a couple of different commands.
First, repeat the command you used above to confirm:
dscl . -read /Users/$USER UserShell
    UserShell: /usr/local/bin/zsh
That’s the most precise way to confirm. Next, try echoing an environment variable (case matters):
echo $SHELL
    /usr/local/bin/zsh
It should be the same result. Finally, check the name of the running process by doing echo $0. It should return -zsh.
Set Shell within Terminal App
Get iTerm 2 if you haven’t got it already. The version 3 beta is especially good, as of April 2016.
You can also set the shell within your terminal app, though I haven’t tested this, and am not sure if there’s any negative aspect to doing so.
- OS X Terminal - Preferences, General, “Shells Open With” and set the path to your preferred shell.
- iTerm 2 - Preferences, Profiles, General, Command.
I believe what this does is to store the selection within a plist file for that app, and ignore the user shell.
Handling Upgrades
There are a couple of considerations to keep in mind any time you upgrade OS X.
First, your shell might get reset, so check it to be sure.
Secondly, OS X El Capitan (v 10.11) has a new security system called “System Integrity Protection”, which is set up to be stricter with the security of /usr/local, among other things. Since this is where brew keeps its files, you’ll likely need to reset security on it by running the following command:
sudo chown -R $(whoami):admin /usr/local
If you upgrade brew using brew update or brew upgrade, it will inform you if there’s a problem with permissions on /usr/local.
Supercharging Zsh
It’s a matter for another post, but if you like zsh and want some cool tools for it, check out Oh My Zsh!, an open source framework for managing zsh config.
oh-my-zsh
sh -c "$(wget https://raw.githubusercontent.com/robbyrussell/oh-my-zsh/master/tools/install.sh -O -)"
plugins=(git bundler osx rake ruby sudo autojump)
ZSH_THEME="bullet-train"
copy theme "bullet-train.zsh-theme" from https://github.com/caiogondim/bullet-train-oh-my-zsh-theme to ~/.oh-my-zsh/themes/
install https://github.com/powerline/fonts
shell> git clone https://github.com/powerline/fonts.git
shell> cd fonts
shell> ./install.sh
install https://github.com/powerline/powerline/tree/develop/font
install powerline:
shell> python -v
Python 2.7.9
shell> pip install powerline-status
shell> pip show powerline-status
Name: powerline-status
Version: 2.0
Location: /Library/Python/2.7/site-packages
Requires:
for:/bin/basse powerline
vim ~/.bash_profile add . /Library/Python/2.7/site-packages/powerline/bindings/bash/powerline.sh
sudo su - //root
//link the source for root to use ohmyzsh
ln -s /Users/xxxx/.oh-my-zsh /var/root/.oh-my-zsh
ln -s /Users/xxxx/.zshrc /var/root/.zshrc
![]()
if got problem with git issues:
#This will perform chmod g-w for each file returned by compaudit to remove write access for group
compaudit | xargs -I % chmod g-w "%"
#This will perform chown to current user (Windows and Linux) for each file returned by compaudit
compaudit | xargs -I % chown $USER "%"
#Remove all dump files (which normally speed up initialization)
rm ~/.zcompdump*
#Regenerate completions file
compinit
什么是powerline
如果你不是通过搜索引擎搜到这篇文章的话,也许你还没有听说过powerline。而你又恰巧是个*UNIX党,或者VIM党的话,那么强烈建议你了解并使用powerline。powerline是一个stateless status line,即一个全局状态/提示栏。如果你成功为你的bash,Terminal,iTerm2,VIM配置上powerline的话,那么效果将会是这样的:
Bash的提示符将会是这样的: 
VIM的状态栏将会是这样的: 
VIM的整体效果图: 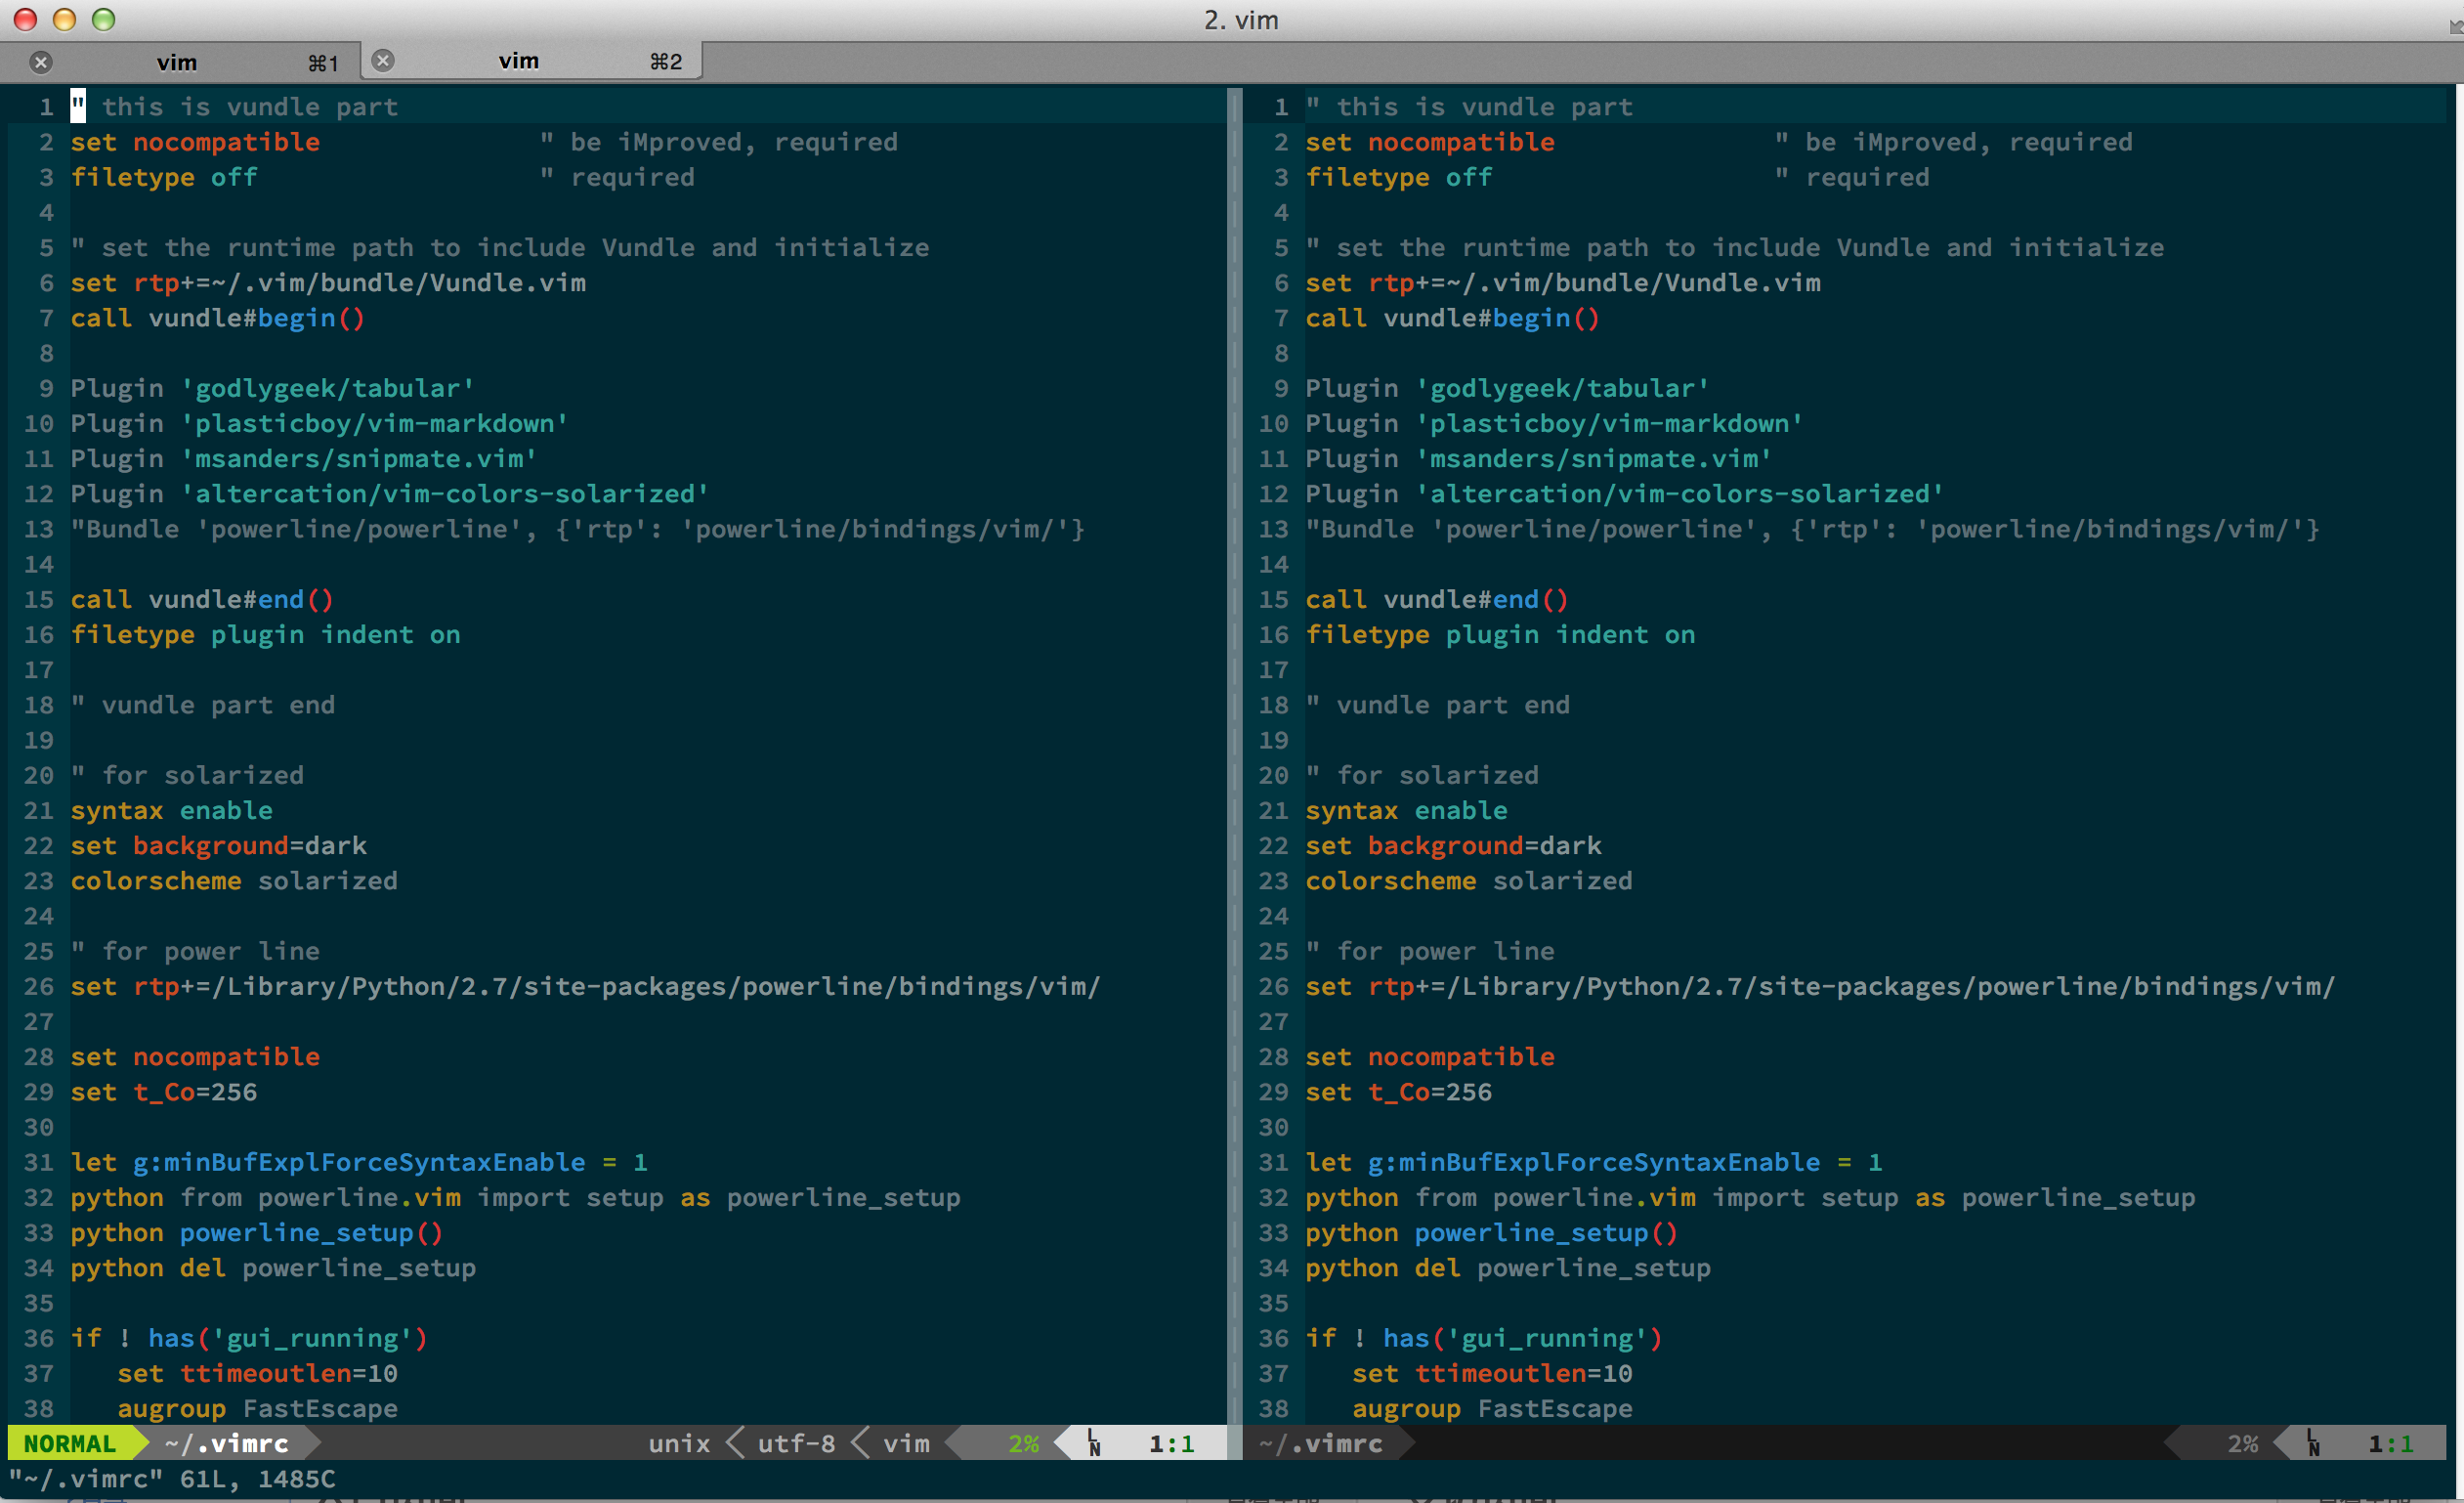
相信看了以上几个截图后,powerline的功能也就不言而喻了。他提供了各个app各个环境下的状态提示,极大的提高了工作效率
开始Mac上安装powerline
首先我们需要下载安装powerline。在正式安装之前先啰嗦几句powerline的代码结构,github上的powerline项目下涵盖了用于适配各种APP(bash,vim等)的代码。因此,你完全可以在Mac任何一个地方下载该代码包,然后将不同的APP配置使用这个路径,以Plugin形式加载。为了方便读者选择性安装,本文对于不同的程序将分开给出安装路径和配置。
先确定本机环境有一套版本大于等于2.7的Python的环境。如果没有合适环境的话,可以通过homebrew安装,这里不多做赘述。
shell> python -v
Python 2.7.9
然后通过pip安装powerline:
shell> pip install powerline-status
安装完成后通过pip show powerline-status查看powerline所处的具体路径。注意:这个路径很重要,会用在之后的配置环节
shell> pip show powerline-status
Name: powerline-status
Version: 2.0
Location: /Library/Python/2.7/site-packages
Requires:
配置Bash使用powerline
配置方法很简单,只需要在Bash配置文件(例如:/etc/bashrc,~/.bashrc,~/.bash_profile)中增加一行调用安装路径下的bindings/bash/powerline.sh即可。这样每次调用生成新的Bash窗口时,都会自动执行powerline.sh文件中的内容。下面以~/.bash_profile为例:
shell> echo << EOF >> ~/.bash_profile
. /Library/Python/2.7/site-packages/powerline/bindings/bash/powerline.sh
EOF
shell> . /Library/Python/2.7/site-packages/powerline/bindings/bash/powerline.sh
注意:根据python安装方式的不同,你的powerline所在路径也可能不同。如果你是通过python官网或者apple store通过安装工具安装的python,那么你的powerline安装路径就是/Library/Python/2.7/site-packages/powerline/。如果你是通过brew install python的话,那么你的powerline路径可能会有不同。请根据实际情况修改上面的命令。
Teriminal字体配置
执行完上面两步后,不出意外powerline就已经开始工作了。但是你会发现Bash提示符会和下图一样是一些非常恶心的符号。  出现这样情况的原因是powerline为了美观自己造了一些符号,而这些符号不在Unicode字库内(如果你不知道Unicode字库是什么的话可以看下博主以前的相关介绍)。所以想要powerline正常显示的话,需要安装特殊处理过的字体。好在有一位热心人的帮助,他把大部分的程序猿常用的等宽字体都打上了powerline patch使得我们的这部配置将异常简单。首先我们从github上下载并安装字体:
shell> git clone https://github.com/powerline/fonts.git
shell> cd fonts
shell> ./install.sh
安装完成后我们就可以在iTerm2或者Terminal的字体选项里看到并选择多个xxx for powerline的字体了。*注意:对于ASCII fonts和non-ASCII fonts都需要选择for powerline的字体。如下图: 
VIM相关配置
这部分我们将介绍如何为VIM配置powerline。首先你需要确保你的vim编译时开启了python支持。如果通过python --version|grep +python没有结果的话,那么你需要通过brew install vim --with-python --with-ruby --with-perl重新编译安装vim,或者使用brew install macvim --env-std --override-system-vim安装macvim。
然后,你只需要在~/.vimrc中加上以下部分,VIM就能够正常加载powerline功能了: 注意:其中set rtp+=/Library/Python/2.7/site-packages/powerline/bindings/vim和上文一样需要按照自己的实际情况调整。
set rtp+=/Library/Python/2.7/site-packages/powerline/bindings/vim
" These lines setup the environment to show graphics and colors correctly.
set nocompatible
set t_Co=256
let g:minBufExplForceSyntaxEnable = 1
python from powerline.vim import setup as powerline_setup
python powerline_setup()
python del powerline_setup
if ! has('gui_running')
set ttimeoutlen=10
augroup FastEscape
autocmd!
au InsertEnter * set timeoutlen=0
au InsertLeave * set timeoutlen=1000
augroup END
endif
set laststatus=2 " Always display the statusline in all windows
set guifont=Inconsolata\ for\ Powerline:h14
set noshowmode " Hide the default mode text (e.g. -- INSERT -- below the statusline)
Reference:
powerline powerline installation setup vim powerline getting spiffy with powerline
zsh: permission denied: /Users/xxx
chmod +x bin/*


 217
217

 被折叠的 条评论
为什么被折叠?
被折叠的 条评论
为什么被折叠?
 到【灌水乐园】发言


