


Mybatis-generator有什么用?
答:可以根据我们已经设计好的数据库表帮助我们自动生成实体类(pojo)、接口(dao)、映射文件(mapper),这样就可以避免每次使用表的时候手动创建一些类和映射文件,节约了大量的时间。(仅限于简单的CRUD操作)
Mybatis-generator什么时候用?
答:当你无数次的创建这些类与映射文件并且感到想吐的时候,就可以使用它了,前提:数据库表已经设计好。
Mybatis-generator怎么用?
答:使用方法共有3种使用方法:Maven插件、Eclipse插件、cmd命令行。(本文暂且只介绍第一种方法,简单粗暴易上手,废话不多说,从头开始演示)
开始:
一、创建项目模板(过于赘述了,建议直接看第二步)
1.新建一个Maven项目:File--->New--->Project

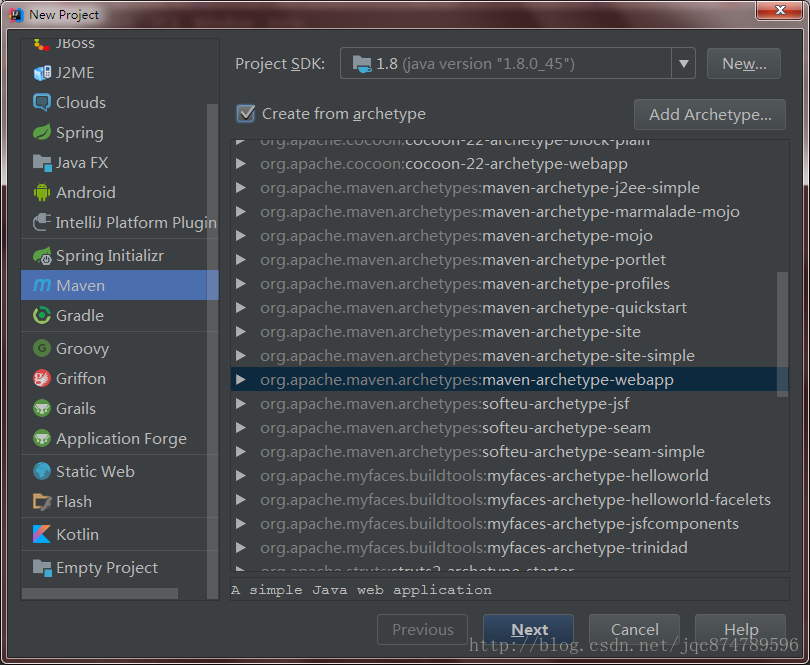
2.选择项目模板:选择SDK版本号--->选中左侧Maven--->勾选Create from archetype--->选中maven-archetype-webapp--->Next
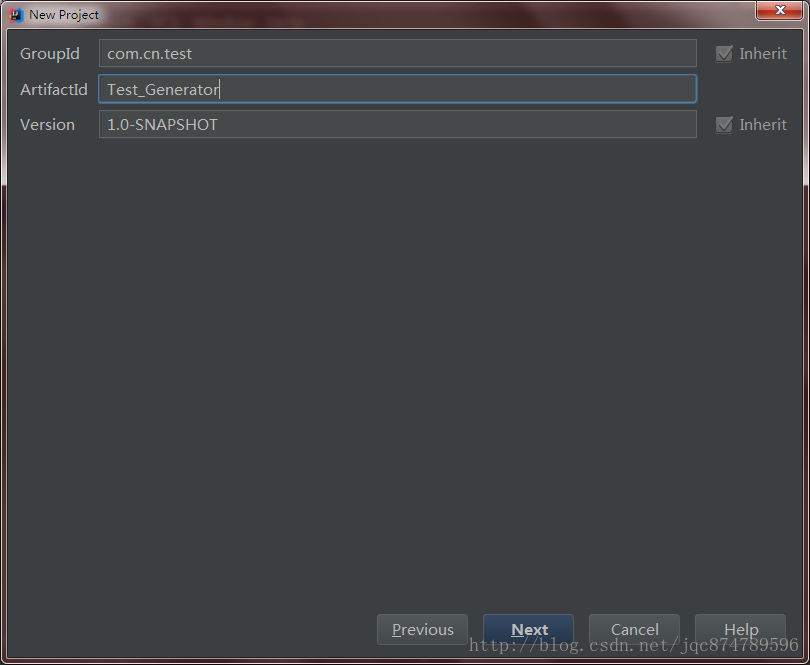
3.输入名字:项目组名--->项目名--->Next
4.按图中说明配置好,直接点击Next
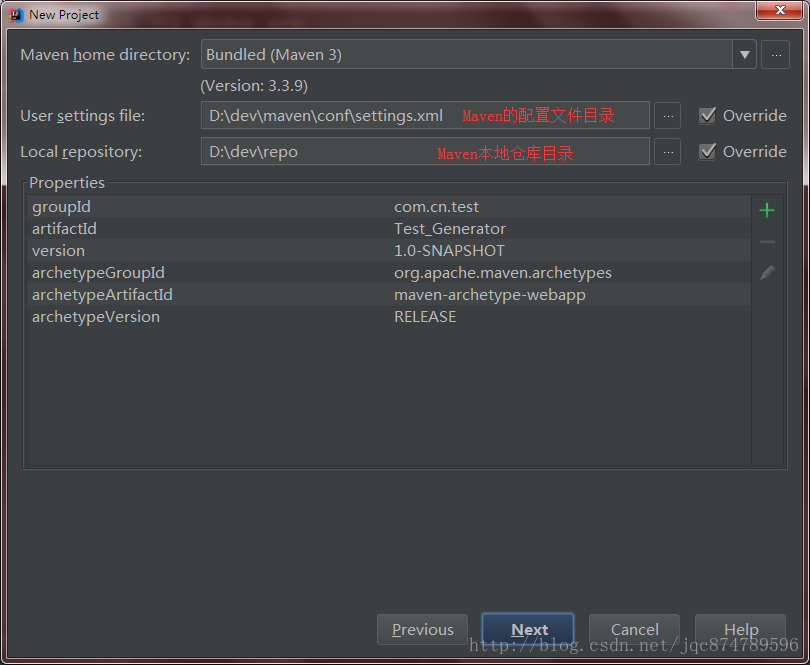
5.按图中说明配置好,点击Finish就创建完了

先看一下创建好的项目的目录
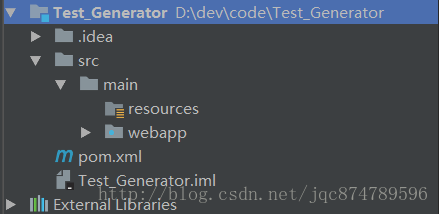
但是这样的目录并不是我想要的,在main目录下再创建一个java资源目录
6.添加java资源目录:Ctrl+Shift+Alt+s--->选中左侧Modules--->选中我们创建的项目--->点击Source选项卡--->视图中选中main目录并右键点击New Folder--->输入java--->点击OK
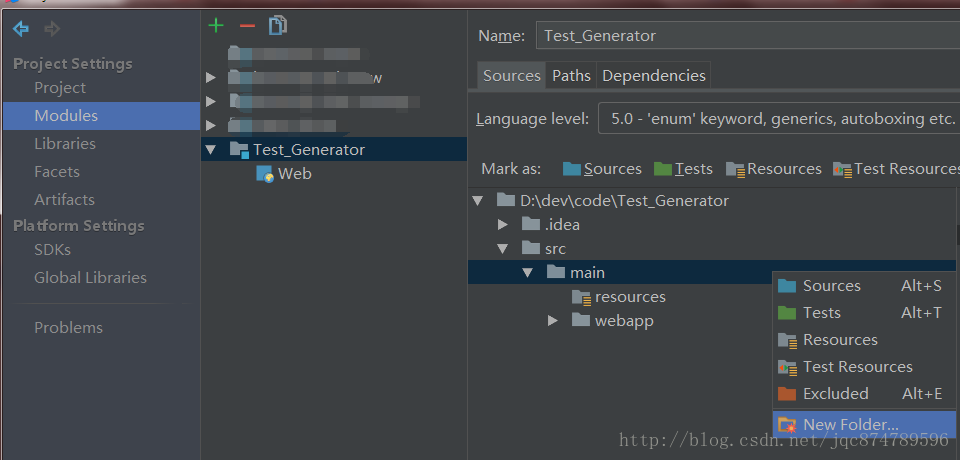
7.java目录设置为资源目录:选中java目录并右键--->点击Source(java目录变成蓝色就可以了)

以上步骤均为创建模板,重点是在下面
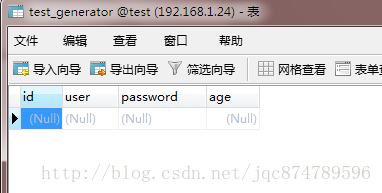
二、根据个人需要设计数据库表
三、配置generatorConfig.xml配置文件:在resource目录下新建generatorConfig.xml文件,按下面注释配置好。
这里直接给出文件内容
<?xml version="1.0" encoding="UTF-8"?>
<!DOCTYPE generatorConfiguration
        PUBLIC "-//mybatis.org//DTD MyBatis Generator Configuration 1.0//EN"
        "http://mybatis.org/dtd/mybatis-generator-config_1_0.dtd">
<generatorConfiguration>
    <!--本机数据库驱动jar包存放目录-->
    <classPathEntry    location="D:\dev\repo\mysql\mysql-connector-java\5.1.35\mysql-connector-java-5.1.35.jar"/>
    <context id="DB2Tables"    targetRuntime="MyBatis3">
        <commentGenerator>
            <property name="suppressDate" value="true"/>
            <property name="suppressAllComments" value="true"/>
        </commentGenerator>
        <!--数据库驱动,数据库地址及表名,账号,密码-->
        <jdbcConnection driverClass="com.mysql.jdbc.Driver" connectionURL="jdbc:mysql://192.168.25.1/mymessages"    userId="root" password="123456">
        </jdbcConnection>
        <javaTypeResolver>
            <property name="forceBigDecimals" value="false"/>
        </javaTypeResolver>
        <!--生成Model类的包名及存放位置-->
        <javaModelGenerator targetPackage="com.cn.pojo" targetProject="src/main/java">
            <property name="enableSubPackages" value="true"/>
            <property name="trimStrings" value="true"/>
        </javaModelGenerator>
        <!--生成映射文件的包名及存放位置-->
        <sqlMapGenerator targetPackage="com.cn.mapper" targetProject="src/main/java">
            <property name="enableSubPackages" value="true"/>
        </sqlMapGenerator>
        <!--生成Dao类的包名及存放位置-->
        <javaClientGenerator type="XMLMAPPER" targetPackage="com.cn.dao" targetProject="src/main/java">
            <property name="enableSubPackages" value="true"/>
        </javaClientGenerator>
        <!--生成对应表及类名,domainObjectName是设置实体类的名字的-->
        <table tableName="test_generator" domainObjectName="User" enableCountByExample="false" enableUpdateByExample="false" enableDeleteByExample="false" enableSelectByExample="false" selectByExampleQueryId="false"></table>
    </context>
</generatorConfiguration>
四、配置配置Maven的pom.xml文件
这里直接给出pom.xml文件内容
<project xmlns="http://maven.apache.org/POM/4.0.0" xmlns:xsi="http://www.w3.org/2001/XMLSchema-instance"
         xsi:schemaLocation="http://maven.apache.org/POM/4.0.0 http://maven.apache.org/maven-v4_0_0.xsd">
  <modelVersion>4.0.0</modelVersion>
  <groupId>com.cn.test</groupId>
  <artifactId>Test_Generator</artifactId>
  <packaging>war</packaging>
  <version>1.0-SNAPSHOT</version>
  <name>Test_Generator Maven Webapp</name>
  <url>http://maven.apache.org</url>
  <dependencies>
    <!--jdbc驱动包-->
    <dependency>
      <groupId>mysql</groupId>
      <artifactId>mysql-connector-java</artifactId>
      <version>5.1.35</version>
    </dependency>
    <!--mybatis-generator核心包-->
    <dependency>
      <groupId>org.mybatis.generator</groupId>
      <artifactId>mybatis-generator-core</artifactId>
      <version>1.3.2</version>
    </dependency>
  </dependencies>
  <build>
    <plugins>
      <plugin>
        <groupId>org.mybatis.generator</groupId>
        <artifactId>mybatis-generator-maven-plugin</artifactId>
        <version>1.3.2</version>
        <configuration>
          <!--配置文件的位置-->
          <configurationFile>src/main/resources/generatorConfig.xml</configurationFile>
          <verbose>true</verbose>
          <overwrite>true</overwrite>
        </configuration>
        <executions>
          <execution>
            <id>Generate MyBatis Artifacts</id>
            <goals>
              <goal>generate</goal>
            </goals>
          </execution>
        </executions>
      </plugin>
    </plugins>
  </build>
五、运行Maven插件:调出Maven面板--->展开Plugins--->展开mybatis-generator--->右键Run Maven Build

稍等几秒钟就完成啦!
现在看一下代码生成器帮我们生成的目录文件:

分别把这三个文件的内容贴出来给大家看一下
UserMapper:
package com.cn.dao;

import com.cn.pojo.User;

public interface UserMapper {
    int deleteByPrimaryKey(Long id);

    int insert(User record);

    int insertSelective(User record);

    User selectByPrimaryKey(Long id);

    int updateByPrimaryKeySelective(User record);

    int updateByPrimaryKey(User record);
}
UserMapper.xml:
<?xml version="1.0" encoding="UTF-8" ?>
<!DOCTYPE mapper PUBLIC "-//mybatis.org//DTD Mapper 3.0//EN" "http://mybatis.org/dtd/mybatis-3-mapper.dtd" >
<mapper namespace="com.cn.dao.UserMapper" >
  <resultMap id="BaseResultMap" type="com.cn.pojo.User" >
    <id column="id" property="id" jdbcType="BIGINT" />
    <result column="user" property="user" jdbcType="VARCHAR" />
    <result column="password" property="password" jdbcType="VARCHAR" />
    <result column="age" property="age" jdbcType="INTEGER" />
  </resultMap>
  <sql id="Base_Column_List" >
    id, user, password, age
  </sql>
  <select id="selectByPrimaryKey" resultMap="BaseResultMap" parameterType="java.lang.Long" >
    select
    <include refid="Base_Column_List" />
    from test_generator
    where id = #{id,jdbcType=BIGINT}
  </select>
  <delete id="deleteByPrimaryKey" parameterType="java.lang.Long" >
    delete from test_generator
    where id = #{id,jdbcType=BIGINT}
  </delete>
  <insert id="insert" parameterType="com.cn.pojo.User" >
    insert into test_generator (id, user, password,
      age)
    values (#{id,jdbcType=BIGINT}, #{user,jdbcType=VARCHAR}, #{password,jdbcType=VARCHAR},
      #{age,jdbcType=INTEGER})
  </insert>
  <insert id="insertSelective" parameterType="com.cn.pojo.User" >
    insert into test_generator
    <trim prefix="(" suffix=")" suffixOverrides="," >
      <if test="id != null" >
        id,
      </if>
      <if test="user != null" >
        user,
      </if>
      <if test="password != null" >
        password,
      </if>
      <if test="age != null" >
        age,
      </if>
    </trim>
    <trim prefix="values (" suffix=")" suffixOverrides="," >
      <if test="id != null" >
        #{id,jdbcType=BIGINT},
      </if>
      <if test="user != null" >
        #{user,jdbcType=VARCHAR},
      </if>
      <if test="password != null" >
        #{password,jdbcType=VARCHAR},
      </if>
      <if test="age != null" >
        #{age,jdbcType=INTEGER},
      </if>
    </trim>
  </insert>
  <update id="updateByPrimaryKeySelective" parameterType="com.cn.pojo.User" >
    update test_generator
    <set >
      <if test="user != null" >
        user = #{user,jdbcType=VARCHAR},
      </if>
      <if test="password != null" >
        password = #{password,jdbcType=VARCHAR},
      </if>
      <if test="age != null" >
        age = #{age,jdbcType=INTEGER},
      </if>
    </set>
    where id = #{id,jdbcType=BIGINT}
  </update>
  <update id="updateByPrimaryKey" parameterType="com.cn.pojo.User" >
    update test_generator
    set user = #{user,jdbcType=VARCHAR},
      password = #{password,jdbcType=VARCHAR},
      age = #{age,jdbcType=INTEGER}
    where id = #{id,jdbcType=BIGINT}
  </update>
</mapper>
User:
package com.cn.pojo;

public class User {
    private Long id;

    private String user;

    private String password;

    private Integer age;

    public Long getId() {
        return id;
    }

    public void setId(Long id) {
        this.id = id;
    }

    public String getUser() {
        return user;
    }

    public void setUser(String user) {
        this.user = user == null ? null : user.trim();
    }

    public String getPassword() {
        return password;
    }

    public void setPassword(String password) {
        this.password = password == null ? null : password.trim();
    }

    public Integer getAge() {
        return age;
    }

    public void setAge(Integer age) {
        this.age = age;
    }
}
至此就完成了Maven插件使用代码生成器的所有步骤!
总结一下四部曲:
1。创建项目模板
2。设计数据库表
3。配置generatorConfig.xml
4。配置pom.xml
maven插件对比其它两种方法的区别:
与eclipse插件相比:
1.不需要预先将jdbc驱动包下载好放置本地,但是需要在pom.xml文件中配置
2.eclipse插件需要预先创建3个包,而maven插件不需要,会自动生成
与命令行相比:
1.需要使用开发工具和配置pom.xml配置文件,命令行不需要但是需要预先将2个jar包下载到本地
eclipse插件使用Mybaits-generator代码生成器:
http://blog.csdn.net/jqc874789596/article/details/79126282
命令行使用Mybatis-generator代码生成器:
http://blog.csdn.net/jqc874789596/article/details/79129257


 9万+
9万+

 被折叠的 条评论
为什么被折叠?
被折叠的 条评论
为什么被折叠?
 到【灌水乐园】发言


