


最近需要用到Matlab C++混编,研究了一下Matlab中混编C++版本OpenCV的方法。
例子是opencv中sample里的一个em算法,mex_em.cpp,核心的mexFunction函数内容如下,必须严格按照mex要求编写
void mexFunction( int nlhs, mxArray *plhs[], int nrhs, const mxArray *prhs[] )
nlhs表示输出变量数目; plhs表示输出变量指针; nrhs表示输入变量数目; prhs表示输入变量指针;
Sample1: matlab 传矩阵到mexfunction中,转为opencv的Mat格式,最终返回处理后的矩阵。
mexfuntion内容为:
#include "mex.h"
#include <iostream>
#include "opencv2/core/core.hpp"
using namespace std;
using namespace cv;
void mexFunction(int nlhs, mxArray *plhs[], int nrhs,
        const mxArray *prhs[]) {

    int Rows=mxGetM(prhs[0]);
    int Cols=mxGetN(prhs[0]);
    double *pIn = mxGetPr(prhs[0]);
    cout<<pIn[0]<<endl;
    cout<<pIn[1]<<endl;
    cout<<pIn[2]<<endl;
    cout<<pIn[3]<<endl;
    cout<<pIn[4]<<endl;

    Mat InMat(Cols,Rows,CV_64FC1,mxGetPr(prhs[0]));//Matlab passes data column-wise
                                                   // no need to copy data - SUPER!

    InMat=InMat.t();//transpose so the matrix is identical to MATLAB's one
    cout<<InMat<<endl<<endl;

    //Make some openCV operations on InMat to get OutMat...
    Mat ones = Mat::ones(InMat.rows,InMat.cols,CV_64FC1);
    cout<<ones<<endl<<endl;

    Mat OutMat;
    add(InMat, ones, OutMat);

    plhs[0]=mxCreateDoubleMatrix(OutMat.rows,OutMat.cols,mxREAL);
    double *pOut=mxGetPr(plhs[0]);

    for (int i(0);i<OutMat.rows;i++)
      for (int j(0);j<OutMat.cols;j++)
         pOut[i+j*OutMat.rows]=OutMat.at<double>(i,j);
}
编译代码
OpenCV_INLCUDE_DIR = '-I/usr/local/include -I/usr/local/include/opencv -I/usr/local/include/opencv2 '
OpenCV_LIBRARY_DIR = '-L/usr/local/lib -lopencv_core -lopencv_imgproc -lopencv_highgui -lopencv_contrib -lopencv_legacy';

eval(['mex feature_extractor_mex.cpp ' OpenCV_INLCUDE_DIR OpenCV_LIBRARY_DIR]);
输入矩阵为:
A =

     8     5    10    12     9    11
    21    19     2     4    18     7
    16    15    14    20    22     3
    17    23     1     6    13    24
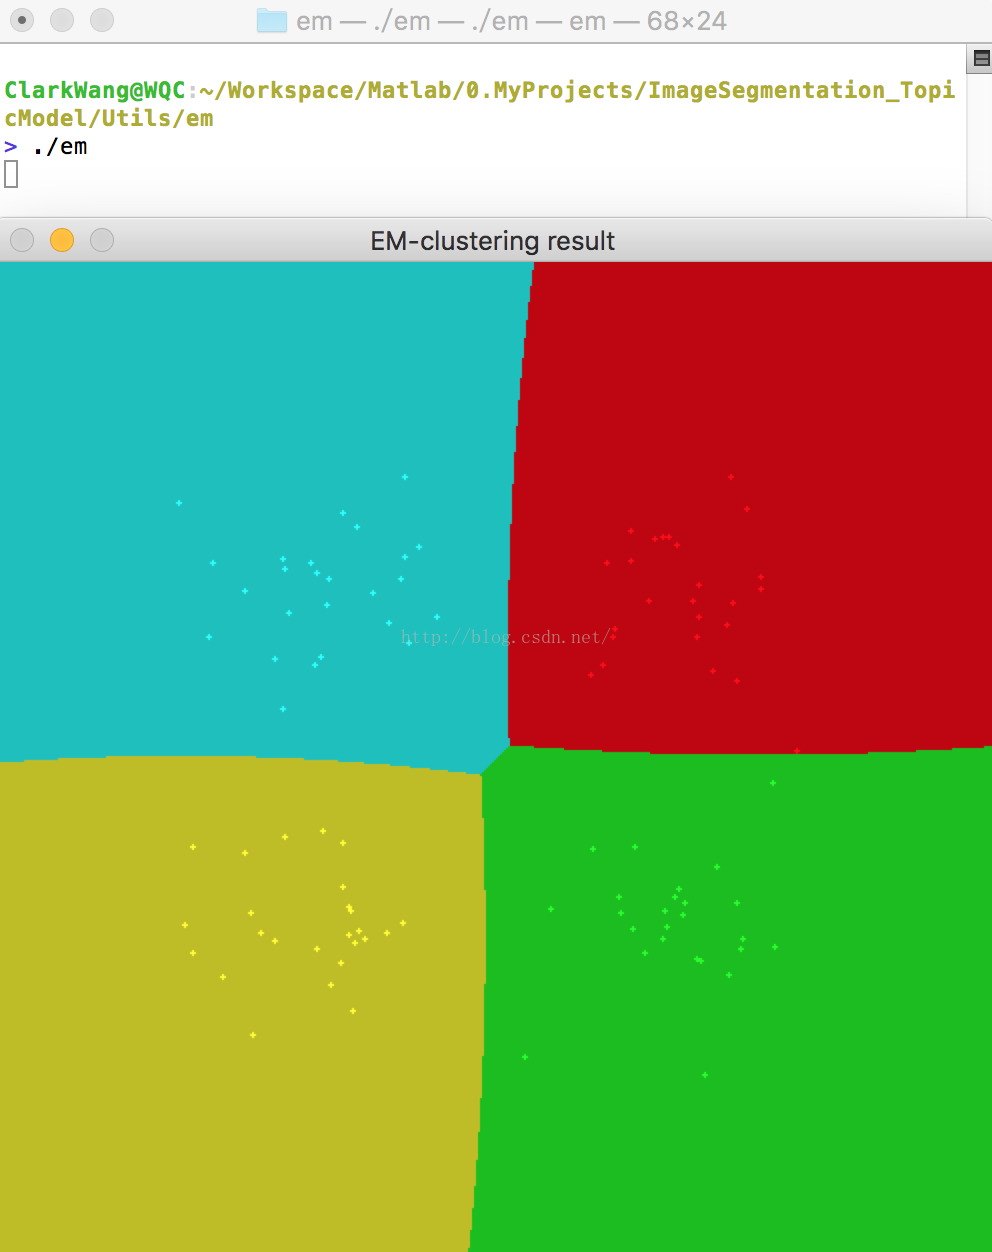
Sample2: mex_em.cpp:这个例子相对简单,不需要输入数据,opencv全部都完成em算法,最后在mex函数中输出结果图像,在matlab中显示。
#include "mex.h"

#include <fstream>
#include <iostream>
#include <vector>
#include <cassert>

#include <opencv2/opencv.hpp>
#include <opencv2/core/core.hpp>
#include <opencv2/legacy/legacy.hpp>
#include <opencv2/highgui/highgui.hpp>

#include "matlab_multiarray.hpp"

using namespace cv;
using namespace std;

void mexFunction( int nlhs, mxArray *plhs[], int nrhs, const mxArray *prhs[] )
{

    const int N = 4;
    const int N1 = (int)sqrt((double)N);
    const Scalar colors[] =
    {
        Scalar(0,0,255), Scalar(0,255,0),
        Scalar(0,255,255),Scalar(255,255,0)
    };

    int i, j;
    int nsamples = 100;
    Mat samples( nsamples, 2, CV_32FC1 );
    Mat labels;
    Mat img = Mat::zeros( Size( 500, 500 ), CV_8UC3 );


    Mat sample( 1, 2, CV_32FC1 );
    CvEM em_model;
    CvEMParams params;

    samples = samples.reshape(2, 0);
    for( i = 0; i < N; i++ )
    {
        // form the training samples
        Mat samples_part = samples.rowRange(i*nsamples/N, (i+1)*nsamples/N );

        Scalar mean(((i%N1)+1)*img.rows/(N1+1),
                    ((i/N1)+1)*img.rows/(N1+1));
        Scalar sigma(30,30);
        randn( samples_part, mean, sigma );
    }
    samples = samples.reshape(1, 0);

    // initialize model parameters
    params.covs      = NULL;
    params.means     = NULL;
    params.weights   = NULL;
    params.probs     = NULL;
    params.nclusters = N;
    params.cov_mat_type       = CvEM::COV_MAT_SPHERICAL;
    params.start_step         = CvEM::START_AUTO_STEP;
    params.term_crit.max_iter = 300;
    params.term_crit.epsilon  = 0.1;
    params.term_crit.type     = CV_TERMCRIT_ITER|CV_TERMCRIT_EPS;

    // cluster the data
    printf("cluster the data\n");
    em_model.train( samples, Mat(), params, &labels );


    // classify every image pixel
    for( i = 0; i < img.rows; i++ )
    {
        for( j = 0; j < img.cols; j++ )
        {
            sample.at<float>(0) = (float)j;
            sample.at<float>(1) = (float)i;
            int response = cvRound(em_model.predict( sample ));
            Scalar c = colors[response];

            circle( img, Point(j, i), 1, c*0.75, CV_FILLED );
        }
    }

    //draw the clustered samples
    for( i = 0; i < nsamples; i++ )
    {
        Point pt(cvRound(samples.at<float>(i, 0)), cvRound(samples.at<float>(i, 1)));
        circle( img, pt, 1, colors[labels.at<int>(i)], CV_FILLED );
    }

    int height = img.rows;
    int width = img.cols;
    int channels = img.channels();
    const int DIMEN = 3;
    mwSize dims[DIMEN] = {height, width, channels};
    plhs[0] = mxCreateNumericArray(DIMEN, dims, mxUINT8_CLASS, mxREAL);

    MatlabMultiArray3<uchar> out_Mat(plhs[0]);

    uchar* data= img.ptr<uchar>(0);
    for (int i = 0; i < height; i++){
        for (int j = 0; j < width; j++){
            out_Mat[i][j][0]=*(data++);
            out_Mat[i][j][1]=*(data++);
            out_Mat[i][j][2]=*(data++);
        }
    }
}
注: 在mexFunction函数中将OpenCV的Mat数据结构输出采用了,matlab_multiarray.hpp,来自于CVPR2014文章<Multiscale Combinatorial Grouping>提供的工具函数,其中的数据结构MatlabMultiArray3 还蛮好用的,还有二维数组MatlabMultiArray。
可以编写一个build文件,编译mex_em.cpp文件,并测试,如下Demo.m:
OpenCV_INLCUDE_DIR = '-I/usr/local/include -I/usr/local/include/opencv -I/usr/local/include/opencv2 ';
Boost_INCLUDE_DIR = '-I/usr/local/Cellar/boost/1.59.0/include/'
INCLUDE_DIR = [OpenCV_INLCUDE_DIR Boost_INCLUDE_DIR];
LIBRARY_DIR = '-L/usr/local/lib -lopencv_core -lopencv_imgproc -lopencv_highgui -lopencv_legacy ';

eval(['mex mex_em.cpp ' INCLUDE_DIR LIBRARY_DIR]);

dst = mex_em();

imshow(dst);
注:由于用到了OpenCV库和Boost库,mex命令后后面需要加上相应的include,lib路径,以及opencv相关的lib库,与C++编译opencv类似。然后执行命令就可以了。
Matlab混编opencv的结果:

Sample3: 另一个例子是Matlab传图像给mexFunction,执行彩色图像分离成单通道图像的操作,并返回结果显示。
#include "mex.h"
#include "matlab_multiarray.hpp"  //MatlabMultiArray3<uchar> out_Mat(plhs[0])

#include "cv.h"
#include "highgui.h"
#include <opencv2/opencv.hpp>

#include <iostream>
#include <fstream>
#include <vector>

using namespace cv;
using namespace std;

void mexFunction( int nlhs, mxArray *plhs[], int nrhs, const mxArray *prhs[] )
{
    RNG& rng = theRNG();

    uchar* pData;
    int width, height, channels;
    const int *dim_array;

	pData = (uchar *) mxGetPr(prhs[0]);

    int numberOfElements = mxGetNumberOfElements(prhs[0]);

    dim_array = mxGetDimensions(prhs[0]);
    height = *dim_array;
    width = *(dim_array+1);
    channels = *(dim_array+2);

    printf("height=%d,width=%d,channel=%d,numberOfElements=%d\n",height,width,channels,numberOfElements);
    //mexPrintf("height=%d,width=%d,dim_array=%d\n",height,width,dim_array);

    // 复制数据
    Mat srcImg(height, width, CV_8UC3);
    printf("rows=%d,cols=%d,channels=%d\n",srcImg.rows,srcImg.cols,srcImg.channels());
    Mat planes[] = {Mat::zeros(height, width, CV_8UC1),
                    Mat::zeros(height, width, CV_8UC1),
                    Mat::zeros(height, width, CV_8UC1)};

    for(int c = 0; c < channels; c++){
        for (int i = 0; i < height; i++){
            for (int j = 0; j < width; j++){
                planes[c].at<uchar>(i,j) = pData[c*height*width + height*j + i];
                //printf("%d ",pData[c*height*width + height*j + i]);
            }
        }
	}

	// 因为C与Matlab的存储方式不同,C是按行存储,Matlab是按列存储
	// 所以将图片转置
    Mat dstImg = srcImg.clone();


    const int DIMEN = 3, DIMEN2 = 2;

    mwSize dims[DIMEN] = {height, width, channels};
    mwSize dims2[DIMEN2] = {height, width};

    plhs[0] = mxCreateNumericArray(DIMEN, dims, mxUINT8_CLASS, mxREAL);
    plhs[1] = mxCreateNumericArray(DIMEN2, dims2, mxUINT8_CLASS, mxREAL);
    plhs[2] = mxCreateNumericArray(DIMEN2, dims2, mxUINT8_CLASS, mxREAL);
    plhs[3] = mxCreateNumericArray(DIMEN2, dims2, mxUINT8_CLASS, mxREAL);

    MatlabMultiArray3<uchar> out_Mat(plhs[0]);
    MatlabMultiArray<uchar> out_Mat2(plhs[1]);
    MatlabMultiArray<uchar> out_Mat3(plhs[2]);
    MatlabMultiArray<uchar> out_Mat4(plhs[3]);

    for (int i = 0; i < height; i++){
        for (int j = 0; j < width; j++){
            out_Mat[i][j][0]=planes[0].at<uchar>(i,j);
            out_Mat[i][j][1]=planes[1].at<uchar>(i,j);
            out_Mat[i][j][2]=planes[2].at<uchar>(i,j);

            out_Mat2[i][j]=planes[0].at<uchar>(i,j);
            out_Mat3[i][j]=planes[1].at<uchar>(i,j);
            out_Mat4[i][j]=planes[2].at<uchar>(i,j);
        }
    }
}
编译测试:
INCLUDE_DIR = '-I/usr/local/include -I/usr/local/include/opencv -I/usr/local/include/opencv2 ';
LIBRARY_DIR = '-L/usr/local/lib -lopencv_core -lopencv_imgproc -lopencv_highgui ';

eval(['mex mex_ColorImage2singleChannelImage.cpp ' INCLUDE_DIR LIBRARY_DIR]);

imgColor = imread('pokemon.jpg');
imgGray = rgb2gray(imgColor);

[dst1, dst2, dst3, dst4] = mex_ColorImage2singleChannelImage(imgColor);

figure;
subplot(2,2,1);imshow(dst1);subplot(2,2,2);imshow(dust);
subplot(2,2,3);imshow(dst3);subplot(2,2,4);imshow(dst4);
输出结果:

Sample4: Matlab 传图像数据给mexfunction进行处理,返回opencv库的相应处理后的图像数据
#include "mex.h"
#include <cstdio>
#include <string>
#include <time.h>


#include <opencv/cv.h>
#include <opencv2/core/core.hpp>
#include <opencv2/highgui/highgui.hpp>
#include <opencv2/imgproc/imgproc.hpp>


using namespace std;
using namespace cv;


void mexFunction(int nlhs, mxArray *plhs[], int nrhs,
        const mxArray *prhs[]) {

    uchar *inData = (uchar*)mxGetPr(prhs[0]); //获得指向输入矩阵的指针
    int rows = mxGetM(prhs[0]); //获得输入矩阵的行数
    int cols = mxGetN(prhs[0]); //获得输入矩阵的列数
    int channel = mxGetNumberOfDimensions(prhs[0]);//灰度图为2,彩色图为3
    if(channel == 2)
    {
        cout<<"Channel: "<<channel<<endl;
        Mat image(rows,cols,CV_8UC1);

        for (int i = 0; i < rows; i++)
            for (int j = 0; j < cols; j++)
                 image.at<uchar>(i, j) = *(inData + i + j * rows);

        Mat out;
        flip(image, out, 1);

        plhs[0] = mxCreateDoubleMatrix(rows, cols, mxREAL);
        double *outData;
        outData = mxGetPr(plhs[0]);
        for (int i = 0; i < rows; i++)
            for (int j = 0; j < cols; j++)
                 *(outData + i + j * rows) = (double)out.at<uchar>(i, j);
    }
    else{
        cols = cols/channel;
        Mat image(rows,cols,CV_8UC3);//CV_8UC3
        uchar *InCurRow;
        for (int i = 0; i < rows; i++){
            InCurRow = (uchar*)image.ptr<uchar>(i);//获取第i行的指针
            for (int j = 0; j < cols; j++)
                for (int k = 0; k < channel; k++)
                      *(InCurRow + j * channel + (2 - k)) = *(inData + i + j * rows + k * rows * cols);
        }


        Mat out;
        flip(image, out, 1);

        plhs[0] = mxCreateDoubleMatrix(rows, cols, mxREAL);
        double *outData_R = mxGetPr(plhs[0]);
        plhs[1] = mxCreateDoubleMatrix(rows, cols, mxREAL);
        double *outData_G = mxGetPr(plhs[1]);
        plhs[2] = mxCreateDoubleMatrix(rows, cols, mxREAL);
        double *outData_B = mxGetPr(plhs[2]);


         for (int i = 0; i < rows; i++){
            for (int j = 0; j < cols; j++)  {
                *(outData_R + i + j * rows) = (double)out.at<Vec3b>(i, j)[2];
                *(outData_G + i + j * rows) = (double)out.at<Vec3b>(i, j)[1];
                *(outData_B + i + j * rows) = (double)out.at<Vec3b>(i, j)[0];
            }
        }
    }
}
Matlab 命令:
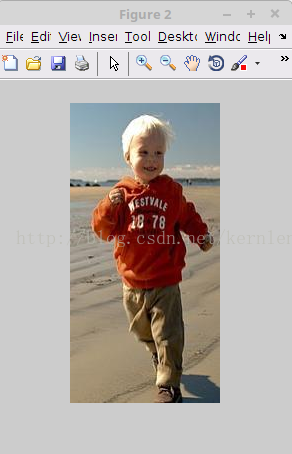
A = imread('Running_0013.jpg');
figure;imshow(A);
[R,G,B] = feature_extractor_mex(A);
figure;imshow(uint8(R));
figure;imshow(uint8(G));
figure;imshow(uint8(B));
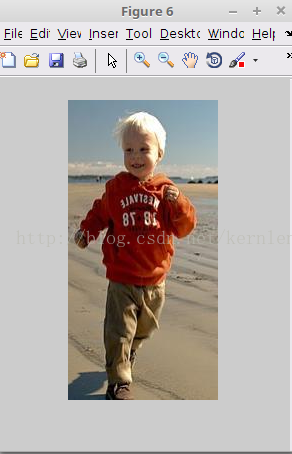
imgRGB = cat(3,uint8(R),uint8(G),uint8(B))
figure;imshow(imgRGB);matlab返回结果:
原图
返回的R, G, B 三通道图是double类型的,需要转换为uint8类型才能在matlab中显示

采用 cat(3,uint8(R),uint8(G),uint8(B)) 函数将三通道图合并为彩色图像。
参考:
2. <Multiscale Combinatorial Grouping> CVPR 2014 Code


 611
611


 被折叠的 条评论
为什么被折叠?
被折叠的 条评论
为什么被折叠?
 到【灌水乐园】发言


