


转载请注明出处:http://blog.csdn.net/l1028386804/article/details/78309501
这边博文就带着大家一起学习如何安装HBase,首先,我们来学习如何在单节点上安装HBase,后续会带着大家一起学习如何搭建HBase集群。
一、配置服务器主机名和IP映射
1、配置主机名
vim /etc/sysconfig/network
NETWORKING=yes
HOSTNAME=liuyazhuang121
NTPSERVERARGS=iburst
2、配置主机名映射
vim /etc/hosts
127.0.0.1   localhost localhost.localdomain localhost4 localhost4.localdomain4
::1         localhost localhost.localdomain localhost6 localhost6.localdomain6
192.168.209.121 liuyazhuang121
二、安装Hadoop
1、伪分布式安装
请参考博文:《Hadoop之——Hadoop2.4.1伪分布搭建》
2、 集群安装
请参考博文《Hadoop之——CentOS + hadoop2.5.2分布式环境配置》
3、 高可用集群安装
请参考博文《Hadoop之——Hadoop2.5.2 HA高可靠性集群搭建(Hadoop+Zookeeper)前期准备》和《Hadoop之——Hadoop2.5.2 HA高可靠性集群搭建(Hadoop+Zookeeper)》
这篇博文中,我也是在单节点上安装的Hadoop,将HBase和Hadoop安装在了同一台服务器上。由于HBase的运行依赖于Zookeeper,所以,在同一台服务器上,又安装了单节点的Zookeeper。三、安装并配置Zookeeper
HBase的运行依赖于Zookeeper,所以我们先安装Zookeeper。
1、安装Zookeeper
这里我安装的Zookeeper版本是zookeeper-3.4.9.tar.gz,上传Zookeeper到服务器的/usr/local目录下,然后解压
tar -zxvf zookeeper-3.4.9.tar.gz2、配置系统环境变量
vim /etc/profile
HADOOP_HOME=/usr/local/hadoop-2.5.2
ZOOKEEPER_HOME=/usr/local/zookeeper-3.4.9
PATH=$HADOOP_HOME/bin:$HADOOP_HOME/sbin:$ZOOKEEPER_HOME/bin:$PATH
export HADOOP_HOME ZOOKEEPER_HOME PATH
3、配置zoo.cfg
进入ZOOKEEPER_HOME/conf目录下,执行如下命令
cp zoo_sample.cfg zoo.cfg# The number of milliseconds of each tick
tickTime=2000
# The number of ticks that the initial
# synchronization phase can take
initLimit=10
# The number of ticks that can pass between
# sending a request and getting an acknowledgement
syncLimit=5
# the directory where the snapshot is stored.
# do not use /tmp for storage, /tmp here is just
# example sakes.
dataDir=/usr/local/zookeeper-3.4.9/data
dataLogDir=/usr/local/zookeeper-3.4.9/dataLog
# the port at which the clients will connect
clientPort=2182
# the maximum number of client connections.
# increase this if you need to handle more clients
#maxClientCnxns=60
#
# Be sure to read the maintenance section of the
# administrator guide before turning on autopurge.
#
# http://zookeeper.apache.org/doc/current/zookeeperAdmin.html#sc_maintenance
#
# The number of snapshots to retain in dataDir
#autopurge.snapRetainCount=3
# Purge task interval in hours
# Set to "0" to disable auto purge feature
#autopurge.purgeInterval=1然后再ZOOKEEPER_HOME目录下创建data、dataLog目录。
mkdir -p /usr/local/zookeeper-3.4.9/data
mkdir -p /usr/local/zookeeper-3.4.9/dataLog
4、启动Zookeeper
zkServer.sh start四、安装并配置HBase
1、安装Hbase
这里我安装的HBase版本是hbase-0.96.2-hadoop2-bin.tar.gz,将其上传到服务器的/usr/local目录下,然后输入如下命令解压
tar-zxvf hbase-0.96.2-hadoop2-bin.tar.gz2、配置系统环境变量
vim /etc/profile
HADOOP_HOME=/usr/local/hadoop-2.5.2
ZOOKEEPER_HOME=/usr/local/zookeeper-3.4.9
HBASE_HOME=/usr/local/hbase-0.96.2-hadoop2
PATH=$HADOOP_HOME/bin:$HADOOP_HOME/sbin:$ZOOKEEPER_HOME/bin:$HBASE_HOME/bin:$PATH
export HADOOP_HOME ZOOKEEPER_HOME PATH HBASE_HOME
3、拷贝Hadoop的hdfs-site.xml和core-site.xml文件
cp /usr/local/hadoop-2.5.2/etc/hadoop/core-site.xml /usr/local/hbase-0.96.2-hadoop2/conf/
cp /usr/local/hadoop-2.5.2/etc/hadoop/hdfs-site.xml /usr/local/hbase-0.96.2-hadoop2/conf/
4、修改hbase-env.sh
4.1 修改JAVE_HOME
export JAVA_HOME=/usr/local/src/jdk1.7.0_80修改HBASE_MANAGES_ZK为false来告诉HBase使用外部的Zookeeper
export HBASE_MANAGES_ZK=false5、修改hbase-site.xml
修改后的文件如下:
<?xml version="1.0"?>
<?xml-stylesheet type="text/xsl" href="configuration.xsl"?>
<!--
/**
 *
 * Licensed to the Apache Software Foundation (ASF) under one
 * or more contributor license agreements.  See the NOTICE file
 * distributed with this work for additional information
 * regarding copyright ownership.  The ASF licenses this file
 * to you under the Apache License, Version 2.0 (the
 * "License"); you may not use this file except in compliance
 * with the License.  You may obtain a copy of the License at
 *
 *     http://www.apache.org/licenses/LICENSE-2.0
 *
 * Unless required by applicable law or agreed to in writing, software
 * distributed under the License is distributed on an "AS IS" BASIS,
 * WITHOUT WARRANTIES OR CONDITIONS OF ANY KIND, either express or implied.
 * See the License for the specific language governing permissions and
 * limitations under the License.
 */
-->
<configuration>
	<property>
			<name>hbase.rootdir</name>
			<value>hdfs://liuyazhuang121:9000/hbase</value>
	</property>
	<property>
			<name>hbase.cluster.distributed</name>
			<value>false</value>
	</property>
	<property>
			<name>hbase.zookeeper.quorum</name>
			<value>liuyazhuang121:2182</value>
	</property>
</configuration>
6、修改regionservers
修改regionservers文件,将localhost修改成liuyazhuang121如下:
liuyazhuang1217、启动HBase
start-hbase.sh8、查看本机启动的Java进程
[root@liuyazhuang121 conf]# jps
6008 QuorumPeerMain
2445 NameNode
2539 DataNode
7289 Jps
6153 HMaster
2723 SecondaryNameNode
2993 NodeManager
2893 ResourceManager
[root@liuyazhuang121 conf]#
9、查看HBase管理页面
在浏览器中输入http://192.168.209.121:60010查看HBase管理页面如下:
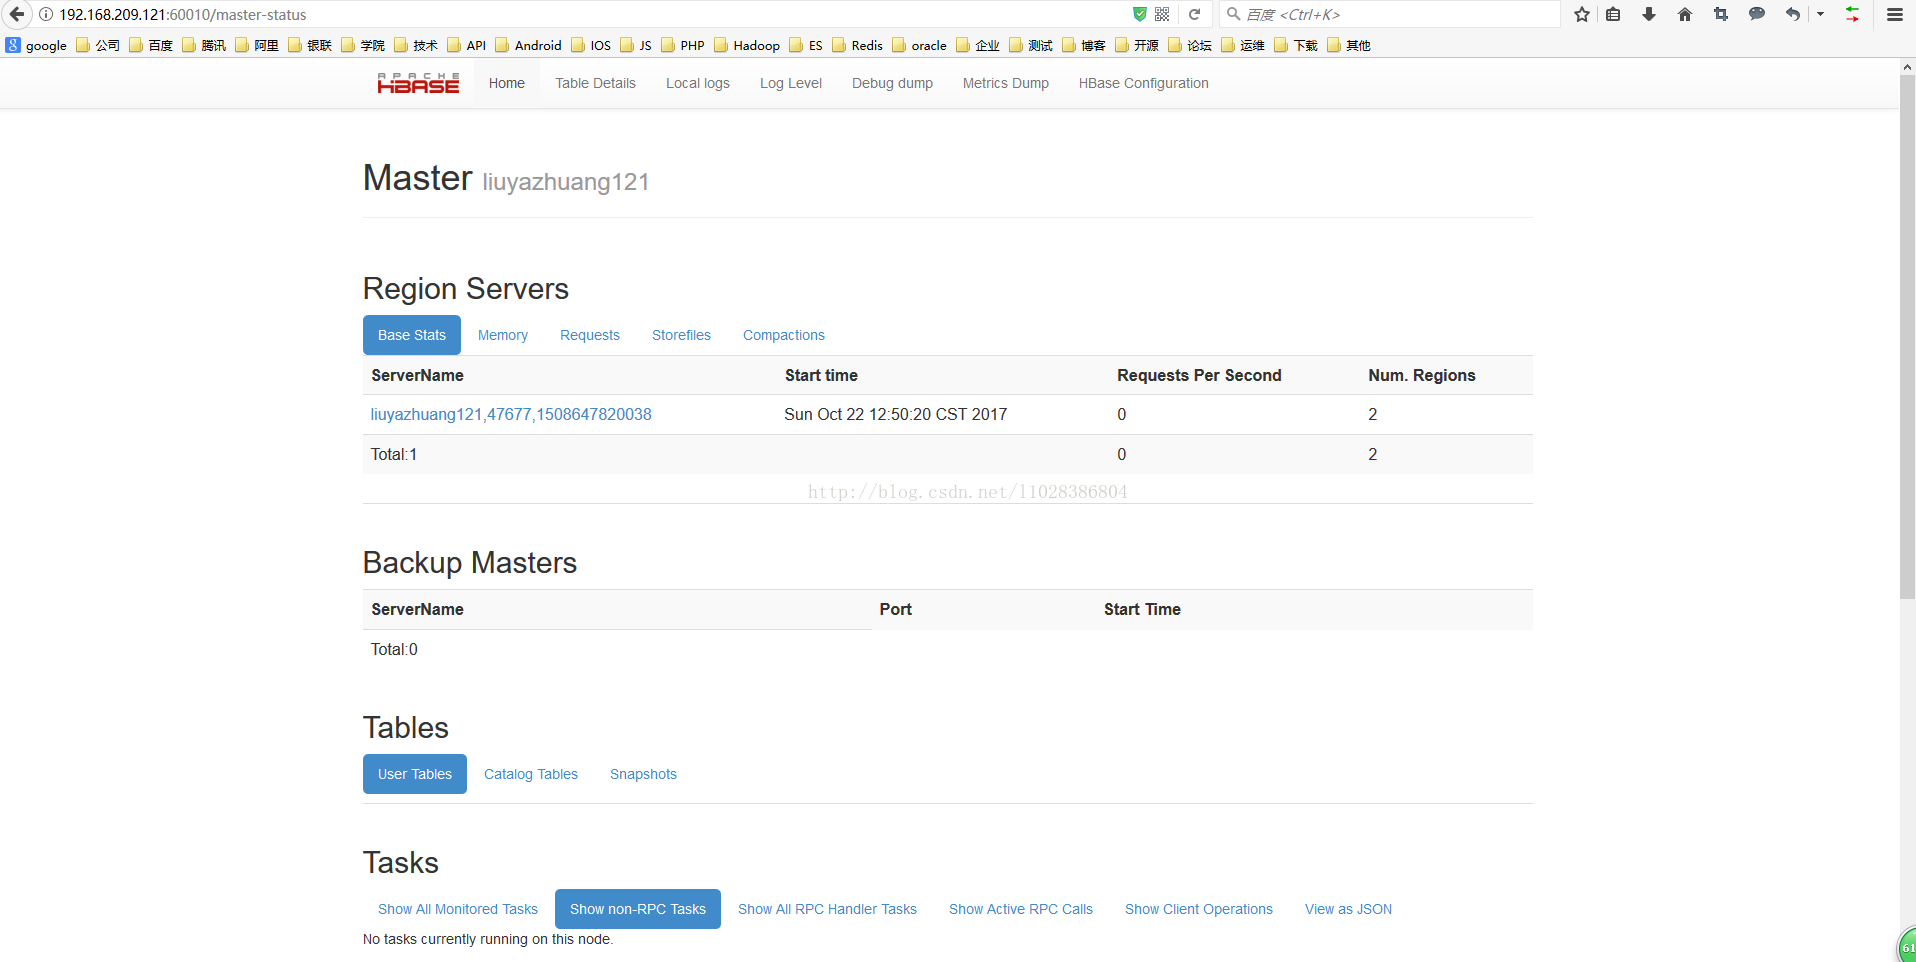
至此,单机版HBase安装配置成功


 283
283


 被折叠的 条评论
为什么被折叠?
被折叠的 条评论
为什么被折叠?
 到【灌水乐园】发言


