


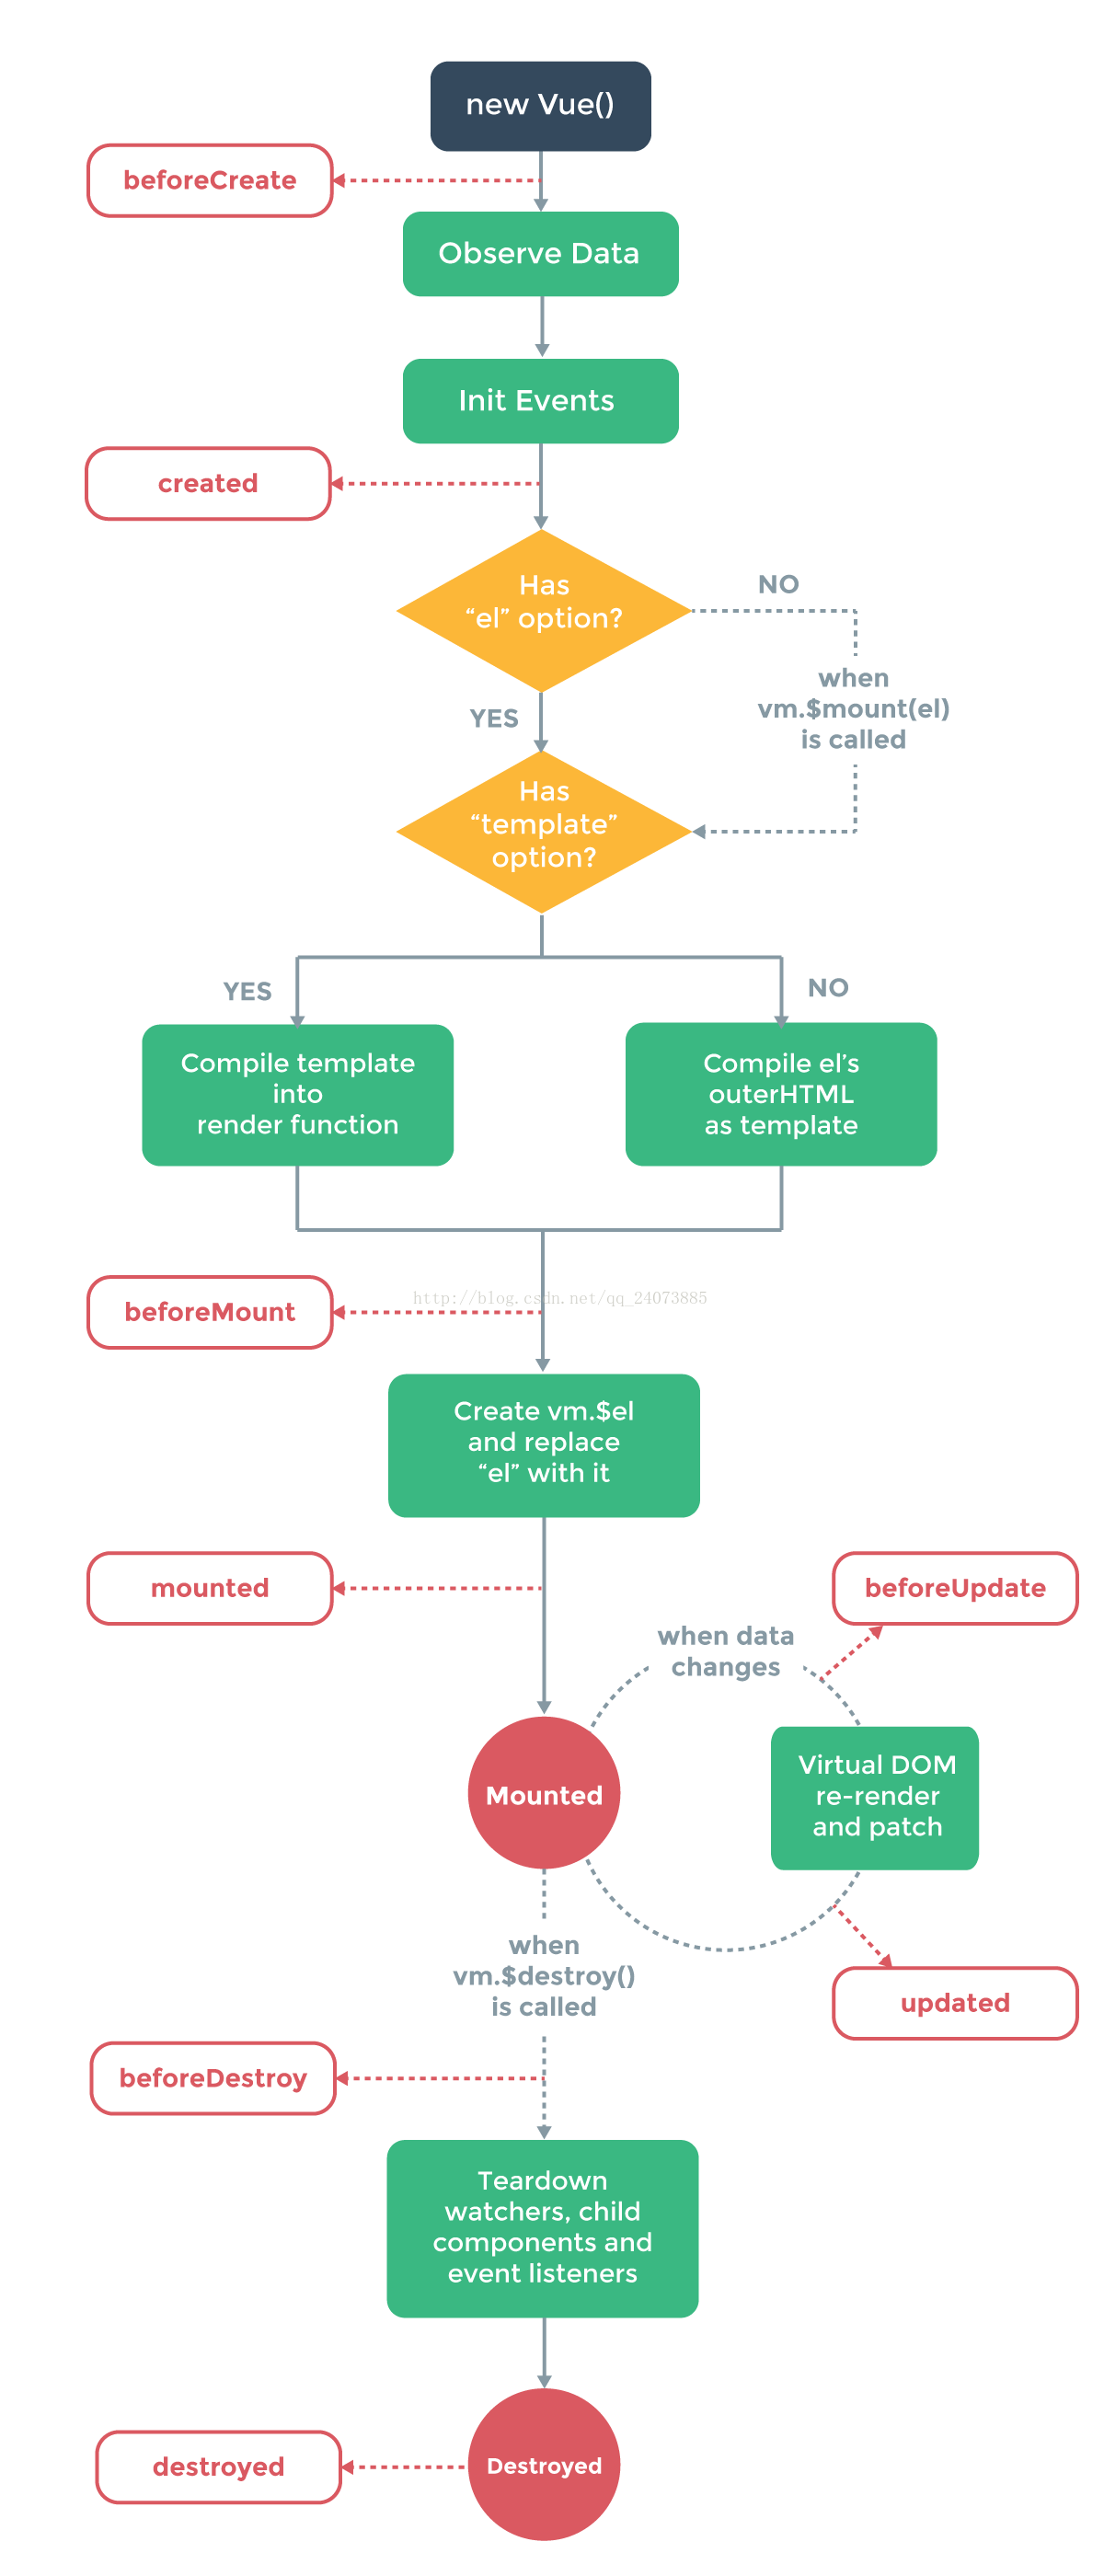
借用下面这张图先简单了解Vue的整个生命周期
<div id="app">
    <child></child>
    <button @click="msg++">increase</button>
    <h2>{{msg}}</h2>
    <button @click="destroy">destroy</button>
</div>
一、创建与挂载(created and mounted)
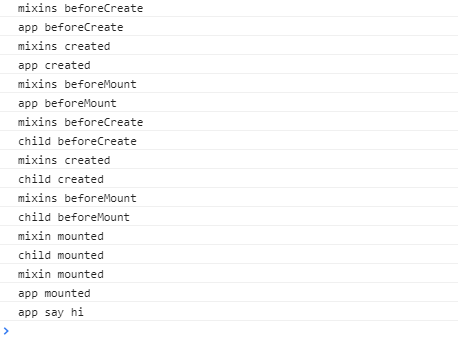
当一个父组件中加载一个子组件,且父组件和子组件中同时调用mixin函数时,整个生命周期的顺序为:
1、创建父组件
beforeCreate:父组件中的mixins--父组件--子组件中的mixins--子组件
created:父组件中的mixins--父组件
2、挂载父组件之前
beforeMount:父组件中的mixins--父组件
1) 创建子组件
beforeCreate:子组件中的mixins--子组件
created:子组件中的mixins--子组件
2) 挂载子组件之前
beforeMount:子组件中的mixins--子组件
3、挂载子组件
mounted:子组件中的mixins--子组件
4、挂载父组件
mounted:父组件中的mixins--父组件
总的来说,从创建到挂载,是从外到内,再从内到外,且mixins的钩子函数总是在当前组件之前执行
let mixin={
    beforeCreate(){
        console.log('mixins beforeCreate')
    },
    created(){
        console.log('mixins created')
    },
    beforeMount(){
        console.log('mixins beforeMount')
    },
    mounted(){
        console.log('mixins mounted')
    },
    beforeUpdate: function(){
        console.log('mixins beforeUpdate')
    },
    updated: function(){
        console.log('mixins updated')
    },
    beforeDestroy: function(){
        console.log('mixins beforeDestroy')
    },
    destroyed: function(){
        console.log('mixins destroyed')
    },
    data(){
        return{
            msg:1
        }
    },
    methods:{
        foo(){
            console.log('mixin foo()'+this.msg++)
        }
    }
}


var child=Vue.component('child',{
    template:`<h1 @click="foo">child component+"--"+{{msg}}</h1>`,
    mixins:[mixin],
    beforeCreate(){
        console.log('child beforeCreate')
    },
    created(){
        console.log('child created')
    },
    beforeMount(){
        console.log('child beforeMount')
    },
    mounted(){
        console.log('child mounted')
    },
    beforeUpdate: function(){
        console.log('child beforeUpdate')
    },
    updated: function(){
        console.log('child updated')
    },
    beforeDestroy: function(){
        console.log('child beforeDestroy')
    },
    destroyed: function(){
        console.log('child destroyed')
    },
    data(){
        return{
            msg: 2
        }
    },
    methods:{
        foo(){
            console.log('Child foo()'+this.msg++)
        }
    }
})


let vm=new Vue({
    el:"#app",
    data:{
        msg: 3
    },
    mixins:[mixin],
    methods:{
        foo(){
            console.log('Parent foo()'+this.msg++)
        },
        destroy(){
            vm.$destroy();
        }
    },
    beforeCreate: function(){
        console.log('app beforeCreate')
    },
    created: function(){
        console.log('app created')
    },
    beforeMount: function(){
        console.log('app beforeMount')
    },
    mounted: function(){
        console.log('app mounted')
        console.log('app say hi')
    },
    beforeUpdate: function(){
        console.log('app beforeUpdate')
    },
    updated: function(){
        console.log('app updated')
    },
    beforeDestroy: function(){
        console.log('app beforeDestroy')
    },
    destroyed: function(){
        console.log('app destroyed')
    }
})
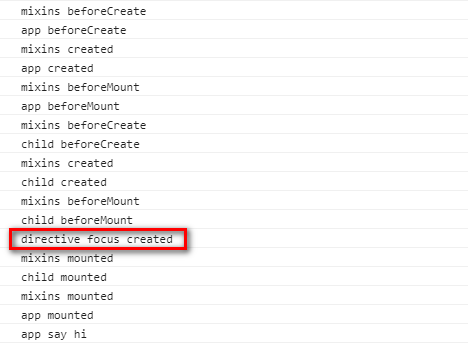
如果引入自定义指令:
Vue.directive('init',{
    bind:function(el){
        console.log('directive init created')
    }
})
<child v-init></child>
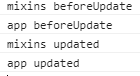
二、数据更新(updated)
只有在标签上绑定了data时,data发生改变,才会触发updated钩子函数。如果只是在控制台改变data,而没有反馈到视图上,则无法触发。
当data中的数据改变时,不会触发子组件中的updated函数。触发的顺序仍然是mixins先于组件
单击increase按钮,控制台的数据显示如下
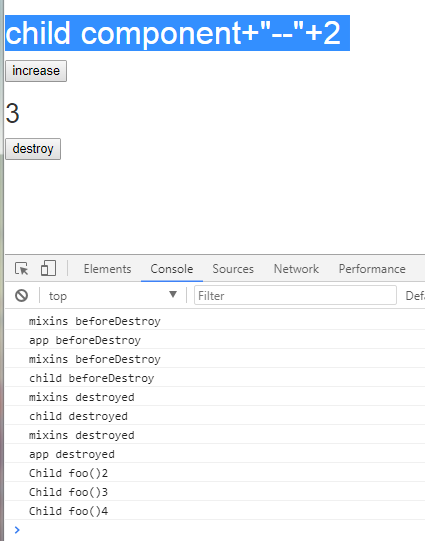
三、组件销毁(destroy)
组件销毁的顺序跟创建的顺序类似,还是尊重“从外到内,再从内到外,mixins先于组件”这样的原则。但是,小编尝试过,绑定在子组件中的事件仍然可以调用(这点我也很奇怪)。
总结:生命周期遵从“从外到内,再从内到外,mixins先于组件”的原则。
如有缺漏,请指正!


 344
344

 被折叠的 条评论
为什么被折叠?
被折叠的 条评论
为什么被折叠?
 到【灌水乐园】发言


