


网上参考了很多例子,都没有关于vue+php实现前后端的例子,后来自己总结了一个,希望大家批评指正。
vue实现动态数据的方式主要有vue-resource和axios,但是从Vue2.0开始,已经不对vue-resource进行更新,因此,本文主要利用axios进行操作。
1、安装axios
npm install axios --save
2、在Vue-cli的components中编写组件
<template>
  <div class="count">
    <table cellspacing="0" border="1px">
      <tr>
        <th>id</th>
        <th>name</th>
        <th>age</th>
        <th>intro</th>
      </tr>
      <tr v-for="user in users">
        <td>{{user.id}}</td>
        <td>{{user.name}}</td>
        <td>{{user.age}}</td>
        <td>{{user.intro}}</td>
      </tr>
    </table>
  </div>
</template>

<script>
import Vuex from "vuex";
import axios from "axios";

  export default{
    name:'count',
    data(){
      return{
        users: []//预先创建一个数组,用于存放请求得到的数据
      }
    },
    created(){ //此处用created相当于对前端页面数据进行初始化
      axios.get("http://xxxx/axios.php").then(res=>{  //这里是ES6的写法,get请求的地址,是小编自己在网站上存放的php文件,后面将介绍其编写,也可以自己定义
        this.users=res.data;//获取数据
        console.log('success');
        console.log(this.users);
      })
    }
  }
</script>

<style scoped>
  table{
    width:600px;
    height:300px;
    margin:100px
  }
</style>
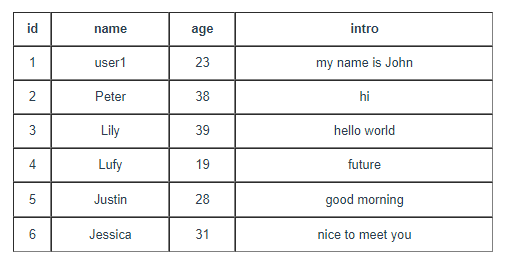
本文创建的数据表信息主要由id、user、name、intro几个
可以根据自己的需求,自己创建。具体的创建方式,网上很多,此处不再详细描述。创建的数据如下:
4、需要请求的php
<?php
	header("Access-Control-Allow-Origin: *");//这个必写,否则报错
	$mysqli=new mysqli('localhost','root','passwd','table');//根据自己的数据库填写

	$sql="select * from users";
	$res=$mysqli->query($sql);

	$arr=array();
	while ($row=$res->fetch_assoc()) {
		$arr[]=$row;
	}
	$res->free();
	//关闭连接
	$mysqli->close();

	echo(json_encode($arr));//这里用echo而不是return

?>


 6697
6697

 被折叠的 条评论
为什么被折叠?
被折叠的 条评论
为什么被折叠?
 到【灌水乐园】发言


