


前言:一晃距离上次搭android环境已经4个月了,还没怎么学习android,买的android书看了遍目录,看了最基本的控件以及都能实现哪些功能(而且只是看看,没练),androidbus上100多天的签到记录(只是为了下载东西时不缺下载分的未雨绸缪),仅此而已。当初想玩android时,只是为了实现一个小小的需求,通过手机关闭电脑(每次睡前看会手机,但手机连着电脑开启的共享wifi,玩完手机还得起来关电脑,真麻烦,当时也未找到遥控关机的相关app)。周五发现360出了软件版的wifi,下了个360wifi,发现这款360wifi配合其app竟然有遥控关机这个功能,看来这种需求的人不少。自己等自己的这个软件等到花都谢了,当时想着通过android调用WCF服务,然后WCF服务里实现关机的逻辑。周五晚上临时决定周末搞定android调用Webservice,经过周五周六两晚加周六一天,初步完成,过程是艰辛的,特此记录。
例子准备工作:
a.ksoap2的下载, 下载地址,刚看了看最新的版本是3.3.0,我例子中用的2.5.4版本的;b.搜索免费的webservice,我用的是 webxml上的,选了天气和手机归属地作为示例;
例子中的关键技术:
a.基本的控件以及布局
涉及ScrollView、TableLayout、Button、TextView、EditText的用法。其中EditText有个hint属性,可以在为空时显示提示信息,另外注意的是,在最新的版本中xmlns只需要一次声明否则会报诸如“Unexpected namespace prefix "xmlns" found for tag LinearLayout”的错,此例中只在ScrollView声明了一次。b.ksoap2调用webservice
首先从webservice上获得一些必要的信息,包括NameSpace、SoapAction、url,url就是webservice的url,然后在浏览器中打开webservice,点开方法,如下图所示找出NameSpace、SoapAction

调用webservice的一般步骤如下:
SoapObject soapObject = new SoapObject(nameSpaceWeather, methodWeather);
//给调用参数赋值
soapObject.addProperty("theCityCode", "1960");
soapObject.addProperty("userId", "");
//设置一些基本参数
SoapSerializationEnvelope envelope = new SoapSerializationEnvelope(
				SoapEnvelope.VER11);
envelope.bodyOut = soapObject;
envelope.dotNet = true;
envelope.setOutputSoapObject(soapObject);
HttpTransportSE httpTransportSE = new HttpTransportSE(urlWeather);
try{
	//实际调用webservice的操作
	httpTransportSE.call(soapActionWeather, envelope);
}
catch (Exception e){
	e.printStackTrace();
}
//获得调用的结果
SoapObject object = (SoapObject) envelope.bodyIn;
txtWeather = object.getProperty(0).toString();
c.线程知识
android 4.0之后的版本不可以在主线程中进行网络操作,故要调用webservice需要新开线程;public void onClick(View v) {
new Thread(new Runnable() {
public void run() {
//这边是具体的操作
}
}).start();
}d.跨线程修改更新UI数据;
android禁止跨线程修改ui,如果线程是在oncreate中创建则子线程中可以直接修改ui,但如果在按钮的事件中新建的子线程执行更新ui则会出现异常;本例子是在按钮的事件中新建的子线程,解决方案就是在子线程执行完之后将更新ui的操作交给主线程;先定义如下Handler handlerWeather = new Handler() {
public void handleMessage(Message msg) {
//这边是更新UI的操作
weather.setText(txtWeather);
}
};e.弹框提示以及日志记录;
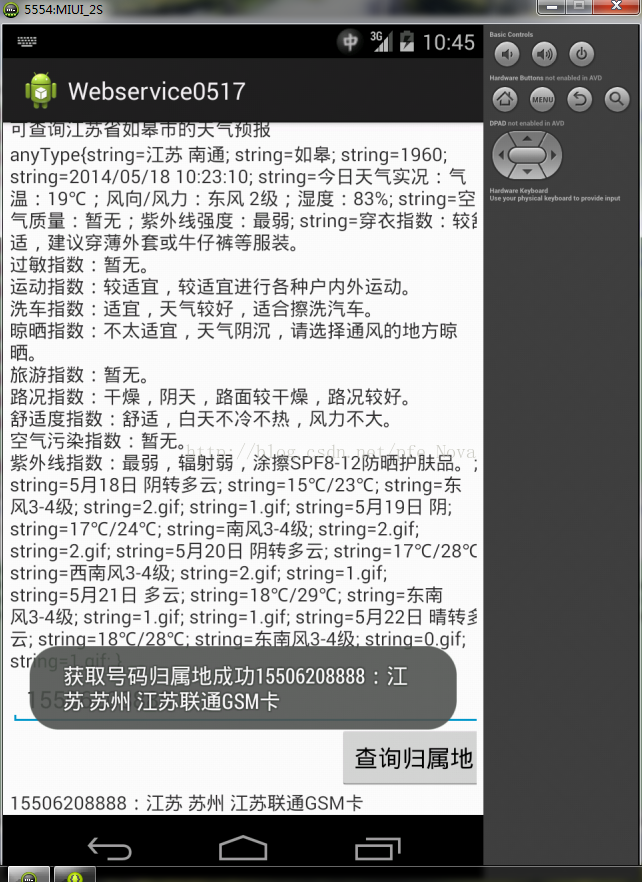
执行某个操作之后如果有个提示,那就更好了,比如网络操作如果没提示,到底是执行完了没结果还是没执行或者报错了,有提示那就一目了然了。本示例中采用浮出提示,然后自动消失。代码:
Toast.makeText(MainActivity.this, "获取天气成功", Toast.LENGTH_LONG).show();日志记录有助于调试,方便找出异常的地点以及原因。本示例采用:
System.out.println("××0××更新号码归属地数据,归属地为:"+txtAddress);然后在LogCat中查看,下图是我运行的日志截图:

搭建例子完整过程及代码
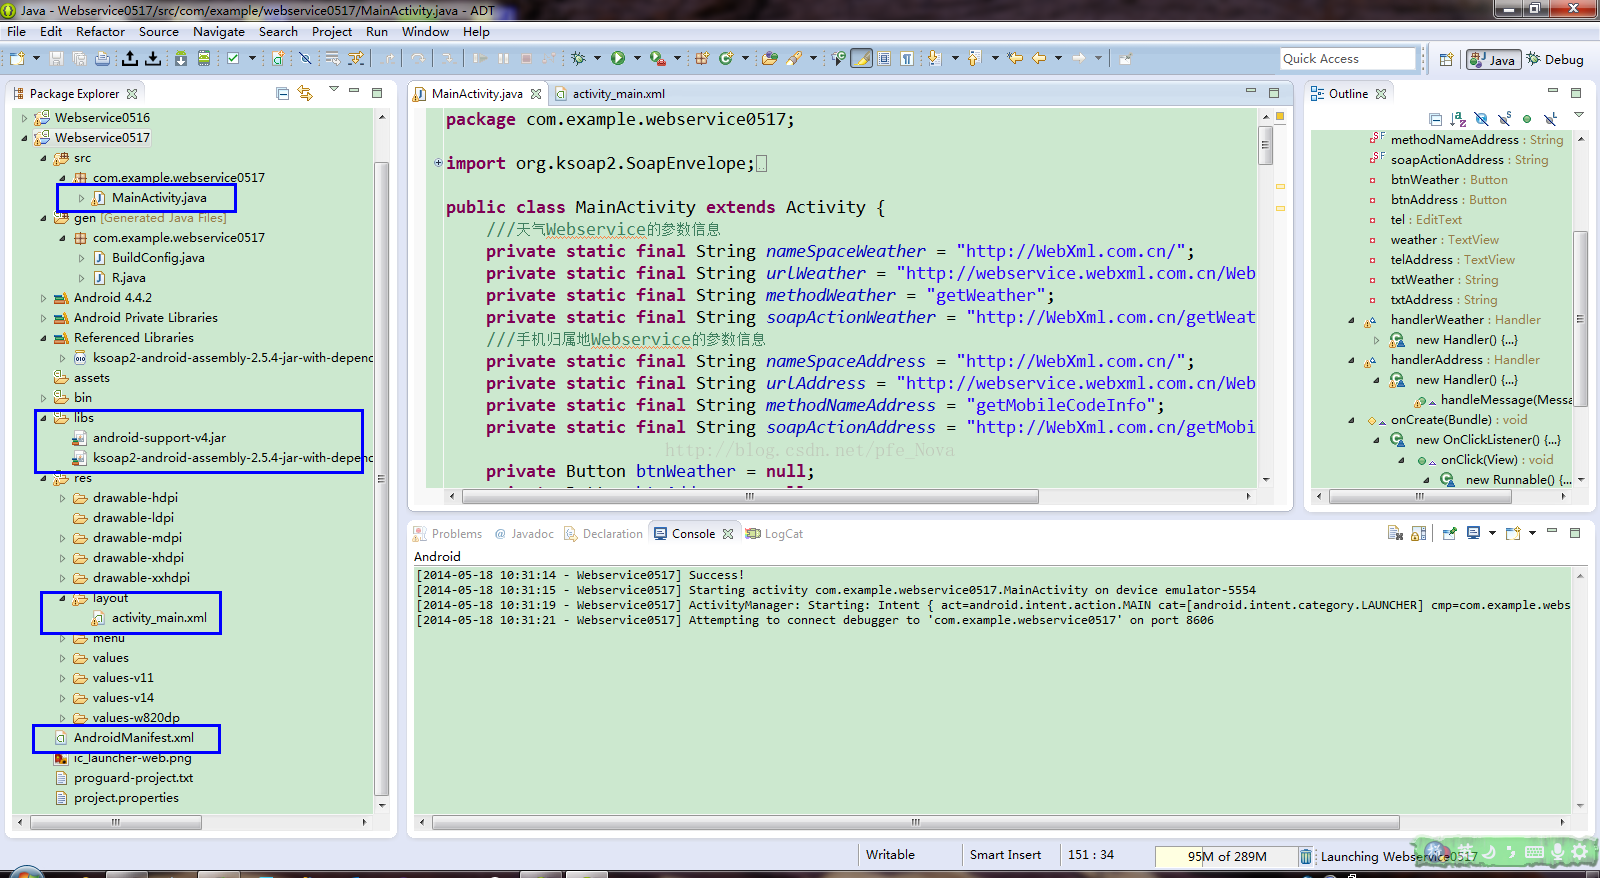
a.新建android项目
本例最低版本设置的是4.1(因为最新的编译器当最低版本低于4.1时会自动增加一个诸如appcompat_v7_2兼容包,删掉就会出错,看着怪不舒服的,故最低选用的4.1),将下载下来的ksoap2包在解决方案上复制到libs中,然后右键解决方案-->Build Path-->Add External Archives…,选择libs下的那个ksoap2包。开始我没有在解决方案中复制到libs,直接添加的,然后写代码时一直报找不到包的错误。
b.项目的整体布局如下:
c.页面设计代码activity_main.xml
<?xml version="1.0" encoding="utf-8"?>
<ScrollView
    xmlns:android="http://schemas.android.com/apk/res/android"
    android:id="@+id/myscroll"
    android:layout_width="fill_parent"
    android:layout_height="fill_parent">
<TableLayout
    android:orientation="vertical"
    android:layout_width="fill_parent"
    android:layout_height="wrap_content"
    android:paddingTop="5dip"
    android:paddingLeft="5dip"
    android:paddingRight="5dip">
      <TableRow>
        <Button android:id="@+id/btnSearchWeather"
	    	android:layout_width="fill_parent"
	    	android:layout_height="wrap_content"
	    	android:text="查询如皋天气"/>
   	 </TableRow>
      <TableRow>
	      <TextView
			    android:layout_width="fill_parent"
			    android:layout_height="wrap_content"
			    android:text="可查询江苏省如皋市的天气预报"/>
    </TableRow>
    <TableRow>
    	<TextView android:id="@+id/weatherInfo"
	    	android:layout_width="wrap_content"
	    	android:layout_height="wrap_content"/>
    </TableRow>
    <TableRow>
    	<EditText android:id="@+id/telNo"
	    	android:layout_width="fill_parent"
	    	android:layout_height="wrap_content"
	    	android:hint="请输入手机号"/>
    </TableRow>
     <TableRow>
    	<Button android:id="@+id/btnSearchAddress"
	    	android:layout_width="fill_parent"
	    	android:layout_height="wrap_content"
	    	android:layout_gravity="right"
	    	android:text="查询归属地"/>
    	</TableRow>
    <TableRow>
		<TextView android:id="@+id/telAddress"
		    android:layout_width="fill_parent"
		    android:layout_height="wrap_content"/>
    </TableRow>

</TableLayout>
</ScrollView>
d.后台代码MainActivity.java
package com.example.webservice0517;

import org.ksoap2.SoapEnvelope;
import org.ksoap2.serialization.SoapObject;
import org.ksoap2.serialization.SoapSerializationEnvelope;
import org.ksoap2.transport.HttpTransportSE;

import android.app.Activity;
import android.os.Bundle;
import android.os.Handler;
import android.os.Message;
import android.view.View;
import android.widget.Button;
import android.widget.EditText;
import android.widget.TextView;
import android.widget.Toast;

public class MainActivity extends Activity {
	///天气Webservice的参数信息
	static final String nameSpaceWeather = "http://WebXml.com.cn/";
	static final String urlWeather
			= "http://webservice.webxml.com.cn/WebServices/WeatherWS.asmx";
	static final String methodWeather = "getWeather";
	static final String soapActionWeather = "http://WebXml.com.cn/getWeather";
	///手机归属地Webservice的参数信息
	static final String nameSpaceAddress = "http://WebXml.com.cn/";
	static final String urlAddress
			= "http://webservice.webxml.com.cn/WebServices/MobileCodeWS.asmx";
	static final String methodNameAddress = "getMobileCodeInfo";
	static final String soapActionAddress
			= "http://WebXml.com.cn/getMobileCodeInfo";

	private Button btnWeather = null;
	private Button btnAddress = null;
	private EditText tel = null;
	private TextView weather = null;
	private TextView telAddress = null;

	private String txtWeather = "";
	private String txtAddress = "";

	Handler handlerWeather = new Handler() {
		public void handleMessage(Message msg) {
			System.out.println("××0××更新天气数据,天气为:"+txtWeather);
			weather.setText(txtWeather);
			Toast.makeText(MainActivity.this, "获取天气成功", Toast.LENGTH_LONG)
					.show();
		}
	};
	Handler handlerAddress = new Handler() {
		public void handleMessage(Message msg) {
			System.out.println("××0××更新号码归属地数据,归属地为:"+txtAddress);
			telAddress.setText(txtAddress);
			Toast.makeText(MainActivity.this, "获取号码归属地成功"+txtAddress, Toast.LENGTH_LONG)
					.show();
		}
	};

	@Override
	protected void onCreate(Bundle savedInstanceState) {
		super.onCreate(savedInstanceState);
		setContentView(R.layout.activity_main);
		btnWeather = (Button) this.findViewById(R.id.btnSearchWeather);
		btnAddress = (Button) this.findViewById(R.id.btnSearchAddress);
		weather = (TextView) this.findViewById(R.id.weatherInfo);
		telAddress = (TextView) this.findViewById(R.id.telAddress);
		tel = (EditText) this.findViewById(R.id.telNo);

		btnAddress.setOnClickListener(new Button.OnClickListener() {
			@Override
			public void onClick(View v) {
				new Thread(new Runnable() {
					public void run() {
						getTelAddress();
					}
				}).start();

			}
		});

		btnWeather.setOnClickListener(new Button.OnClickListener() {
			@Override
			public void onClick(View v) {
				new Thread(new Runnable() {
					public void run() {
						getWeather();
					}
				}).start();

			}
		});
	}
	public void getWeather()
	{
		System.out.println("××1××进入getWeather方法");
		SoapObject soapObject = new SoapObject(nameSpaceWeather, methodWeather);
		///这边1960是江苏如皋的地区码,这个也是通过这个webservice的方法查的
		soapObject.addProperty("theCityCode", "1960");
		///免费用户userid为空
		soapObject.addProperty("userId", "");
		SoapSerializationEnvelope envelope = new SoapSerializationEnvelope(
				SoapEnvelope.VER11);
		envelope.bodyOut = soapObject;
		envelope.dotNet = true;
		envelope.setOutputSoapObject(soapObject);
		HttpTransportSE httpTransportSE = new HttpTransportSE(urlWeather);
		System.out.println("××2××基本服务设置完毕,下面开始调用服务");
		try
		{
			httpTransportSE.call(soapActionWeather, envelope);
			System.out.println("××3××调用webservice服务成功");
		}
		catch (Exception e)
		{
			e.printStackTrace();
			System.out.println("××4××调用webservice服务失败");
		}

		SoapObject object = (SoapObject) envelope.bodyIn;
		System.out.println("××5××获得服务数据成功");
		txtWeather = object.getProperty(0).toString();
		System.out.println("××6××解析服务数据成功,数据为:"+txtWeather);
		System.out.println("××7××向主线程发送消息,显示天气信息");
		handlerWeather.sendEmptyMessage(0);
		System.out.println("××8××向主线程发送消息成功,getWeather函数执行完毕");
	}
	public void getTelAddress()
	{
		System.out.println("××1××进入getTelAddress方法");
		SoapObject soapObject
				= new SoapObject(nameSpaceAddress, methodNameAddress);
		///这边理论上要做输入验证的,例子图省事没做输入验证验证
		soapObject.addProperty("mobileCode", tel.getText().toString());
		soapObject.addProperty("userId", "");
		SoapSerializationEnvelope envelope = new SoapSerializationEnvelope(
				SoapEnvelope.VER11);
		envelope.bodyOut = soapObject;
		envelope.dotNet = true;
		envelope.setOutputSoapObject(soapObject);
		HttpTransportSE httpTransportSE = new HttpTransportSE(urlAddress);
		System.out.println("××2××基本服务设置完毕,下面开始调用服务");
		try
		{
			httpTransportSE.call(soapActionAddress, envelope);
			System.out.println("××3××调用webservice服务成功");
		}
		catch (Exception e)
		{
			e.printStackTrace();
			System.out.println("××4××调用webservice服务失败");
		}

		SoapObject object = (SoapObject) envelope.bodyIn;
		System.out.println("××5××获得服务数据成功");
		txtAddress = object.getProperty(0).toString();
		System.out.println("××6××解析服务数据成功,数据为:"+txtAddress);
		System.out.println("××7××向主线程发送消息,显示号码归属地");
		handlerAddress.sendEmptyMessage(0);
		System.out.println("××8××向主线程发送消息成功,getTelAddress函数执行完毕");
	}
}
e.增加访问网络的权限
AndroidManifest.xml中加权限:<uses-permission android:name="android.permission.INTERNET" />
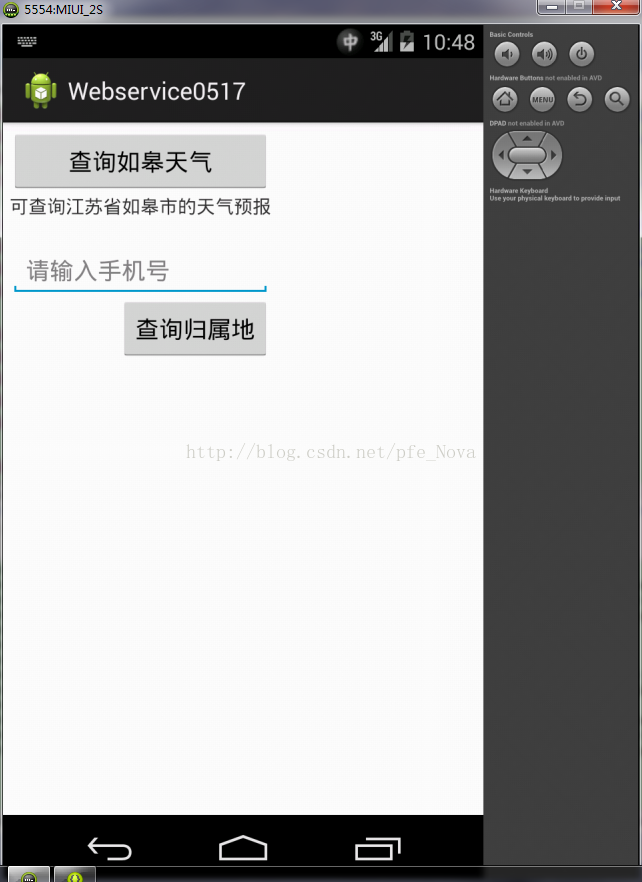
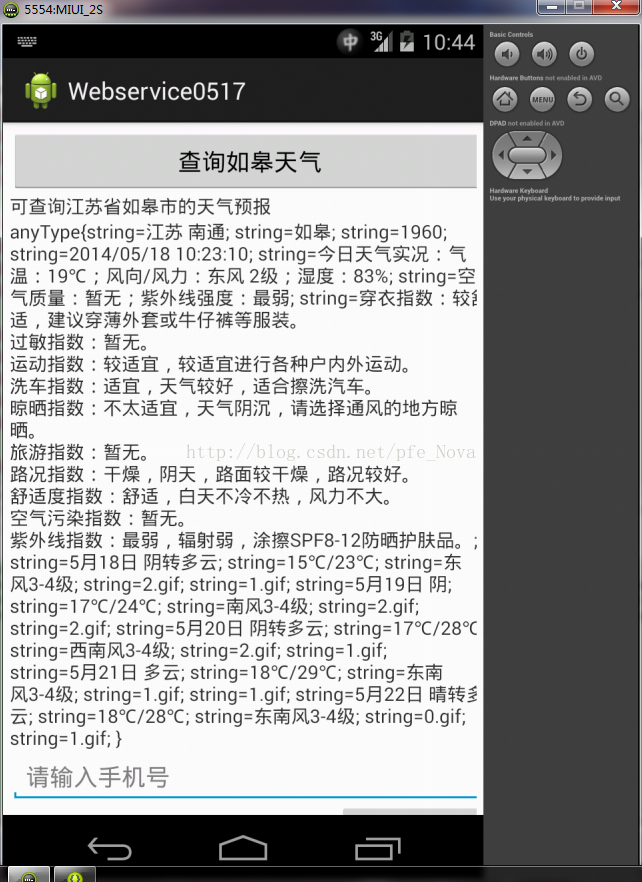
f.运行的截图:
后记:
在写例子进度缓慢主要的两个原因:
a..android版本的升级变化导致很多前人原有的代码以及书的示例代码不能直接运行;b..本人对android了解太少了,没实际写过android的代码,整个过程犯的最傻的一个问题是Button控件写成ButtonView(没有动手实际写过代码,与Button是继承自TextView混了);
写例子时还碰到的问题以及一些其他建议:
a.页面上有六个TableRow,为了布局更合理,我把下面的三个移到上面,然后就一直报加载失败,没法在模拟器上运行,报错截图如下:
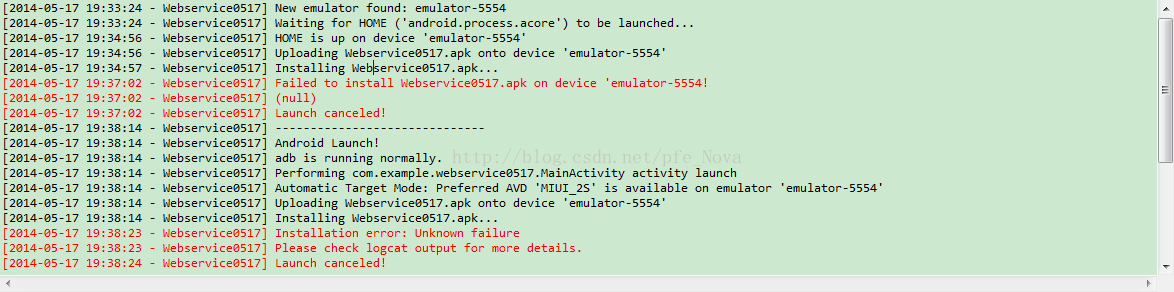
详细报错报的cast button失败,没找到原因,关闭再开,重启电脑都没效果,再恢复到下面就一切正常了,不知道为什么,不知是不是TableRow的什么设置没设置好还是环境有问题。
b.几个非常有用的快捷键
Ctrl+/可以快速提示;
Ctrl+Shift+F可以快速格式化代码;
Ctrl+Shift+O自动导入所缺的包;
Ctrl+M可以切换标准模式和全代码模式;
调整代码的大小,环境默认的大小是10,太小了,看的眼睛都累,注释也看不清,窗口点击鼠标右键选择最后一个preference(偏好)-->General-->Appearance在右边选择Java-->Java Editor Text Font-->Edit--选择14这样java代码字体变大了,xml的还没变,xml的跟上面设置类似在Basic-->Text Editor Block Selection Font里设置;
页面布局变化,没法复原成原有的布局,可以点击Windows-->Reset Perspective重新复原。
例子写完感觉也还很简单,对自己是一个记录,希望也能对读者有些帮助,欢迎阅读、讨论、转载,转载请保留原文链接。
2015年1月4日更新:关于源码手机号码查询正常,但是天气预报一直调用不成功的问题,经过调查是天气webservice的问题,天气webservice对免费用户进行了限制,如果是开发者调用则直接重定向到新浪网站(目前是重定向到http://sina.cn/,不知道以后还会有什么花样,说不定以后手机webservice也会有问题),所以不必纠结,掌握原理即可。


 1617
1617

 被折叠的 条评论
为什么被折叠?
被折叠的 条评论
为什么被折叠?
 到【灌水乐园】发言


