


首先,请允许我絮叨一下,我算是外行转到码农的一个例子了。也是因为接触IOS,让我在互联网的世界里面更加疯狂,所以我看了很多大牛的视频和著作。站在巨人的肩膀上我也想开始总结一下,关于IOS的开发的点点滴滴,仅供各位参考。废话不多说,那就开讲。
在UIView里面添加UIlabel主要有两种大的方法。
第一种:控件添加型 直接在Xcode的右下角直接拖UIlabel进入storyboard,然后在.h文件设置@property(nonamtic ,weak) IBoutlett UIlabel *mylabel声明, 右面属性框里面,任意设置属性,建立连接,然后实现文件.m文件里面应用,这种方式因为在后期更改属性的时候相对比较不是那么方便了,所以各位同学,今天起,我们一起就把这种臃肿的编程方式从脑海里忘记吧,随我一起用代码完成所有的操作。
第二种:代码添加型,这个正是我最最推荐的方式了,好吧,废话不多说,开整。
第一步:如何将控件在父类View里面显示
在.m 文件下面添加下面的话
- (void)viewDidLoad {
//设置UIlabel的位置
CGRect rect =CGRectMake(50, 50, self.view.frame.size.width/2, self.view.frame.size.height/2);
UILabel *mylabel =[[UILabel alloc]initWithFrame:rect];
// 设置UILabel文字
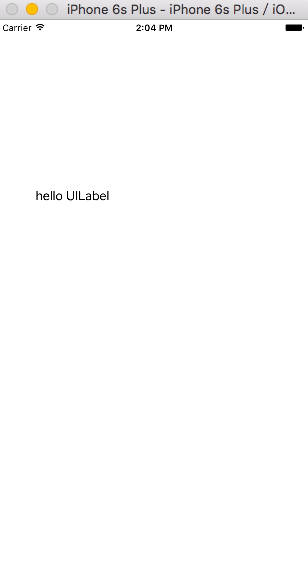
mylabel.text = @"hello UILabel";
//添加UIlabel到父类view内 这句话很重要,要是没有的话是没有的话,就没有办法显示了
[self.view addSubview:mylabel];
[super viewDidLoad];
}
运行结果为:
第二步 设置属性
- (void)viewDidLoad {
//设置UIlabel的位置
// CGRect rect = CGRectMake(0, 0, self.view.frame.size.width, self.view.frame.size.height);
//
// UILabel *label = [[UILabel alloc] initWithFrame:rect];
CGRect rect =CGRectMake(50, 50, self.view.frame.size.width/2, self.view.frame.size.height/2);
UILabel *mylabel =[[UILabel alloc]initWithFrame:rect];
// UILabel *mylabel =[[UILabel alloc] initWithFrame:CGRectMake(0, 0, self.view.frame.size.width/2, self.view.frame.size.height/2)];
// 设置UILabel文字
mylabel.text = @"hello UILabel";
// 设置Text为粗体
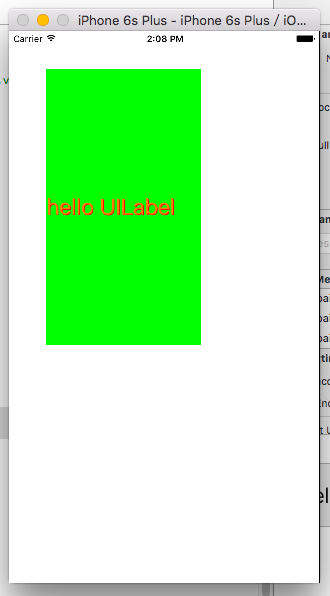
mylabel.font = [UIFont systemFontOfSize:30];
// 设置字体颜色
mylabel.textColor = [UIColor blackColor];
// 设置背景色
mylabel.backgroundColor = [UIColor greenColor];
// 文字换行
mylabel.numberOfLines = 1;
//高亮显示
mylabel.highlighted = YES;
mylabel.highlightedTextColor = [UIColor orangeColor];
//设置阴影
mylabel.shadowColor = [UIColor redColor];
mylabel.shadowOffset = CGSizeMake(1.0,1.0);
//设置label中的文字是否可变,默认值是YES
mylabel.enabled = YES;
//添加UIlabel到父类view内
[self.view addSubview:mylabel];
[super viewDidLoad];
}
运行结果为
是不是很简单,但是为了UI设计也会有更多的功能,这样大家可以按住command键 点击UIlabel,便可以查看源代码,可以看更多的定义,如下:
//
// UILabel.h
// UIKit
//
// Copyright (c) 2006-2015 Apple Inc. All rights reserved.
//
#import <Foundation/Foundation.h>
#import <CoreGraphics/CoreGraphics.h>
#import <UIKit/UIView.h>
#import <UIKit/UIStringDrawing.h>
#import <UIKit/UIKitDefines.h>
NS_ASSUME_NONNULL_BEGIN
@class UIColor, UIFont;
NS_CLASS_AVAILABLE_IOS(2_0) @interface UILabel : UIView <NSCoding>
@property(nullable, nonatomic,copy) NSString *text; // default is nil
@property(null_resettable, nonatomic,strong) UIFont *font; // default is nil (system font 17 plain)
@property(null_resettable, nonatomic,strong) UIColor *textColor; // default is nil (text draws black)
@property(nullable, nonatomic,strong) UIColor *shadowColor; // default is nil (no shadow)
@property(nonatomic) CGSize shadowOffset; // default is CGSizeMake(0, -1) -- a top shadow
@property(nonatomic) NSTextAlignment textAlignment; // default is NSTextAlignmentLeft
@property(nonatomic) NSLineBreakMode lineBreakMode; // default is NSLineBreakByTruncatingTail. used for single and multiple lines of text
// the underlying attributed string drawn by the label, if set, the label ignores the properties above.
@property(nullable, nonatomic,copy) NSAttributedString *attributedText NS_AVAILABLE_IOS(6_0); // default is nil
// the 'highlight' property is used by subclasses for such things as pressed states. it's useful to make it part of the base class as a user property
@property(nullable, nonatomic,strong) UIColor *highlightedTextColor; // default is nil
@property(nonatomic,getter=isHighlighted) BOOL highlighted; // default is NO
@property(nonatomic,getter=isUserInteractionEnabled) BOOL userInteractionEnabled; // default is NO
@property(nonatomic,getter=isEnabled) BOOL enabled; // default is YES. changes how the label is drawn
// this determines the number of lines to draw and what to do when sizeToFit is called. default value is 1 (single line). A value of 0 means no limit
// if the height of the text reaches the # of lines or the height of the view is less than the # of lines allowed, the text will be
// truncated using the line break mode.
@property(nonatomic) NSInteger numberOfLines;
// these next 3 property allow the label to be autosized to fit a certain width by scaling the font size(s) by a scaling factor >= the minimum scaling factor
// and to specify how the text baseline moves when it needs to shrink the font.
@property(nonatomic) BOOL adjustsFontSizeToFitWidth; // default is NO
@property(nonatomic) UIBaselineAdjustment baselineAdjustment; // default is UIBaselineAdjustmentAlignBaselines
@property(nonatomic) CGFloat minimumScaleFactor NS_AVAILABLE_IOS(6_0); // default is 0.0
// Tightens inter-character spacing in attempt to fit lines wider than the available space if the line break mode is one of the truncation modes before starting to truncate.
// The maximum amount of tightening performed is determined by the system based on contexts such as font, line width, etc.
@property(nonatomic) BOOL allowsDefaultTighteningForTruncation NS_AVAILABLE_IOS(9_0); // default is NO
// override points. can adjust rect before calling super.
// label has default content mode of UIViewContentModeRedraw
- (CGRect)textRectForBounds:(CGRect)bounds limitedToNumberOfLines:(NSInteger)numberOfLines;
- (void)drawTextInRect:(CGRect)rect;
// Support for constraint-based layout (auto layout)
// If nonzero, this is used when determining -intrinsicContentSize for multiline labels
@property(nonatomic) CGFloat preferredMaxLayoutWidth NS_AVAILABLE_IOS(6_0);
// deprecated:
@property(nonatomic) CGFloat minimumFontSize NS_DEPRECATED_IOS(2_0, 6_0) __TVOS_PROHIBITED; // deprecated - use minimumScaleFactor. default is 0.0
// Non-functional. Hand tune by using NSKernAttributeName to affect tracking, or consider using the allowsDefaultTighteningForTruncation property.
@property(nonatomic) BOOL adjustsLetterSpacingToFitWidth NS_DEPRECATED_IOS(6_0,7_0) __TVOS_PROHIBITED;
@end
NS_ASSUME_NONNULL_END
这样就可以查用自己想要的效果,好了,这是第一步,下面会有下面的一步的。
下回再会了。喜欢我的,那就关注我吧,技术问题大家可以一起交流交流。


 305
305

 被折叠的 条评论
为什么被折叠?
被折叠的 条评论
为什么被折叠?
 到【灌水乐园】发言


