


前面介绍的方式是最基本,最原始的方法
当出现增删改查等多种操作时,使用不是很方便,因而开发中使用注解的方式开发(一个url对应一个controller)
基本步骤,不啰嗦
1.导入必备包
2.配置web.xml文件,所有的处理交由DispatcherServlet处理
3.spring-servlet.xml
此处采用注解开发
(1)它会自动扫描com.qzp.web下面的class文件;
(2)视图解析器负责视图的解析,和前缀后缀的添加
<?xml version="1.0" encoding="UTF-8"?>
<beans xmlns="http://www.springframework.org/schema/beans"
	xmlns:xsi="http://www.w3.org/2001/XMLSchema-instance"
	xmlns:context="http://www.springframework.org/schema/context"
	xmlns:mvc="http://www.springframework.org/schema/mvc"
	xsi:schemaLocation="http://www.springframework.org/schema/beans http://www.springframework.org/schema/beans/spring-beans.xsd
		http://www.springframework.org/schema/context http://www.springframework.org/schema/context/spring-context-3.1.xsd
		http://www.springframework.org/schema/mvc http://www.springframework.org/schema/mvc/spring-mvc-3.1.xsd">

	<mvc:annotation-driven/>
	<context:component-scan base-package="com.qzp.web"/>
	<bean class="org.springframework.web.servlet.view.InternalResourceViewResolver">
		<property name="prefix" value="/WEB-INF/jsp/"/>
		<property name="suffix" value=".jsp"/>
	</bean>
</beans>
4.Controller
几点说明(1)@controller声明了它是一个控制器;(2)@RequestMapping声明了此方法对应哪个url来处理;(3)最后return的是视图名称,他和视图解析器中的前缀和后缀一起来决定要跳转到的页面
package com.qzp.web;
import org.springframework.stereotype.Controller;
import org.springframework.web.bind.annotation.RequestMapping;
@Controller
public class MyFirstController {
//RequestMapping表示用哪个url来对应
@RequestMapping({"/hello","/"})
public String helloWorld(){
System.out.println("第一个spring mvc");
//这个就是视图的名称
return "hello";
}
//一个controller中可以映射多个
@RequestMapping("/hello")
public String welcome(){
return "welcome";
}
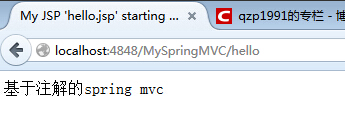
}5.hello.jsp 位于WEB-INF/jsp/之下
<body>
    基于注解的spring mvc
  </body>
当访问hello这个url值时,交由MyFirstController处理,MyFirstController会返回hello,交由视图解析器处理,添加前缀和后缀,最终返回结果给用户。


 1092
1092

 被折叠的 条评论
为什么被折叠?
被折叠的 条评论
为什么被折叠?
 到【灌水乐园】发言


