


本文转载至:http://xmodulo.com/install-run-chromium-os-vmware-player.html
该文介绍了如何下载 Chromium OS 的 VMware Player 镜像并安装的过程。
It is that holiday season! Google's Chromebook is one of the hottest gift ideas under $300 (e.g., Samsung Chromebook priced at $229 from Amazon). While some of you may dismiss Chromebook as an incapable barebone laptop, the matter of fact is that sales of Chromebooks continue to soar while the rest of PC sales are plummeting.
If you want to try out Google's Chrome OS powered Chromebook without purchasing Chromebook hardware, you can actually test-run Chromium OS as a virtual machine (VM). In this tutorial, I will explain how to install and run Chromium OS on VMware Player.
Google's Chrome OS vs. Chromium OS
Chromium OS is a pure open-source project which shares the same code base as Google's Chrome OS. The main difference is that Chromium OS does not contain hardware specific firmware features and proprietary binary blobs that ship with Google's Chrome OS.
Create a Chromium OS VM on VMware Player
First, download a VMware image for Chromium OS from Hexxeh. The latest build is Build #4028.
Then launch VMware Player, and create a new VM with VM wizard. You need to choose "I will install the operating system later" option.
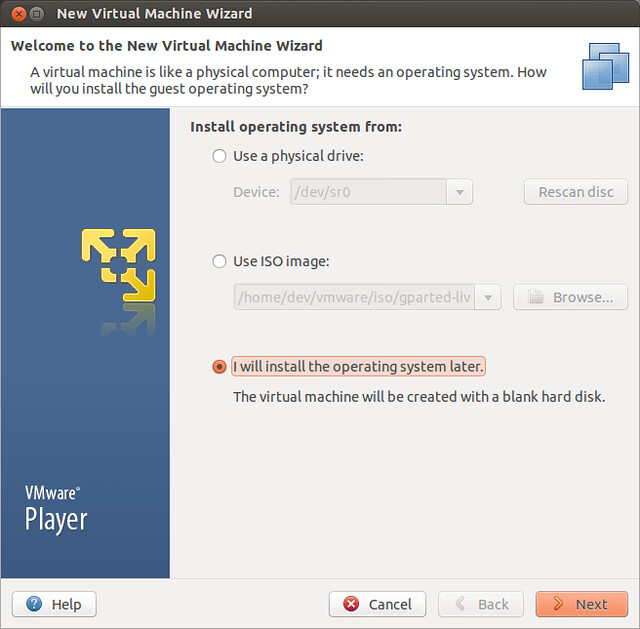
Follow the rest of VM creation steps in VM wizard. You can enter arbitrary choices for guest operating system, disk size, memory size, etc., because the created .vmx file will be overwritten later anyway.
After you are done with creating a VM, close VMware Player.
Extract the downloaded Chromium VM image into the location of the VM which was just created (e.g., ~/vmware/chromium in this tutorial).
The following two files will be extracted into the directory: a VM configuration file (*.vmx), and a virtual disk file (*.vmdx).
ChromeOS-Vanilla-4028.0.2013_04_20_1810-r706c4144-VMWare.vmdk
ChromeOS-Vanilla-4028.0.2013_04_20_1810-r706c4144-VMWare.vmx
Rename these files to shorter names.
Then open up chromium.vmx with a text editor, and change 'ide0:0.fileName" as follows.
ide0:0.fileName = "chromium.vmdk"
In addition, add the following entry, which will enable you to use networking on Chromium VM.
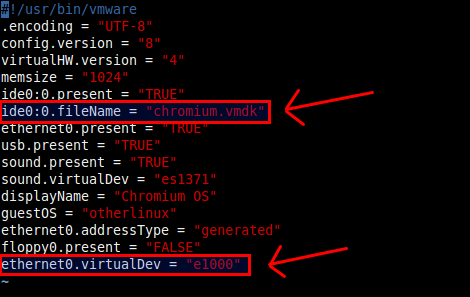
Save the change, and close chromium.vmx.
Launch Chromium OS VM on VMware Player
Re-launch VMware Player, and power on Chromium VM.
During power-on, you may get a warning saying that "Failed to open Alsa sound device "/dev/dsp": No such file or directory. Alsa sound will not be used." For now, ignore this.
Once Chromium VM is powered-on, you will be asked to log in to your Google account. After login, you will see the following initial welcome screen.
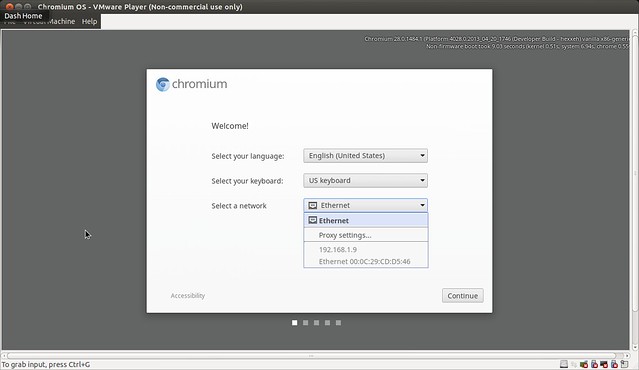
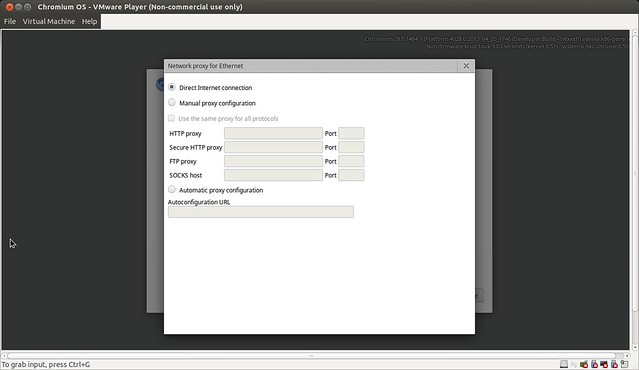
The Ethernet should be available to use. If you are behind a proxy, you can configure proxy by clicking on "Proxy settings" under "Ethernet".
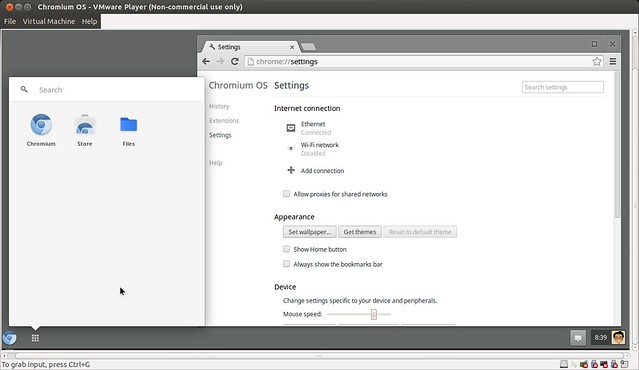
Chrome OS settings can be tweaked through Chrome browser interface.
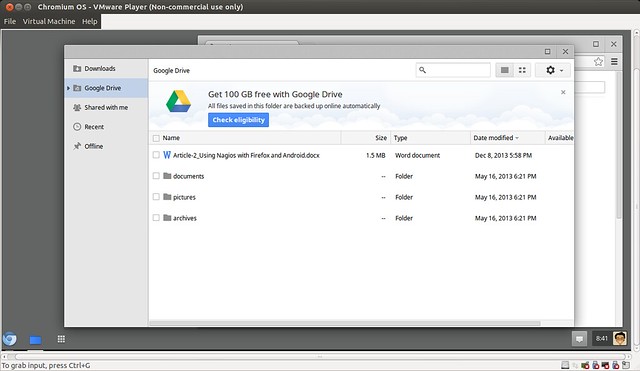
You can access Google Drive linked with your Google account.
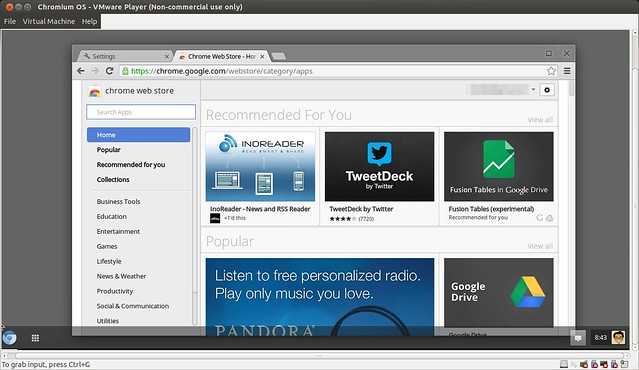
You can also install any app from Google Chrome Web Store.


 2563
2563


 被折叠的 条评论
为什么被折叠?
被折叠的 条评论
为什么被折叠?
 到【灌水乐园】发言


