


微信小游戏刚刚开始公测,目前还不提供注册上线功能,但官方提供了一个简单的游戏demo,本篇博客就带领大家熟悉一下小游戏开发,并最终实现一个小游戏的demo(使用的是小游戏原生的api非adapter)
最终的游戏效果如下

(1)模块化
- 开发不可避免的需要封装一些常用逻辑/工具类等,此时就需要通过module.exports 和 exports 定义一些常用工具,通过 require 引入模块,实现代码复用
- module.exports 和 exports不仅可以封装一些变量、方法还能使用类Class
- 代码实例
- 在项目根目录js/test.js下定义各种封装(方法、变量、类)
//module.exports暴露一个模块方法add
module.exports.add = function (x, y) {
     return x + y;
}

//module.exports暴露一个模块变量msg
module.exports.msg = 'Hello World'

//exports暴露一个模块变量time
exports.time = new Date()

//暴露一个类Class
module.exports.Person = class Person{
constructor() {
     console.log("构造方法")
}
add() {
     console.log("add方法")
}
}
- 在项目根目录game.js使用这些
//require绝对路径引入模块变量(./表示当前目录 ../表示上一目录)
var test = require('./js/test')
//使用模块定义的方法
var res = test.add(1,3)
console.log(res)
//使用模块定义的变量
console.log(test.msg)//Hello World
//使用exports方式暴露的变量
console.log(test.time)//Sun Jan 07 2018 12:28:42 GMT+0800 (中国标准时间)
//使用类
var Person = test.Person
var p = new Person()//构造方法
p.add()//add方法
- 类的模块化还有一种写法(官方)
//test.js 中定义

//暴露一个类
export default class Person {
constructor() {
     console.log("构造方法")
}
add(){
     console.log("add方法")
}
}

//game.js 使用
import Person1 from './js/test'
var p = new Person1()
p.add()
(2)小游戏开发主要流程
- new Main()游戏入口 开启游戏
- 构造方法中通过requestAnimationFrame请求重绘,回调中执行循环逻辑loop
- 渲染帧率为 60 帧每秒,1秒loop执行60次重绘逻辑
- loop再分重绘界面逻辑render 和 业务逻辑update
class Main {
constructor() {
//下次重绘是执行(callback)中逻辑
requestAnimationFrame(
     this.loop.bind(this)
)
}

/**
* 重绘循环执行的逻辑
*/
loop(){
console.log('重绘')

this.render()
this.update()

requestAnimationFrame(
     this.loop.bind(this)
)
}

/**
* 重绘界面
*/
render(){

}

/**
* 更新逻辑
*/
update(){

}
}

//游戏入口 开启游戏
new Main()
(2)游戏精灵类Sprite
- Sprite类主要3大功能
- constructor():构造方法传入精灵类的图片信息
- drawToCavans():负责把图片绘制到屏幕上
- isCollideWith():判断其他精灵的位置是否和本精灵碰撞
/**
* 游戏基础精灵类
*/
export default class Sprite {

/**
* 构造方法
* imgSrc 图片地址
* width 图片宽度
* height 图片长度
* x 图片的左上角x坐标
* y 图片的左上角y坐标
*/
constructor(imgSrc = '', width = 0, height = 0, x = 0, y = 0) {
this.img = wx.createImage()
this.img.src = imgSrc

this.width = width
this.height = height

this.x = x
this.y = y

this.visible = true //显示/隐藏
}

/**
* 把精灵图片绘制到cavans画布上
*/
drawToCavans(ctx) {
//隐藏就无需绘制
if (!this.visible) return

/**
* this.img 图片对象
* this.x this.y 图片的左上角坐标
* this.width this.height 图片的宽高
*/
ctx.drawImage(
this.img,
this.x,
this.y,
this.width,
this.height
)
}

/**
* 简单的碰撞检测定义:
* 另一个精灵的中心点处于本精灵所在的矩形内即可
* @param{Sprite} sp: Sptite的实例
*/
isCollideWith(sp) {
//另一个精灵的中心点
let spX = sp.x + sp.width / 2
let spY = sp.y + sp.height / 2

if (!this.visible || !sp.visible) return false

return !!(spX >= this.x
&& spX <= this.x + this.width
&& spY >= this.y
&& spY <= this.y + this.height)
}
}
(3)绘制精灵类
- import引入Sprite类
- constructor()构造方法中实例化
- render()将精灵类绘制到屏幕上
//引入类
import Sprite from './js/sprite'

//全局变量
let canvas = wx.createCanvas()
let ctx = canvas.getContext('2d')

class Main {
constructor() {
var imgSrc = 'images/hero.png'
this.sprite = new Sprite(imgSrc, 100, 100, 0, 0)

//下次重绘是执行(callback)中逻辑
requestAnimationFrame(
     this.loop.bind(this)
)
}

/**
* 重绘循环执行的逻辑
*/
loop(){
console.log('重绘')

this.render()
this.update()

requestAnimationFrame(
     this.loop.bind(this)
)
}
/**
* 重绘界面
*/
render(){
     this.sprite.drawToCavans(ctx)
}
/**
* 更新逻辑
*/
update(){

}
}

//游戏入口 开启游戏
new Main()
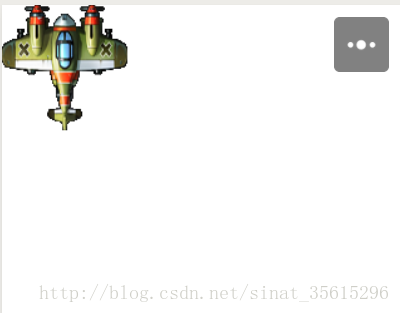
- 运行后,效果图
下面是我的公众号“Monkey旺”,欢迎大家关注,一起学习,一起交流


 2404
2404


 被折叠的 条评论
为什么被折叠?
被折叠的 条评论
为什么被折叠?
 到【灌水乐园】发言


