


一、废话
算是一个入门的例子,虽然难度不大,但对于我这种刚接触Maven和SpringMVC的菜鸟来讲还是费了点时间。貌似网上很多教程都是关于在Eclipse下搭建的,不过像我这样的屌丝还是坚持我的Myeclipse之旅吧。Eclipse神马的,=日后再说吧。废话不多说,切入主题。
二、项目搭建流程
都是流程上的东西,记住便可了。下面步骤没有非常细化,自认为比较重要
Step1:
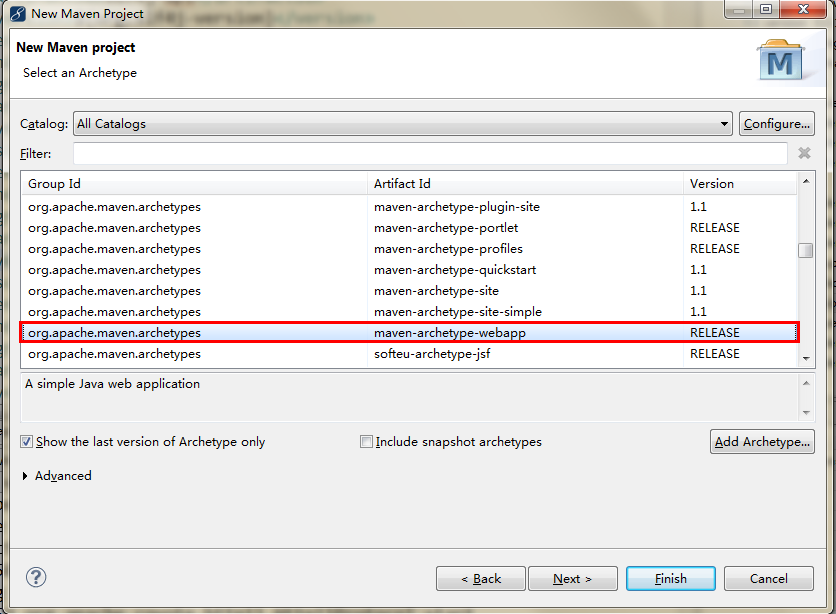
Step2:
控制器Controller编写
package com.techbirds.web.controller;

import java.util.Map;

import org.springframework.context.annotation.Scope;
import org.springframework.stereotype.Controller;
import org.springframework.ui.Model;
import org.springframework.web.bind.annotation.RequestMapping;
import org.springframework.web.bind.annotation.RequestParam;

@Controller
@Scope("prototype")
public class HelloContorller {

	//hello world例子
	@RequestMapping(value="/hello")
	public String hello(){
		System.out.println("spring mvc hello world!");
		return "hello";
	}

}
Step3:
maven项目的pom.xml配置
<project xmlns="http://maven.apache.org/POM/4.0.0" xmlns:xsi="http://www.w3.org/2001/XMLSchema-instance"
	xsi:schemaLocation="http://maven.apache.org/POM/4.0.0 http://maven.apache.org/maven-v4_0_0.xsd">
	<modelVersion>4.0.0</modelVersion>
	<groupId>com.techbirds.web</groupId>
	<artifactId>springmvc-hello</artifactId>
	<packaging>war</packaging>
	<version>0.0.1-SNAPSHOT</version>
	<name>springmvc-hello Maven Webapp</name>
	<url>http://maven.apache.org</url>
	<properties>
		<org.slf4j-version>1.6.1</org.slf4j-version>
	</properties>

	<dependencies>
		<dependency>
			<groupId>junit</groupId>
			<artifactId>junit</artifactId>
			<version>4.10</version>
			<scope>test</scope>
		</dependency>

		<dependency>
			<groupId>org.springframework</groupId>
			<artifactId>spring-context</artifactId>
			<version>3.1.1.RELEASE</version>
		</dependency>
		<dependency>
			<groupId>org.springframework</groupId>
			<artifactId>spring-webmvc</artifactId>
			<version>3.1.1.RELEASE</version>
		</dependency>


		<dependency>
			<groupId>org.apache.geronimo.specs</groupId>
			<artifactId>geronimo-servlet_2.5_spec</artifactId>
			<version>1.2</version>
		</dependency>


	</dependencies>

</project>
Step4:
使用外部tomcat部署,方便debug。不过必须每次依赖配置后,redeploy一下,否则依赖的包更新不到tomcat下。
这里顺便记录下:
因为多个spring版本一起时造成的异常:
java.lang.NoSuchMethodError: org.springframework.beans.MutablePropertyValues.add
运行成功:hello world!


 7877
7877


 被折叠的 条评论
为什么被折叠?
被折叠的 条评论
为什么被折叠?
 到【灌水乐园】发言


