


强烈推荐阅读 http://www.cnblogs.com/Clingingboy/archive/2010/12/26/1917188.html
一、命令基本元素及关系
我们已经知道WPF里已经有了路由事件,可以发布及传播一些消息,那为什么还需要命令呢?这是因为事件指负责发送消息,对消息如何处理则不管,而命令是有约束力,每个接收者对命令执行统一的行为,比如菜单上的保存,工具栏上的保存都必须是执行同样的保存。
在WPF中,命令(Commanding)被分割成了四个部分,分别是ICommand,ICommandSource,CommandTarget和CommandBinding。下面我们来分别探讨这四个部分。
命令(Command):实现了ICommand接口的类,经常使用的有RoutedCommand类
(private RoutedCommand clearCmd = newRoutedCommand("序列化的声明名称", typeof(所有者类型));)
命令源:是命令的发送者,是实现了ICommandSource接口的类,大部分界面的控件都实现了这个接口,Button, MenuItem 等等。
(为按钮设置调用的命令 如:按钮.Command=)
命令目标:命令的接收者,命令目标是视线了IInputElement接口的类。
(设置引发指定命令的元素 如:按钮.CommandTarget= )
命令关联:负责一些逻辑与命令关联起来,比如判断命令是否可以执行,以及执行完毕后做一些处理。
1、CommandBinding :将RoutedCommand 绑定到事件处理程序。
(
//CommandBinding 将命令绑定到事件处理程序
CommandBinding cb = new CommandBinding();
//命令
cb.Command = 命令对象;
//事件处理程序
cb.CanExecute += new CanExecuteRoutedEventHandler(cb_CanExecute);
cb.Executed += new ExecutedRoutedEventHandler(cb_Executed);
)
2、把命令关联安置在外围控件上(将命令CommandBinding添加到命令集合CommandBindings 中)
布局控件.CommandBindings.Add(CommandBinding对象);
四个命令元素之间的关系:

实例一:RoutedCommand自定义命令:
与业务逻辑无关的命令,使用 RoutedCommand,业务逻辑要依靠外围的CommandBinding来实现。这样一来,如果对CommandBinding管理不善就可能造成代码混乱无章,毕竟一个CommandBinding要牵扯到谁是它的宿主以及它的两的事件处理器。
使用 Button 来发送这个命令,当命令送达到 TextBox 时,TextBox被清空(如果TextBox没有文字,则命令不可以被发送)
效果:
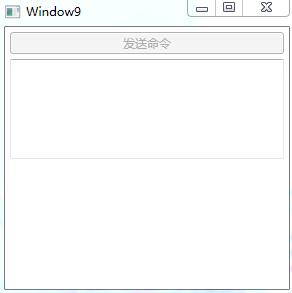
代码:
    <StackPanel x:Name="stackpanel">
        <Button x:Name="button1" Content="发送命令" Margin="5"/>
        <TextBox x:Name="textboxA" Margin="5,0" Height="100"/>
    </StackPanel>
注意:
RoutedCommand 只负责跑腿,并不对命名目标做任何操作
CommandBinding 对命名目标做操作
using System;
using System.Collections.Generic;
using System.Linq;
using System.Text;
using System.Windows;
using System.Windows.Controls;
using System.Windows.Data;
using System.Windows.Documents;
using System.Windows.Input;
using System.Windows.Media;
using System.Windows.Media.Imaging;
using System.Windows.Shapes;

namespace WpfApplication
{
    /// <summary>
    /// Window9.xaml 的交互逻辑
    /// </summary>
    public partial class Window9 : Window
    {
        public Window9()
        {
            InitializeComponent();
            InitializeCommand();
        }

        //第一步:声明并定义命令(命令名称是Clear 所有者类型是Window9)
        //(RoutedCommand 只负责跑腿,并不对命名目标做任何操作)
        private RoutedCommand clearCmd = new RoutedCommand("Clear", typeof(Window9));

        private void InitializeCommand()
        {
            //第二步:把命令赋值给命令源(发送者),并指定快捷建
            this.button1.Command = this.clearCmd;
            this.clearCmd.InputGestures.Add(new KeyGesture(Key.C,ModifierKeys.Alt));

            //第三步:指定命令的目标
            this.button1.CommandTarget = this.textboxA;

            //第四步:创建命令关联(CommandBinding 对命名目标做操作)
            CommandBinding cb = new CommandBinding();
            cb.Command = this.clearCmd;
            cb.CanExecute+=new CanExecuteRoutedEventHandler(cb_CanExecute);
            cb.Executed+=new ExecutedRoutedEventHandler(cb_Executed);

            //第五步:把命令关联安置在外围控件上(将命令绑定添加到命令集合中)
            this.stackpanel.CommandBindings.Add(cb);
        }

        //当探测命名是否可以执行时,此方法被调用
        public void cb_CanExecute(object sender, CanExecuteRoutedEventArgs e)
        {
            if (string.IsNullOrEmpty(this.textboxA.Text))
            {
                e.CanExecute = false;
            }
            else
            {
                e.CanExecute = true;
            }
            //避免继续向上传而降低程序性能
            e.Handled = true;
        }

        //命令送达目标后,此方法被调用
        public void cb_Executed(object sender, ExecutedRoutedEventArgs e)
        {
            this.textboxA.Clear();
            //避免继续向上传而降低程序性能
            e.Handled = true;
        }

    }
}
推荐阅读:========================================================================================
    public partial class Window13 : Window
    {
        //第1步:定义路由命令
        private RoutedCommand clearCmd = new RoutedCommand();
        public Window13()
        {
            InitializeComponent();

            //第2步:为按钮指定【命令】
            this.button1.Command = clearCmd;

            //第3步:为按钮指定【命令目标】
            this.button1.CommandTarget = this.textboxA;

            //第4步:将路由命令绑定到事件处理程序
            var cb = new CommandBinding(clearCmd, ClearExcute, ClearCanExcute);

            //第5步:将路由命令绑定添加到命令集合中
            this.CommandBindings.Add(cb);

        }
        /// <summary>
        /// 可以执行
        /// </summary>
        /// <param name="sender"></param>
        /// <param name="e"></param>
        private void ClearCanExcute(object sender, CanExecuteRoutedEventArgs e)
        {
            if (string.IsNullOrEmpty(this.textboxA.Text))
            {
                e.CanExecute = false;
            }
            else
            {
                e.CanExecute = true;
            }
            //避免继续向上传而降低程序性能
            e.Handled = true;
        }
        /// <summary>
        /// 执行
        /// </summary>
        /// <param name="sender"></param>
        /// <param name="e"></param>
        private void ClearExcute(object sender, ExecutedRoutedEventArgs e)
        {
            this.textboxA.Clear();
            //避免继续向上传而降低程序性能
            e.Handled = true;
        }
    }
实例二:WPF命令库,比如:复制,粘贴。。。
命令库包括:
ApplicationCommands
ComponentCommands
NavigationCommands
MediaCommands
EditingCommands
它们都是静态类
推荐文章:桂素伟 WPF中的命令 http://axzxs.blog.51cto.com/730810/525418
实例三:命令中的参数传递(同个命令区分,需要参数)
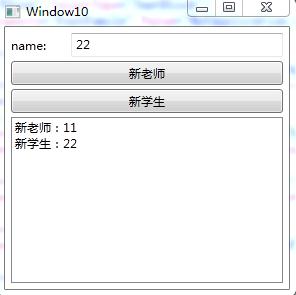
代码:
<Window x:Class="WpfApplication.Window10"
xmlns="http://schemas.microsoft.com/winfx/2006/xaml/presentation"
xmlns:x="http://schemas.microsoft.com/winfx/2006/xaml"
Title="Window10" Height="300" Width="300">
<Grid Margin="6">
<Grid.RowDefinitions>
<RowDefinition Height="24"/>
<RowDefinition Height="4"/>
<RowDefinition Height="24"/>
<RowDefinition Height="4"/>
<RowDefinition Height="24"/>
<RowDefinition Height="4"/>
<RowDefinition Height="*"/>
</Grid.RowDefinitions>
<TextBlock Text="name:" VerticalAlignment="Center" HorizontalAlignment="Left" Grid.Row="0"/>
<TextBox x:Name="nameTextBox" Margin="60,0,0,0" Grid.Row="0"/>
<!--两个按钮都使用了New命令,使用Teacher,Student字符串作为参数-->
<Button Content="新老师" Command="New" CommandParameter="Teacher" Grid.Row="2"/>
<Button Content="新学生" Command="New" CommandParameter="Student" Grid.Row="4"/>
<ListBox x:Name="listboxnewItem" Grid.Row="6"/>
</Grid>
<Window.CommandBindings>
<CommandBinding Command="New" CanExecute="New_CanExecute" Executed="New_Executed"/>
</Window.CommandBindings>
</Window>
        private void New_CanExecute(object sender, CanExecuteRoutedEventArgs e)
        {
            if (string.IsNullOrEmpty(this.nameTextBox.Text))
            { e.CanExecute = false; }
            else
            { e.CanExecute = true; }
        }

        private void New_Executed(object sender, ExecutedRoutedEventArgs e)
        {
            string name = this.nameTextBox.Text;
            if (e.Parameter.ToString() == "Teacher")
            {
                this.listboxnewItem.Items.Add(string.Format("新老师:{0}",name));
            }
            if (e.Parameter.ToString() == "Student")
            {
                this.listboxnewItem.Items.Add(string.Format("新学生:{0}", name));
            }
        }
实例四:命令与Binding结合(Command 属性调用多个命令)
<Button x:Name="dynamicCmdBtn" Command="{Binding Path=ppp,Source=sss}" Content="动态命令"/>
二、近观命令
1、ICommand接口与RoutedCommand
2、自定义命令(实现 ICommand 接口) (推荐)
命令:实现 ICommand 接口开始,定义自己的命令并且把某些业务逻辑包含到命令中,这才是真正意义上的自定义命令。
命令源: 实现 ICommandSource接口
命令目标:
第一步:定义接口 IView.cs,并且需要接受命令的控件都要实现这个接口,这样就确保了命令可以成功对它执行操作。
    public interface IView
    {
        bool IsChanged { get; set; }

        void SetBinding();
        void Refresh();
        void Clear();
        void Save();
    }
第二步:创建命令 。ClearCommand.cs
    //命令
    //实现ICommand接口,并继承了CanExecuteChanged事件,CanExecute方法和Execute方法
    public class ClearCommand:ICommand
    {
        //当命令可执行状态发生改变时,应当被激活
        public event EventHandler CanExecuteChanged;

        //用于判断命令是否可以执行(暂时不实现)
        public bool CanExecute(object parameter)
        {
            throw new NotImplementedException();
        }

        public void Execute(object parameter)
        {
            //执行命令,带与业务相关的Clear逻辑
            IView view = parameter as IView;
            if (view != null)
            {
                view.Clear();
            }

        }
    }
执行用户控件MiniView的Clear()方法
第三步:命令源(调用命令的对象 如:按钮) MyCommandSource.cs
    //命令源
    public class MyCommandSource:UserControl1,ICommandSource
    {

        //继承 ICommandSource 三个属性
        public ICommand Command{get;set;}
        public object CommandParameter{get;set;}
        public System.Windows.IInputElement CommandTarget{get;set;}

        protected override void OnMouseLeftButtonDown(MouseButtonEventArgs e)
        {
            base.OnMouseLeftButtonDown(e);

            //命令作用于命令目标
            if (this.CommandTarget != null)
            {
                this.Command.Execute(CommandTarget);
            }
        }
    }
CommandTarget 命令目标 如:miniView
Command.Execute 点击鼠标左键,执行ClearCommand.cs中的Execute方法
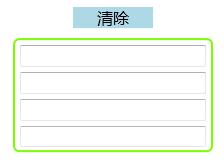
第四步:命令目标
效果图:

用户控件:
<UserControl x:Class="WpfApplication.MiniView"
        xmlns="http://schemas.microsoft.com/winfx/2006/xaml/presentation"
        xmlns:x="http://schemas.microsoft.com/winfx/2006/xaml"
        Height="114" Width="200">
    <Border CornerRadius="5" BorderBrush="LawnGreen" BorderThickness="2">
        <StackPanel>
          <TextBox x:Name="textbox1" Margin="5"/>
          <TextBox x:Name="textbox2" Margin="5,0"/>
          <TextBox x:Name="textbox3" Margin="5"/>
          <TextBox x:Name="textbox4" Margin="5,0"/>
        </StackPanel>
    </Border>
</UserControl>
    /// <summary>
    /// 命令目标
    /// </summary>
    public partial class MiniView :UserControl,IView
    {
        public MiniView()
        {
            InitializeComponent();
        }

        public bool IsChanged{get;set;}

        public void SetBinding()
        {//方法体
        }

        public void Refresh()
        {//方法体
        }

        public void Save()
        {//方法体
        }

        //用于清除内容的业务逻辑
        public void Clear()
        {
            this.textbox1.Clear();
            this.textbox2.Clear();
            this.textbox3.Clear();
            this.textbox4.Clear();
        }
    }
第五步:将命令、命令源、命令目标集成起来
效果图:
代码:
<Window x:Class="WpfApplication.Window11"
        xmlns="http://schemas.microsoft.com/winfx/2006/xaml/presentation"
        xmlns:x="http://schemas.microsoft.com/winfx/2006/xaml"
        xmlns:local="clr-namespace:WpfApplication"
        Title="Window11" Height="300" Width="300">
    <StackPanel>
        <local:MyCommandSource x:Name="ctrlClear" Margin="10">
            <TextBlock Text="清除" FontSize="16" TextAlignment="Center" Background="LightBlue" Width="80"/>
        </local:MyCommandSource>
        <local:MiniView x:Name="miniView"/>
    </StackPanel>
</Window>
        public Window11()
        {
            InitializeComponent();

            //声明命令
            ClearCommand clearCommand = new ClearCommand();
            //命令源命令
            this.ctrlClear.Command = clearCommand;
            //命令源目标
            this.ctrlClear.CommandTarget = this.miniView;


        }
<span style="color:#ff0000">//注意:正规方法,应该把命令声明在静态全局的地方,供所有对象使用。</span>
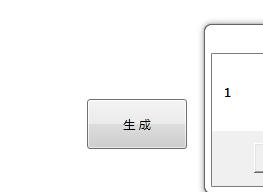
实例:MVVM为按钮添加事件
DelegateCommand.cs
    public class DelegateCommand : ICommand
    {
        public Action<object> ExecuteCommand = null;
        public Func<object, bool> CanExecuteCommand = null;

        public event EventHandler CanExecuteChanged;

        public bool CanExecute(object parameter)
        {
            if (CanExecuteCommand != null)
            {
                return this.CanExecuteCommand(parameter);
            }
            else
            {
                return true;
            }
        }
        public void Execute(object parameter)
        {
            if (this.ExecuteCommand != null) this.ExecuteCommand(parameter);
        }
        public void RaiseCanExecuteChanged()
        {
            if (CanExecuteChanged != null)
            {
                CanExecuteChanged(this, EventArgs.Empty);
            }
        }

    }
ViewModel.cs
    public class ViewModel
    {
        public DelegateCommand BuildCommand { get; set; }
        public ViewModel()
        {
            BuildCommand = new DelegateCommand();
            BuildCommand.ExecuteCommand = new Action<object>(Build);
        }
        private void Build(object obj)
        {
            MessageBox.Show(obj.ToString());
        }
    }
View.xaml
DataContext = new ViewModel();
        <Button Content="生 成" Height="50"  Width="100"
                Command="{Binding BuildCommand}"
                CommandParameter="1"/>


 901
901

 被折叠的 条评论
为什么被折叠?
被折叠的 条评论
为什么被折叠?
 到【灌水乐园】发言


