


写在前面 :这是我 [Spring 实战] 系列文章的第一篇,[Spring 实战]将是本博客第一个可能会长期写下去的专栏,主要就是分享我在学习Spring 实战这本书以及Spring相关资料的感受,经历,以及Code。我的想法是我会尽可能的展示代码和截图以及很少的文字 提高文章可阅读行。
接下来我会展示如何使用Spring 写一个很简单的HelloWorld程序
1. 使用intellij 创建一个spring项目(你也可以使用其他的任意java IDE 然后引入spring 相关的一些jar包,在这里我们使用intellij 推荐!)

2.这个HelloWorld需要什么?
Interface :GreetingService
Class:GreetingServiceImpl
MainClass:HelloApp配置Bean:hello.xml
package main;

/**
 * Created by YanMing on 2017/2/19.
 */
public interface GreetingService {
    void sayGreeting();
}
package main;

/**
 * Created by YanMing on 2017/2/19.
 */
public class GreetingServiceImpl implements GreetingService{
    private String greeting;
    public GreetingServiceImpl() {

    }
    public GreetingServiceImpl(String greeting) {
        this.greeting = greeting;
    }

    @Override
    public void sayGreeting() {
        System.out.println(greeting);
    }

    public void setGreeting(String greeting) {
        this.greeting = greeting;
    }
}
package main;

/**
 * Created by YanMing on 2017/2/19.
 */
import org.springframework.context.support.ClassPathXmlApplicationContext;
public class HelloApp {
    public static void main(String[]args) throws Exception{
        ClassPathXmlApplicationContext context =
                new ClassPathXmlApplicationContext(
                        "helloworld.xml");

        GreetingService greetingService = (GreetingService) context.getBean("greetingService");

        greetingService.sayGreeting();


    }
}
3.什么是Bean?为什么要配置Bean呢?
Bean,我们通俗的来解释就是你创建的打算交给Spring进行管理,并且在使用的时候通过注入的方式直接申
请 的类。在后面的文章中我们会提到Ioc特性以及DI(动态注入),届时我们会详细的讲解Bean。
所以我们只需要按照某种方式,把我们的自己创建的类告诉Spring,让他去接纳我们的类,并且进行管理和
实例化对象。那么我们需要通过什么方式呢?XML!(Spring 同时支持通过java的方式来配置,本文不做讲解)在你的项目里创建hello.xml文件,在intellij中你会得到如下文档:
<?xml version="1.0" encoding="UTF-8"?>
<beans xmlns="http://www.springframework.org/schema/beans"
       xmlns:xsi="http://www.w3.org/2001/XMLSchema-instance"
       xsi:schemaLocation="http://www.springframework.org/schema/beans http://www.springframework.org/schema/beans/spring-beans.xsd">

</beans>
这是IDE直接为你添加的Spring 配置使用的xml模板。在beans标签中添加以下新增代码,完成xml。
<?xml version="1.0" encoding="UTF-8"?>
<beans xmlns="http://www.springframework.org/schema/beans"
       xmlns:xsi="http://www.w3.org/2001/XMLSchema-instance"
       xsi:schemaLocation="http://www.springframework.org/schema/beans http://www.springframework.org/schema/beans/spring-beans.xsd">

    <bean id="greetingService" class="main.GreetingServiceImpl">
        <property name="greeting" value="Hello World!"></property>
    </bean>
</beans>
至此,我们的HelloWorld已经完成了。右击HelloApp,运行代码
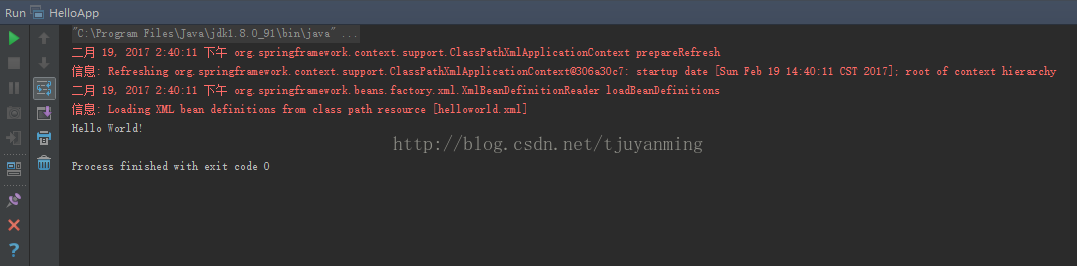
3.刚刚发生了什么? 接口函数以及类实现都很简单。那么在HelloApp 以及 Hello.xml中发生了什么呢? 正如我们前面所说的,我们通过xml文件,以某种方式在Spring中配置了我们的Bean,Spring负责管理和实 例化我们的对象。在HelloApp中,我们有如下代码:
 ClassPathXmlApplicationContext context =
                new ClassPathXmlApplicationContext(
                        "helloworld.xml");

        GreetingService greetingService = (GreetingService) context.getBean("greetingService");

        greetingService.sayGreeting();
这段代码,就是我们从Spring的BeanFactory中,获得我们的对象的代码。仿佛是我们找到了Hello.xml文件
然后,我们创建了一个对象并执行对象的sayGreeting()。就好像我们最熟悉的方式:
 GreetingServiceImpl greetingService1 =
                new GreetingServiceImpl("Hello World!");
所以Spring是让我们变得复杂了么?答案自然是:No! 接下来,我们会讲到,Spring 通过何种方式对我们的代码进行解耦合,使得代码可以复用。


 142
142


 被折叠的 条评论
为什么被折叠?
被折叠的 条评论
为什么被折叠?
 到【灌水乐园】发言


