


根据google官方的文档(http://developer.android.com/reference/android/os/Bundle.html)
Bundle类是一个key-value对,“A mapping from String values to various Parcelable types.”
类继承关系:
java.lang.Object
android.os.Bundle
Bundle类是一个final类:
public final class
Bundle
extends Objectimplements Parcelable Cloneable
两个activity之间的通讯可以通过bundle类来实现,做法就是:
(1)新建一个bundle类
- Bundle mBundle = new Bundle();
- mBundle.putString("Data", "data from TestBundle");
(3)新建一个intent对象,并将该bundle加入这个intent对象
- Intent intent = new Intent();
- intent.setClass(TestBundle.this, Target.class);
- intent.putExtras(mBundle);
android mainfest.xml如下:
- <?xml version="1.0" encoding="utf-8"?>
- <manifest xmlns:android="http://schemas.android.com/apk/res/android"
- package="com.tencent.test"
- android:versionCode="1"
- android:versionName="1.0">
- <application android:icon="@drawable/icon" android:label="@string/app_name">
- <activity android:name=".TestBundle"
- android:label="@string/app_name">
- <intent-filter>
- <action android:name="android.intent.action.MAIN" />
- <category android:name="android.intent.category.LAUNCHER" />
- </intent-filter>
- </activity>
- <activity android:name=".Target"></activity>
- </application>
- <uses-sdk android:minSdkVersion="7" />
- </manifest>
两个类如下:intent从TestBundle类发起,到Target类。
类1:TestBundle类:
- import android.app.Activity;
- import android.content.Intent;
- import android.os.Bundle;
- import android.view.View;
- import android.view.View.OnClickListener;
- import android.widget.Button;
- public class TestBundle extends Activity {
- private Button button1;
- private OnClickListener cl;
- public void onCreate(Bundle savedInstanceState) {
- super.onCreate(savedInstanceState);
- setContentView(R.layout.main);
- button1 = (Button) findViewById(R.id.button1);
- cl = new OnClickListener(){
- @Override
- public void onClick(View arg0) {
- // TODO Auto-generated method stub
- Intent intent = new Intent();
- intent.setClass(TestBundle.this, Target.class);
- Bundle mBundle = new Bundle();
- mBundle.putString("Data", "data from TestBundle");//压入数据
- intent.putExtras(mBundle);
- startActivity(intent);
- }
- };
- button1.setOnClickListener(cl);
- }
- }
类2: Target
- import android.app.Activity;
- import android.os.Bundle;
- public class Target extends Activity{
- public void onCreate(Bundle savedInstanceState) {
- super.onCreate(savedInstanceState);
- setContentView(R.layout.target);
- <span style="color:#ff6600;">Bundle bundle = getIntent().getExtras(); </span> //得到传过来的bundle
- String data = bundle.getString("Data");//读出数据
- setTitle(data);
- }
- }
布局文件:
main.xml
- <?xml version="1.0" encoding="utf-8"?>
- <LinearLayout xmlns:android="http://schemas.android.com/apk/res/android"
- android:orientation="vertical"
- android:layout_width="fill_parent"
- android:layout_height="fill_parent"
- >
- <TextView
- android:layout_width="fill_parent"
- android:layout_height="wrap_content"
- android:text="@string/hello"
- />
- <Button
- android:layout_width="fill_parent"
- android:layout_height="wrap_content"
- android:text="@string/button"
- android:id = "@+id/button1"
- />
- </LinearLayout>
- <?xml version="1.0" encoding="utf-8"?>
- <LinearLayout xmlns:android="http://schemas.android.com/apk/res/android"
- android:orientation="vertical"
- android:layout_width="fill_parent"
- android:layout_height="fill_parent"
- >
- <TextView
- android:layout_width="fill_parent"
- android:layout_height="wrap_content"
- android:text="@string/target"
- />
- </LinearLayout>
String.xml
- <?xml version="1.0" encoding="utf-8"?>
- <resources>
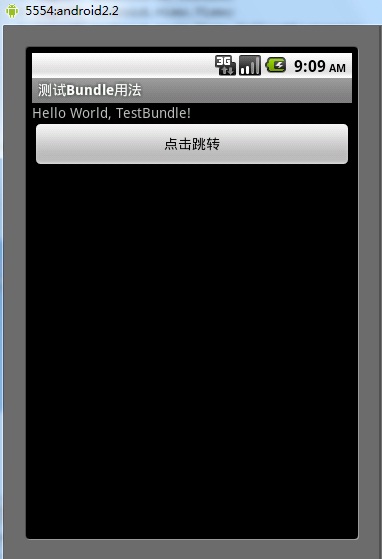
- <string name="hello">Hello World, TestBundle!</string>
- <string name="app_name">测试Bundle用法</string>
- <string name="button">点击跳转</string>
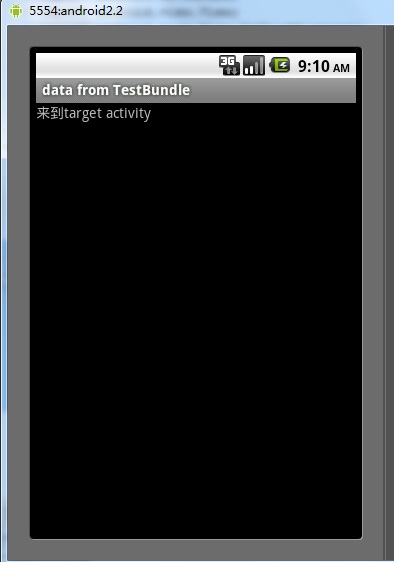
- <string name="target">来到target activity</string>
- </resources>
结果:
跳转结果:
一、API文档说明
1.介绍
用于不同Activity之间的数据传递
1.重要方法
clear():清除此Bundle映射中的所有保存的数据。
clone():克隆当前Bundle
containsKey(String key):返回指定key的值
getString(String key):返回指定key的字符
hasFileDescriptors():指示是否包含任何捆绑打包文件描述符
isEmpty():如果这个捆绑映射为空,则返回true
putString(String key, String value):插入一个给定key的字符串值
readFromParcel(Parcel parcel):读取这个parcel的内容
remove(String key):移除指定key的值
writeToParcel(Parcel parcel, int flags):写入这个parcel的内容
二、实例
public class BundleDemo extends Activity {
private EditText etName;
Button btn;
/*
* (non-Javadoc)
*
* @see android.app.Activity#onCreate(android.os.Bundle)
*/
@Override
protected void onCreate(Bundle savedInstanceState) {
// TODO Auto-generated method stub
super.onCreate(savedInstanceState);
setContentView(R.layout.bundle);
etName = (EditText) findViewById(R.id.etname);
btn = (Button) findViewById(R.id.btn);
btn.setOnClickListener(new OnClickListener() {
@Override
public void onClick(View v) {
String info = etName.getText().toString();
Bundle bundle = new Bundle();
//保存输入的信息
bundle.putString("name", info);
Intent intent=new Intent(BundleDemo.this,BundleDemo1.class);
intent.putExtras(bundle);
finish();
startActivity(intent);
}
});
}
}
public class BundleDemo1 extends Activity {
private TextView etName;
/* (non-Javadoc)
* @see android.app.Activity#onCreate(android.os.Bundle)
*/
@Override
protected void onCreate(Bundle savedInstanceState) {
// TODO Auto-generated method stub
super.onCreate(savedInstanceState);
setContentView(R.layout.b1);
etName=(TextView)findViewById(R.id.txtname);
Bundle b=getIntent().getExtras();
//获取Bundle的信息
String info=b.getString("name");
etName.setText("您的姓名:"+info);
}
}
三、与SharedPreferences的区别
SharedPreferences是简单的存储持久化的设置,就像用户每次打开应用程序时的主页,它只是一些简单的键值对来操作。它将数据保存在一个xml文件中
Bundle是将数据传递到另一个上下文中或保存或回复你自己状态的数据存储方式。它的数据不是持久化状态。


 1万+
1万+

 被折叠的 条评论
为什么被折叠?
被折叠的 条评论
为什么被折叠?
 到【灌水乐园】发言


