


左滑删除使用比较多一点,在网上也有不少资料实现,不过坑总是不少。
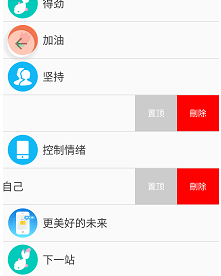
整合资料做出来一个效果,大家看看依据效果选择是否需要继续研究。
一、自定义控件的实现
1,自定义控件的实现
实现思路主要是:将整体内容分为主体内容和左滑显示内容,布局文件中必须有两个子类。在依据ViewDragHelper的帮助计算主体内容和左滑内容的显示以及显示多少。
/**
 * 左滑删除
 * 2017/12/11.
 */

public class SwipeLayout extends FrameLayout {

    private ViewDragHelper dragHelper;
    private OnSwipeChangeListener swipeChangeListener;

    private View backView;//侧滑菜单
    private View frontView;//内容区域
    private int height;//自定义控件布局高
    private int width;//自定义控件布局宽
    private int range;//侧滑菜单可滑动范围

    public boolean isOpen() {
        return isOpen;
    }

    private boolean isOpen = false;//是否是打开状态

    public void setOpen(boolean open) {
        isOpen = open;
    }

    //重写三个构造方法
    public SwipeLayout(Context context) {
        this(context, null);
    }

    public SwipeLayout(Context context, AttributeSet attrs) {
        this(context, attrs, 0);
    }

    public SwipeLayout(Context context, AttributeSet attrs, int defStyleAttr) {
        super(context, attrs, defStyleAttr);
        dragHelper = ViewDragHelper.create(this, callback);
    }

    //获取两个View
    protected void onFinishInflate() {
        super.onFinishInflate();

        int childCount = getChildCount();
        if (childCount < 2) {
            throw new IllegalStateException("you need 2 children view");
        }
        if (!(getChildAt(0) instanceof ViewGroup) || !(getChildAt(1) instanceof ViewGroup)) {
            throw new IllegalArgumentException("your children must be instance of ViewGroup");
        }

        backView = getChildAt(0);//侧滑菜单
        frontView = getChildAt(1);//内容区域

    }

    //初始化布局的高height宽width以及可滑动的范围range
    protected void onSizeChanged(int w, int h, int oldw, int oldh) {
        super.onSizeChanged(w, h, oldw, oldh);

        height = frontView.getMeasuredHeight();
        width = frontView.getMeasuredWidth();
        range = backView.getMeasuredWidth();
    }

    //布局子View
    protected void onLayout(boolean changed, int left, int top, int right, int bottom) {
//        super.onLayout(changed, left, top, right, bottom);
//        layoutContent(false);
        layoutContent(isOpen);
    }

    /**
     * @param isOpen 侧滑菜单是否打开
     */
    private void layoutContent(boolean isOpen) {
        Rect frontRect = computeFrontViewRect(isOpen);
        frontView.layout(frontRect.left, frontRect.top, frontRect.right, frontRect.bottom);

        Rect backRect = computeBackViewRect(frontRect);
        backView.layout(backRect.left, backRect.top, backRect.right, backRect.bottom);

        //调整顺序
//        bringChildToFront(backView);
    }

    /**
     * 通过内容区域所占矩形坐标计算侧滑菜单的矩形位置区域
     *
     * @param frontRect 内容区域所占矩形
     * @return
     */
    private Rect computeBackViewRect(Rect frontRect) {
        int left = frontRect.right;
        return new Rect(left, 0, left + range, height);
    }

    /**
     * 通过菜单打开与否isOpen计算内容区域的矩形区
     *
     * @param isOpen
     * @return
     */
    private Rect computeFrontViewRect(boolean isOpen) {
        int left = 0;
        if (isOpen) {
            left = -range;
        }
        return new Rect(left, 0, left + width, height);
    }


    private ViewDragHelper.Callback callback = new ViewDragHelper.Callback() {

        //所有子View都可拖拽
        public boolean tryCaptureView(View child, int pointerId) {
            return true;
        }

        //水平拖拽后处理
        public int clampViewPositionHorizontal(View child, int left, int dx) {
            if (child == frontView) {
                if (left > 0) {
                    return 0;
                } else if (left < -range) {
                    return -range;
                }
            } else if (child == backView) {
                if (left > width) {
                    return width;
                } else if (left < width - range) {
                    return width - range;
                }
            }
            return left;
        }

        public void onViewPositionChanged(View changedView, int left, int top, int dx, int dy) {
            if (changedView == frontView) {
                backView.offsetLeftAndRight(dx);
            } else if (changedView == backView) {
                frontView.offsetLeftAndRight(dx);
            }
            //事件派发
            dispatchSwipeEvent();
            //兼容低版本
            invalidate();
        }

        //松手后根据侧滑位移确定菜单打开与否
        public void onViewReleased(View releasedChild, float xvel, float yvel) {
            if (xvel == 0 && frontView.getLeft() < -range * 0.3f) {//-range * 0.5f  修改灵敏度
                open();
            } else if (xvel < 0) {
                open();
            } else {
                close();
            }
        }

        //子View如果是clickable,必须重写的方法
        public int getViewHorizontalDragRange(View child) {
            return 1;
        }

        public int getViewVerticalDragRange(View child) {
            return 1;
        }
    };


    public boolean onInterceptTouchEvent(MotionEvent ev) {
        return dragHelper.shouldInterceptTouchEvent(ev);
    }


    public boolean onTouchEvent(MotionEvent event) {
        dragHelper.processTouchEvent(event);
        return true;
    }


    // 持续平滑动画 高频调用
    public void computeScroll() {
        // 如果返回true,动画还需要继续
        if (dragHelper.continueSettling(true)) {
            ViewCompat.postInvalidateOnAnimation(this);
        }
    }

    public void open() {
        open(true);
    }

    public void open(boolean isSmooth) {
        int finalLeft = -range;
        if (isSmooth) {
            if (dragHelper.smoothSlideViewTo(frontView, finalLeft, 0)) {
                ViewCompat.postInvalidateOnAnimation(this);
            }
            //布局方式调整
     /*       else {
                layoutContent(true);//添加部分,执行OnLayout中方法,效果一样
            }*/
        } else {
            layoutContent(true);
        }
    }

    public void close() {
        close(true);
    }

    public void close(boolean isSmooth) {
        int finalLeft = 0;
        if (isSmooth) {
            if (dragHelper.smoothSlideViewTo(frontView, finalLeft, 0)) {
                ViewCompat.postInvalidateOnAnimation(this);
            }
        } else {
            layoutContent(false);
        }
    }


    private Status status = Status.CLOSE;//拖拽状态 默认关闭

    public static enum Status {
        OPEN, CLOSE, DRAGING
    }

    //拖拽事件监听器
    public static interface OnSwipeChangeListener {
        void onDraging(SwipeLayout mSwipeLayout);

        void onOpen(SwipeLayout mSwipeLayout);

        void onClose(SwipeLayout mSwipeLayout);

        void onStartOpen(SwipeLayout mSwipeLayout);

        void onStartClose(SwipeLayout mSwipeLayout);

    }

    //更改状态
    private Status updateStatus() {
        int left = frontView.getLeft();
        if (left == 0) {
            return Status.CLOSE;
        } else if (left == -range) {
            return Status.OPEN;
        }
        return Status.DRAGING;
    }

    //根据当前状态判断回调事件
    protected void dispatchSwipeEvent() {
        Status preStatus = status;
        status = updateStatus();

        if (swipeChangeListener != null) {
            swipeChangeListener.onDraging(this);
        }

        if (preStatus != status && swipeChangeListener != null) {
            if (status == Status.CLOSE) {
                swipeChangeListener.onClose(this);
            } else if (status == Status.OPEN) {
                swipeChangeListener.onOpen(this);
            } else if (status == Status.DRAGING) {
                if (preStatus == Status.CLOSE) {
                    swipeChangeListener.onStartOpen(this);
                } else if (preStatus == Status.OPEN) {
                    swipeChangeListener.onStartClose(this);
                }
            }
        }
    }

    public void setSwipeChangeListener(OnSwipeChangeListener swipeChangeListener) {
        this.swipeChangeListener = swipeChangeListener;
    }
}
2,注意点
(1)onLayout()中修改重新计算布局的控制方式 --- 解决整体管理时,显示出来的部分能够显示左滑内容,而新滑动出来的内容不能正常显示。
(2)在滑动最后状态结束的地方调整比率,可以适当提高反应灵敏度;
(3)该控件放置在可以左滑的控件(ViewPager)中,滑动事件会冲突,效果使用不好。
二、自定义控件的使用
1,布局中使用 ListView 的Item布局中
<?xml version="1.0" encoding="utf-8"?>
<com.future.leftdragdeletedemo.view.SwipeLayout xmlns:android="http://schemas.android.com/apk/res/android"
    android:id="@+id/swipeLayout"
    android:layout_width="match_parent"
    android:layout_height="60dp">

    <LinearLayout
        android:layout_width="wrap_content"
        android:layout_height="match_parent">

        <TextView
            android:layout_width="70dp"
            android:layout_height="match_parent"
            android:background="#ccc"
            android:gravity="center"
            android:text="置顶"
            android:textColor="#fff" />

        <TextView
            android:id="@+id/tv_del"
            android:layout_width="70dp"
            android:layout_height="match_parent"
            android:background="#f00"
            android:clickable="true"
            android:gravity="center"
            android:text="刪除"
            android:textColor="#fff" />
    </LinearLayout>

    <LinearLayout
        android:layout_width="match_parent"
        android:layout_height="match_parent"
        android:gravity="center_vertical">

        <ImageView
            android:id="@+id/imageView"
            android:layout_width="50dp"
            android:layout_height="50dp"
            android:layout_marginLeft="8dp"
            android:layout_marginRight="8dp"
            android:src="@mipmap/kxg" />

        <TextView
            android:id="@+id/textView"
            android:layout_width="wrap_content"
            android:layout_height="match_parent"
            android:gravity="center_vertical"
            android:textColor="#444"
            android:textSize="18sp" />
    </LinearLayout>

</com.future.leftdragdeletedemo.view.SwipeLayout>
2,主布局中使用
<?xml version="1.0" encoding="utf-8"?>
<RelativeLayout xmlns:android="http://schemas.android.com/apk/res/android"
    xmlns:app="http://schemas.android.com/apk/res-auto"
    xmlns:tools="http://schemas.android.com/tools"
    android:layout_width="match_parent"
    android:layout_height="match_parent"
    tools:context="com.future.leftdragdeletedemo.MainActivity">

    <RelativeLayout
        android:id="@+id/head_rl"
        android:layout_width="match_parent"
        android:layout_height="50dp">

        <ImageView
            android:id="@+id/head_back_iv"
            android:layout_width="wrap_content"
            android:layout_height="match_parent"
            android:layout_centerVertical="true"
            android:layout_marginLeft="10dp"
            android:src="@mipmap/head_backpic" />

        <TextView
            android:id="@+id/title_tv"
            android:layout_width="wrap_content"
            android:layout_height="wrap_content"
            android:layout_centerInParent="true"
            android:text="控制我自己"
            android:textSize="18sp" />

        <TextView
            android:id="@+id/whole_control_tv"
            android:layout_width="wrap_content"
            android:layout_height="wrap_content"
            android:layout_alignParentRight="true"
            android:layout_centerVertical="true"
            android:layout_marginRight="12dp"
            android:text="管理"
            android:textSize="18sp" />

    </RelativeLayout>

    <ListView
        android:id="@+id/listView"
        android:layout_width="match_parent"
        android:layout_height="match_parent"
        android:layout_below="@+id/head_rl"
        android:choiceMode="singleChoice" />

</RelativeLayout>
3,适配器实现
public class ListViewAdapter extends BaseAdapter {
    private Context context;
    private List<ItemBean> dataList;
    /**
     * 是否是打开状态
     */
    private boolean isOpen;

    public ListViewAdapter(Context context, List<ItemBean> dataList) {
        this.context = context;
        this.dataList = dataList;
    }

    /**
     * 设置全部打开状态
     *
     * @param open
     */
    public void setOpenStatus(boolean open) {
        isOpen = open;
        if (dataList != null && dataList.size() > 0) {
            for (int i = 0; i < dataList.size(); i++) {
                dataList.get(i).setOpen(open);
            }
        }
        notifyDataSetChanged();
    }

    //存放所有已经打开的菜单
    private List<SwipeLayout> openList = new ArrayList<SwipeLayout>();

    @Override
    public int getCount() {
        return dataList.size();
    }

    @Override
    public Object getItem(int position) {
        return dataList.get(position);
    }

    @Override
    public long getItemId(int position) {
        return position;
    }

    @Override
    public View getView(final int position, View convertView, ViewGroup parent) {
        final ViewHolder holder;
        if (convertView == null) {
            holder = new ViewHolder();
            convertView = LayoutInflater.from(context).inflate(R.layout.layout_item, parent, false);
            holder.textView = (TextView) convertView.findViewById(R.id.textView);
            holder.imageView = (ImageView) convertView.findViewById(R.id.imageView);
            holder.tv_del = (TextView) convertView.findViewById(R.id.tv_del);
            holder.swipeLayout = (SwipeLayout) convertView.findViewById(R.id.swipeLayout);
            convertView.setTag(holder);
        } else {
            holder = (ViewHolder) convertView.getTag();
        }
        final ItemBean bean = dataList.get(position);
        holder.textView.setText(bean.getDescContent());
        holder.imageView.setImageResource(bean.getPicIndex());
        holder.tv_del.setOnClickListener(new View.OnClickListener() {
            @Override
            public void onClick(View v) {
                holder.swipeLayout.close();
                Toast.makeText(context, bean.getDescContent(), Toast.LENGTH_SHORT).show();
            }
        });

        if (bean.isOpen()) {
            holder.swipeLayout.setOpen(true);
            holder.swipeLayout.open();
        } else {
            holder.swipeLayout.setOpen(false);
            holder.swipeLayout.close();
        }

        holder.swipeLayout.setSwipeChangeListener(new SwipeLayout.OnSwipeChangeListener() {

            @Override
            public void onStartOpen(SwipeLayout mSwipeLayout) {
                if (!isOpen) {
                    for (SwipeLayout layout : openList) {
                        layout.close();
                    }
                    openList.clear();
                }
            }

            @Override
            public void onStartClose(SwipeLayout mSwipeLayout) {

            }

            @Override
            public void onOpen(SwipeLayout mSwipeLayout) {
                openList.add(mSwipeLayout);
                bean.setOpen(true);
            }

            @Override
            public void onDraging(SwipeLayout mSwipeLayout) {

            }

            @Override
            public void onClose(SwipeLayout mSwipeLayout) {
                openList.remove(mSwipeLayout);
                bean.setOpen(false);
            }
        });
        return convertView;
    }


    private class ViewHolder {
        SwipeLayout swipeLayout;
        TextView textView;
        TextView tv_del;
        ImageView imageView;
    }
}
4,主类实现
public class MainActivity extends AppCompatActivity implements View.OnClickListener {
    /**
     * 内容控件
     */
    private ListView listView;
    /**
     * 返回
     */
    private ImageView headBack;
    /**
     * 控制按钮
     */
    private TextView controlTV;

    private ListViewAdapter adapter;

    protected void onCreate(Bundle savedInstanceState) {
        super.onCreate(savedInstanceState);
        requestWindowFeature(Window.FEATURE_NO_TITLE);
        setContentView(R.layout.activity_main);
        initView();
        initData();
        initListener();
    }


    /**
     * 初始化控件
     */
    private void initView() {
        headBack = findViewById(R.id.head_back_iv);
        controlTV = findViewById(R.id.whole_control_tv);
        listView = (ListView) findViewById(R.id.listView);
    }

    /**
     * 初始化数据
     */
    private void initData() {
        List<ItemBean> list = new ArrayList<>();
        ItemBean item = new ItemBean();

        for (int i = 0; i < strs.length; i++) {
            item.setDescContent(strs[i]);
            item.setPicIndex(ids[i]);
            list.add(item);
            item = new ItemBean();//不添加是同一个??
        }

        adapter = new ListViewAdapter(MainActivity.this, list);
        listView.setAdapter(adapter);
    }


    /**
     * 初始化监听器
     */
    private void initListener() {
        headBack.setOnClickListener(this);
        controlTV.setOnClickListener(this);
    }


    private String strs[] = {"得劲", "加油", "坚持", "慎独", "控制情绪", "好好对待自己", "更美好的未来",
            "下一站", "懵懂", "秋高气爽", "嘟噜噜", "就这样吧", "还挺不错的", "普通的小孩"};
    private int ids[] = {R.mipmap.kxg, R.mipmap.mmi, R.mipmap.geu, R.mipmap.feb, R.mipmap.fdy, R.mipmap.ewo, R.mipmap.mdt,
            R.mipmap.kxg, R.mipmap.mmi, R.mipmap.geu, R.mipmap.feb, R.mipmap.fdy, R.mipmap.ewo, R.mipmap.mdt};

    @Override
    public void onClick(View view) {
        switch (view.getId()) {
            //返回
            case R.id.head_back_iv:
                finish();
                break;
            //管理
            case R.id.whole_control_tv:
                String desc = controlTV.getText().toString().trim();
                if ("管理".equals(desc)) {
                    controlTV.setText("取消");
                    adapter.setOpenStatus(true);
                } else {
                    controlTV.setText("管理");
                    adapter.setOpenStatus(false);
                }
                break;
        }
    }


    /**
     * 问题备注:
     * 1,list压入数据时,需要新创建bean对象;-----数据处理
     * 2,上下滑动,左滑状态不能保持; ------   bean类中添加控制变量,适配器中做修改
     * 3,管理添加后,状态不能统一管理;
     * 4,管理打开状态下,左滑之后右滑会状态混乱;
     * 5,同时向左滑动两个Item;
     * 6,管理点击后显示的页面正确,未展示出来的部分展示不对;
     * 7,多个条目同时滑动;
     */
}
如此,按照以上的步骤实现,就能够实现开篇实现的效果。
这个过程出现以下问题,逐一分解解决。
三、出现相关问题修复优化
1,滑动状态不能保持
在Bean类中添加控制变量,赋予默认值。
public class ItemBean implements Serializable {
    /**
     * 图片索引
     */
    private int picIndex;
    /**
     * 描述
     */
    private String descContent;


    public int getPicIndex() {
        return picIndex;
    }

    public void setPicIndex(int picIndex) {
        this.picIndex = picIndex;
    }

    public String getDescContent() {
        return descContent;
    }

    public void setDescContent(String descContent) {
        this.descContent = descContent;
    }


    /**
     * 是否打开状态
     */
    private boolean isOpen = false;

    public boolean isOpen() {
        return isOpen;
    }

    public void setOpen(boolean open) {
        isOpen = open;
    }
}
private boolean isOpen = false;当实现滑动时,修改该变量的值,就能够保持状态值。
模拟器在录屏时刷新不及时,有点延迟。
2,添加全局的控制管理
顶部添加“管理”按钮,实现整体状态的管理。
注意在实现的时候,修改adpter中的状态时,要同时修改每一个bean类中的状态值。
  /**
     * 设置全部打开状态
     *
     * @param open
     */
    public void setOpenStatus(boolean open) {
        isOpen = open;
        if (dataList != null && dataList.size() > 0) {
            for (int i = 0; i < dataList.size(); i++) {
                dataList.get(i).setOpen(open);
            }
        }
        notifyDataSetChanged();
    }
3,注意在监听左滑时,我们加入了清除其他的已经左滑的状态。
在管理状态下,先右滑其中一个再次左滑时,按照以上的逻辑,会将其他的左滑状态全部改回正常状态。添加状态控制,正好在setOpenStatus()中保存了当前正处于的状态。
     @Override
            public void onStartOpen(SwipeLayout mSwipeLayout) {
                if (!isOpen) {
                    for (SwipeLayout layout : openList) {
                        layout.close();
                    }
                    openList.clear();
                }
            }
4,ListView的多item同时左滑
就出来下面这个么情形:
Activity会引用theme,在theme中添加:
   <!--添加到Application中,所有的Activity都不能多点点击使用-->
        <item name="android:windowEnableSplitTouch">false</item>
        <item name="android:splitMotionEvents">false</item>
则可以控制,一次只能滑动一个item。将上面的部分添加到Application中,会让全部的Activity都不能多点触碰。
存在感从来不是争取来的!你需要做的,是去锤炼自己的能力,同时找回那个被丢在半路上的自己。
因为你不爱自己。你让自己受了太多太多委屈。你逞强,你倔强,你尽量的照顾别人的感受,却频频的让自己受伤……
你要先爱自己,给她吃,给她喝,给她情书。
你若盛开,蝴蝶自来;你若精彩,天自安排!
你若精彩,老天自有安排!
——做有意义的事,去经营更好的自己


 263
263

 被折叠的 条评论
为什么被折叠?
被折叠的 条评论
为什么被折叠?
 到【灌水乐园】发言


