


前言
上一篇blog(处女男学Android(三)---Handler简介以及初步应用)简单的记录了关于Handler实现线程间通信的基本用法,通过一个例子实现了在主线程中给其他线程发送消息,并通过Handler的回调方法得到子线程的反馈数据从而实现了这种异步通信。本篇将通一个小例子,并结合源代码,循序渐进的记录了Handler以及相关组件(Looper、MessageQueue)的工作机制和原理。
一、初识Looper、MessageQueue
Looper和MessageQueue是同Handler一起工作的组件,通过上篇的介绍我们知道Handler可以发送消息,接收并处理消息,那么发送和接收的中间环节是如何实现的?这里就用到了Looper和MessageQueue。它们大致的工作过程是这样的:Handler发送消息到MessageQueue(消息队列),而Looper负责读取MessageQueue中的Message对象,读到的消息再交给发送消息的Handler对象进行处理,这样的解释我们似乎可以接受,但是如何考证?先不着急,首先我们通过一个例子初识一下Looper类,然后再结合源码对上面的陈述做出确切的解释和证明。
这个例子很简单,界面上只有一个Button,通过这个Button在主线程中给一个新线程中发送消息,注意是从主线程中发送消息,上一篇的例子都是在新的线程中发送消息,这样反过来我们又要如何处理?没错我们需要使用到Looper类了,先看一下代码:
Layout代码(fourth.xml):
<?xml version="1.0" encoding="utf-8"?>
<LinearLayout xmlns:android="http://schemas.android.com/apk/res/android"
    android:layout_width="match_parent"
    android:layout_height="match_parent"
    android:orientation="vertical" >
    <Button
        android:id="@+id/btn_sendMessage"
        android:layout_width="match_parent"
        android:layout_height="wrap_content"
        android:text="Send Message"
        android:gravity="center"
        />

</LinearLayout>
Activity代码:
package com.example.handlertest;

import android.app.Activity;
import android.os.Bundle;
import android.os.Handler;
import android.os.Looper;
import android.os.Message;
import android.view.View;
import android.view.View.OnClickListener;
import android.widget.Button;

public class FourthActivity extends Activity{

	private Button button1;
	private Handler handler;

	@Override
	protected void onCreate(Bundle savedInstanceState) {
		// TODO Auto-generated method stub
		super.onCreate(savedInstanceState);
		setContentView(R.layout.fourth);

		button1=(Button)findViewById(R.id.btn_sendMessage);
		button1.setOnClickListener(new OnClickListener() {
			@Override
			public void onClick(View v) {
				Message msg=handler.obtainMessage();  // 得到Message对象
				handler.sendMessage(msg);  // 发送消息
			}
		});
		Thread t=new WorkerThread();
		t.start();
	}

	class WorkerThread extends Thread{
		@Override
		public void run(){
			//准备Looper对象
			Looper.prepare();
			handler=new Handler(){
				@Override
				public void handleMessage(Message msg){
					System.out.println("收到了消息对象"); // 接收消息
				}
			};
			//Looper对象将不断的从消息队列中取出消息对象,然后调用handler的handlerMessage()方法,处理该消息对象
			//如果消息队列当中没有对象,则该线程阻塞
			Looper.loop();
		}
	}

}
我们看一下运行效果:
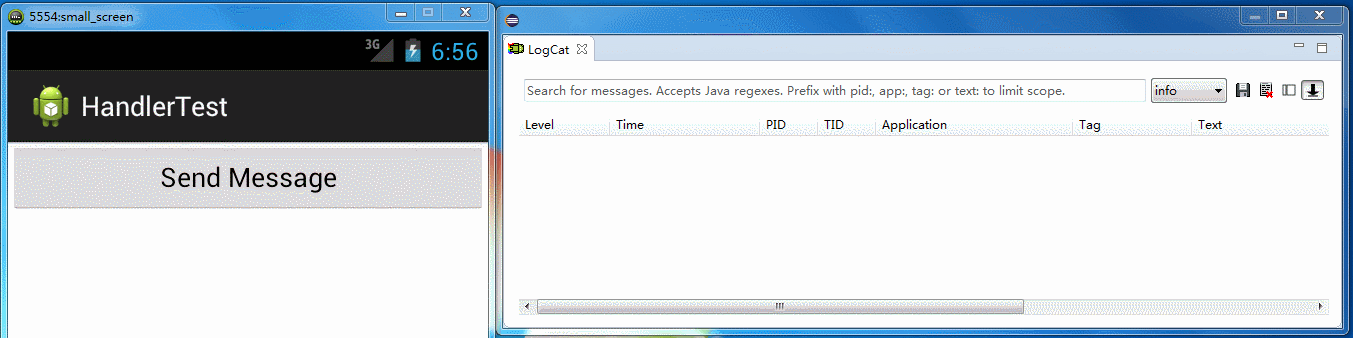
点击Button,确实在新的线程中接收到了消息,那么也许我们会有很多疑问,比如:
1.Looper对象是怎么工作的?它和Handler有什么联系?
2.Looper.prepare()方法和Looper.loop()方法分别有什么用?
3.MessageQueue在哪里?它又和Looper、Handler是怎么关联的?
关于这些问题,我们只能通过读Android源代码来看看它们分别是如何实现的。
二、源码分析
根据上面的代码我们发现使用了Looper.prepare()和Looper.loop(),那么我们首先来看看Looper类以及这两个方法都做了些什么:
public final class Looper {
    private static final String TAG = "Looper";

    // sThreadLocal.get() will return null unless you've called prepare().
    static final ThreadLocal<Looper> sThreadLocal = new ThreadLocal<Looper>();
    private static Looper sMainLooper;  // guarded by Looper.class

    final MessageQueue mQueue;
    final Thread mThread;

    private Printer mLogging;
    public static void prepare() {
        prepare(true);
    }
    private static void prepare(boolean quitAllowed) {
        if (sThreadLocal.get() != null) {
            throw new RuntimeException("Only one Looper may be created per thread");
        }
        sThreadLocal.set(new Looper(quitAllowed));
    }
通过上面的代码我们可以发现,Looper类有MessageQueue和ThreadLocal这两个成员变量,不知道ThreadLocal对象的同学可以看看Java基础,简单的说可以理解成一个特殊的Map对象,只不过是与当前线程相关的,也就是说只能在当前线程存储对象。下面我们再看prepare方法,不难理解,它首先判断ThreadLocal成员变量是否为null,如果不为null的话会抛出异常,Only one looper may be created per thread,也就是说一个线程只能有唯一的一个Looper对象的实例,好了,如果当前线程没有Looper对象的话,那么通过构造方法new了一个Looper对象并绑定到当前线程,下面我们看看Looper的构造方法:
private Looper(boolean quitAllowed) {
        mQueue = new MessageQueue(quitAllowed);
        mThread = Thread.currentThread();
    }
不难发现,其实Looper的构造方法就是创建了一个MessageQueue与之关联,这个MessageQueue当然就是负责管理消息了,到这里我们可以得出以下结论:
prepare方法做了两件事:
第一,创建唯一的一个Looper对象并绑定到当前线程。
第二,创建Looper对象的同时又创建了与Looper对应的MessageQueue对象负责管理消息。
准备工作完成了,下来我们看看Looper是如何读取MessageQueue的Message对象的,很明显,是通过loop()方法来实现的:
public static void loop() {
        final Looper me = myLooper();
        if (me == null) {
            throw new RuntimeException("No Looper; Looper.prepare() wasn't called on this thread.");
        }
        final MessageQueue queue = me.mQueue;

        // Make sure the identity of this thread is that of the local process,
        // and keep track of what that identity token actually is.
        Binder.clearCallingIdentity();
        final long ident = Binder.clearCallingIdentity();

        for (;;) {
            Message msg = queue.next(); // might block
            if (msg == null) {
                // No message indicates that the message queue is quitting.
                return;
            }

            // This must be in a local variable, in case a UI event sets the logger
            Printer logging = me.mLogging;
            if (logging != null) {
                logging.println(">>>>> Dispatching to " + msg.target + " " +
                        msg.callback + ": " + msg.what);
            }

            msg.target.dispatchMessage(msg);

            if (logging != null) {
                logging.println("<<<<< Finished to " + msg.target + " " + msg.callback);
            }

            // Make sure that during the course of dispatching the
            // identity of the thread wasn't corrupted.
            final long newIdent = Binder.clearCallingIdentity();
            if (ident != newIdent) {
                Log.wtf(TAG, "Thread identity changed from 0x"
                        + Long.toHexString(ident) + " to 0x"
                        + Long.toHexString(newIdent) + " while dispatching to "
                        + msg.target.getClass().getName() + " "
                        + msg.callback + " what=" + msg.what);
            }

            msg.recycle();
        }
    }
public static Looper myLooper() {
return sThreadLocal.get();
}
/*package*/ Handler target;
/**
     * Subclasses must implement this to receive messages.
     */
    public void handleMessage(Message msg) {
    }

    /**
     * Handle system messages here.
     */
    public void dispatchMessage(Message msg) {
        if (msg.callback != null) {
            handleCallback(msg);
        } else {
            if (mCallback != null) {
                if (mCallback.handleMessage(msg)) {
                    return;
                }
            }
            handleMessage(msg);
        }
    }
先不管前面的判断,很明显最后调用的是handleMessage(msg)方法,而Handler的handleMessage(msg)又是一个空方法,为什么呢?因为消息的最终回调是由我们控制的,这就是我们创建Handler的时候要重写handleMessage(msg)这个方法的原因。
说了这么多,我们已经知道了如果通过Looper循环MessageQueue取出消息,取出之后如何处理消息,还有一点没有说,就是如何发送消息?消息是怎么发送到指定的MessageQueue?换句话说,就是Handler是如何和MessageQueue相关联的,下面我们看看Handler的源代码:
public Handler() {
        this(null, false);
    }
public Handler(Callback callback, boolean async) {
if (FIND_POTENTIAL_LEAKS) {
final Class<? extends Handler> klass = getClass();
if ((klass.isAnonymousClass() || klass.isMemberClass() || klass.isLocalClass()) &&
(klass.getModifiers() & Modifier.STATIC) == 0) {
Log.w(TAG, "The following Handler class should be static or leaks might occur: " +
klass.getCanonicalName());
}
}
mLooper = Looper.myLooper();
if (mLooper == null) {
throw new RuntimeException(
"Can't create handler inside thread that has not called Looper.prepare()");
}
mQueue = mLooper.mQueue;
mCallback = callback;
mAsynchronous = async;
}
不难发现,handler在初始化时调用了Looper.myLooper()得到Looper对象的实例,并通过这个实例进而得到MessageQueue对象,并将这两个对象和当前的Handler绑定起来。
最后我们看看常用的发送消息方法,看看是Handler是如何将Message放到MessageQueue中去的:
public final boolean sendMessage(Message msg)
    {
        return sendMessageDelayed(msg, 0);
    }
public final boolean sendMessageDelayed(Message msg, long delayMillis)
{
if (delayMillis < 0) {
delayMillis = 0;
}
return sendMessageAtTime(msg, SystemClock.uptimeMillis() + delayMillis);
}public boolean sendMessageAtTime(Message msg, long uptimeMillis) {
MessageQueue queue = mQueue;
if (queue == null) {
RuntimeException e = new RuntimeException(
this + " sendMessageAtTime() called with no mQueue");
Log.w("Looper", e.getMessage(), e);
return false;
}
return enqueueMessage(queue, msg, uptimeMillis);
}private boolean enqueueMessage(MessageQueue queue, Message msg, long uptimeMillis) {
msg.target = this;
if (mAsynchronous) {
msg.setAsynchronous(true);
}
return queue.enqueueMessage(msg, uptimeMillis);
}
不难发现,sendMessage(msg)最后是跳到了enqueueMessage这个方法,第一行就是将当前的handler赋值给了Message的target属性,最终会调用queue的enqueueMessage的方法,也就是说handler发出的消息,最终会保存到消息队列中去。
至此整个过程就已经介绍完毕,下面再对这个过程做一个总结:
1.Looper.prepare()方法会在当前线程实例化唯一的一个Looper对象,实例化Looper对象的同时会实例化一个MessageQueue对象保存在Looper中。因为Looper在线程中是唯一的,所以MessageQueue自然也是唯一的,这样在一个线程中就确定了一个Looper和MessageQueue的对应关系。
2.Looper.loop()方法会进入死循环,不断的从MessageQueue中读取Message对象,并通过msg.target.dispatchMessage(msg)方法将Message对象交给Handler的dispatchMessage(msg)方法去处理。
3.实例化Handler的同时,会得到当前线程的Looper对象以及MessageQueue对象,这样三者就能关联上了。
4.通过sendMessage(msg)将当前的Handler赋值给Message的target属性,并将消息加入到MessageQueue。
5.实例化Handler时,重写handleMessage(msg),最终在dispatchMessage(msg)进行调用。
最后说一点,上一篇博客的例子为什么没有用到Looper对象呢?因为在UI线程(主线程)中,系统已经初始化了一个Looper对象,因此程序直接创建一个Handler对象即可发送消息、处理消息了。
三、总结
本篇blog主要介绍了Handler、Looper、MessageQueue这三个组件的工作原理和机制,读了源码之后也清楚它们是如何联系起来的,如何工作的,看到这里相信我们上面的三个疑问也都应该迎刃而解了,虽然源码不算很长,但我确实也看了很长时间,而且还没有完全消化(脑子笨),这种设计思想确实非常直接继续深入学习和理解,后续还会有一篇关于Handler的介绍,主要是记录Handler的post方法。先到这里吧,让我再好好理一理!!


 2734
2734

 被折叠的 条评论
为什么被折叠?
被折叠的 条评论
为什么被折叠?
 到【灌水乐园】发言


