


android studio开发NDK还是很方便的。无论是ndk-build还是cmake方式。c/c++来实现,让开发人员越来越懒。
一: 创建项目

在include C++ Support 打勾。就是支持C++代码。可以进行C编写。一直next到:
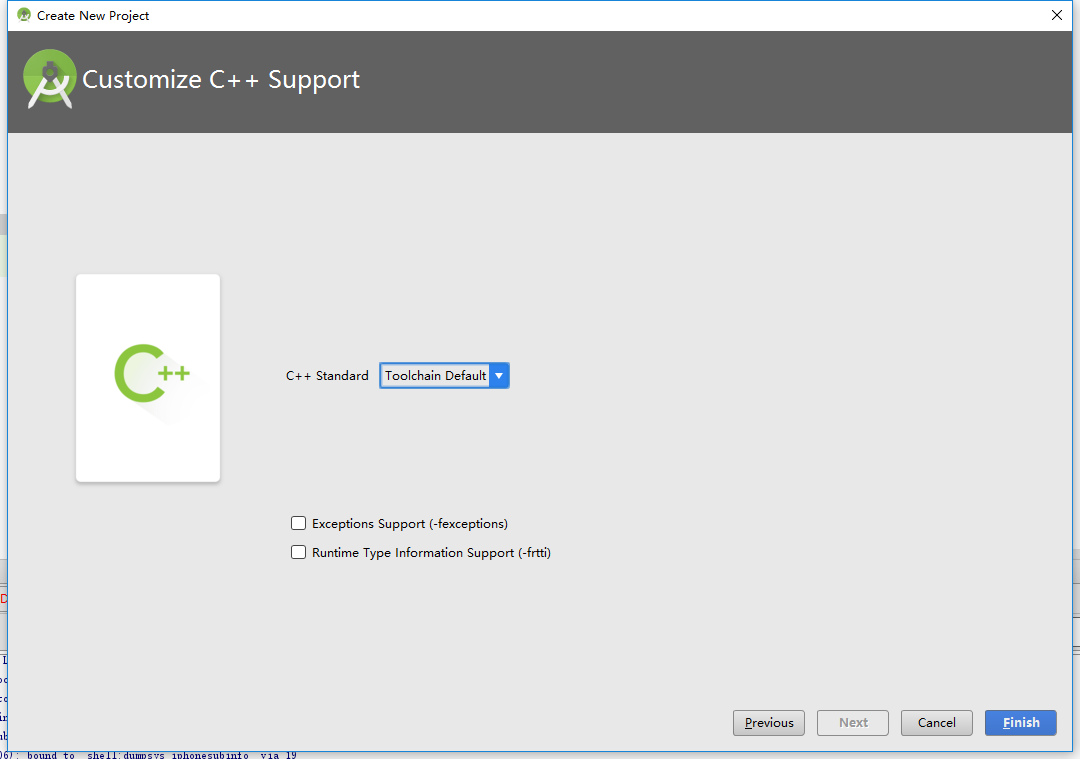
已经完成,直接Finish.其余选项默认即可。
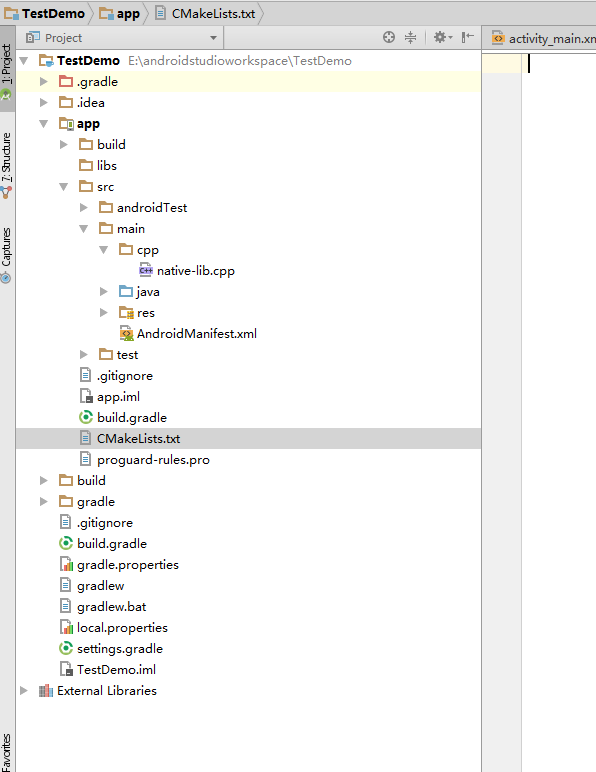
项目建立完成:

默认给出一个“Hello from C++”的JNI例子。
运行即可。那么这就是第一个Android Studio的 JNI项目。就是这么简单。
二:分析
首先,JNI的项目比较通常的安卓项目,多了一个cpp的文件夹。还有External Build Files 中的Cmake文件。其中gradle中的代码也会有所不同。下面一一看来。
先看MainActivity里面的:
static {
    System.loadLibrary("native-lib");
}
表示加载一个native的库。这个库里面就是c/c++编译的。
public native String stringFromJNI(); 声明一个native的接口方法。在这个项目中这个方法在 native-lib的库里面实现了。所以直接调用就可以。
那在在看native-lib.cpp中:
#include <jni.h>
#include <string>

extern "C"
jstring
Java_com_xiaoyunchengzhu_jnidemo_MainActivity_stringFromJNI(
        JNIEnv *env,
        jobject /* this */) {
    std::string hello = "Hello from C++";
    return env->NewStringUTF(hello.c_str());
}
这个里面的方法就是对stringFromJni接口的实现。返回“Hello from C++”字符串。
在看gradle中:
apply plugin: 'com.android.application'

android {
    compileSdkVersion 23
    buildToolsVersion "24.0.0"
    defaultConfig {
        applicationId "com.xiaoyunchengzhu.jnidemo"
        minSdkVersion 15
        targetSdkVersion 23
        versionCode 1
        versionName "1.0"
        testInstrumentationRunner "android.support.test.runner.AndroidJUnitRunner"
        externalNativeBuild {
            cmake {
                cppFlags ""
            }
        }
    }
    buildTypes {
        release {
            minifyEnabled false
            proguardFiles getDefaultProguardFile('proguard-android.txt'), 'proguard-rules.pro'
        }
    }
    externalNativeBuild {
        cmake {
            path "CMakeLists.txt"
        }
    }
    productFlavors {
    }
}

dependencies {
    compile fileTree(include: ['*.jar'], dir: 'libs')
    androidTestCompile('com.android.support.test.espresso:espresso-core:2.2.2', {
        exclude group: 'com.android.support', module: 'support-annotations'
    })
    compile 'com.android.support:appcompat-v7:23.0.0'
    testCompile 'junit:junit:4.12'
}
最新版本native由cmake编译创建,在以前是由ndk-build来创建。cmake文件通常是 CMakeLists.txt。cmake是什么东西呢?cmake是一个编译工具。ok,说到这里,具体怎么用,以后再说。gradle中指定了cmake的flag, ,指定了cmake的文件路径。 CMakeLists.txt具体代码:cmake_minimum_required(VERSION 3.4.1):指定创建native库的cmake的最低版本。# Sets the minimum version of CMake required to build the native # library. You should either keep the default value or only pass a # value of 3.4.0 or lower. cmake_minimum_required(VERSION 3.4.1) # Creates and names a library, sets it as either STATIC # or SHARED, and provides the relative paths to its source code. # You can define multiple libraries, and CMake builds it for you. # Gradle automatically packages shared libraries with your APK. add_library( # Sets the name of the library. native-lib # Sets the library as a shared library. SHARED # Provides a relative path to your source file(s). # Associated headers in the same location as their source # file are automatically included. src/main/cpp/native-lib.cpp ) # Searches for a specified prebuilt library and stores the path as a # variable. Because system libraries are included in the search path by # default, you only need to specify the name of the public NDK library # you want to add. CMake verifies that the library exists before # completing its build. find_library( # Sets the name of the path variable. log-lib # Specifies the name of the NDK library that # you want CMake to locate. log ) # Specifies libraries CMake should link to your target library. You # can link multiple libraries, such as libraries you define in the # build script, prebuilt third-party libraries, or system libraries. target_link_libraries( # Specifies the target library. native-lib # Links the target library to the log library # included in the NDK. ${log-lib} )
add_library:创建和命名一个库。可以设计库的名字,设置库作为共享库,提供一个相对路劲。
find_library:自动搜索预构建的库,系统库。
target_link_libraries:目标库连接。指定的目标库,连接目标库在ndk中。
其实也不用说,里面的英文解释的很清楚了。我翻译的不太好,这也算是自己的见解。
三:从项目中添加JNI支持
之前都是一开始就创建的JNI的项目。那么怎么从已经有的项目中添加JNI 的支持呢?
其实很简单,相比较于在一中,没有什么就主动创建什么,
1、先创建cpp文件夹,和native库文件也就是cpp文件。

cpp文件就是jni那一套代码,还有c/c++的代码。
2、创建cmake的脚本。
cmake文件的命名必须是CMakeLists.txt。
这种编译工具类的文件最好和gradle一个文件夹下。
cmake的代码步骤:
        1)版本最低声明:cmake_minimum_required(VERSION 3.4.1)
        2)增加native库支持  add_library( native-lib  SHARED  src/main/cpp/native-lib.cpp )
3)自动搜索预构建库,系统库支持。
find_library(log-lib log )
       4)增加目标库连接:
         arget_link_libraries( native-lib  ${log-lib} )
       另外:怎么增加其它的预构建的库呢?比如import-lib是一个外部库。
       用add_library(import-lib SHARED IMPORTED) 来添加,2中的路径边成了IMPORTED 标记。来指明是引入的库。并用set_target_properties(import-libPROPERTIES IMPORTED_LOCATION  import-lib/src/${ANDROID_ABI}/libimport-lib.so)其中 $(ANDROID_ABI)是不同的ABI路径文件夹。这里是so的文件。
       如果需要引入头文件 则include_directories( import-lib/include/ )在include目录下的头文件。就被加到里面了。

     3、gradle中连接native库和cmake。
     gradle中加cmake的路径。android {·······
defaultConfig {······
externalNativeBuild{
    cmake{
        cppFlags""
    }
}
·····
}
·····
     externalNativeBuild {
        cmake {
        path "CMakeLists.txt"
       }
   }
·······
}
     cmake还有其它的配置上面是最基本的,简单的配置。还有一些标记的设置,比如cppFlags标记c++标记。如果要打包特殊的ABI配置的so文件则可以增加:
android {·······
ndk {

    abiFilters 'x86', 'x86_64', 'armeabi', 'armeabi-v7a',  'arm64-v8a'
}
···
}

       4、c++连接到gradle

在第3个步骤以前就已经配置完毕了,那么最后一步就是为了在android studio的视图中能看到cpp,和cmake文件。
效果为:

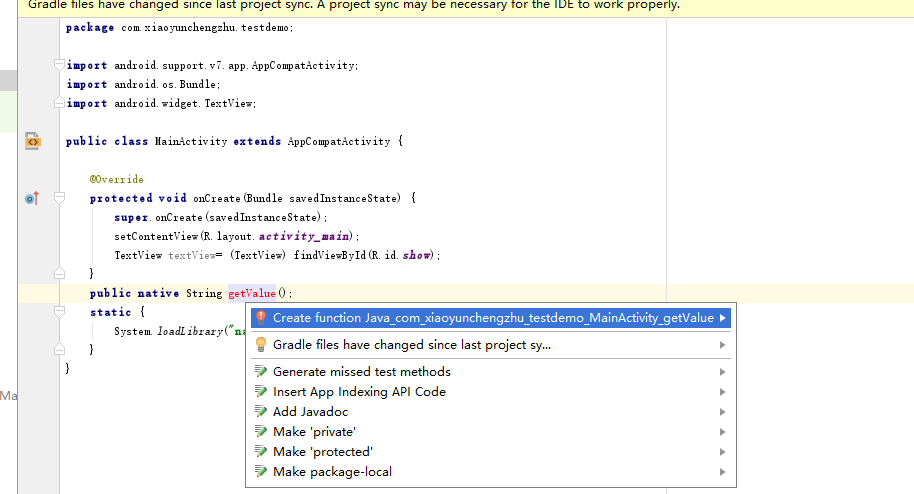
5、在Java代码中加载native库,声明native接口方法。
public class MainActivity extends AppCompatActivity {

    @Override
    protected void onCreate(Bundle savedInstanceState) {
        super.onCreate(savedInstanceState);
        setContentView(R.layout.activity_main);
        TextView textView= (TextView) findViewById(R.id.show);
        textView.setText(getValue());
    }
    public native String getValue();
    static {
        System.loadLibrary("native-lib");
    }
}
我们写了一个简单的native接口getVelue();
那么在cpp中实现代码为:
#include <jni.h>
extern "C"
jstring
Java_com_xiaoyunchengzhu_testdemo_MainActivity_getValue(JNIEnv *env, jobject instance) {

    // TODO


    return env->NewStringUTF( "hello 我爱和平");
}
ok,可以运行试试,屏幕显示的是hello 我爱和平。
另外:
其中在Java代码中写native接口的时候有一个智能提示:
#include <jni.h>

JNIEXPORT jstring JNICALL
Java_com_xiaoyunchengzhu_testdemo_MainActivity_getValue(JNIEnv *env, jobject instance) {

    // TODO


    return (*env)->NewStringUTF(env, "hello world,你好啊");
}
如果继续的话,会创建一个jni文件夹下native-lib.c的文件同时里面已经自动补全好了代码,就剩一个const char*的参数。这个是自动生成的c文件实现方式。这里我就改变了hello world,你好啊。那么只需要cmake的配置就需要变化一下。
 add_library( native-lib  SHARED  src/main/jni/native-lib.c )。ok运行一下。成功。看来依然可以运行用c来实现的native。
      c++和c来实现有一个区别就是c++的文件需要加一个extern "C";
那么我们怎么查看生成编译好的.so文件来用呢?这里我们用cmake生成的那么我们去cmake的文件夹下去找:
app\build\intermediates\cmake\ 这个文件加下有两个一个是debug,一个是realase。这下面就是生成相应的so库文件。我这里是调试,所以在debug里面下找。

没有指定ABI,所以全部的都生成。

ok,.就到这里了。
第一个JNI项目就这么完成了。


 3020
3020

 被折叠的 条评论
为什么被折叠?
被折叠的 条评论
为什么被折叠?
 到【灌水乐园】发言


