


更新完OC部分以后,公司通知我去成都参加安全支付大会,去了三天时间,回来以后把开会的内容做了汇总,刚忙完手头的事情才想起好几天没有更新过博客了。今天闲下来了,正好更新一下。
今天是第一篇UI的博客,主要讲一下ViewController(控制器)、UIImageView(图片视图)、UILabel(标签)。好了,废话不多说了,进入正题。
1.控制器的生命周期(这里就不详细叙述了,这个自行百度即可,主要讲解一下经常用到的两个。新手不建议现在就百度查询,可以等UI入门之后再详细了解,否则门都还没入,就可能被概念弄的一脸懵逼。我也会在UI进行到恰当的时候详细讲解一下AppDelegate和ViewController)
viewDidLoad     进行自定义数据以及动态创建其他控件(绝大多数操作在此方法中完成)
viewWillAppear  视图将出现在屏幕之前(控制器切换的时候不一定会调用viewDidLoad方法,此时如有数据更新等其他操作可在此方法中完成)
2.控制器改变背景色
新建FirstView项目,在ViewController中编写代码
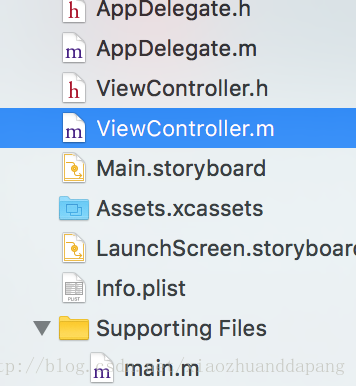
①ViewController.h
#import <UIKit/UIKit.h>

@interface ViewController : UIViewController

@end
②ViewController.m
#import "ViewController.h"

@interface ViewController ()

@end

@implementation ViewController

//进行自定义数据以及动态创建其他控件
- (void)viewDidLoad {
    [super viewDidLoad];

    /**command+R运行控制器颜色变为红色
    *  UIColor是一个颜色类,通过类方法创建颜色对象
    */
    self.view.backgroundColor = [UIColor redColor];

}

//当内存不足时,收到警告,此方法现阶段暂时忽略
- (void)didReceiveMemoryWarning {
    [super didReceiveMemoryWarning];
    // Dispose of any resources that can be recreated.
}

@end
3.UIImageView
新建项目FirstImageView,并将下面的图片导入项目(按住图片,拖入项目即可,命名为beautiful_girl),直接百度美女图片也可。
①ViewController.h
#import <UIKit/UIKit.h>

@interface ViewController : UIViewController

@end
②ViewController.m
#import "ViewController.h"
@interface ViewController ()
@end
@implementation ViewController
- (void)viewDidLoad {
[super viewDidLoad];
UIImageView *imageView = [[UIImageView alloc] init];
/**
* frame(图片视图大小)
* CGRectMake(视图的起点X坐标,视图的起点Y坐标,视图的宽,视图的高)
*/
imageView.frame = CGRectMake(50, 100, 150, 200);
/**
* ①通常编码中将上述两个步骤合为一个步骤编写
* UIImageView *imageView = [[UIImageView alloc] initWithFrame:CGRectMake(50, 100, 150, 200)];
*/
//②根据图片名称在图片视图上显示相应图片
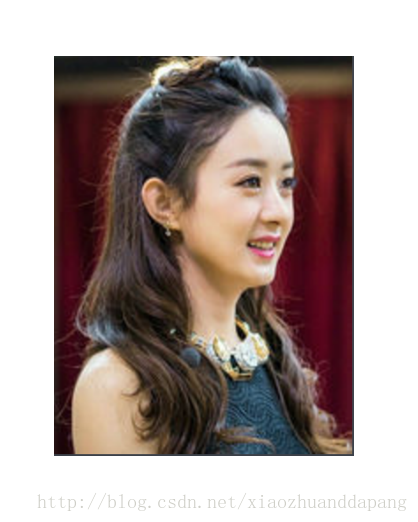
imageView.image = [UIImage imageNamed:@"beautiful_girl.png"];
//③将图片视图添加到控制器上
[self.view addSubview:imageView];
}
@end运行效果如图:
4.UILabel
新建项目FirstLabel
①ViewController.h
#import <UIKit/UIKit.h>

@interface ViewController : UIViewController

@end
②ViewController.m
#import "ViewController.h"
@interface ViewController ()
@end
@implementation ViewController
- (void)viewDidLoad {
[super viewDidLoad];
//1、UILabel对象的创建,并设置UILabel的显示位置和大小
UILabel * label = [[UILabel alloc] initWithFrame:CGRectMake(0, 100, 200, 20)];
//2、添加文字信息
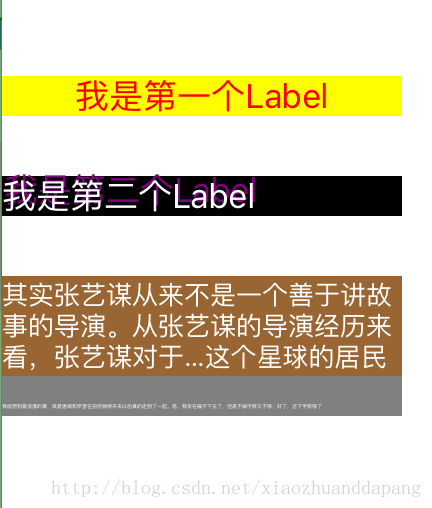
label.text = @"我是第一个Label";
//3、设置标签背景颜色
label.backgroundColor = [UIColor yellowColor];
//4、设置字体颜色
label.textColor = [UIColor redColor];
/**
* 5.设置字体显示样式
* NSTextAlignmentCenter 居中
* NSTextAlignmentRight 居右
* NSTextAlignmentLeft 居左
*/
label.textAlignment = NSTextAlignmentCenter;
//6、设置字体大小)
label.font = [UIFont systemFontOfSize:17];
//7、把label加到self.view上面
[self.view addSubview:label];
UILabel * label2 = [[UILabel alloc] initWithFrame:CGRectMake(0, 150, 200, 20)];
label2.backgroundColor = [UIColor blackColor];
label2.text = @"我是第二个Label";
label2.textColor = [UIColor whiteColor];
[self.view addSubview:label2];
/**
* 8.设置字体的阴影效果
* shadowOffset:阴影偏移量
* shadowColor:阴影颜色
*/
label2.shadowOffset = CGSizeMake(1, -3);
label2.shadowColor = [UIColor purpleColor];
UILabel * label3 = [[UILabel alloc] initWithFrame:CGRectMake(0, 200, 200, 50)];
label3.backgroundColor = [UIColor brownColor];
label3.text = @"其实张艺谋从来不是一个善于讲故事的导演。从张艺谋的导演经历来看,张艺谋对于画面的掌控能力比较强,对于近现代题材有着很好地表现能力。其实看一下张艺谋早期参与的作品,从《红高粱》到《活着》,张艺谋的技巧是没得说的。这一时期,即便对于张艺谋的电影有争议,也只是局限在张艺谋是否通过暴露中国落后的一面来获得国际关注,但对于影片本身的质量,极少有人有质疑。及至《英雄》之后,《十面埋伏》、《满城尽带黄金甲》、《三枪拍案惊奇》几部电影前后脚上映,对于张艺谋的批评声音顿时多了起来。除了《英雄》还有一些可圈可点之处之外,后面几部真的是太掉价。《金陵十三钗》和《归来》的出现,让人又感叹那个让人熟悉的张艺谋又回来了。其实纵观张艺谋的经历,会发现张艺谋有两个比较严重的缺陷:第一,由于成长环境的限制,张艺谋的历史积淀并不高,所以一旦当题材超越出他的经验范围时,就容易跑偏;第二,张艺谋是摄影出身,摄影出身的导演普遍的特征是画面拍的比较好,但不太会讲故事。而对于幻想小说这种开脑洞的题材,张艺谋真的是无能为力的。我曾看过央视做的一期节目,里面邀请张艺谋和卡梅隆同台。节目最后,主持人让二人互相以对方为主角编一个故事。张艺谋的故事是:卡梅隆先生因为一个机缘巧合穿越到了唐朝,见到了当时最美丽的女人杨贵妃,跟他谈起了恋爱。卡梅隆的故事是:张先生是一个非常厉害的科学家,他一生中都在追寻一种世界上从没有过的梦幻般的颜色,有一天他听说外星球有这种颜色的矿石,于是张先生搭乘飞船来到了这个星球,然后他见到了这个星球的居民";
label3.textColor = [UIColor whiteColor];
label3.font = [UIFont systemFontOfSize:13];
/**
* 9、label默认的文字显示行数为1行,如果文字内容多于一行显示的内容,那么文字就会显示不完全
* label3.numberOfLines = 3;表示如果文字不够三行,够几行,显示几行;如果文字超过三行,高度足够,只显示三行。一般设置为0,表示行数按照字体大小和label高度自动设置最大值。
*
*/
label3.numberOfLines = 0;
//10、设置换行样式:NSLineBreakByTruncatingMiddle表示下面行数为以单词换行,行数不够,舍去尾行的行尾,显示省略号。
label3.lineBreakMode = NSLineBreakByTruncatingMiddle;
[self.view addSubview:label3];
UILabel * label4 = [[UILabel alloc] init];
label4.frame = CGRectMake(0, 250, 200, 20);
label4.backgroundColor = [UIColor grayColor];
label4.textColor = [UIColor whiteColor];
label4.text = @"我能想到最浪漫的事,就是唐嫣和罗晋在拍完锦绣未央以后真的走到了一起。恩,我实在编不下去了,但是不编字数又不够,好了,这下字数够了";
//11、设置文字自适应宽度,如果宽度不够,文字缩小,如果宽度过宽,文字不会放大
label4.adjustsFontSizeToFitWidth = YES;
[self.view addSubview:label4];
}
@end效果如图:
【小技巧】label3.lineBreakMode = NSLineBreakByTruncatingMiddle;例如设置换行样式等时,根据需求查看换行样式效果,长按command并单击NSLineBreakByTruncatingMiddle,查看枚举值。
小练习
将绿色控制器中,用15号字体显示蓝底红字的“程序员小咖”五个字。
参考答案(一万个读者有一万个哈姆雷特,一万个程序员有一万种编码风格,答案仅供参考)
新建Test项目,ViewController.h中不做任何操作
ViewController.m
#import "ViewController.h"

@interface ViewController ()

@end

@implementation ViewController

- (void)viewDidLoad {
    [super viewDidLoad];

    //command+单击UIColor 查看支持的颜色
    self.view.backgroundColor = [UIColor greenColor];

    UILabel *label = [[UILabel alloc] initWithFrame:CGRectMake(0, 100, 200, 50)];
    label.backgroundColor = [UIColor blueColor];
    label.font = [UIFont systemFontOfSize:15];
    label.textColor = [UIColor redColor];
    label.text = @"程序员小咖";
    [self.view addSubview:label];

}

@end


 1151
1151


 被折叠的 条评论
为什么被折叠?
被折叠的 条评论
为什么被折叠?
 到【灌水乐园】发言


