


0 前言
本文描述如果通过文件IO sysfs方式控制EasyARM GPIO端口。通过sysfs方式控制GPIO,先访问/sys/class/gpio目录,向export文件写入GPIO编号,使得该GPIO的操作接口从内核空间暴露到用户空间,GPIO的操作接口包括direction和value等,direction控制GPIO方向,而value可控制GPIO输出或获得GPIO输入。
Linux学习可从应用出发,先不纠结Linux驱动编写,先把Linux给玩起来。
【相关博文】
【代码仓库】
代码仓库位于bitbucket——
easyarm-gpio-sysfs,请使用Hg克隆或者直接下载zip包。请不要使用任何版本的IE浏览器访问链接,除非你已经知道所使用的IE浏览器符合HTML5标准。推荐使用谷歌或者火狐浏览器访问,若使用国产双核浏览器请切换到极速模式。
1 暴露GPIO操作接口
static int gpio_export(int pin)
{
    char buffer[BUFFER_MAX];
    int len;
    int fd;

    fd = open("/sys/class/gpio/export", O_WRONLY);
    if (fd < 0) {
        fprintf(stderr, "Failed to open export for writing!\n");
        return(-1);
    }

    len = snprintf(buffer, BUFFER_MAX, "%d", pin);
    if (write(fd, buffer, len) < 0) {
        fprintf(stderr, "Fail to export gpio!");
        return -1;
    }

    close(fd);
    return 0;
}
2 隐藏GPIO操作接口
static int gpio_unexport(int pin)
{
    char buffer[BUFFER_MAX];
    int len;
    int fd;

    fd = open("/sys/class/gpio/unexport", O_WRONLY);
    if (fd < 0) {
        fprintf(stderr, "Failed to open unexport for writing!\n");
        return -1;
    }

    len = snprintf(buffer, BUFFER_MAX, "%d", pin);
    if (write(fd, buffer, len) < 0) {
        fprintf(stderr, "Fail to unexport gpio!");
        return -1;
    }

    close(fd);
    return 0;
}
3 配置GPIO方向
static int gpio_direction(int pin, int dir)
{
    static const char dir_str[] = "in\0out";
    char path[DIRECTION_MAX];
    int fd;

    snprintf(path, DIRECTION_MAX, "/sys/class/gpio/gpio%d/direction", pin);
    fd = open(path, O_WRONLY);
    if (fd < 0) {
        fprintf(stderr, "failed to open gpio direction for writing!\n");
        return -1;
    }

    if (write(fd, &dir_str[dir == IN ? 0 : 3], dir == IN ? 2 : 3) < 0) {
        fprintf(stderr, "failed to set direction!\n");
        return -1;
    }

    close(fd);
    return 0;
}
【简单说明】
【1】dir_str[dir == IN ? 0 : 3], dir == IN ? 2 : 3 如果输入为常数宏IN, 取dir_str[0]=“in”;若输入常数宏为OUT,取dir_str[0]=“out”。此处巧妙的使用了在数组中的“\0”。
4 控制GPIO输出
static int gpio_write(int pin, int value)
{
    static const char values_str[] = "01";
    char path[DIRECTION_MAX];
    int fd;

    snprintf(path, DIRECTION_MAX, "/sys/class/gpio/gpio%d/value", pin);
    fd = open(path, O_WRONLY);
    if (fd < 0) {
        fprintf(stderr, "failed to open gpio value for writing!\n");
        return -1;
    }

    if (write(fd, &values_str[value == LOW ? 0 : 1], 1) < 0) {
        fprintf(stderr, "failed to write value!\n");
        return -1;
    }

    close(fd);
    return 0;
}
5 获得GPIO输入
static int gpio_read(int pin)
{
    char path[DIRECTION_MAX];
    char value_str[3];
    int fd;

    snprintf(path, DIRECTION_MAX, "/sys/class/gpio/gpio%d/value", pin);
    fd = open(path, O_RDONLY);
    if (fd < 0) {
        fprintf(stderr, "failed to open gpio value for reading!\n");
        return -1;
    }

    if (read(fd, value_str, 3) < 0) {
        fprintf(stderr, "failed to read value!\n");
        return -1;
    }

    close(fd);
    return (atoi(value_str));
}
6 GPIO翻转操作
【main函数】
int main(int argc, char *argv[])
{
    int i = 0;
    gpio_export(P24);

    gpio_direction(P24, OUT); // GPIO为输出状态
    for (i = 0; i < 10; i++) {
        printf("LED Blink\n");
        gpio_write(P24, i % 2);
        usleep(500 * 1000);
    }
    gpio_write(P24, 0); // 恢复输出低电平

    gpio_unexport(P24);
    return 0;
}
【makefile】——此处的代码tab显示可能存在问题,请以代码仓库为主。
# 可执行文件
TARGET=test
# 源文件
SRCS=gpio-sysfs.c

# 目标文件
OBJS=$(SRCS:.c=.o)

# 指令编译器和选项
CROSS=arm-fsl-linux-gnueabi-
CC=$(CROSS)gcc
STRIP=$(CROSS)strip
CFLAGS=-Wall -std=gnu99 -O2

$(TARGET):$(OBJS)
 $(CC) -o $@ $^
 $(STRIP) $@

clean:
 rm -rf $(TARGET) $(OBJS)

# 连续动作,先清除再编译链接,复制到tftpboot中
install:clean $(TARGET)
 @echo 复制到tftpboot目录
 cp $(TARGET) ~/tftpboot
 @echo 复制结束

# 编译规则 $@代表目标文件 $< 代表第一个依赖文件
%.o:%.c
 $(CC) $(CFLAGS) -o $@ -c $<
【交叉编译并复制到tftp根目录】
make
再把可执行文件test复制到tftp根目录中,makefile的使用详见【
Linux学习笔记——例说makefile 索引博文】
【目标板中使用tftp获得可执行文件】
为了方便操作,在目标板中新建一个名为run-test.sh的脚本并修改执行权限,tftp的使用方法详见【
EasyARM i.mx28学习笔记——安装和使用tftp】
#!/bin/sh
tftp -g -r test 192.168.1.106
chmod a+x test
echo "start to run test."
./test
【执行脚本 运行test】
./run-test.sh
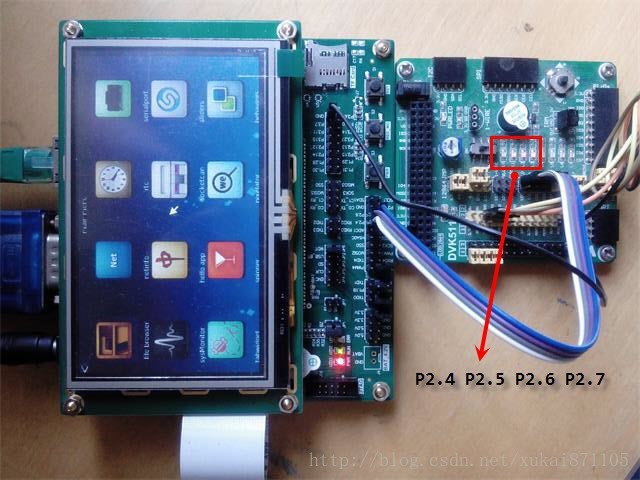
图1 最终效果
7 总结
【1】文件IO方式操作GPIO,使用到了4个函数open close read write。
【2】向export写入具体的GPIO编号便可把控制接口从内核空间暴露到用户空间。
【3】使用文件IO操作Linux外设的方法具有通用性,树莓派同样可以使用该方法。


 1873
1873

 被折叠的 条评论
为什么被折叠?
被折叠的 条评论
为什么被折叠?
 到【灌水乐园】发言


