


一、简介
SpringBoot在搭建的时候不用XML配置文件,同时嵌入
Tomcat,无需部署war,是一个搭建、使用起来都比较方便的框架。
二、开始搭建

选版本之类的,然后输入包名项目名,下载
打开Myeclipse,导入maven项目
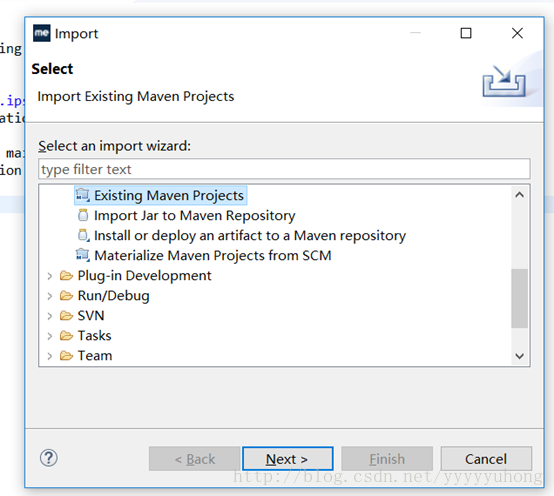
要等一会,因为maven镜像在国外,导入依赖有点慢,可以换成国内的镜像
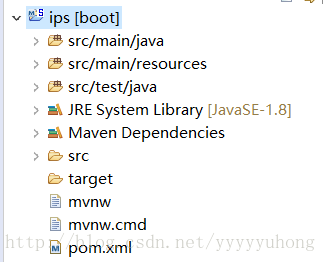
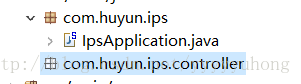
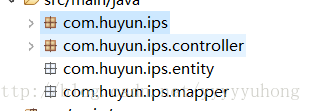
项目结构
这样项目就搭建好啦
三、引入thymeleaf模板
现在开始引入thymeleaf模板,springboot官方推荐这个,vm在spring boot1.5版本之后就不支持了
打开pom.xml
加入如下内容
        <dependency>
        	<groupId>org.springframework.boot</groupId>
        	<artifactId>spring-boot-starter-web</artifactId>
 		</dependency>
 		<!-- thymeleaf模板 -->
    	<dependency>
        	<groupId>org.springframework.boot</groupId>
        	<artifactId>spring-boot-starter-thymeleaf</artifactId>
	</dependency>
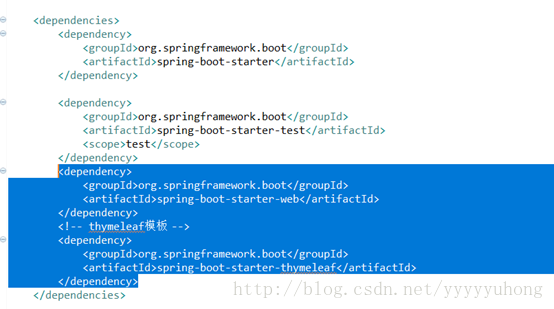
如图
把依赖加进去,等读条,还是maven的问题,会有点慢
一个是web 的模块,一个是thymeleaf模板,都是spring boot里面集成的
打开
application.properties文件

把这些内容扔进去,是web的配置
server.port=8080
spring.thymeleaf.cache=false
spring.thymeleaf.prefix=classpath:/templates/
spring.thymeleaf.check-template-location=true
spring.thymeleaf.suffix=.html
spring.thymeleaf.encoding=UTF-8
spring.thymeleaf.content-type=text/html
spring.thymeleaf.mode=HTML5

这句比较重要,是关闭缓存。不关的话调试的时候修改html就得重启项目
现在开始测试
默认已经有一个包了,里面是已经写好的入口程序
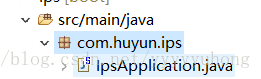
建个
controller
包,要在入口包下面,要在入口包下面,要在入口包下面,不然扫描不到
然后肯定就是建
controller啦,
这里类似spring mvc
@Controller
public class HelloWordController {
	@RequestMapping("/index")
    public String index(Model  model) {
        model.addAttribute("hello","HelloWord");
        return "index";
    }
}
在resources
里建个templates文件夹,html就放里面,springboot默认去templates文件夹下找动态的文件,或者去application.properties文件修改放在哪个文件夹

建个Index.html
内容
<!DOCTYPE HTML>
<html xmlns:th="http://www.thymeleaf.org" >
<head>
    <meta content="text/html;charset=UTF-8"/>
</head>
<body>
	<div th:text="${hello}"></div>
</body>
</html>

这个不加的话也没问题,不过有报警告
然后去入口程序IpsApplication那里,run
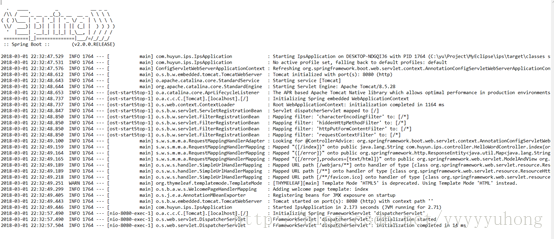
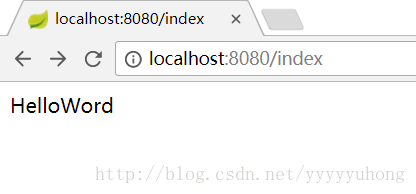
有HelloWord就对了,Thymeleaf模板就配进来了
四、整合mybatis
pom.xml加入下面内容
                <!-- mybatis -->
		<dependency>
			<groupId>org.mybatis.spring.boot</groupId>
			<artifactId>mybatis-spring-boot-starter</artifactId>
			<version>1.1.1</version>
		</dependency>
		<!-- postgresql驱动包 -->
    	        <dependency>
      		        <groupId>org.postgresql</groupId>
      		        <artifactId>postgresql</artifactId>
      		        <version>9.4.1209</version>
    	        </dependency>

如图
用来引入mybatis和postgresql的依赖
打开application.properties
在刚才配置下面加上数据库配置和entity扫描地址,这里我用的是postgresql,你们自己需要什么数据库自己加
#数据库配置
spring.datasource.driverClassName = org.postgresql.Driver
spring.datasource.url = jdbc:postgresql://xxxx
spring.datasource.username = xxx
spring.datasource.password = xxx
#扫描entity
mybatis.type-aliases-package=com.huyun.ips.entity
mapper
有两种方法,一种是写注解,一种就比较传统写xml,这里用写注解的方法
我在test库里弄了个t_user表,不能叫user,跟保留字冲突,总之就是会有坑
在入口文
件加句注解扫描mapper,其实也可以每个mapper都写个@Mapper注解,不过这样方便点
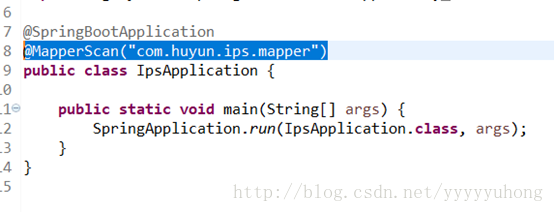
@MapperScan("com.huyun.ips.mapper")建entity包跟mapper包,都要在入口包下面
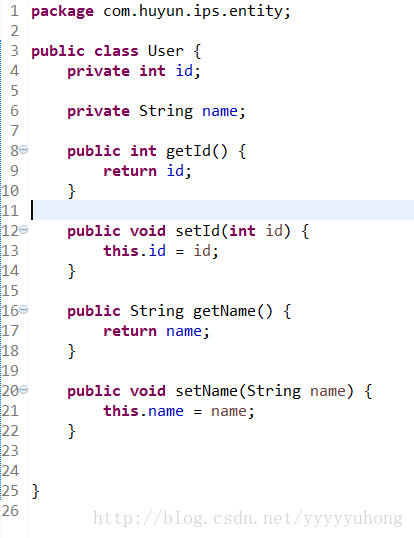
实体类

mapper文件
相比于xml模式其实就是把语句用注解形式写在Dao里
@Select("SELECT * FROM t_user")
	//@Result 修饰返回的结果集,关联实体类属性和数据库字段一一对应,如果实体类属性和数据库属性名保持一致,就不需要这个属性来修饰。
/*	@Results({
		@Result(property = "id",  column = "id", javaType = Integer.class),
		@Result(property = "name", column = "name", javaType = String.class)
	})*/
	List<User> getAll();

	@Insert("INSERT INTO t_user(id,name) VALUES(#{id}, #{name})")
	void insert(User user);
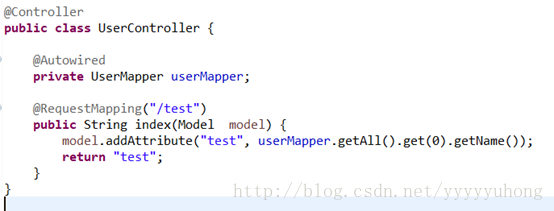
然后弄个测试的controller
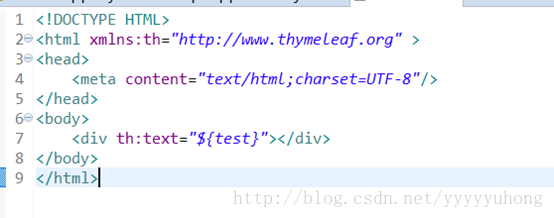
test.html
然后入口程序那里run,如果之前的还在运行,记得先停掉之前运行的
run完访问http://localhost:8080/test
有数据就证明整合成了
然后再去弄个service层,方法类似spring mvc
https://download.csdn.net/download/yyyyyuhong/10275498项目demo,可以去下载


 523
523

 被折叠的 条评论
为什么被折叠?
被折叠的 条评论
为什么被折叠?
 到【灌水乐园】发言


