


Android-搭建简单服务端+ListView异步加载数据
2014年5月6日
本篇博文带给大家的是教大家如何在MyEclipse中搭建一个服务端,并通过手机端与其通信,异步加载数据。
笔者使用的是MyEclipse,各位也可以直接用Eclipse创建Java Web项目,谷歌提供的ADT Bundle是不能创建Web项目,读者可以下载Eclipse For JaveEE Developer这个IDE。
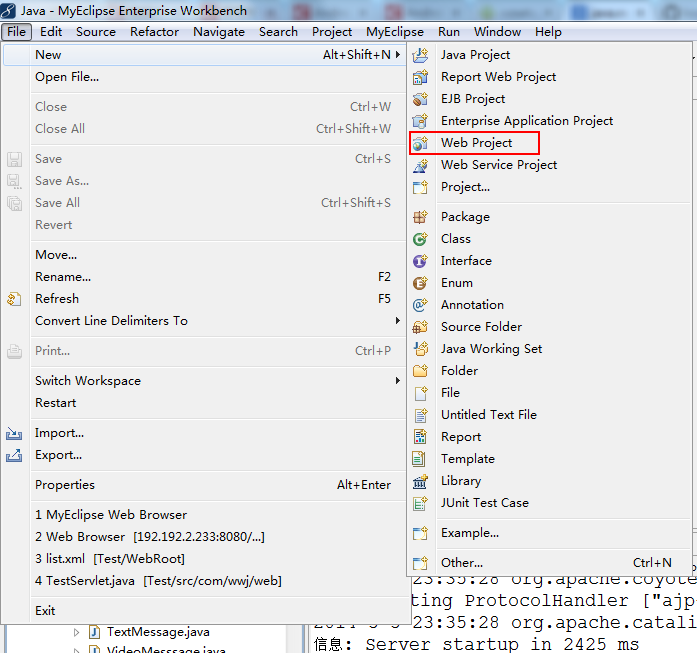
下面来介绍如何在MyEclipse创建一个Web项目,并部署到Tomcat当中,关于Tomcat的配置笔者在这里就不多说了。
创建一个名为Test的Web项目,项目结构如下图所示:
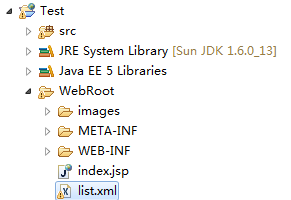
我创建了一个images文件夹和list.xml文件,images文件夹存放的是一些图片,是我们下面要获取的,list.xml是一个xml文件,内容如下:
- <?xml version="1.0" encoding="UTF-8"?>
- <contacts>
- <contact id="1">
- <name>青蛙1</name>
- <image src="http://192.192.8.233:8080/Test/images/1.gif" />
- </contact>
- <contact id="2">
- <name>青蛙2</name>
- <image src="http://192.192.8.233:8080/Test/images/2.gif" />
- </contact>
- <contact id="3">
- <name>青蛙3</name>
- <image src="http://192.192.8.233:8080/Test/images/3.gif" />
- </contact>
- <contact id="4">
- <name>青蛙4</name>
- <image src="http://192.192.8.233:8080/Test/images/4.gif" />
- </contact>
- <contact id="5">
- <name>青蛙5</name>
- <image src="http://192.192.8.233:8080/Test/images/5.gif" />
- </contact>
- <contact id="6">
- <name>青蛙6</name>
- <image src="http://192.192.8.233:8080/Test/images/6.gif" />
- </contact>
- <contact id="7">
- <name>青蛙7</name>
- <image src="http://192.192.8.233:8080/Test/images/7.gif" />
- </contact>
- <contact id="8">
- <name>青蛙8</name>
- <image src="http://192.192.8.233:8080/Test/images/8.gif" />
- </contact>
- <contact id="9">
- <name>青蛙9</name>
- <image src="http://192.192.8.233:8080/Test/images/9.gif" />
- </contact>
- <contact id="10">
- <name>青蛙10</name>
- <image src="http://192.192.8.233:8080/Test/images/10.gif" />
- </contact>
- <contact id="11">
- <name>青蛙11</name>
- <image src="http://192.192.8.233:8080/Test/images/11.gif" />
- </contact>
- <contact id="12">
- <name>青蛙12</name>
- <image src="http://192.192.8.233:8080/Test/images/12.gif" />
- </contact>
- <contact id="13">
- <name>青蛙13</name>
- <image src="http://192.192.8.233:8080/Test/images/13.gif" />
- </contact>
- <contact id="14">
- <name>青蛙14</name>
- <image src="http://192.192.8.233:8080/Test/images/14.gif" />
- </contact>
- <contact id="15">
- <name>青蛙15</name>
- <image src="http://192.192.8.233:8080/Test/images/15.gif" />
- </contact>
- <contact id="16">
- <name>青蛙16</name>
- <image src="http://192.192.8.233:8080/Test/images/16.gif" />
- </contact>
- <contact id="17">
- <name>青蛙17</name>
- <image src="http://192.192.8.233:8080/Test/images/17.gif" />
- </contact>
- <contact id="18">
- <name>青蛙18</name>
- <image src="http://192.192.8.233:8080/Test/images/18.gif" />
- </contact>
- </contacts>
我们可以看到list.xml最外层是一个contacts标签,里面有多个子contact标签,每个子标签包含id、name和image内容,这就是我们下面要解析的内容对应每一个Contact对象。
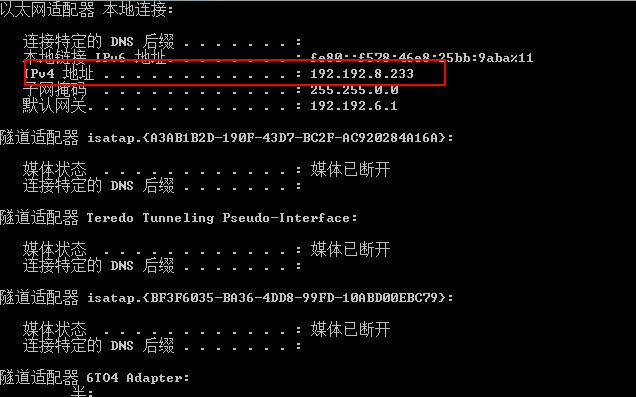
这里要提一下,我们看到image标签,src是图片url地址,这个地址是我PC的IP地址,读者在测试的时候需要将这个IP地址改为你的PC的IP地址,如何得到?运行->cmd->ipconfig /all查看ipv4地址,就是你电脑的ip地址了。
创建好Web项目之后,我们在电脑上测试一下,在浏览器输入地址:
http://192.192.8.233:8080/Test/list.xml
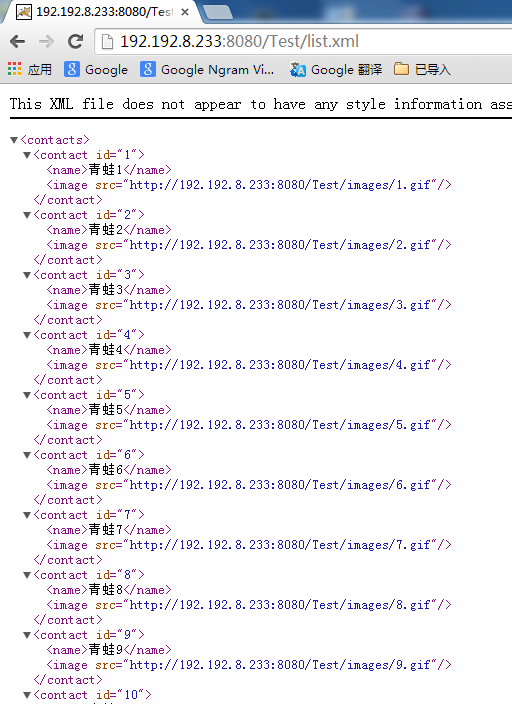
看到以上内容,说明我们已经可以访问到我们的服务端了,下面我们就可以开发我们的客户端:
我这里创建了一个07_DataAsyncLoad的项目:
目录结构如下:
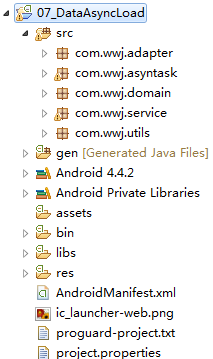
因为需要联网,在AndroidManifest.xml设置权限:
- <!-- 联网权限 -->
- <uses-permission android:name="android.permission.INTERNET" />
根据服务端list.xml,我们需要定义一个实体类:
/07_DataAsyncLoad/src/com/wwj/domain/Contact.java
- package com.wwj.domain;
- /**
- * 联系人实体类
- *
- * @author wwj
- *
- */
- public class Contact {
- public int id;
- public String name;
- public String image;
- public Contact(int id, String name, String image) {
- this.id = id;
- this.name = name;
- this.image = image;
- }
- public Contact() {
- }
- }
需要访问服务端并且解析xml文件,我们定义一个服务类:
/07_DataAsyncLoad/src/com/wwj/service/ContactService.java
- package com.wwj.service;
- import java.io.File;
- import java.io.FileOutputStream;
- import java.io.InputStream;
- import java.net.HttpURLConnection;
- import java.net.URL;
- import java.util.ArrayList;
- import java.util.List;
- import org.xmlpull.v1.XmlPullParser;
- import com.wwj.domain.Contact;
- import com.wwj.utils.MD5;
- import android.net.Uri;
- import android.util.Xml;
- public class ContactService {
- /**
- * 获取联系人
- * @return
- */
- public static List<Contact> getContacts() throws Exception{
- // 服务器文件路径
- String path = "http://192.192.8.233:8080/Test/list.xml";
- HttpURLConnection conn = (HttpURLConnection) new URL(path).openConnection();
- conn.setConnectTimeout(5000); //设置超时5秒
- conn.setRequestMethod("GET"); //设置请求方式
- if(conn.getResponseCode() == 200){ //连接成功返回码200
- return parseXML(conn.getInputStream());
- }
- return null;
- }
- /**
- * 利用pull解析器对xml文件进行解析
- * @param xml
- * @return
- * @throws Exception
- */
- private static List<Contact> parseXML(InputStream xml) throws Exception{
- List<Contact> contacts = new ArrayList<Contact>();
- Contact contact = null;
- XmlPullParser pullParser = Xml.newPullParser();
- pullParser.setInput(xml, "UTF-8");
- int event = pullParser.getEventType(); //取得开始文档语法
- while(event != XmlPullParser.END_DOCUMENT){ //只要不等于文档结束事件,循环解析
- switch (event) {
- case XmlPullParser.START_TAG: //开始标签
- if("contact".equals(pullParser.getName())){
- contact = new Contact();
- contact.id = new Integer(pullParser.getAttributeValue(0));
- }else if("name".equals(pullParser.getName())){
- contact.name = pullParser.nextText(); //取得后面节点的文本值
- }else if("image".equals(pullParser.getName())){
- contact.image = pullParser.getAttributeValue(0); //取得第一个属性的值
- }
- break;
- case XmlPullParser.END_TAG: //结束标签
- if("contact".equals(pullParser.getName())){
- contacts.add(contact); //将contact对象添加到集合中
- contact = null;
- }
- break;
- }
- event = pullParser.next(); //去下一个标签
- }
- return contacts;
- }
- /**
- * 获取网络图片,如果图片存在于缓存中,就返回该图片,否则从网络中加载该图片并缓存起来
- * @param path 图片路径
- * @return
- */
- public static Uri getImage(String path, File cacheDir) throws Exception{// path -> MD5 ->32字符串.jpg
- File localFile = new File(cacheDir, MD5.getMD5(path)+ path.substring(path.lastIndexOf(".")));
- if(localFile.exists()){
- return Uri.fromFile(localFile);
- }else{
- HttpURLConnection conn = (HttpURLConnection) new URL(path).openConnection();
- conn.setConnectTimeout(5000);
- conn.setRequestMethod("GET");
- if(conn.getResponseCode() == 200){
- FileOutputStream outStream = new FileOutputStream(localFile);
- InputStream inputStream = conn.getInputStream();
- byte[] buffer = new byte[1024];
- int len = 0;
- while( (len = inputStream.read(buffer)) != -1){
- outStream.write(buffer, 0, len);
- }
- inputStream.close();
- outStream.close();
- return Uri.fromFile(localFile);
- }
- }
- return null;
- }
- }
上面代码已经很清楚的定义了获取服务端数据的方法,大致流程是这样的:传递一个网络路径path,通过URL打开连接,通过HttpURLConnection连接服务端,得到输入流,解析xml文件再获得数据。
上面代码获取网络图片,需要进行MD5加密计算,具体方法如下:
/07_DataAsyncLoad/src/com/wwj/utils/MD5.java
- package com.wwj.utils;
- import java.security.MessageDigest;
- import java.security.NoSuchAlgorithmException;
- public class MD5 {
- /**
- * MD5加密算法
- *
- * @param content
- * @return
- */
- public static String getMD5(String content) {
- try {
- MessageDigest digest = MessageDigest.getInstance("MD5");
- digest.update(content.getBytes());
- return getHashString(digest);
- } catch (NoSuchAlgorithmException e) {
- e.printStackTrace();
- }
- return null;
- }
- /**
- * 获得哈希字符串
- *
- * @param digest
- * @return
- */
- private static String getHashString(MessageDigest digest) {
- StringBuilder builder = new StringBuilder();
- for (byte b : digest.digest()) {
- builder.append(Integer.toHexString((b >> 4) & 0xf));
- builder.append(Integer.toHexString(b & 0xf));
- }
- return builder.toString();
- }
- }
好,这样我们的服务类就已经写完了,这时我们在MainActivity进行异步加载数据:
/07_DataAsyncLoad/src/com/wwj/asyntask/MainActivity.java
- package com.wwj.asyntask;
- import java.io.File;
- import java.util.List;
- import com.wwj.adapter.ContactAdapter;
- import com.wwj.asyntask.R;
- import com.wwj.domain.Contact;
- import com.wwj.service.ContactService;
- import android.app.Activity;
- import android.os.Bundle;
- import android.os.Environment;
- import android.os.Handler;
- import android.os.Message;
- import android.widget.ListView;
- public class MainActivity extends Activity {
- ListView listView;
- File cache; // 缓存文件
- Handler handler = new Handler() {
- public void handleMessage(Message msg) {
- listView.setAdapter(new ContactAdapter(MainActivity.this,
- (List<Contact>) msg.obj, R.layout.listview_item, cache));
- }
- };
- @Override
- public void onCreate(Bundle savedInstanceState) {
- super.onCreate(savedInstanceState);
- setContentView(R.layout.activity_main);
- listView = (ListView) this.findViewById(R.id.listView);
- cache = new File(Environment.getExternalStorageDirectory(), "cache"); // 实例化缓存文件
- if (!cache.exists())
- cache.mkdirs(); // 如果文件不存在,创建
- // 开一个线程来加载数据
- new Thread(new Runnable() {
- public void run() {
- try {
- List<Contact> data = ContactService.getContacts();
- // 通过handler来发送消息
- handler.sendMessage(handler.obtainMessage(22, data));
- } catch (Exception e) {
- e.printStackTrace();
- }
- }
- }).start();
- }
- @Override
- protected void onDestroy() {
- // 删除缓存
- for (File file : cache.listFiles()) {
- file.delete();
- }
- cache.delete();
- super.onDestroy();
- }
- }
这里我们开了一个线程来加载数据,是因为网络操作不能在UI线程中进行,加载完数据后通过Hanlder发送消息,显示列表。
一般情况下,我们获取图片需要另外处理,我们有很多种方法,最常用的就是Handler+Thread和AsyncTask两种,具体实现来看:
/07_DataAsyncLoad/src/com/wwj/adapter/ContactAdapter.java
我们定义了一个列表适配器,用来填充我们的数据,我们的图片异步加载也在这里实现了:
- package com.wwj.adapter;
- import java.io.File;
- import java.util.List;
- import android.content.Context;
- import android.net.Uri;
- import android.os.AsyncTask;
- import android.view.LayoutInflater;
- import android.view.View;
- import android.view.ViewGroup;
- import android.widget.BaseAdapter;
- import android.widget.ImageView;
- import android.widget.TextView;
- import com.wwj.asyntask.R;
- import com.wwj.domain.Contact;
- import com.wwj.service.ContactService;
- /**
- * 自定义适配器
- *
- * @author wwj
- *
- */
- public class ContactAdapter extends BaseAdapter {
- private List<Contact> data; // 缓存数据
- private int listviewItem; // 条目id
- private File cache; // 缓存文件
- LayoutInflater layoutInflater;
- public ContactAdapter(Context context, List<Contact> data,
- int listviewItem, File cache) {
- this.data = data;
- this.listviewItem = listviewItem;
- this.cache = cache;
- layoutInflater = (LayoutInflater) context
- .getSystemService(Context.LAYOUT_INFLATER_SERVICE);// 获取布局填充服务
- }
- /**
- * 得到数据的总数
- */
- public int getCount() {
- return data.size();
- }
- /**
- * 根据数据索引得到集合所对应的数据
- */
- public Object getItem(int position) {
- return data.get(position);
- }
- public long getItemId(int position) {
- return position;
- }
- /**
- * 当listView每显示一个条目的时候,都会调用这个方法
- */
- public View getView(int position, View convertView, ViewGroup parent) {
- ImageView imageView = null;
- TextView textView = null;
- if (convertView == null) {
- convertView = layoutInflater.inflate(listviewItem, null); // 获取条目的view对象
- imageView = (ImageView) convertView.findViewById(R.id.imageView);
- textView = (TextView) convertView.findViewById(R.id.textView);
- convertView.setTag(new DataWrapper(imageView, textView));
- } else {
- DataWrapper dataWrapper = (DataWrapper) convertView.getTag();
- imageView = dataWrapper.imageView;
- textView = dataWrapper.textView;
- }
- Contact contact = data.get(position);
- textView.setText(contact.name);
- asyncImageLoad(imageView, contact.image);
- return convertView;
- }
- private void asyncImageLoad(ImageView imageView, String path) {
- AsyncImageTask asyncImageTask = new AsyncImageTask(imageView);
- asyncImageTask.execute(path);
- }
- /**
- * 使用AsyncTask异步加载图片
- *
- * @author Administrator
- *
- */
- private final class AsyncImageTask extends AsyncTask<String, Integer, Uri> {
- private ImageView imageView;
- public AsyncImageTask(ImageView imageView) {
- this.imageView = imageView;
- }
- protected Uri doInBackground(String... params) {// 子线程中执行的
- try {
- return ContactService.getImage(params[0], cache);
- } catch (Exception e) {
- e.printStackTrace();
- }
- return null;
- }
- protected void onPostExecute(Uri result) {// 运行在主线程
- if (result != null && imageView != null)
- imageView.setImageURI(result);
- }
- }
- // 使用Handler进行异步加载图片
- /*
- * private void asyncImageLoad(final ImageView imageView, final String path)
- * {
- * final Handler handler = new Handler(){
- * public void
- * handleMessage(Message msg) {//运行在主线程中
- * Uri uri = (Uri)msg.obj;
- * if(uri!=null && imageView!= null) imageView.setImageURI(uri);
- * }
- * };
- *
- * Runnable runnable = new Runnable() {
- * public void run() {
- * try {
- * Uri uri =
- * ContactService.getImage(path, cache);
- * handler.sendMessage(handler.obtainMessage(10, uri));
- * } catch (Exception e) {
- * e.printStackTrace();
- * }
- * }
- * };
- * new Thread(runnable).start();
- * }
- */
- private final class DataWrapper {
- public ImageView imageView;
- public TextView textView;
- public DataWrapper(ImageView imageView, TextView textView) {
- this.imageView = imageView;
- this.textView = textView;
- }
- }
- }
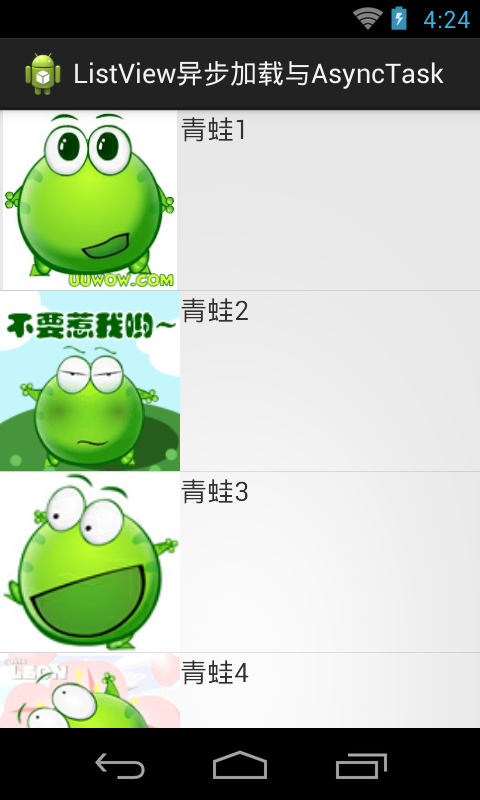
以上就是本项目所有的代码,运行项目效果如下:
最后附上服务端和客户端源码:http://download.csdn.net/detail/wwj_748/7300567


 2502
2502


 被折叠的 条评论
为什么被折叠?
被折叠的 条评论
为什么被折叠?
 到【灌水乐园】发言


