


接口APi开发现状
现在开发接口都要在类似YApi上写文档,这样方便不同的团队之间协作,同步更新接口,提高效率。
但是如果接口很多,你一个个手工在YApi去录入无疑效率很低。
如果是使用Spring Boot集成Swagger可以直接导入YApi非常方便,不过还有一些需要注意的事项。
1.Spring Boot集成Swagger
添加swagger相关的maven依赖
<!-- https://mvnrepository.com/artifact/io.springfox/springfox-swagger-ui -->
<dependency>
    <groupId>io.springfox</groupId>
    <artifactId>springfox-swagger-ui</artifactId>
    <version>2.9.2</version>
</dependency>
<!-- https://mvnrepository.com/artifact/io.springfox/springfox-swagger2 -->
<dependency>
    <groupId>io.springfox</groupId>
    <artifactId>springfox-swagger2</artifactId>
    <version>2.9.2</version>
</dependency>
2.添加swagger的配置类
@Configuration
@EnableSwagger2
@ComponentScan(basePackages = { "xxx.controller" })//扫描的包路径
public class SwaggerConfig {
    @Bean
    public Docket api() {
        return new Docket(DocumentationType.SWAGGER_2).apiInfo(apiInfo()).select()
                .paths(PathSelectors.any()).build();
    }

/**
     * 该套 API 说明,包含作者、简介、版本、host、服务URL
     * @return
     */
    private ApiInfo apiInfo() {
        return new ApiInfoBuilder()
                .title("api 说明")//接口标题
                .description("商品列表接口")//接口描述
                .version("v1.0")//版本号
                .contact(new Contact("name", "url", "email"))//联系人信息
                .build();
    }
}
或者
@Configuration
@EnableSwagger2
public class SwaggerConfig {

    @Bean
    public Docket api() {
        return new Docket(DocumentationType.SWAGGER_2)
                .apiInfo(apiInfo())
                .select()
                .apis(RequestHandlerSelectors.basePackage("xxx.controller")) //扫描的包路径
                .build();
    }

    /**
     * 该套 API 说明,包含作者、简介、版本、host、服务URL
     * @return
     */
    private ApiInfo apiInfo() {
        return new ApiInfoBuilder()
                .title("api 说明")
                .contact(new Contact("allen","null","name@example.com"))
                .version("0.1")
                .termsOfServiceUrl("localhost:8080/demo/")
                .description("demo api")
                .build();
    }

}
3.使用Swagger注解
@Api()用于类;
标识这个类是swagger的资源
tags–表示分组说明标签
@ApiOperation()用于方法;
表示一个http请求的操作
value用于方法描述
notes用于提示内容
@ApiModel()用于实体类
表示对类进行说明,用于参数用实体类接收
value–表示对象名
description–描述
@ApiModelProperty()用于实体类字段
表示对model属性的说明或者数据操作更改
value–字段说明
name–重写属性名字
dataType–重写属性类型
required–是否必填
example–举例说明
hidden–隐藏
@ApiImplicitParam() 用于 controller 方法
表示单独的请求参数
name–参数ming
value–参数说明
dataType–数据类型
paramType–参数类型
example–举例说明
@ApiImplicitParams() 用于 controller 方法,包含多个 @ApiImplicitParam
@ApiIgnore()用于类或者方法上,可以不被swagger显示在页面上
说明:简单的标记只需要@Api(tags="") 和 @ApiOperation(value="",notes="")
更多参考:https://github.com/swagger-api/swagger-core/wiki/Annotations
4.Java代码写上Swagger注解
@Api(tags = "xxx查询列表Api")
@RestController
@RequestMapping(value = {"/xx/"}, produces = {MediaType.APPLICATION_JSON_VALUE})
public class xxxApiController {


    @GetMapping("/xxx/getAllList")
    */
    @ApiOperation("xxxx-查询列表")
    @PostMapping(value = {"/xxx/getList", "/front/getCount"}
5.查看Swagger UI
随着你系统的URL路径不同而不同,默认在这
http://localhost:8080/swagger-ui.html
如果你有服务的前缀xxx-service加上即可
http://localhost:8080/xxx-service/swagger-ui.html
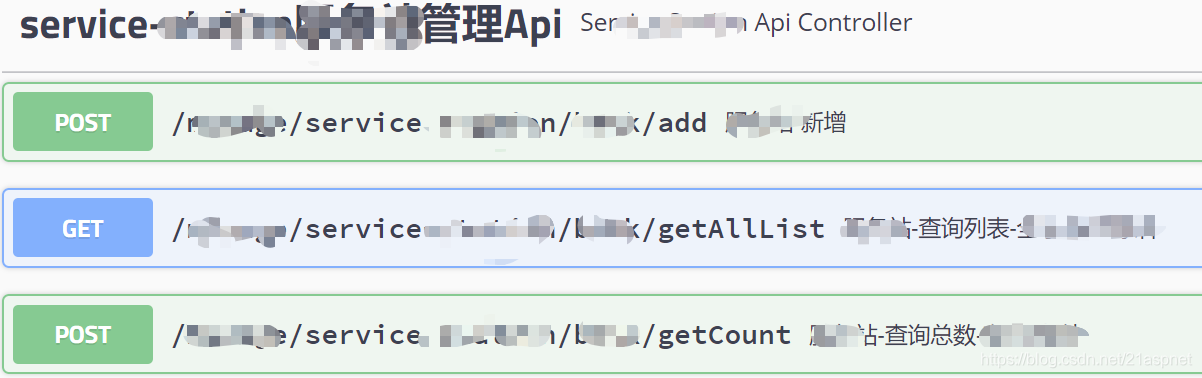
查看某一个controller下的接口列表:
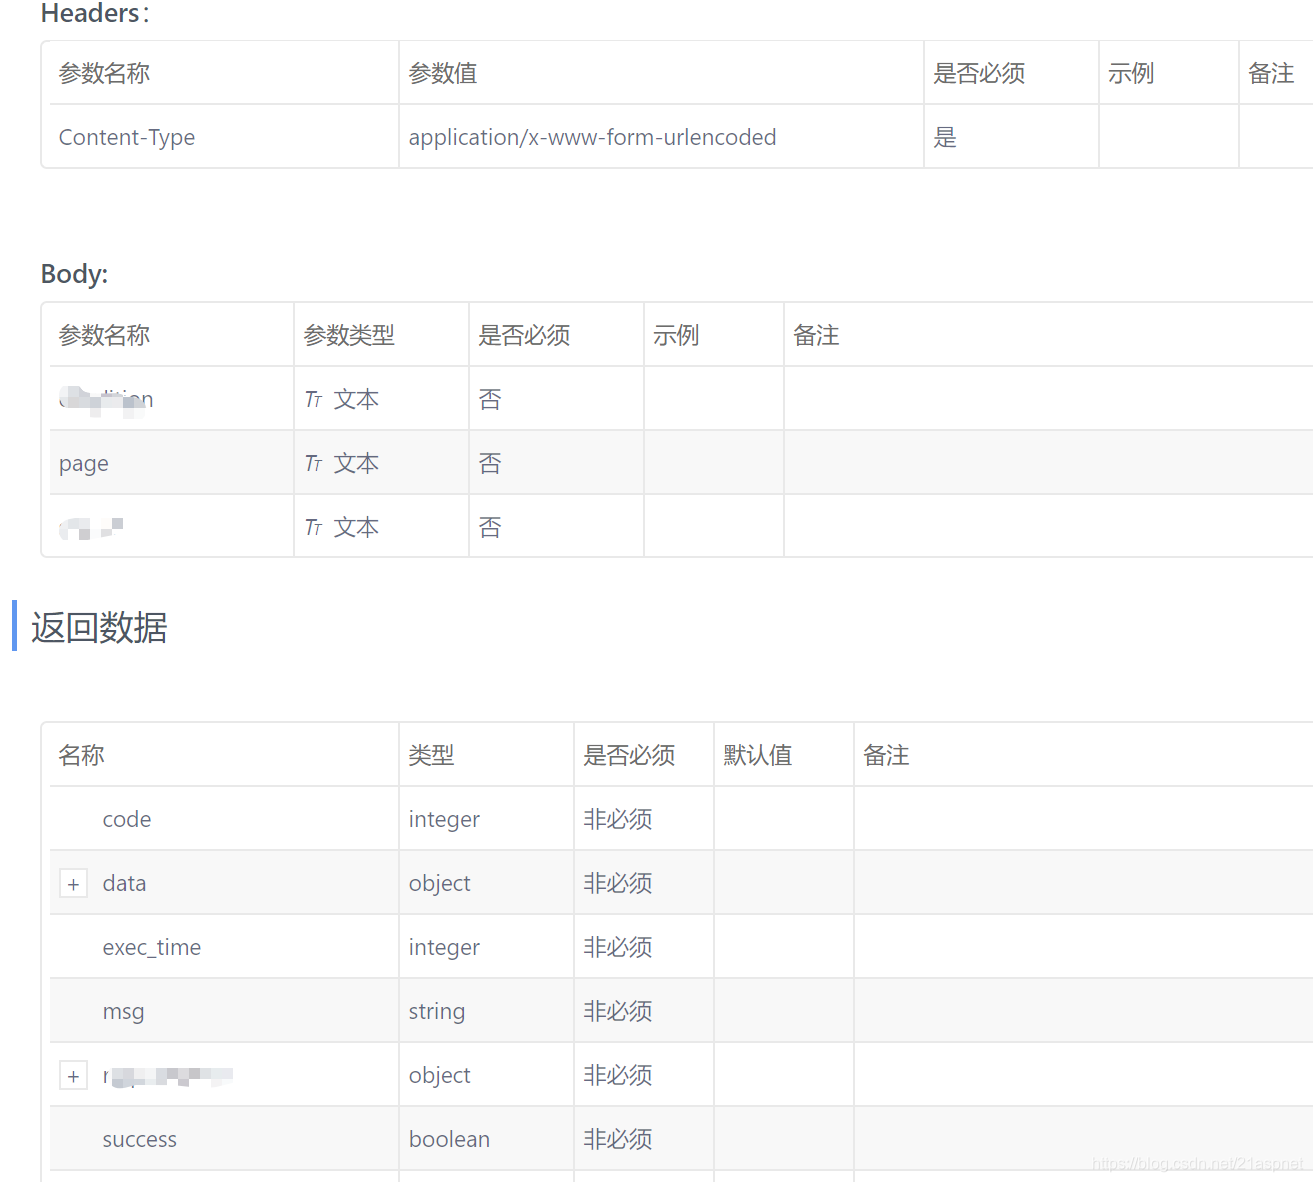
查看某个具体接口:
 返回值
返回值

至此swagger的任务已经完成。
6.swagger导入YApi
swagger ui显然看起来还是不方便,目前很多公司都在用YApi做接口的标准文档管理了。
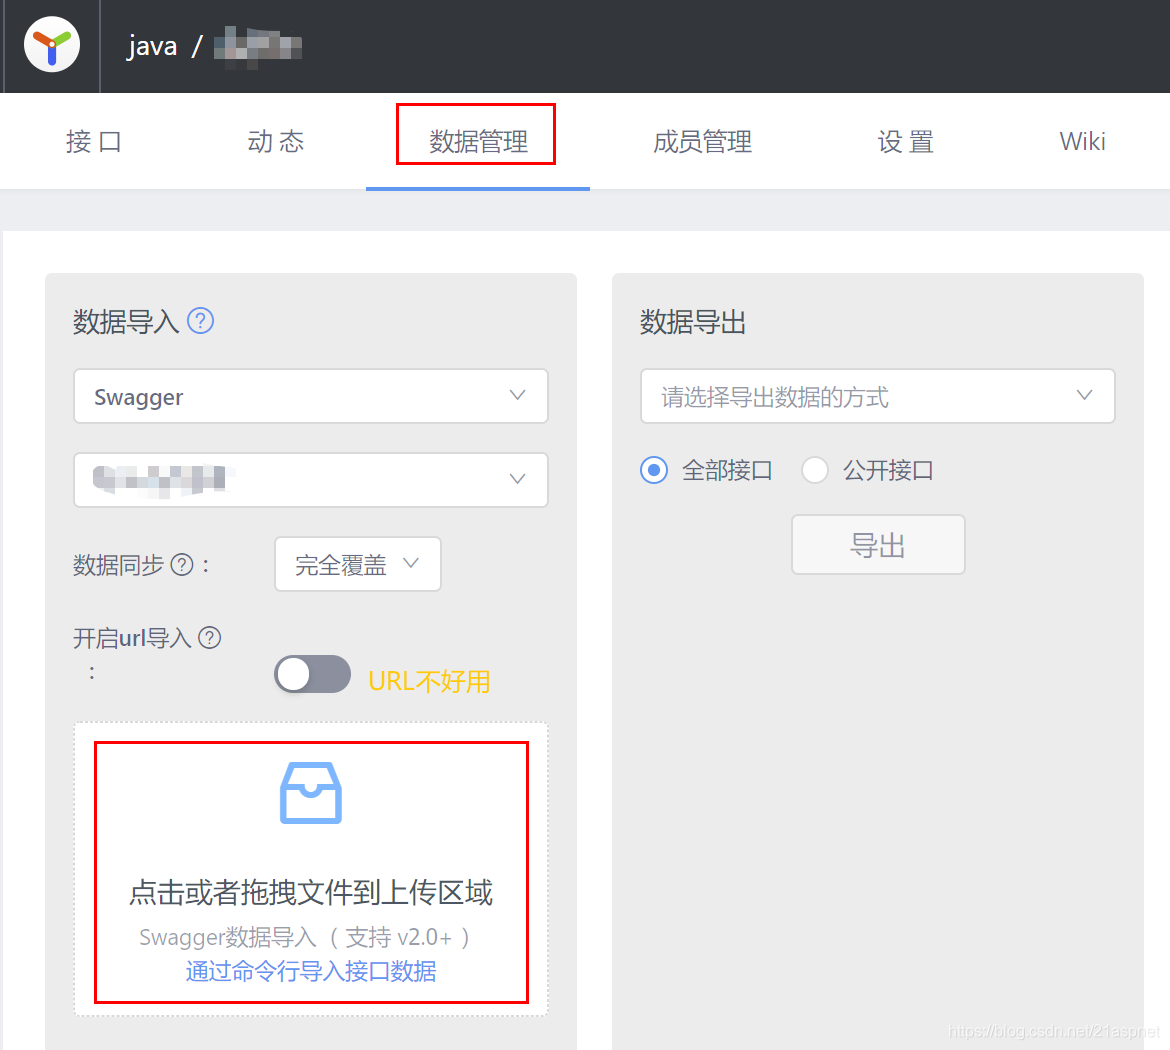
YAPI里点 数据管理 ,然后导入swagger的json数据即可。
注意这里YAPI号称支持导入swagger的URL,发现不好用,导入不进来。
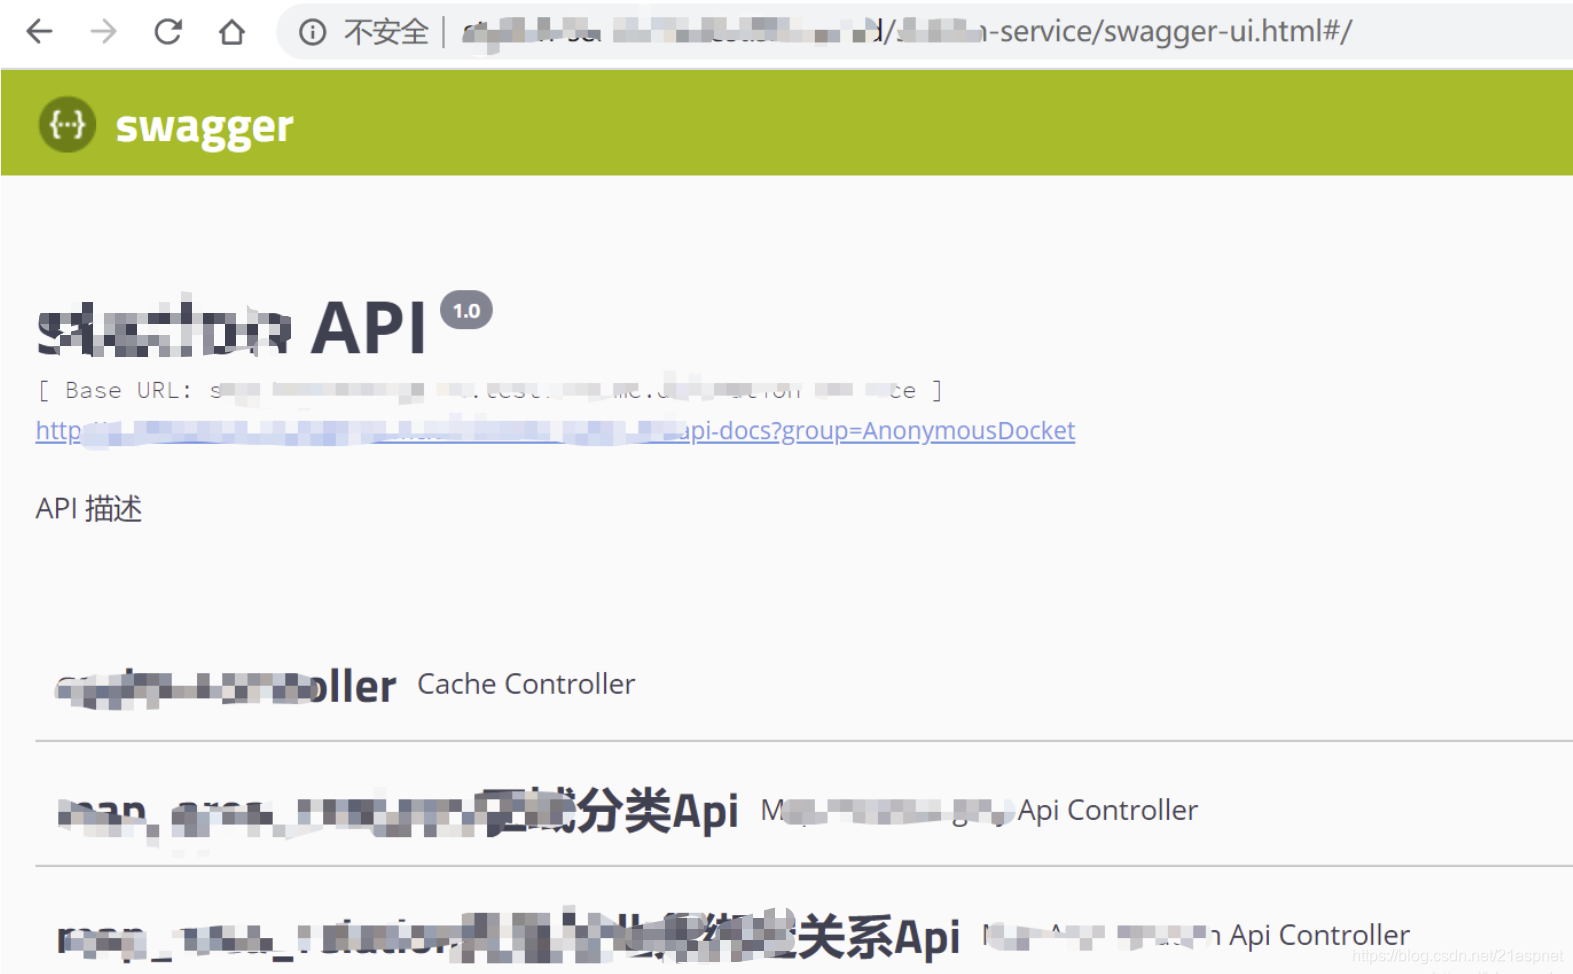
回到swagger的UI界面

点这个链接,打开复制数据存为xxx.json即可,如果存txt也许会乱码

导入yapi即可
 在Ypai里看起来是不是清爽很多:


 372
372


 被折叠的 条评论
为什么被折叠?
被折叠的 条评论
为什么被折叠?
 到【灌水乐园】发言


