


org.springframework.boot
spring-boot-maven-plugin
在common下创建domin(放实体类)和service(放接口)两个文件夹
在domin中创建User.java实体类(这里有一个坑,就是该实体类一定要实现java.io.Serializable这个接口,否则会报错这是因为一个类只有实现了Serializable接口,它的对象才是可序列化的。如果要序列化某些类的对象,这些类就必须实现Serializable接口。而实际上,Serializable是一个空接口,没有什么具体内容,它的目的只是简单的标识一个类的对象可以被序列化。这是我踩过的一个坑,大家可以试着把implements Serializable 去掉,肯定会报错的,报错中会有一句
Serialized class com.yykj.mall.dto.ProductListItemDTO must implement java.io.Serializable):
package com.example.common.domin;
import java.io.Serializable;
public class User implements Serializable {
private int id;
private String name;
private int age;
private String sex;
public int getId() {
return id;
}
public void setId(int id) {
this.id = id;
}
public String getName() {
return name;
}
public void setName(String name) {
this.name = name;
}
public int getAge() {
return age;
}
public void setAge(int age) {
this.age = age;
}
public String getSex() {
return sex;
}
public void setSex(String sex) {
this.sex = sex;
}
@Override
public String toString() {
return “User{” +
“id=” + id +
“, name='” + name + ‘’’ +
“, age=” + age +
“, sex='” + sex + ‘’’ +
‘}’;
}
}
在service中创建UserService接口:
package com.example.common.service;
import com.example.common.domin.User;
/*
*@ZN
*@date 2019/11/11
*/
public interface UserService {
User findUser();
}
application.properties这个文件是空的,大家不用理会,此时,common模块基本完成。
接下来就是provider模块了
如上图,pom.xml添加依赖:
<?xml version="1.0" encoding="UTF-8"?><project xmlns=“http://maven.apache.org/POM/4.0.0” xmlns:xsi=“http://www.w3.org/2001/XMLSchema-instance”
xsi:schemaLocation=“http://maven.apache.org/POM/4.0.0 https://maven.apache.org/xsd/maven-4.0.0.xsd”>
4.0.0
org.springframework.boot
spring-boot-starter-parent
2.2.1.RELEASE
com.example
provider
0.0.1-SNAPSHOT
jar
provider
Demo project for Spring Boot
<project.build.sourceEncoding>UTF-8</project.build.sourceEncoding>
<project.reporting.outputEncoding>UTF-8</project.reporting.outputEncoding>
<java.version>1.8</java.version>
<zkclient.version>0.10</zkclient.version>
com.example
common
0.0.1-SNAPSHOT
org.springframework.boot
spring-boot-starter
org.springframework.boot
spring-boot-starter-test
test
org.junit.vintage
junit-vintage-engine
com.alibaba
dubbo
2.5.5
log4j
log4j
com.101tec
zkclient
${zkclient.version}
org.mybatis.spring.boot
mybatis-spring-boot-starter
1.3.1
org.springframework.boot
spring-boot-starter-jdbc
org.mariadb.jdbc
mariadb-java-client
2.5.1
com.alibaba
druid
1.0.11
org.springframework.boot
spring-boot-maven-plugin
我们这边使用springboot,因为基本上都封装好了,配置就很简单了。我们先新增一个application.yml,具体配置如下,这边直接将mybatis的配置写在配置文件里了,就不需要像ssm一样需要xml文件配置了。application.yml:
server:
port: 8082
servlet:
context-path: /
spring:
datasource:
name: test
url: jdbc:mysql://127.0.0.1:3306/springdb
username: root
password: root
使用druid数据源
type: com.alibaba.druid.pool.DruidDataSource
driver-class-name: com.mysql.jdbc.Driver
filters: stat
maxActive: 20
initialSize: 1
maxWait: 60000
minIdle: 1
timeBetweenEvictionRunsMillis: 60000
minEvictableIdleTimeMillis: 300000
validationQuery: select ‘x’
testWhileIdle: true
testOnBorrow: false
testOnReturn: false
poolPreparedStatements: true
maxOpenPreparedStatements: 20
mybatis:
type-aliases-package: domain
同时,我们需要在项目中配置dubbo,让该项目成为提供者。
SpringBoot_Dubbo_Provider 的 spring-dubbo.xml:
<?xml version="1.0" encoding="UTF-8"?><beans xmlns=“http://www.springframework.org/schema/beans”
xmlns:xsi=“http://www.w3.org/2001/XMLSchema-instance”
xmlns:dubbo=“http://code.alibabatech.com/schema/dubbo”
xsi:schemaLocation="http://www.springframework.org/schema/beans
http://www.springframework.org/schema/beans/spring-beans.xsd
http://code.alibabatech.com/schema/dubbo
http://code.alibabatech.com/schema/dubbo/dubbo.xsd">
<dubbo:application name=“provider”/>
<dubbo:registry address=“zookeeper://127.0.0.1:2181”/>
<dubbo:annotation package=“service.impl”/>
<dubbo:protocol name=“dubbo” port=“20880”/>
<dubbo:service interface=“com.example.common.service.UserService” ref=“userService”/>
Springboot是使用类来作为启动器的,所以启动器ProviderApplication.java,在启动器中将dubbo的配置文件引用,并且去扫描mapper包。
package com.example.provider;
import org.mybatis.spring.annotation.MapperScan;
import org.springframework.boot.SpringApplication;
import org.springframework.boot.autoconfigure.SpringBootApplication;
import org.springframework.context.annotation.ImportResource;
import java.io.IOException;
@SpringBootApplication
@ImportResource({“classpath:spring-dubbo.xml”})
@MapperScan(“mapper”)
public class ProviderApplication {
public static void main(String[] args) {
SpringApplication.run(ProviderApplication.class, args);
System.out.println(“服务端启动成功!!!”);
try {
System.in.read();
} catch (IOException e) {
e.printStackTrace();
}
}
}
同样我们也要为这个项目写一个启动器。在启动器中加载dubbo配置文件 。这里提供者和消费者两个项目不能使用相同的端口号,所以消费者这边端口我使用的是8081 提供者为8082。
也就是在provider中的application.properties中写上server.port=8082,在customer中的application.properties中写上server.port=8081
然后创建mapper文件夹,在里面创建UserMapper接口,接口内容如下:
package com.example.provider.mapper;
import com.example.common.domin.User;
import org.apache.ibatis.annotations.*;
import java.util.List;
@Mapper
public interface UserMapper {
@Results(id = “userMap”, value = {
@Result(column = “id”, property = “id”),
@Result(column = “name”, property = “name”),
@Result(column = “age”, property = “age”),
@Result(column = “sex”, property = “sex”)})
@Select(“SELECT * FROM u_user”)
List getAll();
@Select(“SELECT * FROM u_user t WHERE t.id = #{id}”)
@ResultMap(“userMap”)
User getOne(Long id);
}
在service文件夹下的Impl中编写UserImpl接口的实现类,内容如下:
package com.example.provider.service.impl;
import com.example.common.domin.User;
import com.example.common.service.UserService;
import com.example.provider.mapper.UserMapper;
import org.springframework.beans.factory.annotation.Autowired;
public class UserImpl implements UserService {
@Autowired
private UserMapper userMapper;
@Override
public User findUser() {
return userMapper.getOne(1L);
}
}
此时provider服务端就编写完毕了。
接下来就是编写customer消费端了:
pom.xml添加依赖:
<?xml version="1.0" encoding="UTF-8"?><project xmlns=“http://maven.apache.org/POM/4.0.0” xmlns:xsi=“http://www.w3.org/2001/XMLSchema-instance”
xsi:schemaLocation=“http://maven.apache.org/POM/4.0.0 https://maven.apache.org/xsd/maven-4.0.0.xsd”>
4.0.0
org.springframework.boot
spring-boot-starter-parent
2.2.1.RELEASE
com.example
customer
0.0.1-SNAPSHOT
jar
customer
Demo project for Spring Boot
<project.build.sourceEncoding>UTF-8</project.build.sourceEncoding>
<project.reporting.outputEncoding>UTF-8</project.reporting.outputEncoding>
<java.version>1.8</java.version>
<zkclient.version>0.10</zkclient.version>
com.example
common
0.0.1-SNAPSHOT
org.springframework.boot
spring-boot-starter-web
org.springframework.boot
spring-boot-starter
org.springframework.boot
spring-boot-starter-test
test
org.junit.vintage
junit-vintage-engine
com.alibaba
dubbo
2.5.5
log4j
log4j
com.101tec
zkclient
${zkclient.version}
org.springframework.boot
spring-boot-maven-plugin
接下来要为dubbo编写xml配置文件,在resource文件夹中新建spring-dubbo.xml文件,配置内容如下:
<?xml version="1.0" encoding="UTF-8"?><beans xmlns=“http://www.springframework.org/schema/beans”
xmlns:xsi=“http://www.w3.org/2001/XMLSchema-instance”
xmlns:dubbo=“http://code.alibabatech.com/schema/dubbo”
xsi:schemaLocation="http://www.springframework.org/schema/beans
http://www.springframework.org/schema/beans/spring-beans.xsd
http://code.alibabatech.com/schema/dubbo
http://code.alibabatech.com/schema/dubbo/dubbo.xsd">
<dubbo:application name=“consumer”/>
<dubbo:registry address=“zookeeper://127.0.0.1:2181”/>
<dubbo:protocol name=“dubbo” port=“20880”/>
<dubbo:reference id=“userService” check=“false” interface=“com.example.common.service.UserService”/>
<dubbo:annotation package=“controller”/>
然后就是编写controller了,创建UserController.java文件,调用common中的UserService接口,这里是用注解的形式注入的
package com.example.customer.controller;
import com.alibaba.dubbo.config.annotation.Reference;
import com.example.common.domin.User;
import com.example.common.service.UserService;
import org.springframework.web.bind.annotation.GetMapping;
import org.springframework.web.bind.annotation.RestController;
import javax.annotation.Resource;
/**
-
Created with IntelliJ IDEA.
-
User: zj
-
Date: 2019/11/12
-
Time: 10:45
-
Description:
*/
@RestController
public class UserController {
@Resource
@Reference(version = “1.0.0”)
private UserService userService;
@GetMapping(“getUser”)
public User user() {
System.out.println(“进来了!!!!!!!!!!!!!!!!”);
System.out.println(userService.hashCode() + “!!!”);
System.out.println(userService.findUser());
return userService.findUser();
}
}
再给customer消费端启动类CustomerApplication:
最后
自我介绍一下,小编13年上海交大毕业,曾经在小公司待过,也去过华为、OPPO等大厂,18年进入阿里一直到现在。
深知大多数Java工程师,想要提升技能,往往是自己摸索成长,自己不成体系的自学效果低效漫长且无助。
因此收集整理了一份《2024年Java开发全套学习资料》,初衷也很简单,就是希望能够帮助到想自学提升又不知道该从何学起的朋友,同时减轻大家的负担。

既有适合小白学习的零基础资料,也有适合3年以上经验的小伙伴深入学习提升的进阶课程,基本涵盖了95%以上Java开发知识点,不论你是刚入门Android开发的新手,还是希望在技术上不断提升的资深开发者,这些资料都将为你打开新的学习之门!
如果你觉得这些内容对你有帮助,需要这份全套学习资料的朋友可以戳我获取!!
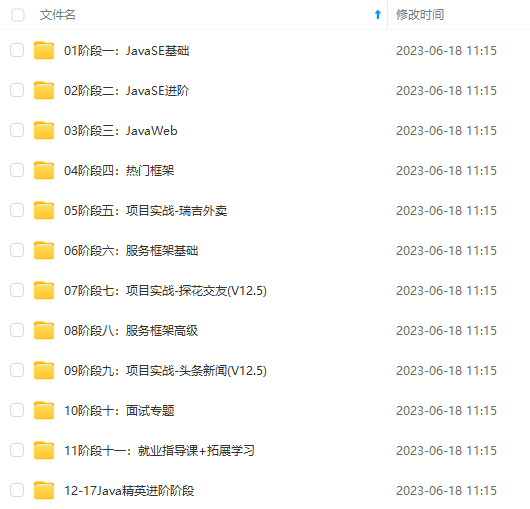
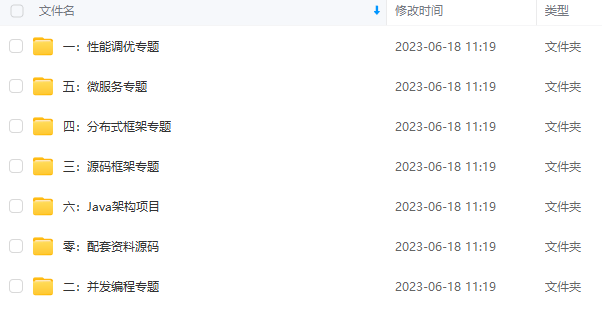
由于文件比较大,这里只是将部分目录截图出来,每个节点里面都包含大厂面经、学习笔记、源码讲义、实战项目、讲解视频,并且会持续更新!
ntroller
public class UserController {
@Resource
@Reference(version = “1.0.0”)
private UserService userService;
@GetMapping(“getUser”)
public User user() {
System.out.println(“进来了!!!!!!!!!!!!!!!!”);
System.out.println(userService.hashCode() + “!!!”);
System.out.println(userService.findUser());
return userService.findUser();
}
}
再给customer消费端启动类CustomerApplication:
最后
自我介绍一下,小编13年上海交大毕业,曾经在小公司待过,也去过华为、OPPO等大厂,18年进入阿里一直到现在。
深知大多数Java工程师,想要提升技能,往往是自己摸索成长,自己不成体系的自学效果低效漫长且无助。
因此收集整理了一份《2024年Java开发全套学习资料》,初衷也很简单,就是希望能够帮助到想自学提升又不知道该从何学起的朋友,同时减轻大家的负担。
[外链图片转存中…(img-D837rNWw-1715069128778)]
[外链图片转存中…(img-qXD0Td96-1715069128779)]
[外链图片转存中…(img-liVC1jU8-1715069128779)]
既有适合小白学习的零基础资料,也有适合3年以上经验的小伙伴深入学习提升的进阶课程,基本涵盖了95%以上Java开发知识点,不论你是刚入门Android开发的新手,还是希望在技术上不断提升的资深开发者,这些资料都将为你打开新的学习之门!
如果你觉得这些内容对你有帮助,需要这份全套学习资料的朋友可以戳我获取!!
由于文件比较大,这里只是将部分目录截图出来,每个节点里面都包含大厂面经、学习笔记、源码讲义、实战项目、讲解视频,并且会持续更新!


 773
773


 被折叠的 条评论
为什么被折叠?
被折叠的 条评论
为什么被折叠?
 到【灌水乐园】发言


