


先自我介绍一下,小编浙江大学毕业,去过华为、字节跳动等大厂,目前阿里P7
深知大多数程序员,想要提升技能,往往是自己摸索成长,但自己不成体系的自学效果低效又漫长,而且极易碰到天花板技术停滞不前!
因此收集整理了一份《2024年最新Android移动开发全套学习资料》,初衷也很简单,就是希望能够帮助到想自学提升又不知道该从何学起的朋友。


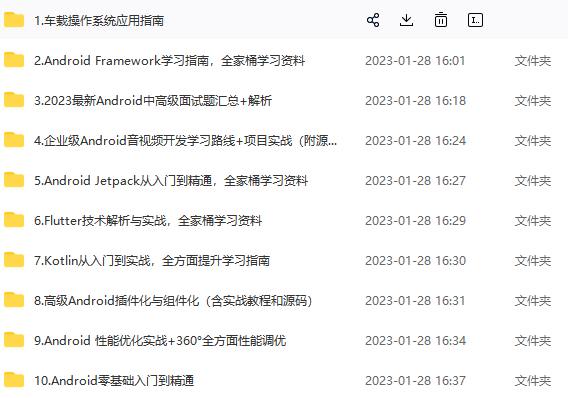
既有适合小白学习的零基础资料,也有适合3年以上经验的小伙伴深入学习提升的进阶课程,涵盖了95%以上Android开发知识点,真正体系化!
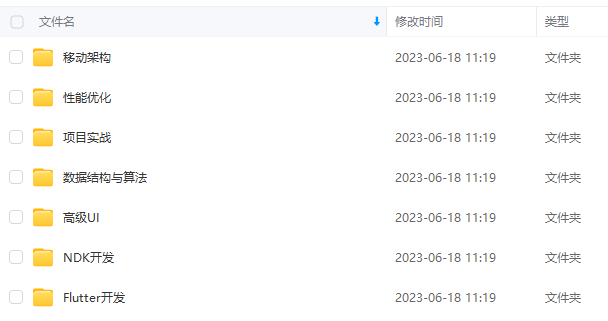
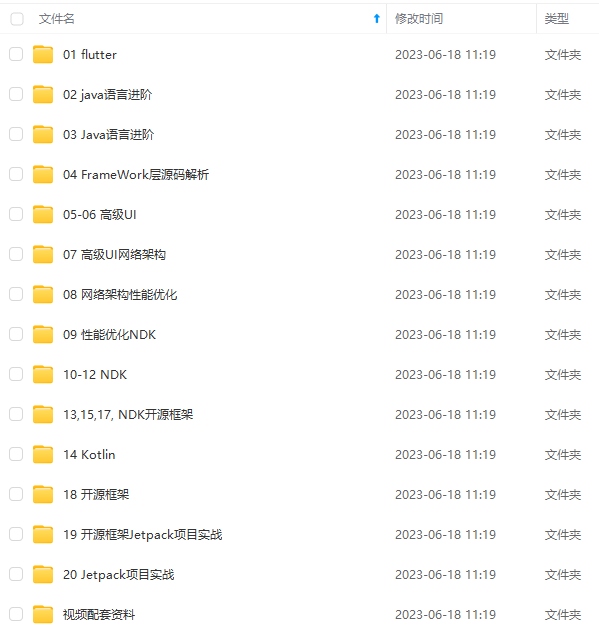
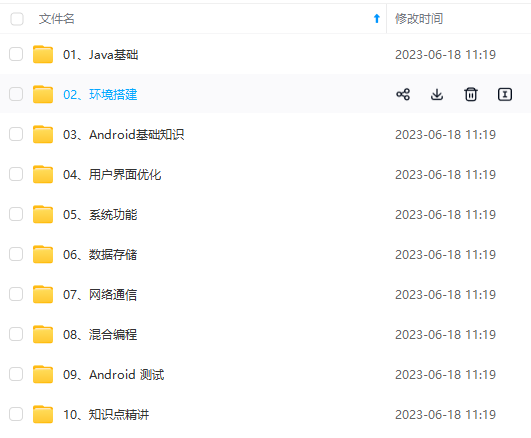
由于文件比较多,这里只是将部分目录截图出来,全套包含大厂面经、学习笔记、源码讲义、实战项目、大纲路线、讲解视频,并且后续会持续更新
如果你需要这些资料,可以添加V获取:vip204888 (备注Android)

正文
if (queue == null) {
RuntimeException e = new RuntimeException(
this + " sendMessageAtTime() called with no mQueue");
Log.w(“Looper”, e.getMessage(), e);
return false;
}
return enqueueMessage(queue, msg, uptimeMillis);
}
3.4 enqueueMessage方法
private boolean enqueueMessage(@NonNull MessageQueue queue, @NonNull Message msg,
long uptimeMillis) {
msg.target = this;
msg.workSourceUid = ThreadLocalWorkSource.getUid();
if (mAsynchronous) {
msg.setAsynchronous(true);
}
return queue.enqueueMessage(msg, uptimeMillis);
}
把Message加入到queue里
3.5 enqueueMessage方法
1.这里面代码看起来有点多和乱。但是核心逻辑就是按照执行时间从前到后的纬度,把当前的message节点插入到单链表当中。技术点2:链表是按照什么方式来排列的。执行时间顺序
2.Message中有一个参数when,这里会在被添加到链表的时候赋值,记录的就是执行时间。
3.同时通过nativeWake唤醒休眠。为何休眠,下面第四章时会讲到,一般无待执行Message时会进入休眠释放CPU资源。
boolean enqueueMessage(Message msg, long when) {
if (msg.target == null) {
throw new IllegalArgumentException(“Message must have a target.”);
}
synchronized (this) {
if (msg.isInUse()) {
throw new IllegalStateException(msg + " This message is already in use.");
}
if (mQuitting) {
IllegalStateException e = new IllegalStateException(
msg.target + " sending message to a Handler on a dead thread");
Log.w(TAG, e.getMessage(), e);
msg.recycle();
return false;
}
msg.markInUse();
msg.when = when;
Message p = mMessages;
boolean needWake;
if (p == null || when == 0 || when < p.when) {
// New head, wake up the event queue if blocked.
msg.next = p;
mMessages = msg;
needWake = mBlocked;
} else {
// Inserted within the middle of the queue. Usually we don’t have to wake
// up the event queue unless there is a barrier at the head of the queue
// and the message is the earliest asynchronous message in the queue.
needWake = mBlocked && p.target == null && msg.isAsynchronous();
Message prev;
for (;😉 {
prev = p;
p = p.next;
if (p == null || when < p.when) {
break;
}
if (needWake && p.isAsynchronous()) {
needWake = false;
}
}
msg.next = p; // invariant: p == prev.next
prev.next = msg;
}
// We can assume mPtr != 0 because mQuitting is false.
if (needWake) {
nativeWake(mPtr);
}
}
return true;
}
至此,message就插入到MessageQueue当中,插入流程完成。
4.1 调用Looper.prepare()与当前线程进行绑定。
一般我们是不需要调用prepare方法的,因为应用启动后,在ActivityThread的main方法中,已经帮我们调用了Looper.prepare方法了。
private static void prepare(boolean quitAllowed) {
if (sThreadLocal.get() != null) {
throw new RuntimeException(“Only one Looper may be created per thread”);
}
sThreadLocal.set(new Looper(quitAllowed));
}
prepare的核心逻辑就是与当前线程进行绑定,通过ThreadLocal。保证一个Looper只会绑定唯一的一个Thread。
4.2Looper.loop启动无限循环
调用Looper.loop方法,启动无限循环。这里会做一个检查,如果Looper没有绑定到当前线程,则会抛出异常。
public static void loop() {
final Looper me = myLooper();
if (me == null) {
throw new RuntimeException(“No Looper; Looper.prepare() wasn’t called on this thread.”);
}
…不重要代码忽略
for (;😉 { //启动无限循环
if (!loopOnce(me, ident, thresholdOverride)) {
return;
}
}
}
4.3获取到message去尝试执行
1.会调用MessageQueue.next()里面尝试获取message,如果获取不到会被阻塞。具体我们下一章节分析。
2.如果获取不到消息并且返回了,这时说明应用处于退出状态了,所以循环也关闭。
3.msg.target.dispatchMessage() 转交给Handler去真正的处理消息,由于当前的执行线程是主线程,所以dispatchMessage里面执行的回调也是在主线程。
4.我们可以看到代码中有logging进行输入打印,这一点对我们性能监控很有帮助,具体我们第七章节讲解。
5.msg.recycleUnChecked标记msg已被使用,进入可复用状态。
4.4dispatchMessage执行message
这里有两种回调的方式,
方式一直接执行Message中的callBack;
方式二自定义Handler,重写其handleMessage方法。
这里我们可以明显看到,callBack的优先级会更高。这是技术点3:CallBack和handleMessage哪个会优先被执行
public void dispatchMessage(@NonNull Message msg) {
if (msg.callback != null) {
handleCallback(msg);
} else {
if (mCallback != null) {
if (mCallback.handleMessage(msg)) {
return;
}
}
handleMessage(msg);
}
}
handleCallBack中就是直接通过
message.callback.run();
执行Message的runnable任务。PS:run()是Runnable接口中定义的方法
先看代码,具体分为下面的几个环节。
Message next() {
…
for (;😉 {
if (nextPollTimeoutMillis != 0) {
Binder.flushPendingCommands();
}
nativePollOnce(ptr, nextPollTimeoutMillis);//4.1 nativePollOnece
synchronized (this) {
// Try to retrieve the next message. Return if found.
final long now = SystemClock.uptimeMillis();
Message prevMsg = null;
Message msg = mMessages;
…屏障消息相关代码先忽略
if (msg != null) {//4.2 寻找可用message
if (now < msg.when) {
// Next message is not ready. Set a timeout to wake up when it is ready.
nextPollTimeoutMillis = (int) Math.min(msg.when - now, Integer.MAX_VALUE);
} else {
// Got a message.
mBlocked = false;
if (prevMsg != null) {
prevMsg.next = msg.next;
} else {
mMessages = msg.next;
}
msg.next = null;
if (DEBUG) Log.v(TAG, "Returning message: " + msg);
msg.markInUse();
return msg;
}
} else {
// No more messages.
nextPollTimeoutMillis = -1;
}
…idelHandler相关代码先忽略
}
}
5.1 nativePollOnce方法
这是一个native方法,阻塞的。我们上面所说的CPU休眠也就是通过nativePollOnce这个机制来实现的。调用这个方法的时候,CPU资源会被释放掉,直到被外界唤醒。底层的实现原理对应的是linux的epoll机制,这篇文章我们就不详细去分析了。我们只要知道其方法的功能就可以了。
nativePollOnce有两个参数,ptr和timeoutMillis
ptr可以理解为一个native标记的唯一值,用来识别绑定线程的。
timeoutMillis是超时时间。主要分为三种-1,0,>0。
=-1的时候是处于无限阻塞的状态,除非被外界唤醒。
=0的时候不会阻塞,会立马执行。
>0时会阻塞对应的时间,然后释放阻塞状态。
PS:nativePollOnce的native实现其实和安卓层有一些类似,也有一个阻塞的循环队列的。底层的实现机制是epoll,由于native层不是本文的核心,这里就不扩展介绍了,感兴趣的同学可以留言,我
5.2 遍历链表,寻找可以用的message
1.因为链表我们插入时是按照执行时间去插入的,所以最先执行的Message一定在链表的最头部;
2.首先获取一下当前系统非休眠状态时间;
3.首先尝试获取链表的头部,那么说明链表中无数据。则把nextPollTimeoutMillis赋值为-1,下一个循环时,就会进入无限阻塞状态,直接被唤醒。这里对应的就是2.5 章节时讲到的native唤醒机制。
4.如果头节点不为空,则判断其执行时间和当前时间做比较;
5.如果其执行时间小于当前时间,则计算差值nextPollTimeoutMillis。并且会跳出此次Message选择流程。并且在下一次循环的时候,nativePollOnce会使用该值休眠对应的时间。保证休眠时间一到,正好到了头节点的执行时间。
6.如果其执行时间是否大于当前时间,则表明该节点是可以被执行的。把头节点改成下一级节点。并且通过Message.markInUse标记当前Message已经被使用。
7.返回上一步查到的message对象
技术点4:屏障异步消息的实现机制
1 屏障消息其实就是target为空的Message消息。
2 异步消息一定要搭配屏障消息来使用。
3 如果头节点为屏障消息时,则会从消息链表中从前向后依次寻找异步消息,找到异步消息则跳出循环。
4 并且从链表中移除当前的异步节点,并且把异步节点的前后两个节点关联起来。
5 这里要注意,头部节点仍然是屏障消息没有被移除。所以正常消息仍然是不会被执行的。
if (msg != null && msg.target == null) {
// Stalled by a barrier. Find the next asynchronous message in the queue.
do {
prevMsg = msg;//如果时异步消息,则保存保存消息之前的那条消息,方便后面关联
msg = msg.next;
} while (msg != null && !msg.isAsynchronous());
}
if (msg != null) {
if (now < msg.when) {
// Next message is not ready. Set a timeout to wake up when it is ready.
nextPollTimeoutMillis = (int) Math.min(msg.when - now, Integer.MAX_VALUE);
} else {
// Got a message.
mBlocked = false;
if (prevMsg != null) {
prevMsg.next = msg.next;//把异步消息的next赋值给前面那个节点的next
} else {
mMessages = msg.next;
}
msg.next = null;
if (DEBUG) Log.v(TAG, "Returning message: " + msg);
msg.markInUse();
return msg;
}
} else {
// No more messages.
nextPollTimeoutMillis = -1;
}
技术点5:IdelHandler执行时机
6.1 IdleHandler介绍
顾名思义,就是闲时任务。当前没有要被执行的Message时,则会触发执行IdelHandler,我们一般可以把那些需要在主线程执行,但是优先级不高的任务放在IdelHandler里面执行,比如预加载下一个页面,二屏加载等等。
6.2IdleHandler何时触发
看代码我可以知道,获取Message的时候,如果没有获取到Message时,则会进入执行IdleHandler的流程。
Message next() {
…代码省略
for (;😉 {
if (DEBUG) Log.v(TAG, "Returning message: " + msg);
msg.markInUse();
return msg; //如果取到了消息则返回
}
} else {
// No more messages.
nextPollTimeoutMillis = -1;
}
…
//如果没有取到消息,则会执行下面的逻辑
// If first time idle, then get the number of idlers to run.
// Idle handles only run if the queue is empty or if the first message
// in the queue (possibly a barrier) is due to be handled in the future.
if (pendingIdleHandlerCount < 0
&& (mMessages == null || now < mMessages.when)) {
pendingIdleHandlerCount = mIdleHandlers.size();
}
if (pendingIdleHandlerCount <= 0) {
// No idle handlers to run. Loop and wait some more.
mBlocked = true;
continue;
}
if (mPendingIdleHandlers == null) {
mPendingIdleHandlers = new IdleHandler[Math.max(pendingIdleHandlerCount, 4)];
}
mPendingIdleHandlers = mIdleHandlers.toArray(mPendingIdleHandlers);
}
// Run the idle handlers.
// We only ever reach this code block during the first iteration.
for (int i = 0; i < pendingIdleHandlerCount; i++) {
final IdleHandler idler = mPendingIdleHandlers[i];
mPendingIdleHandlers[i] = null; // release the reference to the handler
boolean keep = false;
try {
keep = idler.queueIdle();
} catch (Throwable t) {
Log.wtf(TAG, “IdleHandler threw exception”, t);
}
if (!keep) {
synchronized (this) {
mIdleHandlers.remove(idler);
}
}
}
// Reset the idle handler count to 0 so we do not run them again.
pendingIdleHandlerCount = 0;
// While calling an idle handler, a new message could have been delivered
// so go back and look again for a pending message without waiting.
nextPollTimeoutMillis = 0;
}
}
6.3IdleHandler执行流程
IdleHandler可以有多个,在MeesageQueue中由mIdelHandlers存储每执行时,转换为数组依次执行。
pendingIdleHandlerCount = mIdleHandlers.size();
mPendingIdleHandlers = mIdleHandlers.toArray(mPendingIdleHandlers);
for (int i = 0; i < pendingIdleHandlerCount; i++) {
final IdleHandler idler = mPendingIdleHandlers[i];
mPendingIdleHandlers[i] = null; // release the reference to the handler
boolean keep = false;
try {
keep = idler.queueIdle();
} catch (Throwable t) {
Log.wtf(TAG, “IdleHandler threw exception”, t);
}
if (!keep) {
synchronized (this) {
mIdleHandlers.remove(idler);
}
}
}
这里要注意一点,IdleHandler的回调只会执行一次,执行完成后会被移除。
技术点6:如何对主线程卡顿问题进行监控
7.1 触发原理
3.3章节的时候,我们有提到logging这个对象。我们在回头看一下代码,这里我们很清楚的看到,logging会在message执行前和执行后分别调用。那这两次打印之间的时间,就可以认为是Message中回调的执行时间。
private static boolean loopOnce(final Looper me,
final long ident, final int thresholdOverride) {
…省略代码
final Printer logging = me.mLogging;
if (logging != null) {
logging.println(">>>>> Dispatching to " + msg.target + " "
- msg.callback + ": " + msg.what);
}
…省略代码
try {
msg.target.dispatchMessage(msg);
if (observer != null) {
observer.messageDispatched(token, msg);
}
dispatchEnd = needEndTime ? SystemClock.uptimeMillis() : 0;
} catch (Exception exception) {
…省略代码
if (logging != null) {
logging.println("<<<<< Finished to " + msg.target + " " + msg.callback);
}
}
7.2 使用方式
我们看一下logging对应的Printer类,其实就是一个接口,
public interface Printer {
/**
-
Write a line of text to the output. There is no need to terminate
-
the given string with a newline.
*/
void println(String x);
}
总结:
面试是一个不断学习、不断自我提升的过程,有机会还是出去面面,至少能想到查漏补缺效果,而且有些知识点,可能你自以为知道,但让你说,并不一定能说得很好。
有些东西有压力才有动力,而学到的知识点,都是钱(因为技术人员大部分情况是根据你的能力来定级、来发薪水的),技多不压身。
附上我的面试各大专题整理: 面试指南,满满的都是干货,希望对大家有帮助!

网上学习资料一大堆,但如果学到的知识不成体系,遇到问题时只是浅尝辄止,不再深入研究,那么很难做到真正的技术提升。
需要这份系统化的资料的朋友,可以添加V获取:vip204888 (备注Android)

一个人可以走的很快,但一群人才能走的更远!不论你是正从事IT行业的老鸟或是对IT行业感兴趣的新人,都欢迎加入我们的的圈子(技术交流、学习资源、职场吐槽、大厂内推、面试辅导),让我们一起学习成长!
? SystemClock.uptimeMillis() : 0;
} catch (Exception exception) {
…省略代码
if (logging != null) {
logging.println("<<<<< Finished to " + msg.target + " " + msg.callback);
}
}
7.2 使用方式
我们看一下logging对应的Printer类,其实就是一个接口,
public interface Printer {
/**
-
Write a line of text to the output. There is no need to terminate
-
the given string with a newline.
*/
void println(String x);
}
总结:
面试是一个不断学习、不断自我提升的过程,有机会还是出去面面,至少能想到查漏补缺效果,而且有些知识点,可能你自以为知道,但让你说,并不一定能说得很好。
有些东西有压力才有动力,而学到的知识点,都是钱(因为技术人员大部分情况是根据你的能力来定级、来发薪水的),技多不压身。
附上我的面试各大专题整理: 面试指南,满满的都是干货,希望对大家有帮助!
[外链图片转存中…(img-B4pHDWzT-1713453452256)]
网上学习资料一大堆,但如果学到的知识不成体系,遇到问题时只是浅尝辄止,不再深入研究,那么很难做到真正的技术提升。
需要这份系统化的资料的朋友,可以添加V获取:vip204888 (备注Android)
[外链图片转存中…(img-F0Xa2gqD-1713453452256)]
一个人可以走的很快,但一群人才能走的更远!不论你是正从事IT行业的老鸟或是对IT行业感兴趣的新人,都欢迎加入我们的的圈子(技术交流、学习资源、职场吐槽、大厂内推、面试辅导),让我们一起学习成长!


 被折叠的 条评论
为什么被折叠?
被折叠的 条评论
为什么被折叠?
 到【灌水乐园】发言


