


 本文详细描述了如何在CentOS7环境中规划网络、安装必要的软件、配置克隆节点、时间同步、SSH免密登录、Hadoop的上传、解压和配置,以及初始化分布式文件系统HDFS的过程。
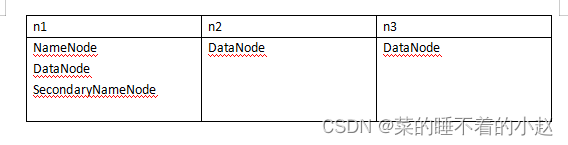
一、分布式集群角色的网络和节点规划
(1)分布式节点角色规划
二、克隆母机安装
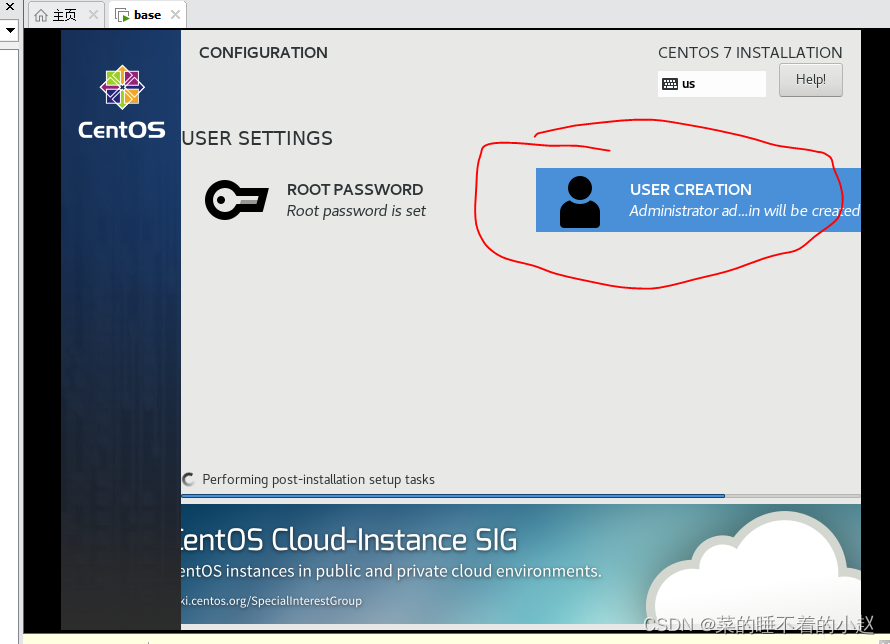
1.安装CentOS7(Linux)
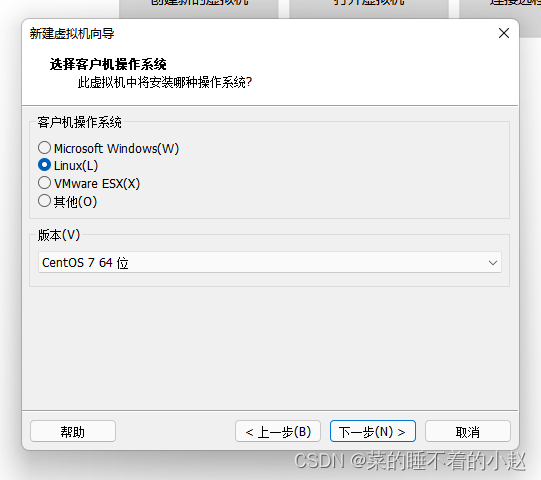

使用的CD/DVD镜像:CentOS-7-x86_64-Minimal-2009
创建管理员用户:admin

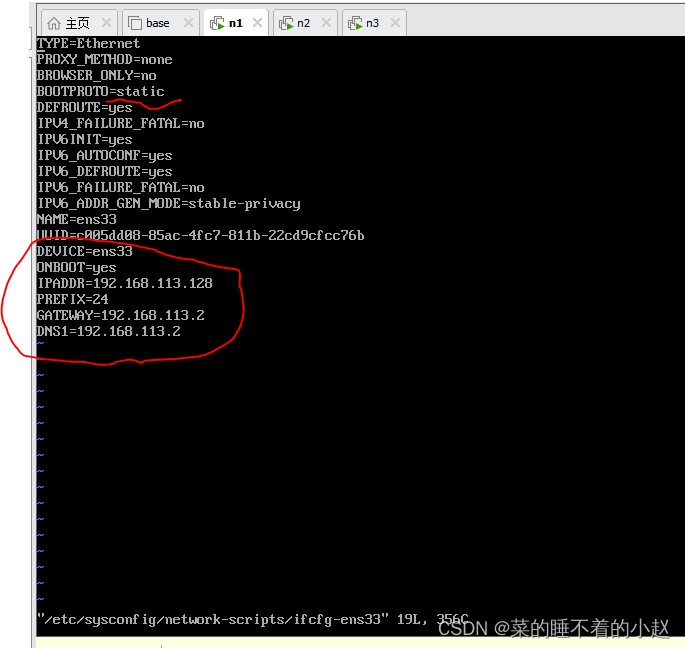
2.配置网络(启动网卡DHCP)
vi /etc/sysconfig/network-scripts/ifcfg-ens33
重新加载网络服务或重启网络接口
service restart network
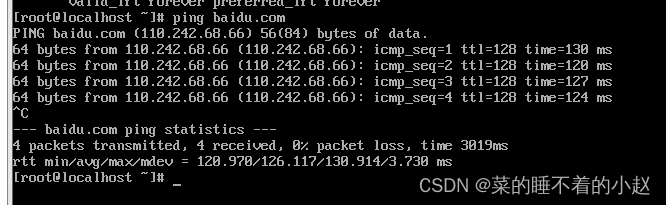
查看是否可以联网
3.安装常用软件
(1)安装网络工具
sudo yum install net-tools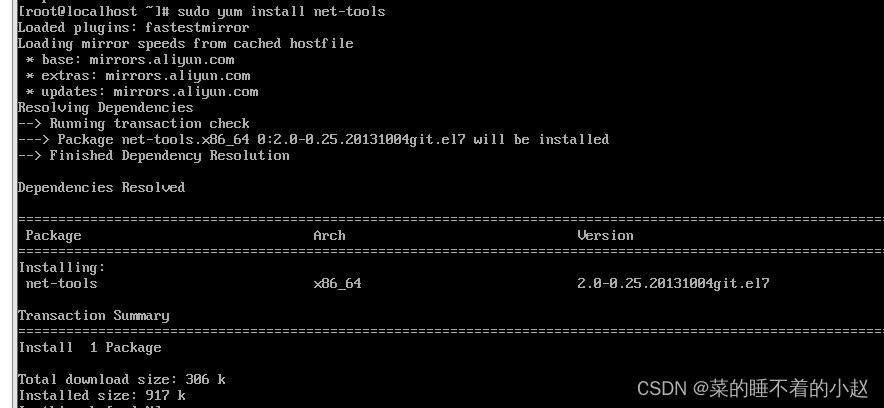
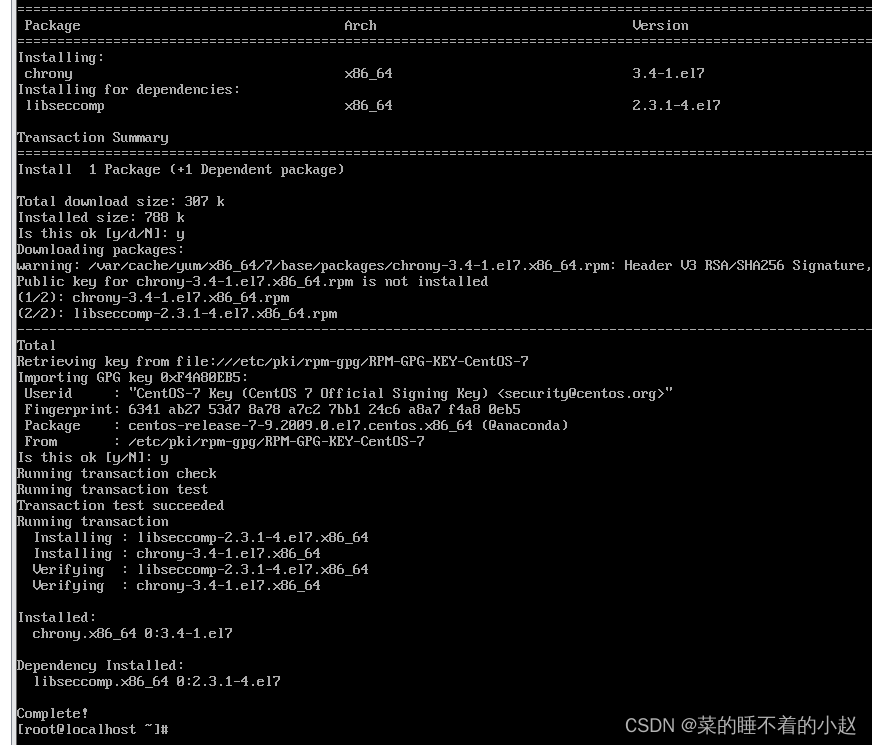
(2)安装网络同步服务
sudo yum install chrony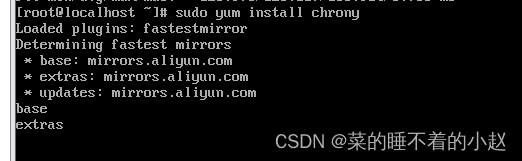
(3)安装Java
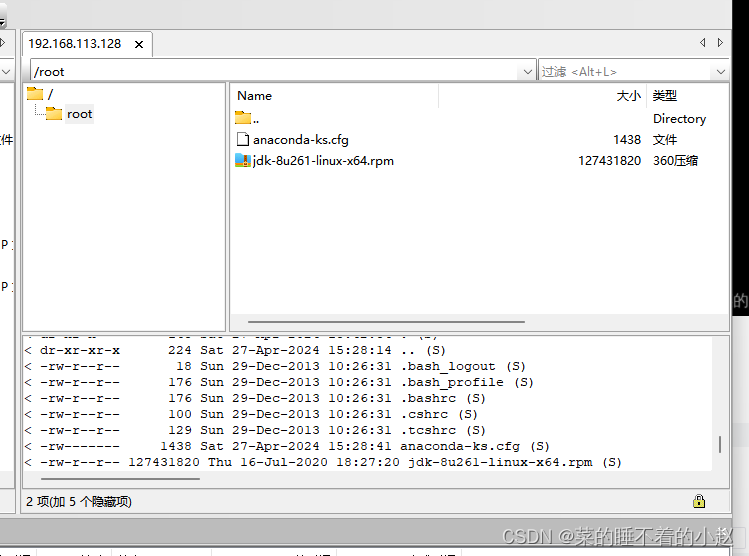
上传文件jdk-8u261-linux-x64.rpm
使用SecureCRSecureFXPortable
rpm -ivh jdk-8u261-linux-x64.rpm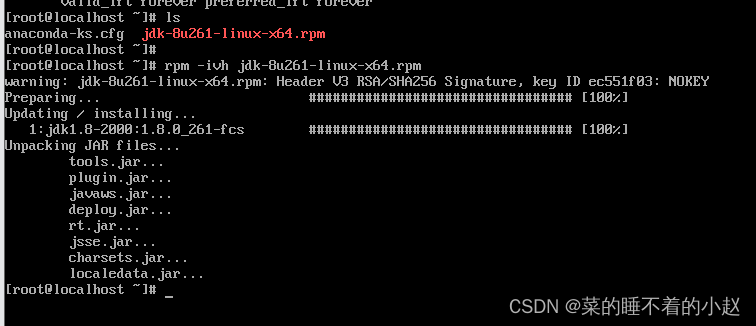
三、分布式环境准备
1.克隆三台虚拟机
将三台克隆好的虚拟机都开启
2.配置静态ip
网络规划

n1:(可以参照二.2配置网络)
n2:(可以参照二.2配置网络)

n3:(可以参照二.2配置网络)

3.配置主机名
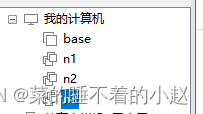
使用SecureCRSecureFXPortable登录三台机器admin账号
[root@localhost ~]#hostnamectl set-hostname n1
                                                              修改成的名字
[root@localhost ~]#exit(退出登录,再重新登录才可以查看到修改后的主机名)
[root@n1 ~]#
三台机器的名字分别为
n1
n2
n3
4.禁用防火墙(三台机器都需要进行)
查看防火墙(在root账号,三台机器上都要进行)
[root@n1 ~]# systemctl status firewalld
● firewalld.service - firewalld - dynamic firewall daemon
   Loaded: loaded (/usr/lib/systemd/system/firewalld.service; disabled; vendor preset: enabled)
   Active: active (running) since Sat 2024-04-27 15:54:53 CST; 27min ago
     Docs: man:firewalld(1)
 Main PID: 731 (firewalld)
   CGroup: /system.slice/firewalld.service
           └─731 /usr/bin/python2 -Es /usr/sbin/firewalld --nofork --nopid

Apr 27 15:54:52 localhost.localdomain systemd[1]: Starting firewalld - dynamic fire....
Apr 27 15:54:53 localhost.localdomain systemd[1]: Started firewalld - dynamic firew....
Apr 27 15:54:53 localhost.localdomain firewalld[731]: WARNING: AllowZoneDrifting is....
Hint: Some lines were ellipsized, use -l to show in full.
[root@n1 ~]# systemctl stop firewalld.service
[root@n1 ~]# systemctl status firewalld
● firewalld.service - firewalld - dynamic firewall daemon
   Loaded: loaded (/usr/lib/systemd/system/firewalld.service; disabled; vendor preset: enabled)
   Active: inactive (dead)
     Docs: man:firewalld(1)

Apr 27 15:54:52 localhost.localdomain systemd[1]: Starting firewalld - dynamic fire....
Apr 27 15:54:53 localhost.localdomain systemd[1]: Started firewalld - dynamic firew....
Apr 27 15:54:53 localhost.localdomain firewalld[731]: WARNING: AllowZoneDrifting is....
Apr 27 16:25:54 n1 systemd[1]: Stopping firewalld - dynamic firewall daemon...
Apr 27 16:25:56 n1 systemd[1]: Stopped firewalld - dynamic firewall daemon.
Hint: Some lines were ellipsized, use -l to show in full.
[root@n1 ~]#
如果防火墙仍然没有关闭,使用这条命令
systemctl stop firewalld.service5.配置Host文件(三台机器都需要进行)
[admin@n1 ~]$ sudo vi /etc/hosts

We trust you have received the usual lecture from the local System
Administrator. It usually boils down to these three things:

    #1) Respect the privacy of others.
    #2) Think before you type.
    #3) With great power comes great responsibility.

[sudo] password for admin:
127.0.0.1   localhost localhost.localdomain localhost4 localhost4.localdomain4
::1         localhost localhost.localdomain localhost6 localhost6.localdomain6


192.168.113.128 n1   <---添加内容IP地址和主机名
192.168.113.129 n2   <---添加内容IP地址和主机名
192.168.113.130 n3   <---添加内容IP地址和主机名
测试:
从任意一台ping,应能ping通
ping n1
ping n2
ping n3
[admin@n1 ~]$ ping n3
PING n3 (192.168.113.130) 56(84) bytes of data.
64 bytes from n3 (192.168.113.130): icmp_seq=1 ttl=64 time=0.296 ms
64 bytes from n3 (192.168.113.130): icmp_seq=2 ttl=64 time=0.696 ms
^C
--- n3 ping statistics ---
2 packets transmitted, 2 received, 0% packet loss, time 1006ms
rtt min/avg/max/mdev = 0.296/0.496/0.696/0.200 ms
[admin@n2 ~]$ ping n1
PING n1 (192.168.113.128) 56(84) bytes of data.
64 bytes from n1 (192.168.113.128): icmp_seq=1 ttl=64 time=0.389 ms
64 bytes from n1 (192.168.113.128): icmp_seq=2 ttl=64 time=0.519 ms
^C
--- n1 ping statistics ---
2 packets transmitted, 2 received, 0% packet loss, time 1003ms
rtt min/avg/max/mdev = 0.389/0.454/0.519/0.065 ms[admin@n3 ~]$ ping n1
PING n1 (192.168.113.128) 56(84) bytes of data.
64 bytes from n1 (192.168.113.128): icmp_seq=1 ttl=64 time=0.456 ms
64 bytes from n1 (192.168.113.128): icmp_seq=2 ttl=64 time=0.607 ms
^C
--- n1 ping statistics ---
2 packets transmitted, 2 received, 0% packet loss, time 1007ms
rtt min/avg/max/mdev = 0.456/0.531/0.607/0.078 ms
[admin@n3 ~]$ 6.配置时间同步图(在root账号)
在三台节点上操作安装chrony
sudo yum install chrony
1.配置n1从公网同步时间,并开放同步时间服务
[admin@n1 ~]$ sudo vi /etc/chrony.conf
# Use public servers from the pool.ntp.org project.
# Please consider joining the pool (http://www.pool.ntp.org/join.html).
server 0.centos.pool.ntp.org iburst
server 1.centos.pool.ntp.org iburst
server 2.centos.pool.ntp.org iburst
server 3.centos.pool.ntp.org iburst

# Record the rate at which the system clock gains/losses time.
driftfile /var/lib/chrony/drift

# Allow the system clock to be stepped in the first three updates
# if its offset is larger than 1 second.
makestep 1.0 3

# Enable kernel synchronization of the real-time clock (RTC).
rtcsync

# Enable hardware timestamping on all interfaces that support it.
#hwtimestamp *

# Increase the minimum number of selectable sources required to adjust
# the system clock.
#minsources 2

# Allow NTP client access from local network.
allow 192.168.0.0/16   <---将#去掉

# Serve time even if not synchronized to a time source.
#local stratum 10

# Specify file containing keys for NTP authentication.
#keyfile /etc/chrony.keys

# Specify directory for log files.
logdir /var/log/chrony

# Select which information is logged.
#log measurements statistics tracking
~
~
~
~
~
~
"/etc/chrony.conf" 38L, 1107C written
[admin@n1 ~]$
2.配置n2、n3从n1同步时间
n2 :(n3同n2)
修改 sudo vi /etc/chrony.conf文件
[root@n2 ~]# vi /etc/chrony.conf
server n1 iburst
# Use public servers from the pool.ntp.org project.
# Please consider joining the pool (http://www.pool.ntp.org/join.html).
#server 0.centos.pool.ntp.org iburst    <---注释这一行
#server 1.centos.pool.ntp.org iburst    <---注释这一行
#server 2.centos.pool.ntp.org iburst    <---注释这一行
#server 3.centos.pool.ntp.org iburst    <---注释这一行
server n1 iburst                        <---添加这一行

# Record the rate at which the system clock gains/losses time.
driftfile /var/lib/chrony/drift

# Allow the system clock to be stepped in the first three updates
# if its offset is larger than 1 second.
makestep 1.0 3

# Enable kernel synchronization of the real-time clock (RTC).
rtcsync

# Enable hardware timestamping on all interfaces that support it.
#hwtimestamp *

# Increase the minimum number of selectable sources required to adjust
# the system clock.
#minsources 2

# Allow NTP client access from local network.
#allow 192.168.0.0/16

# Serve time even if not synchronized to a time source.
#local stratum 10

# Specify file containing keys for NTP authentication.
#keyfile /etc/chrony.keys

# Specify directory for log files.
logdir /var/log/chrony

# Select which information is logged.
#log measurements statistics tracking
~
~
~
~
~
"/etc/chrony.conf" 39L, 1129C written
3.设置开机启动 (三台机器上都需要)
sudo systemctl enable chronyd4.重启服务(三台机器上都需要)
sudo systemctl restart chronyd5.查看时间同步服务的状态(三台机器上都需要)
chronyc sources -v测试
![]()

7.配置免密钥ssh登录
从n1可免密钥登录n1, n2和n3
在n1上配置
输入
ssh-keygen -t rsa[admin@n1 ~]$ ssh-keygen -t rsa
Generating public/private rsa key pair.
Enter file in which to save the key (/home/admin/.ssh/id_rsa):
Created directory '/home/admin/.ssh'.
Enter passphrase (empty for no passphrase):
Enter same passphrase again:
Your identification has been saved in /home/admin/.ssh/id_rsa.
Your public key has been saved in /home/admin/.ssh/id_rsa.pub.
The key fingerprint is:
SHA256:VWgl5iws8ISBsbYma7vZBc8u5XfjnSL2nn1zKnmvSlg admin@n1
The key's randomart image is:
+---[RSA 2048]----+
| .ooo. ooo |
| ...+ . +oo |
| o o o.+ |
| . . . o |
|. o. S E |
| + +. o |
|.. o+ . .. |
|. +.o. + +=o.+ . |
| +....o *=o==o*. |
+----[SHA256]-----+
[admin@n1 ~]$ 再输入
ssh-copy-id n1
ssh-copy-id n2
ssh-copy-id n3
验证:
![]()

补充知识:
加密方式:1.对称加密(通讯双方须事前约定好加密算法和秘钥)
加密的密钥和解密的密钥相同
msg’=Encrypt(msg,key)
msg=Decrypt(msg,key)
缺点:对方必须要知道key
2.非对称加密
加密的密钥和解密的密钥不同
加密的密钥-->公钥 public key
解密的密钥-->私钥 private key
msg’=Encrypt(msg,key1)
msg =Decrypt(msg,key2)
eg:RSA 2048(秘钥的长度)
大数的因数分解
A=a x b
8.上传并解压hadoop文件(每台机器上都需要操作)
(1).上传文件Hadoop(三台机器都需要)
[admin@n1 ~]$ scp hadoop-3.3.1.tar.gz n2:/home/admin/ <--表示传到第二个回话
hadoop-3.3.1.tar.gz 100% 577MB 153.5MB/s 00:03
或者通过secureCRT 传输
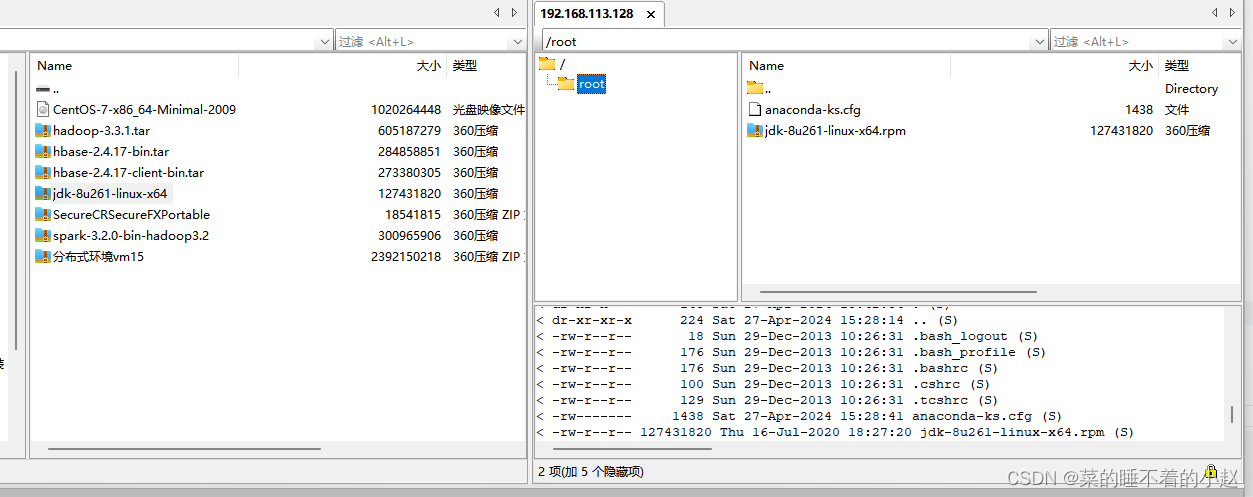
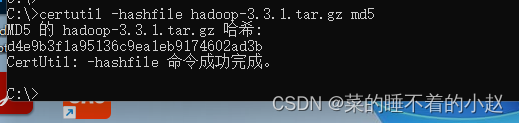
(2).判断上传的Hadoop与电脑中是否相同
查看文件是否上传成功(每台机器上都需要操作)

检验两个文件是否相同可以通过哈希算法
计算文件 哈希算法 :md5 、sha1、sha256
Windows哈希算法查看:certutil -hashfile [文件名\路径] md5
Linux哈希算法查看:md5sum [文件名]
md5sum hadoop-3.3.1.tar.gz
(3).解压文件Hadoop(tar -xzvf 【文件名】)(三台机器都需要)
[admin@n1 ~]$ tar -xzvf hadoop-3.3.1.tar.gz (4).查看是否解压成功(三台机器都需要)
[admin@n2 ~]$ ls
hadoop-3.3.1  hadoop-3.3.1.tar.gz

[admin@n2 ~]$ du -s -h hadoop-3.3.1   <--查看文件大小
1.3G    hadoop-3.3.1
9.Hadoop配置java环境变量 (三台机器都需要)
[admin@n1 ~]$ ll
total 591004
drwxr-xr-x. 10 admin admin       215 Jun 15  2021 hadoop-3.3.1
-rw-rw-r--.  1 admin admin 605187279 Oct  9  2021 hadoop-3.3.1.tar.gz
[admin@n1 ~]$ du -s -h hadoop-3.3.1
1.3G    hadoop-3.3.1
[admin@n1 ~]$ cd hadoop-3.3.1
[admin@n1 hadoop-3.3.1]$ ls
bin  include  libexec         licenses-binary  NOTICE-binary  README.txt  share
etc  lib      LICENSE-binary  LICENSE.txt      NOTICE.txt     sbin
[admin@n1 hadoop-3.3.1]$ vi etc/hadoop/hadoop-env.sh
在文件55行
export JAVA_HOME=/usr/java/latest <——将#删除,添加/usr/java/latest
[admin@n1 hadoop-3.3.1]$  ls /usr/java/latest
bin        javafx-src.zip  legal    man          src.zip
COPYRIGHT  jmc.txt         lib      README.html  THIRDPARTYLICENSEREADME-JAVAFX.txt
include    jre             LICENSE  release      THIRDPARTYLICENSEREADME.txt
[admin@n1 hadoop-3.3.1]$
10.配置core-site.xml(三台机器都需要)
[admin@n1 hadoop-3.3.1]$ cd etc/hadoop/
[admin@n1 hadoop]$ ls
capacity-scheduler.xml            kms-log4j.properties
configuration.xsl                 kms-site.xml
container-executor.cfg            log4j.properties
core-site.xml                     mapred-env.cmd
hadoop-env.cmd                    mapred-env.sh
hadoop-env.sh                     mapred-queues.xml.template
hadoop-metrics2.properties        mapred-site.xml
hadoop-policy.xml                 shellprofile.d
hadoop-user-functions.sh.example  ssl-client.xml.example
hdfs-rbf-site.xml                 ssl-server.xml.example
hdfs-site.xml                     user_ec_policies.xml.template
httpfs-env.sh                     workers
httpfs-log4j.properties           yarn-env.cmd
httpfs-site.xml                   yarn-env.sh
kms-acls.xml                      yarnservice-log4j.properties
kms-env.sh                        yarn-site.xml
进入文件
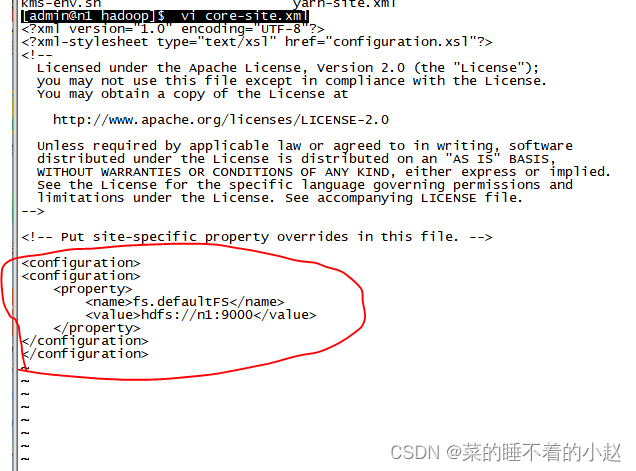
[admin@n1 hadoop]$ vi core-site.xml添加内容
<configuration>
    <property>
        <name>fs.defaultFS</name>
        <value>hdfs://n1:9000</value>
    </property>
</configuration>
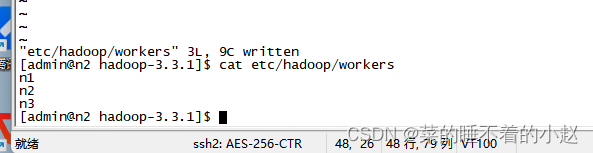
11.配置workers文件(三台机器都需要)
[admin@n1 hadoop]$ cd ..
[admin@n1 etc]$ cd ..
[admin@n1 hadoop-3.3.1]$ vi etc/hadoop/workers
n1			<--删除Localhost,添加n1,n2,n3
n2
n3
查看是否修改成功
12.初始分布式文件系统hdfs(只需要在n1上进行操作)
[admin@n1 hadoop-3.3.1]$ bin/hdfs namenode -format my_hadoop_cluster13.启动hdfs
[admin@n1 hadoop-3.3.1]$ sbin/start-dfs.sh14.验证,用jps
[admin@n1 hadoop-3.3.1]$ jps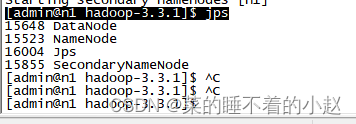
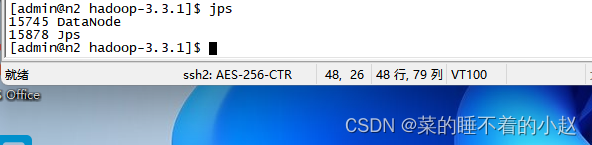

使用ip地址访问http://192.168.113.128:9870


 985
985

 被折叠的 条评论
为什么被折叠?
被折叠的 条评论
为什么被折叠?
 到【灌水乐园】发言


