


这篇文章,我们将来讲一讲SpringMVC如何实现文件的上传操作。
一、文件上传 🌹
1、导入相关依赖
<dependency>
  <groupId>commons-fileupload</groupId>
  <artifactId>commons-fileupload</artifactId>
  <version>1.3.1</version>
</dependency>
<dependency>
  <groupId>commons-io</groupId>
  <artifactId>commons-io</artifactId>
  <version>2.4</version>
</dependency>
2、准备jsp页面
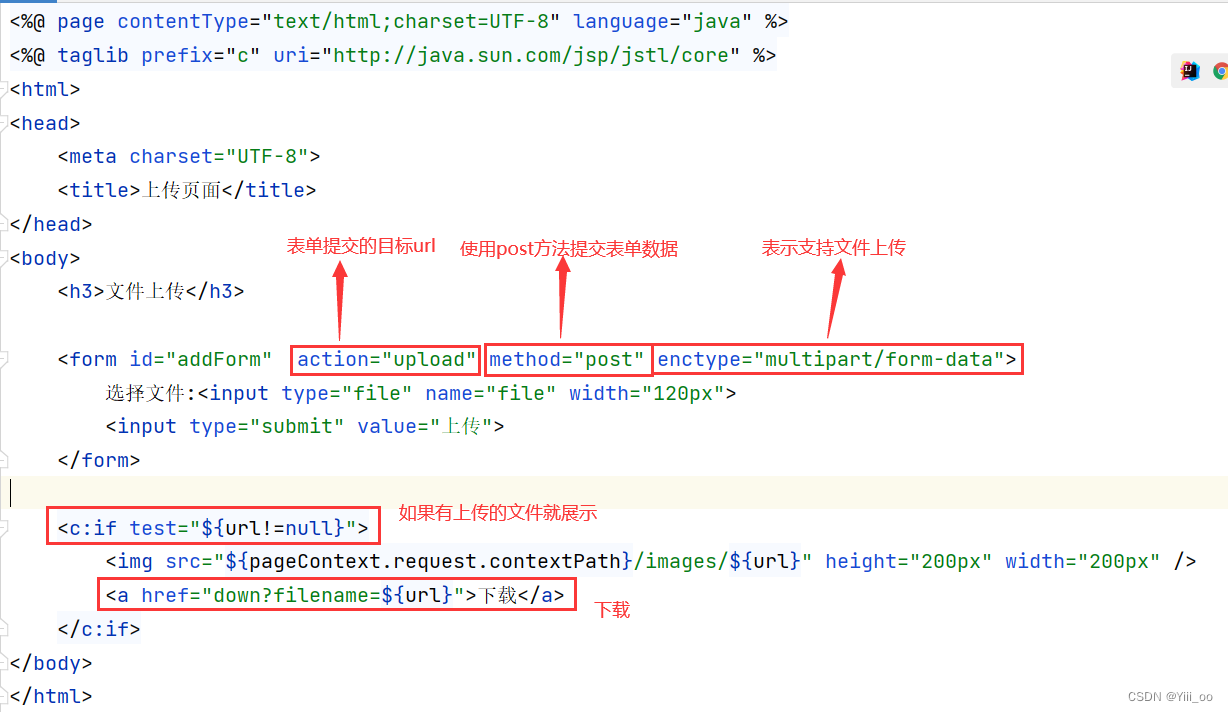
<%@ page contentType="text/html;charset=UTF-8" language="java" %>
<%@ taglib prefix="c" uri="http://java.sun.com/jsp/jstl/core" %>
<html>
<head>
<meta charset="UTF-8">
<title>上传页面</title>
</head>
<body>
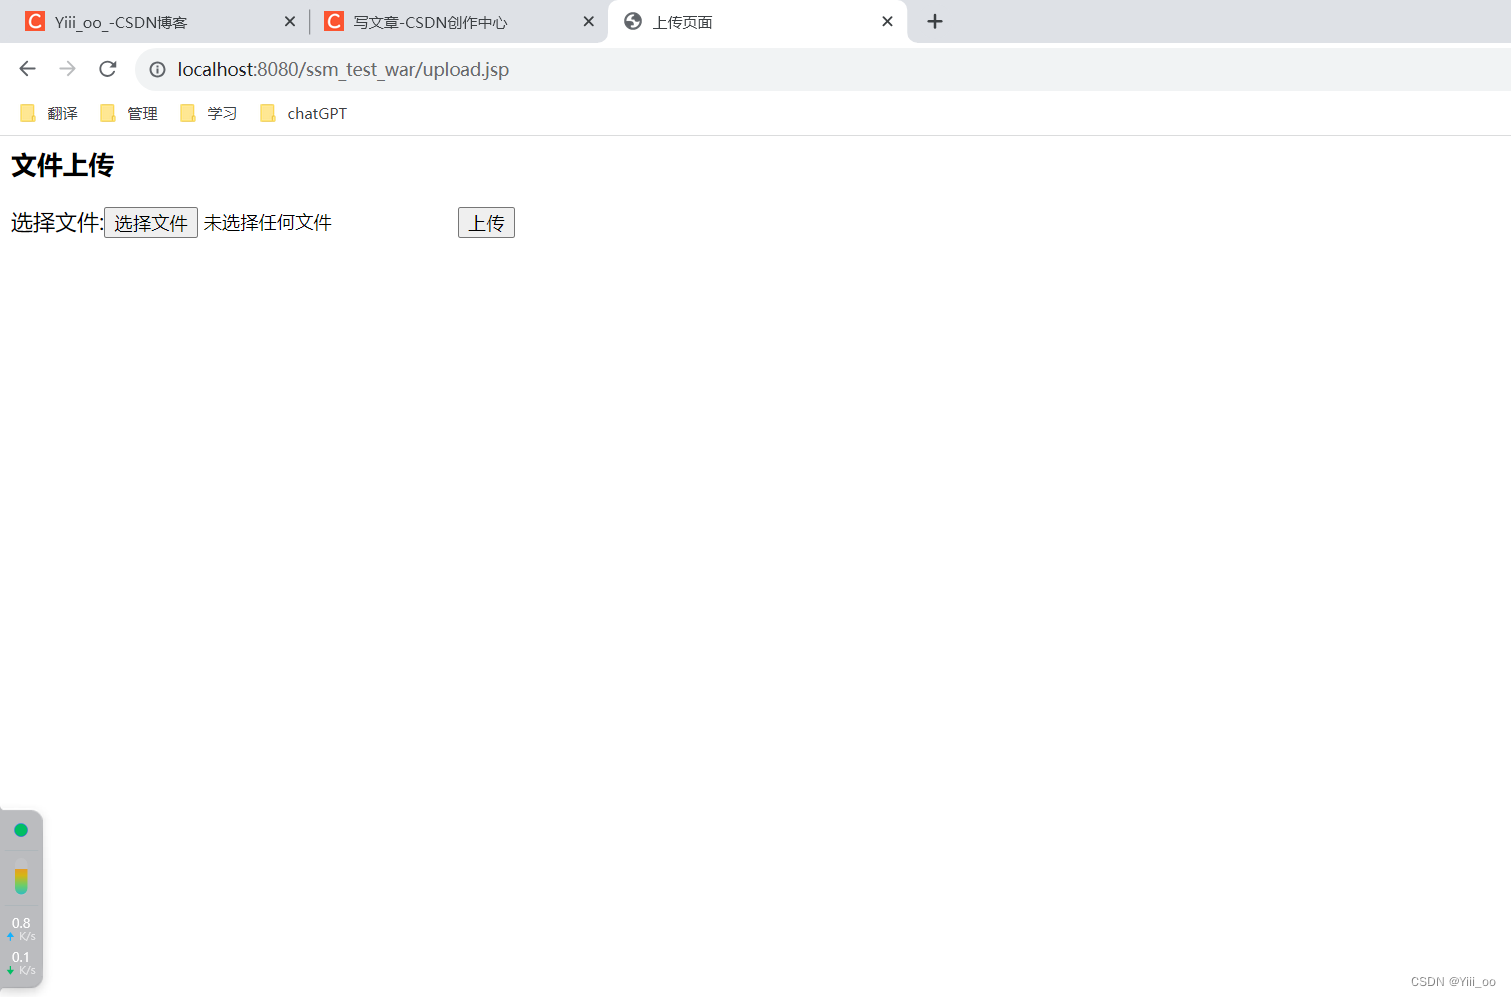
<h3>文件上传</h3>
<form id="addForm" action="upload" method="post" enctype="multipart/form-data">
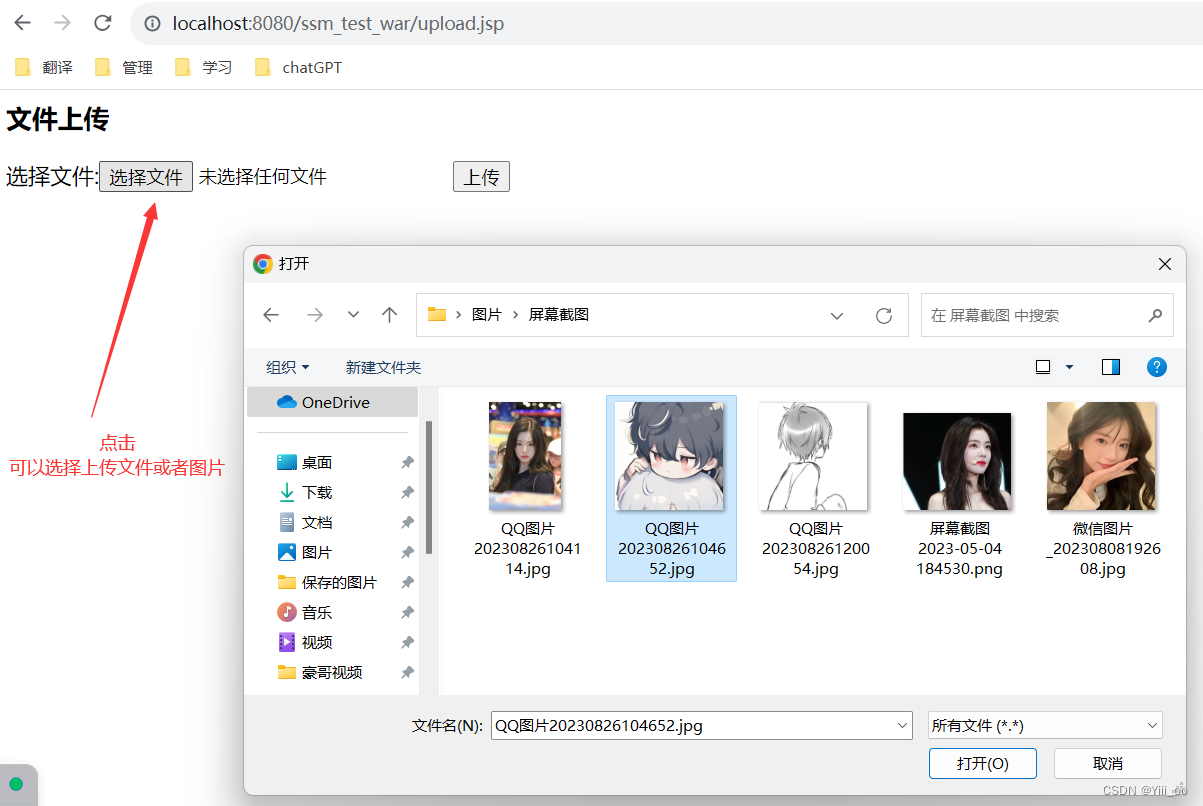
选择文件:<input type="file" name="file" width="120px">
<input type="submit" value="上传">
</form>
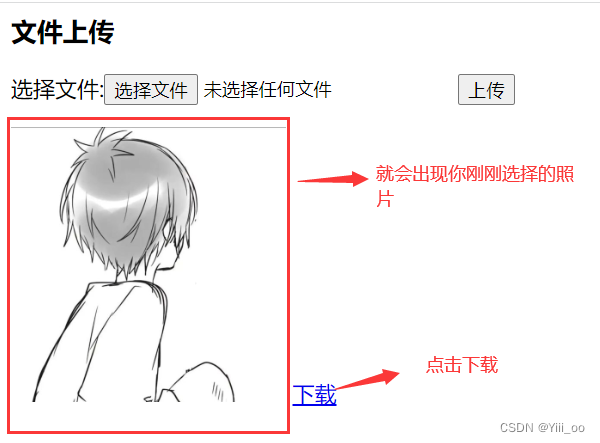
<c:if test="${url!=null}">
<img src="${pageContext.request.contextPath}/images/${url}" height="200px" width="200px" />
<a href="down?filename=${url}">下载</a>
</c:if>
</body>
</html>- 截图
- 运行结果
3、编写Controller
package com.cskt.controller;

import org.springframework.stereotype.Controller;
import org.springframework.web.bind.annotation.RequestMapping;
import org.springframework.web.bind.annotation.RequestMethod;
import org.springframework.web.bind.annotation.RequestParam;
import org.springframework.web.multipart.MultipartFile;
import org.springframework.web.servlet.ModelAndView;

import javax.servlet.http.HttpServletRequest;
import javax.servlet.http.HttpServletResponse;
import java.io.*;
import java.net.URLEncoder;

/**
 * @Description TODO
 * @Author Yii_oo
 * @CreateDate 2023-08-31 11:04
 * @Version 1.0
 * @ClassDesc 文件上传和下载
 */
@Controller
public class UploadController {

    /**
     * 文件上传功能
     * @param file
     * @return
     * @throws IOException
     */
    @RequestMapping(value = "/upload",method = RequestMethod.POST)
    public ModelAndView upload(@RequestParam("file")MultipartFile file, HttpServletRequest request ,ModelAndView modelAndView) throws IOException{
        // 图片存放文件夹位置     image你想放在项目的哪个文件夹下
        String rootPath = request.getSession().getServletContext().getRealPath("images");
        // 上传文件的原始名称
        String originalFileName = file.getOriginalFilename();
        // 新文件名称
        File newFile = new File(rootPath + File.separator + File.separator + originalFileName);
        // 判断目标文件所在目录是否存在
        if (!newFile.getParentFile().exists()) {
            //如果目标文件所在目录不存在,则创建父目录
            newFile.getParentFile().mkdirs();
        }
        file.transferTo(newFile);
        System.out.println(newFile);  //因为newFile是绝对路径,前端的img需要相对路径
        String filePath=newFile.toString();
        //截取相对路径
        String fileName = filePath.substring(filePath.lastIndexOf("\\")+1);
        System.out.println(fileName);
        modelAndView.addObject("url",fileName);
        modelAndView.setViewName("upload");
        return modelAndView;
    }


    /**
     * 文件下载功能
     * @param request
     * @param response
     * @throws Exception
     */
    @RequestMapping("/down")
    public void down(HttpServletRequest request, HttpServletResponse response) throws Exception{
        String filename = request.getParameter("filename");
        System.out.println(filename);
        //模拟文件,myfile.txt为需要下载的文件
        String fileName = request.getSession().getServletContext().getRealPath("images")+"/"+filename;
        //获取输入流
        InputStream bis = new BufferedInputStream(new FileInputStream(new File(fileName)));
        //假如以中文名下载的话
        // String filename = "下载文件.txt";
        //转码,免得文件名中文乱码
        filename = URLEncoder.encode(filename,"UTF-8");
        //设置文件下载头
        response.addHeader("Content-Disposition", "attachment;filename=" + filename);
        //1.设置文件ContentType类型,这样设置,会自动判断下载文件类型
        response.setContentType("multipart/form-data");
        BufferedOutputStream out = new BufferedOutputStream(response.getOutputStream());
        int len = 0;
        while((len = bis.read()) != -1){
            out.write(len);
            out.flush();
        }
        out.close();
    }
}
4、运行结果


就完成了!


 929
929


 被折叠的 条评论
为什么被折叠?
被折叠的 条评论
为什么被折叠?
 到【灌水乐园】发言


