


vue2的Todolist
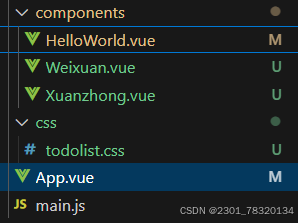
首先在创建四个.vue文件在src目录下,并且在App组件里面导入使用下面是目录:
下面是App里面的代码:
<template>
  <div id="app">
    <!-- 第一个是input输入框 -->
    <HelloWorld @hus="yiu" />
    <!-- 第二个是渲染添加后的数据没选中的 -->
    <Weixuan :list="list" @dels="delst" />
    <!-- 第三个是添加后选中状态 -->
    <Xuanzhong :list="list" />

  </div>
</template>

<script>
// 导入所需的组件
import HelloWorld from './components/HelloWorld.vue'
import Weixuan from './components/Weixuan.vue'
import Xuanzhong from './components/Xuanzhong.vue'


export default {
  name: 'app',
  // 然后在components里面注册刚才导入的组件
  components: {
    HelloWorld,
    Weixuan,
    Xuanzhong,

  },
  // 定义数据
  data() {
    return {
      // 定义一个数组
      list: []
    }
  },
  // 在方法里面实现功能
  methods: {
    // 接受参数然后从新赋值
    yiu(list) {
      console.log(list);
      this.list = list
    },

    delst(index) {
      // 删除当前的数据
      this.list.splice(index, 1)
    }
  },

}


</script>
然后就是第一个组件HelloWorld里面的input输入事件
<template>
  <div class="hello">
    <header>
      <section>
        <!-- 阻止表单的默认提交事件 -->
        <label for="title">ToDoList</label>
        <input type="text" placeholder="添加ToDo" v-model="msg" @keyup.13="add" />
      </section>
    </header>
  </div>
</template>

<script>
export default {
  data() {
    return {
      // 定义输入的字段为字符串
      msg: '',
      // 然后定义个数组
      list: []
    }
  },
  methods: {
    // 在输入完字段后执行add事件然后把事件添加到数组里面,通过子传父的方法,传到父组件做处理
    add() {
      this.list.push({ title: this.msg, flag: false, checked: false });
      this.$emit('hus', this.list)
    },
  },
};
</script>

<style>
/* 这边是样式 */
label {
  float: left;
  width: 100px;
  line-height: 50px;
  color: #ddd;
  font-size: 24px;
  cursor: pointer;
  font-family: "Helvetica Neue", Helvetica, Arial, sans-serif;
}

header {
  height: 50px;
  background: #333;
  background: rgba(47, 47, 47, 0.98);
}

header input {
  float: right;
  width: 60%;
  height: 24px;
  margin-top: 12px;
  text-indent: 10px;
  border-radius: 5px;
  box-shadow: 0 1px 0 rgba(255, 255, 255, 0.24),
    0 1px 6px rgba(0, 0, 0, 0.45) inset;
  border: none;
}

input:focus {
  outline-width: 0;
}

@media screen and (max-device-width: 620px) {
  section {
    width: 96%;
    padding: 0 2%;
  }
}

@media screen and (min-width: 620px) {
  section {
    width: 600px;
    padding: 0 10px;
  }
}
</style>
然后就是第二个组件,渲染数据,list组件
<template>
    <div class="weixuan">
        <section>
            <h2>正在进行<span>{{ sum }}</span></h2>
            <ol>
                <li v-for="item,index in list" v-show="!item.flag" :key="index">
                    <input type="checkbox" v-model="item.flag" />
                    <!-- 在点击p表标签时进入编辑的状态 -->
                    <input style="width:80%;margin-left:30px; display: none;" ref="input" v-show="item.checked"  @blur="blur(index, $event)" />
                    <!-- 不是编辑状态 -->
                    <p @dblclick="bianji(index)">{{ item.title }}</p>
                    <a href="javascript:;" @click="dels(index)">-</a>
                </li>
            </ol>
        </section>
    </div>
</template>
<script>
export default {
    // 接收父组件传过来的数据
    props:['list'],
    methods:{
        // 双击出现input框然后编辑
        bianji(idx){
            // idx是传过来的参数,当前的index当前数组的下标
            this.list[idx].checked = true
            // 通过nextTick让当前的input获焦
            this.$nextTick(() => {
                this.$refs.input[idx].focus()
            })
        },
        // 然后失焦 完成编辑
        blur(index, e) {
            // 通过事件对象e得到事件对象上的值就是e.target.value 修改当前的title的值
            this.list[index].title = e.target.value
            this.list[index].checked = false
        },
        dels(index){
            // 删除 接收当前数组的下标
            // 然后在父组件做事情,子通知父
            this.$emit('dels', index)
        }
    },
    computed:{
        sum(){
            // 通过计算属性和过滤这个数组里面的item每一个item.flag他的长度来看有几条
            return this.list.filter(item=>item.flag == false).length
        }
    }
}
</script>
<style>
/* 样式 */
section {
    margin: 0 auto;
}

h2 {
    position: relative;
}

span {
    position: absolute;
    top: 2px;
    right: 5px;
    display: inline-block;
    padding: 0 5px;
    height: 20px;
    border-radius: 20px;
    background: #e6e6fa;
    line-height: 22px;
    text-align: center;
    color: #666;
    font-size: 14px;
}

ol,
ul {
    padding: 0;
    list-style: none;
}

li input {
    position: absolute;
    top: 2px;
    left: 10px;
    width: 22px;
    height: 22px;
    cursor: pointer;
}

p {
    margin: 0;
}

li p input {
    top: 3px;
    left: 40px;
    width: 70%;
    height: 20px;
    line-height: 14px;
    text-indent: 5px;
    font-size: 14px;
}

li {
    height: 32px;
    line-height: 32px;
    background: #fff;
    position: relative;
    margin-bottom: 10px;
    padding: 0 45px;
    border-radius: 3px;
    border-left: 5px solid #629a9c;
    box-shadow: 0 1px 2px rgba(0, 0, 0, 0.07);
}

ol li {
    cursor: move;
}

ul li {
    border-left: 5px solid #999;
    opacity: 0.5;
}

li a {
    position: absolute;
    top: 2px;
    right: 5px;
    display: inline-block;
    width: 14px;
    height: 12px;
    border-radius: 14px;
    border: 6px double #fff;
    background: #ccc;
    line-height: 14px;
    text-align: center;
    color: #fff;
    font-weight: bold;
    font-size: 14px;
    cursor: pointer;
}
</style>
然后就是第三个组件选中的数据
<template>
    <div class="xuanzhong">
        <section>
            <h2>已经完成<span>{{ sum }}</span></h2>
            <ul>
                <li v-for="item,index in list" :key="index" v-show="item.flag">
                    <input type="checkbox" v-model="item.flag" />
                    <p>{{ item.title }}</p>
                    <a href="javascript:;" >-</a>
                </li>
            </ul>
        </section>
    </div>
</template>
<script>
export default {
    props:['list'],
    computed:{
        sum(){
            return this.list.filter(item=>item.flag == true).length
        }
    }
}
</script>
<style>
section {
    margin: 0 auto;
}

h2 {
    position: relative;
}

span {
    position: absolute;
    top: 2px;
    right: 5px;
    display: inline-block;
    padding: 0 5px;
    height: 20px;
    border-radius: 20px;
    background: #e6e6fa;
    line-height: 22px;
    text-align: center;
    color: #666;
    font-size: 14px;
}

ol,
ul {
    padding: 0;
    list-style: none;
}

li input {
    position: absolute;
    top: 2px;
    left: 10px;
    width: 22px;
    height: 22px;
    cursor: pointer;
}

p {
    margin: 0;
}

li p input {
    top: 3px;
    left: 40px;
    width: 70%;
    height: 20px;
    line-height: 14px;
    text-indent: 5px;
    font-size: 14px;
}

li {
    height: 32px;
    line-height: 32px;
    background: #fff;
    position: relative;
    margin-bottom: 10px;
    padding: 0 45px;
    border-radius: 3px;
    border-left: 5px solid #629a9c;
    box-shadow: 0 1px 2px rgba(0, 0, 0, 0.07);
}

ol li {
    cursor: move;
}

ul li {
    border-left: 5px solid #999;
    opacity: 0.5;
}

li a {
    position: absolute;
    top: 2px;
    right: 5px;
    display: inline-block;
    width: 14px;
    height: 12px;
    border-radius: 14px;
    border: 6px double #fff;
    background: #ccc;
    line-height: 14px;
    text-align: center;
    color: #fff;
    font-weight: bold;
    font-size: 14px;
    cursor: pointer;
}
</style>


 642
642

 被折叠的 条评论
为什么被折叠?
被折叠的 条评论
为什么被折叠?
 到【灌水乐园】发言


