


关于MaaS平台
MaaS 平台即 “模型即服务”(Model as a Service)平台,是一种依托云计算的人工智能服务模式。
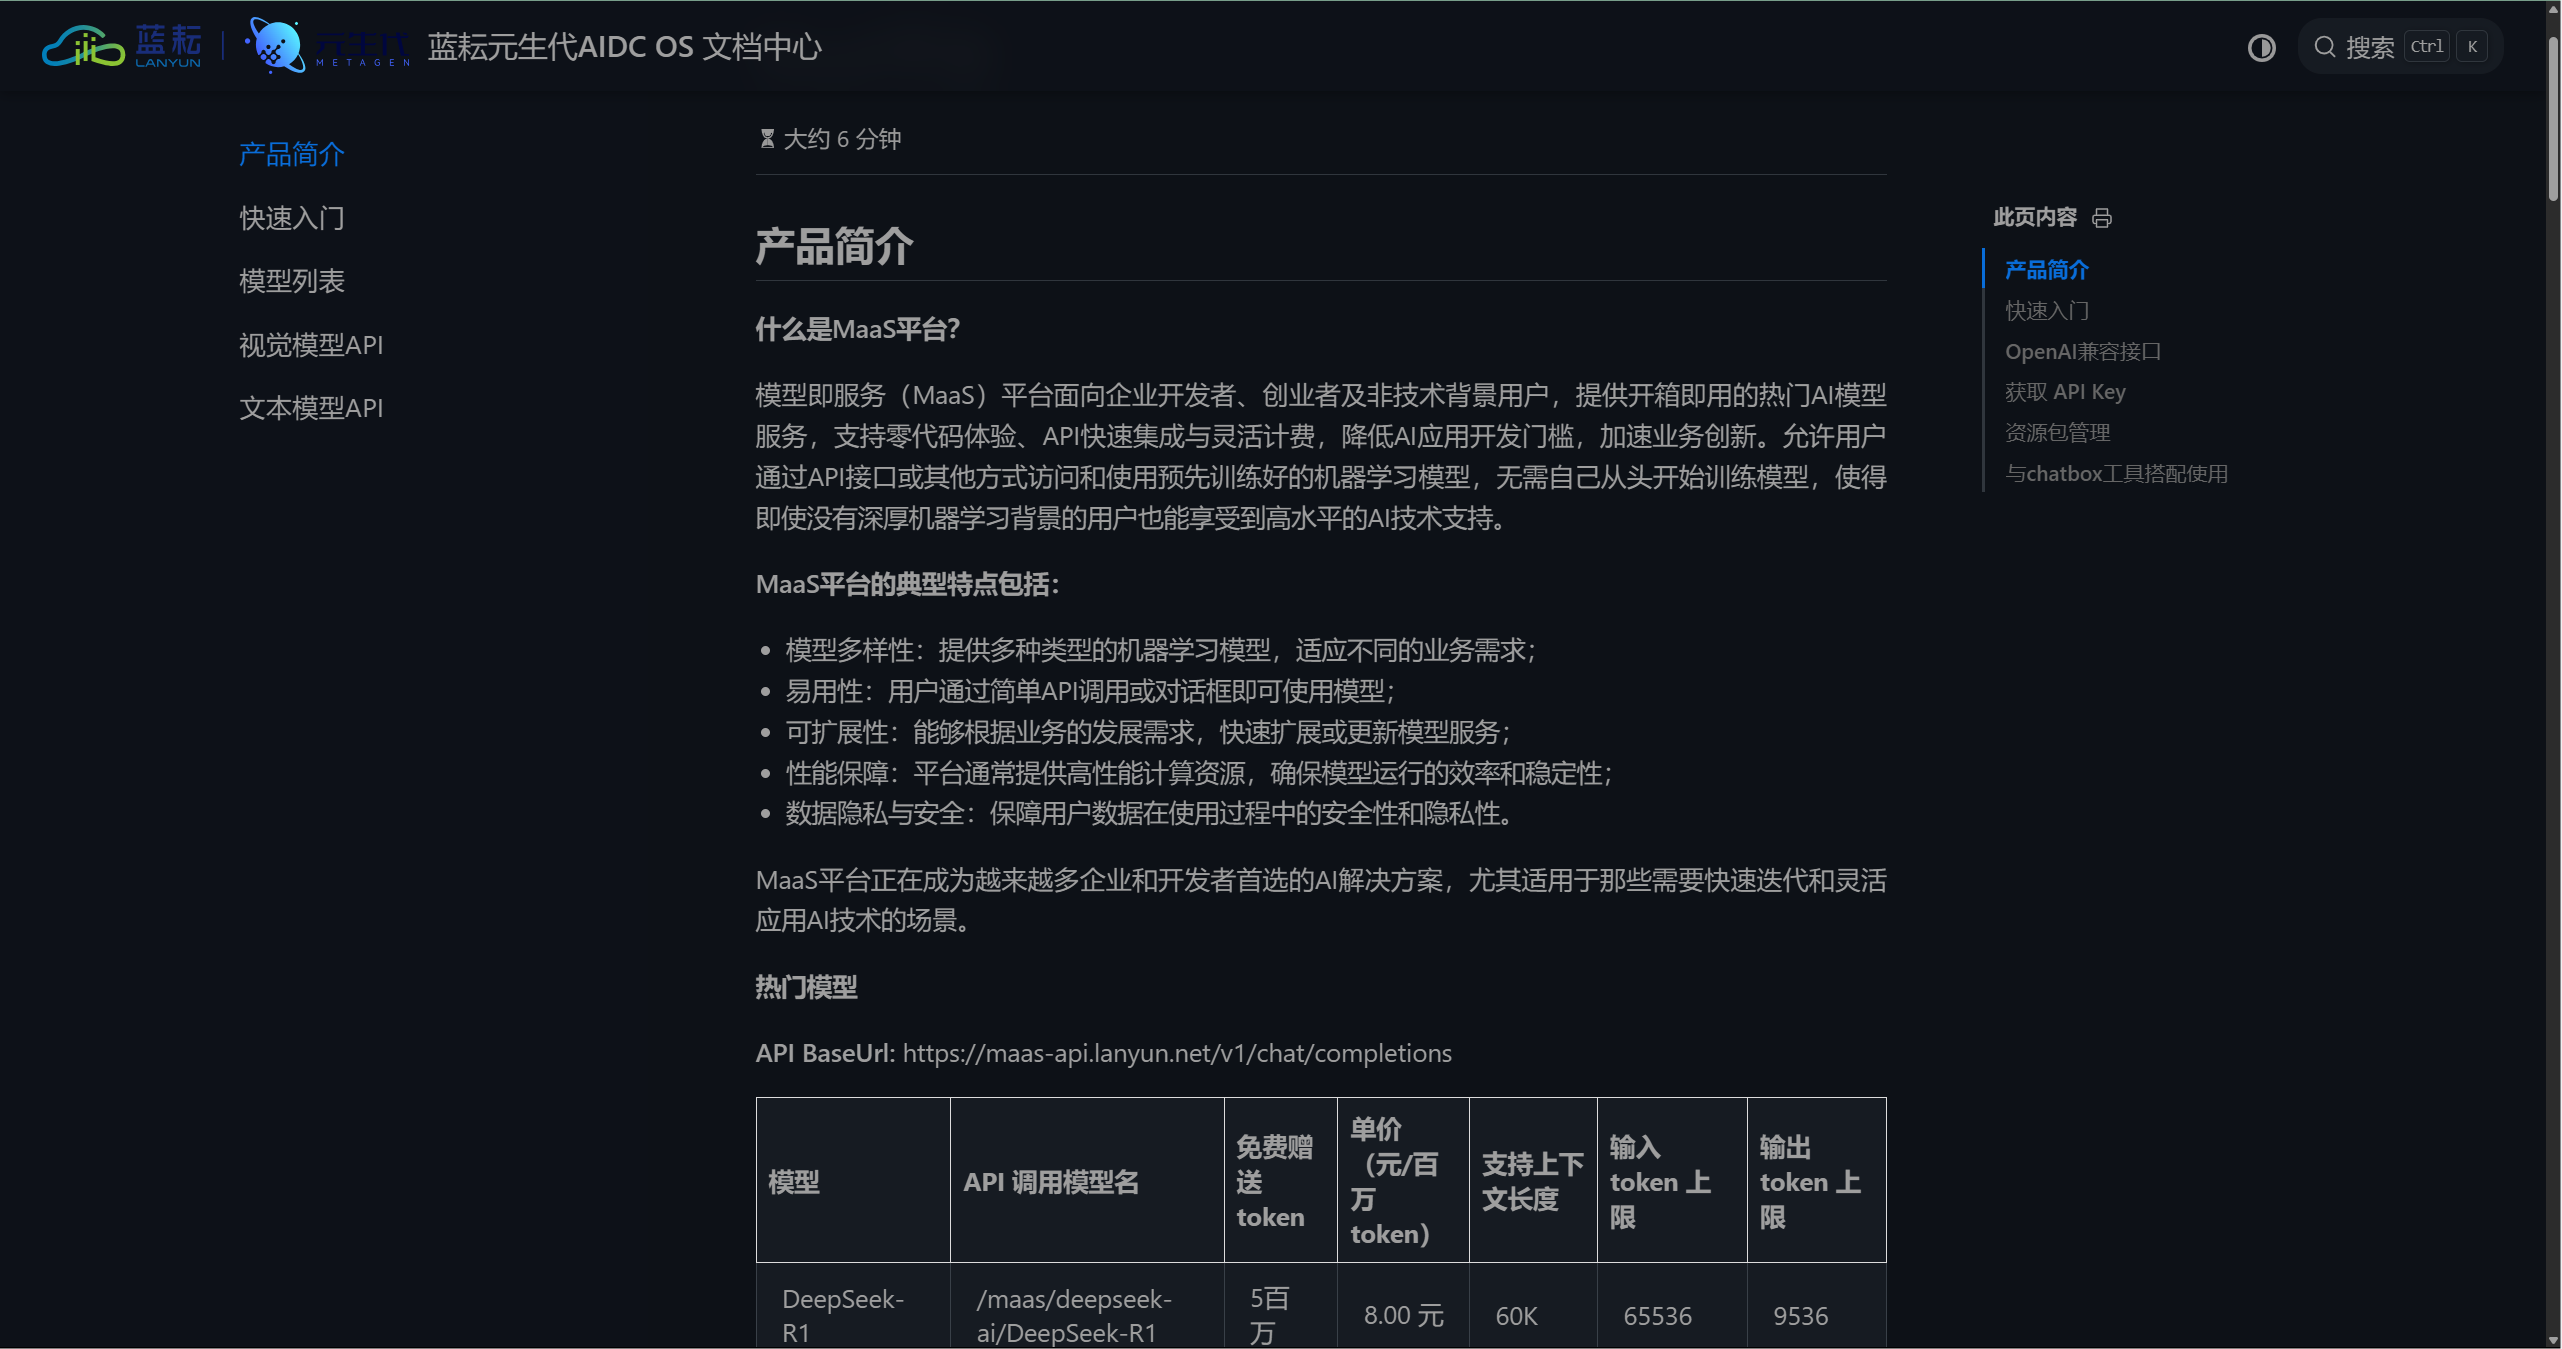
模型即服务(MaaS)平台面向企业开发者、创业者及非技术背景用户,提供开箱即用的热门AI模型服务,支持零代码体验、API快速集成与灵活计费,降低AI应用开发门槛,加速业务创新。允许用户通过API接口或其他方式访问和使用预先训练好的机器学习模型,无需自己从头开始训练模型,使得即使没有深厚机器学习背景的用户也能享受到高水平的AI技术支持。
关于具体介绍,可以看看这里蓝耘元生代AIDC OS 文档中心,介绍的还是蛮详细的
那么这个时候就有人想问,我们能通过该平台做什么呢?
对于我来说,调用api来进行本地的兴趣开发操作,下面我就教大家如果使用这个平台进行api的调用操作
调用蓝耘内api进行本地机器人的搭建操作
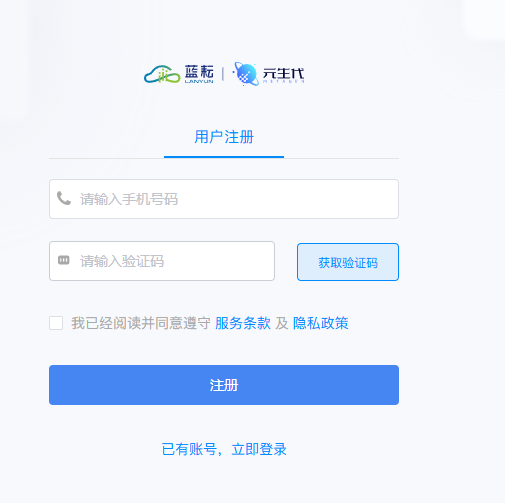
调用之前我们先进行平台的注册操作,输入你的正确信息就能登录到平台,开启的数据漫游了
https://cloud.lanyun.net//#/registerPage?promoterCode=0131
调用api,我们需要正确的调用代码,在文档中有详细的介绍
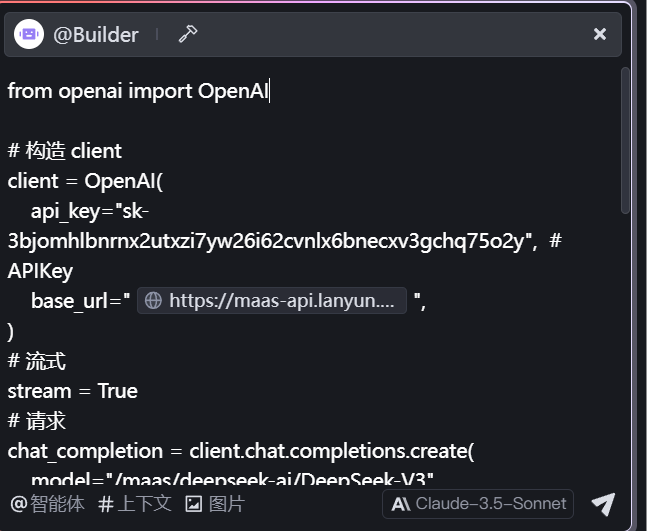
这里我们直接使用Python进行调用操作
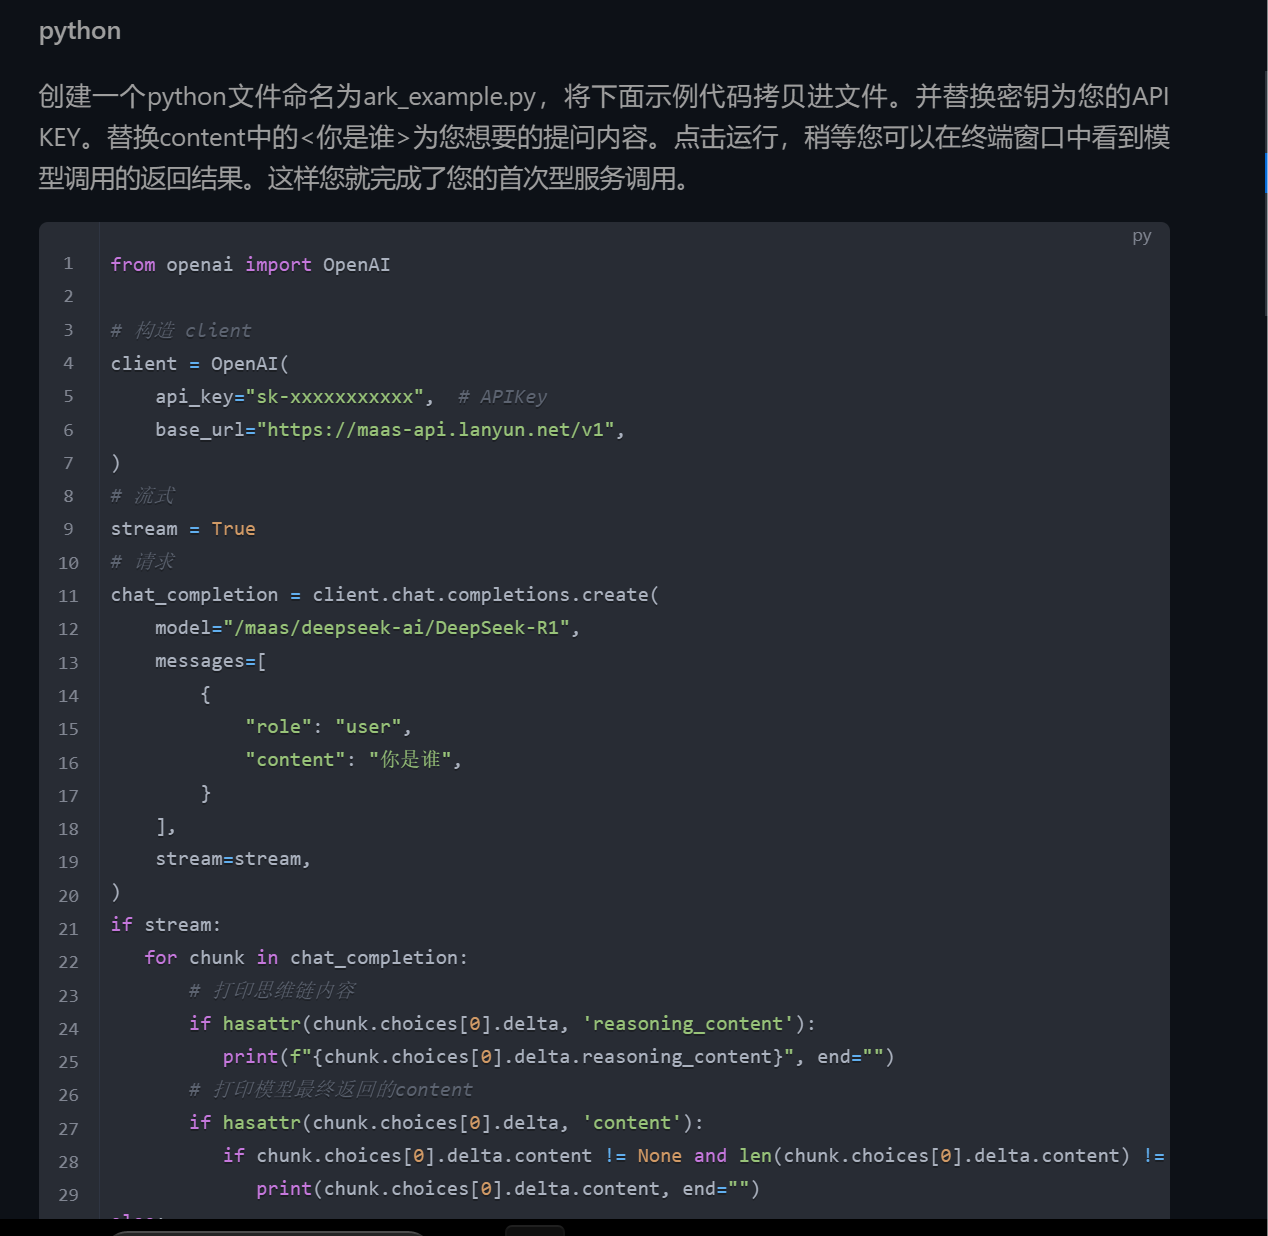
from openai import OpenAI

# 构造 client
client = OpenAI(
    api_key="sk-xxxxxxxxxxx",  # APIKey
    base_url="https://maas-api.lanyun.net/v1",
)
# 流式
stream = True
# 请求
chat_completion = client.chat.completions.create(
    model="/maas/deepseek-ai/DeepSeek-R1",
    messages=[
        {
            "role": "user",
            "content": "你是谁",
        }
    ],
    stream=stream,
)
if stream:
   for chunk in chat_completion:
       # 打印思维链内容
       if hasattr(chunk.choices[0].delta, 'reasoning_content'):
          print(f"{chunk.choices[0].delta.reasoning_content}", end="")
       # 打印模型最终返回的content
       if hasattr(chunk.choices[0].delta, 'content'):
          if chunk.choices[0].delta.content != None and len(chunk.choices[0].delta.content) != 0:
             print(chunk.choices[0].delta.content, end="")
else:
   result = chat_completion.choices[0].message.content
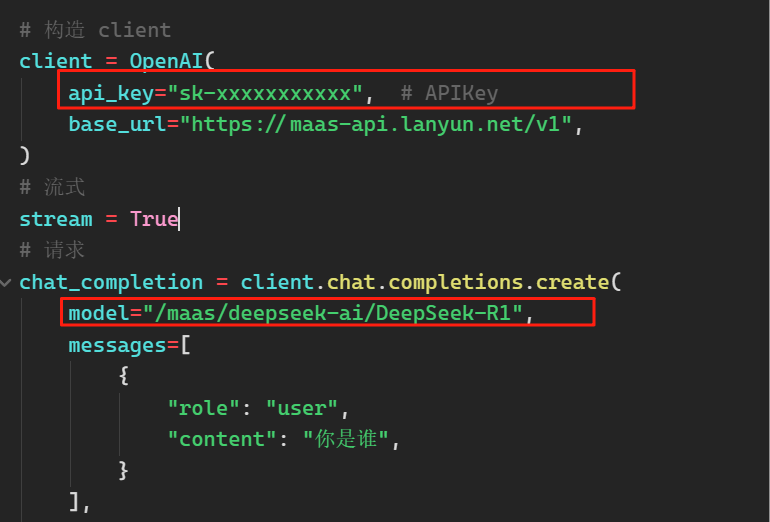
这里我们不难发现,调用api的话我们需要改变两个变量,一个是api_key,一个是model
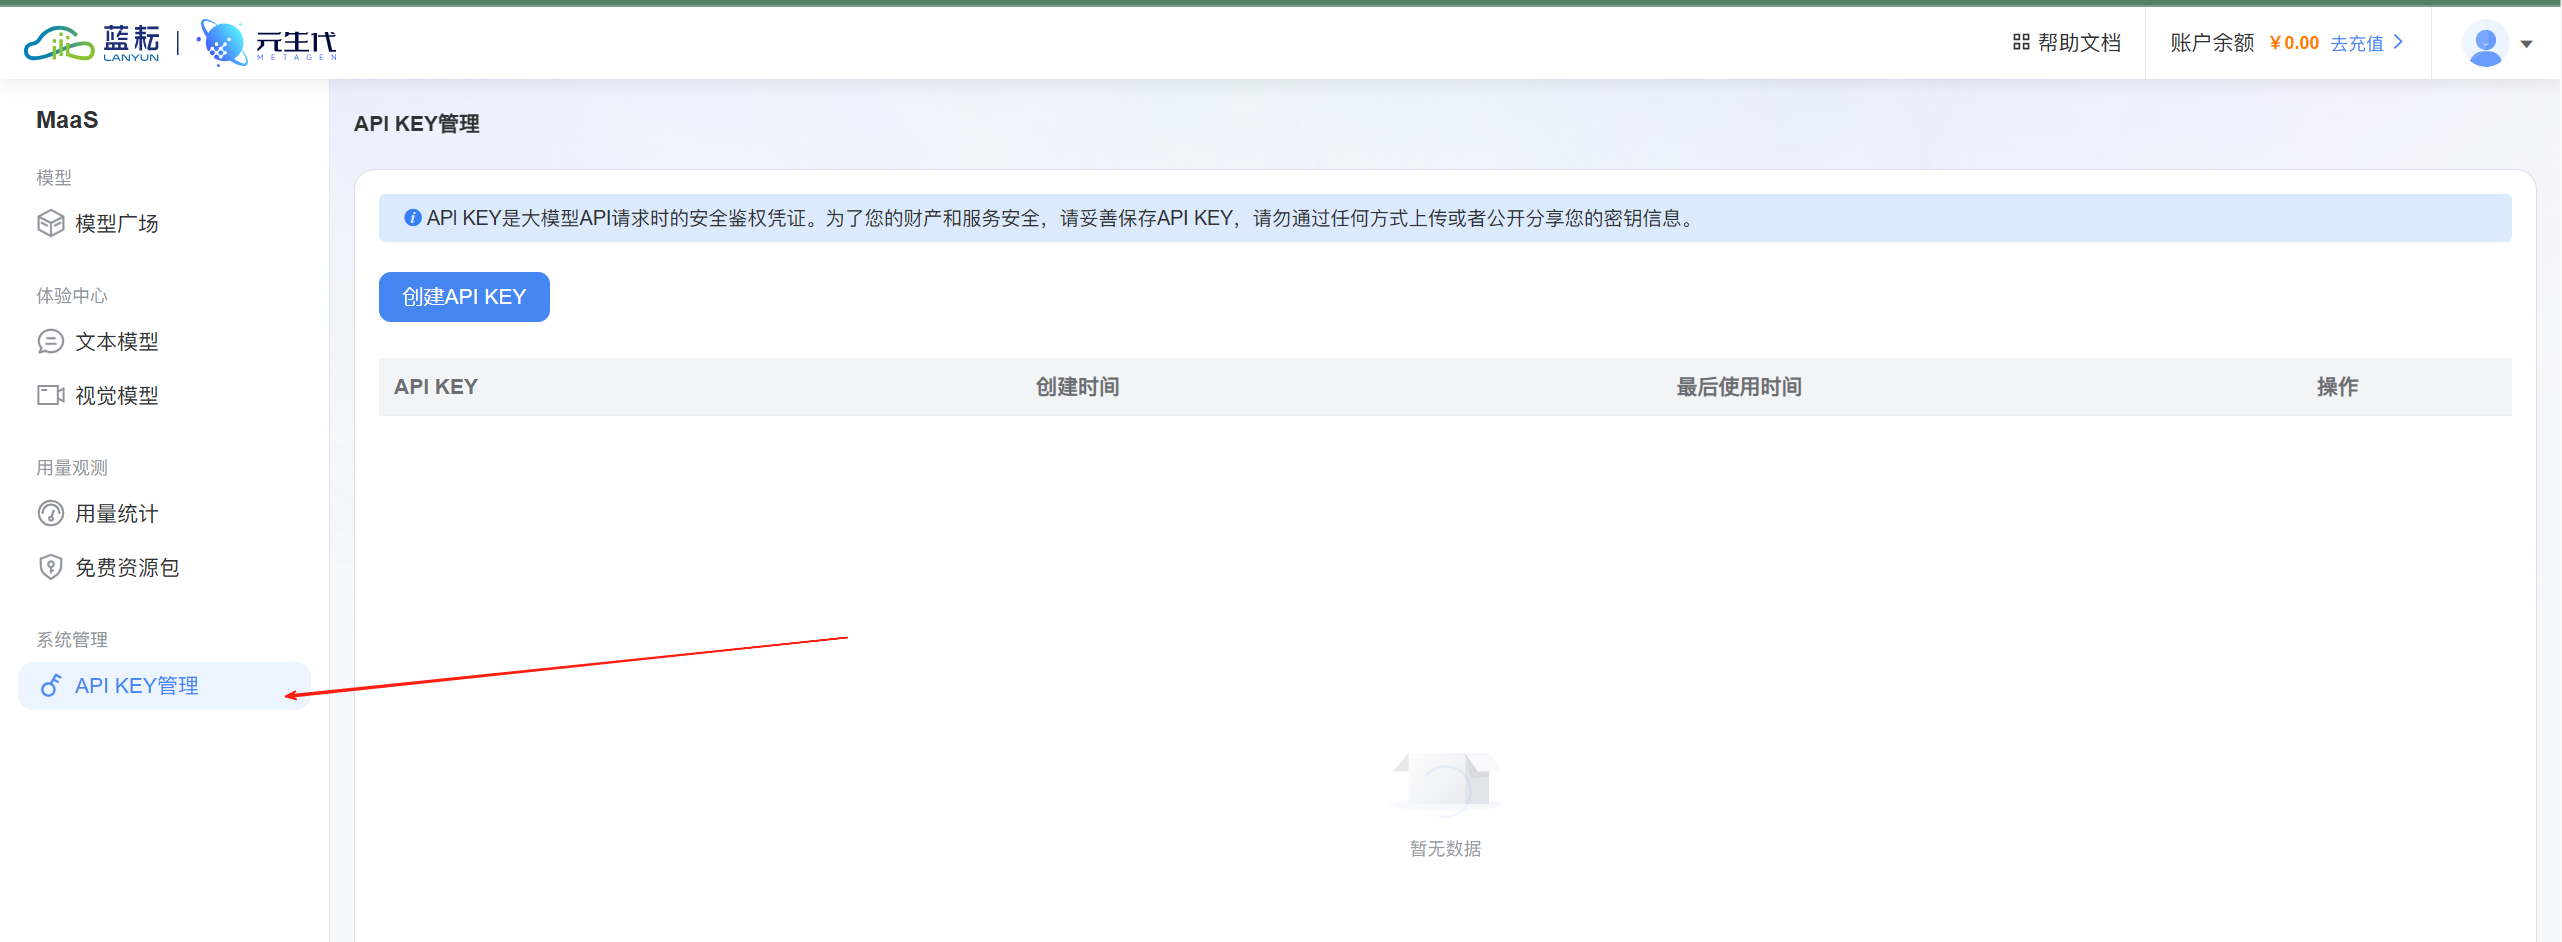
点击模型广场,我们进行API_KEY的创建操作
创建好了之后就是这个样子,我们是可以进行点击复制操作的
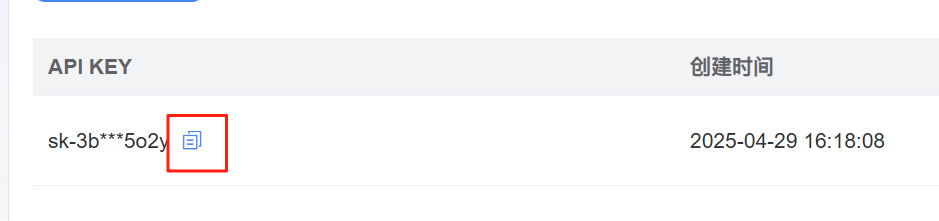
然后将这个API KEY填写到上面调用代码的api_key里面就行了
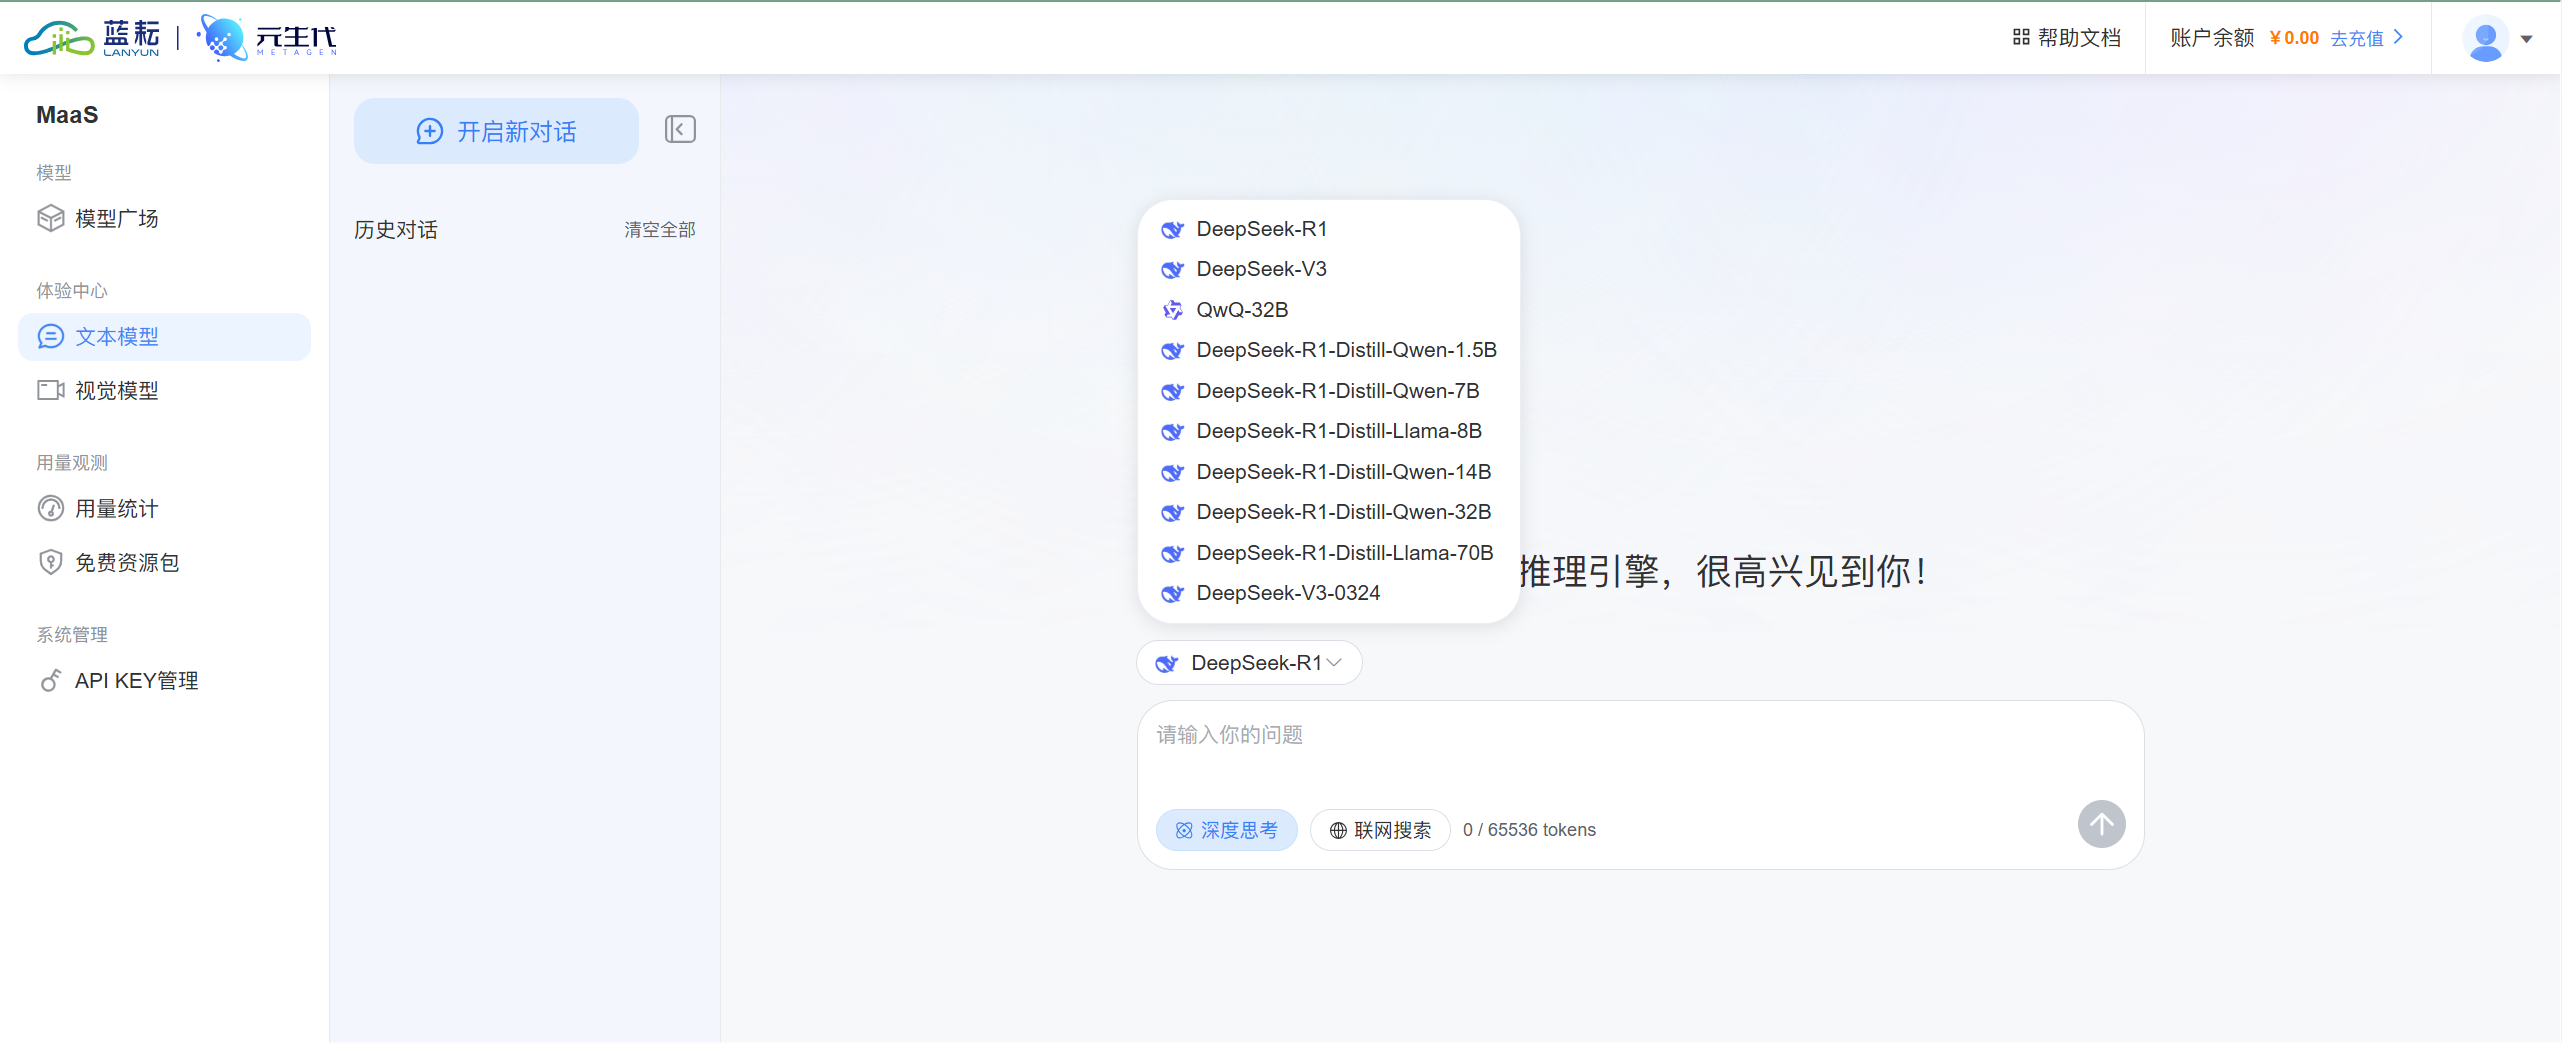
model的话就直接选择你想带调用的模型,这里我们可以发现模型广场可以带哦用的类型还是蛮多的
model的话我们选择模型下方的名字就行了
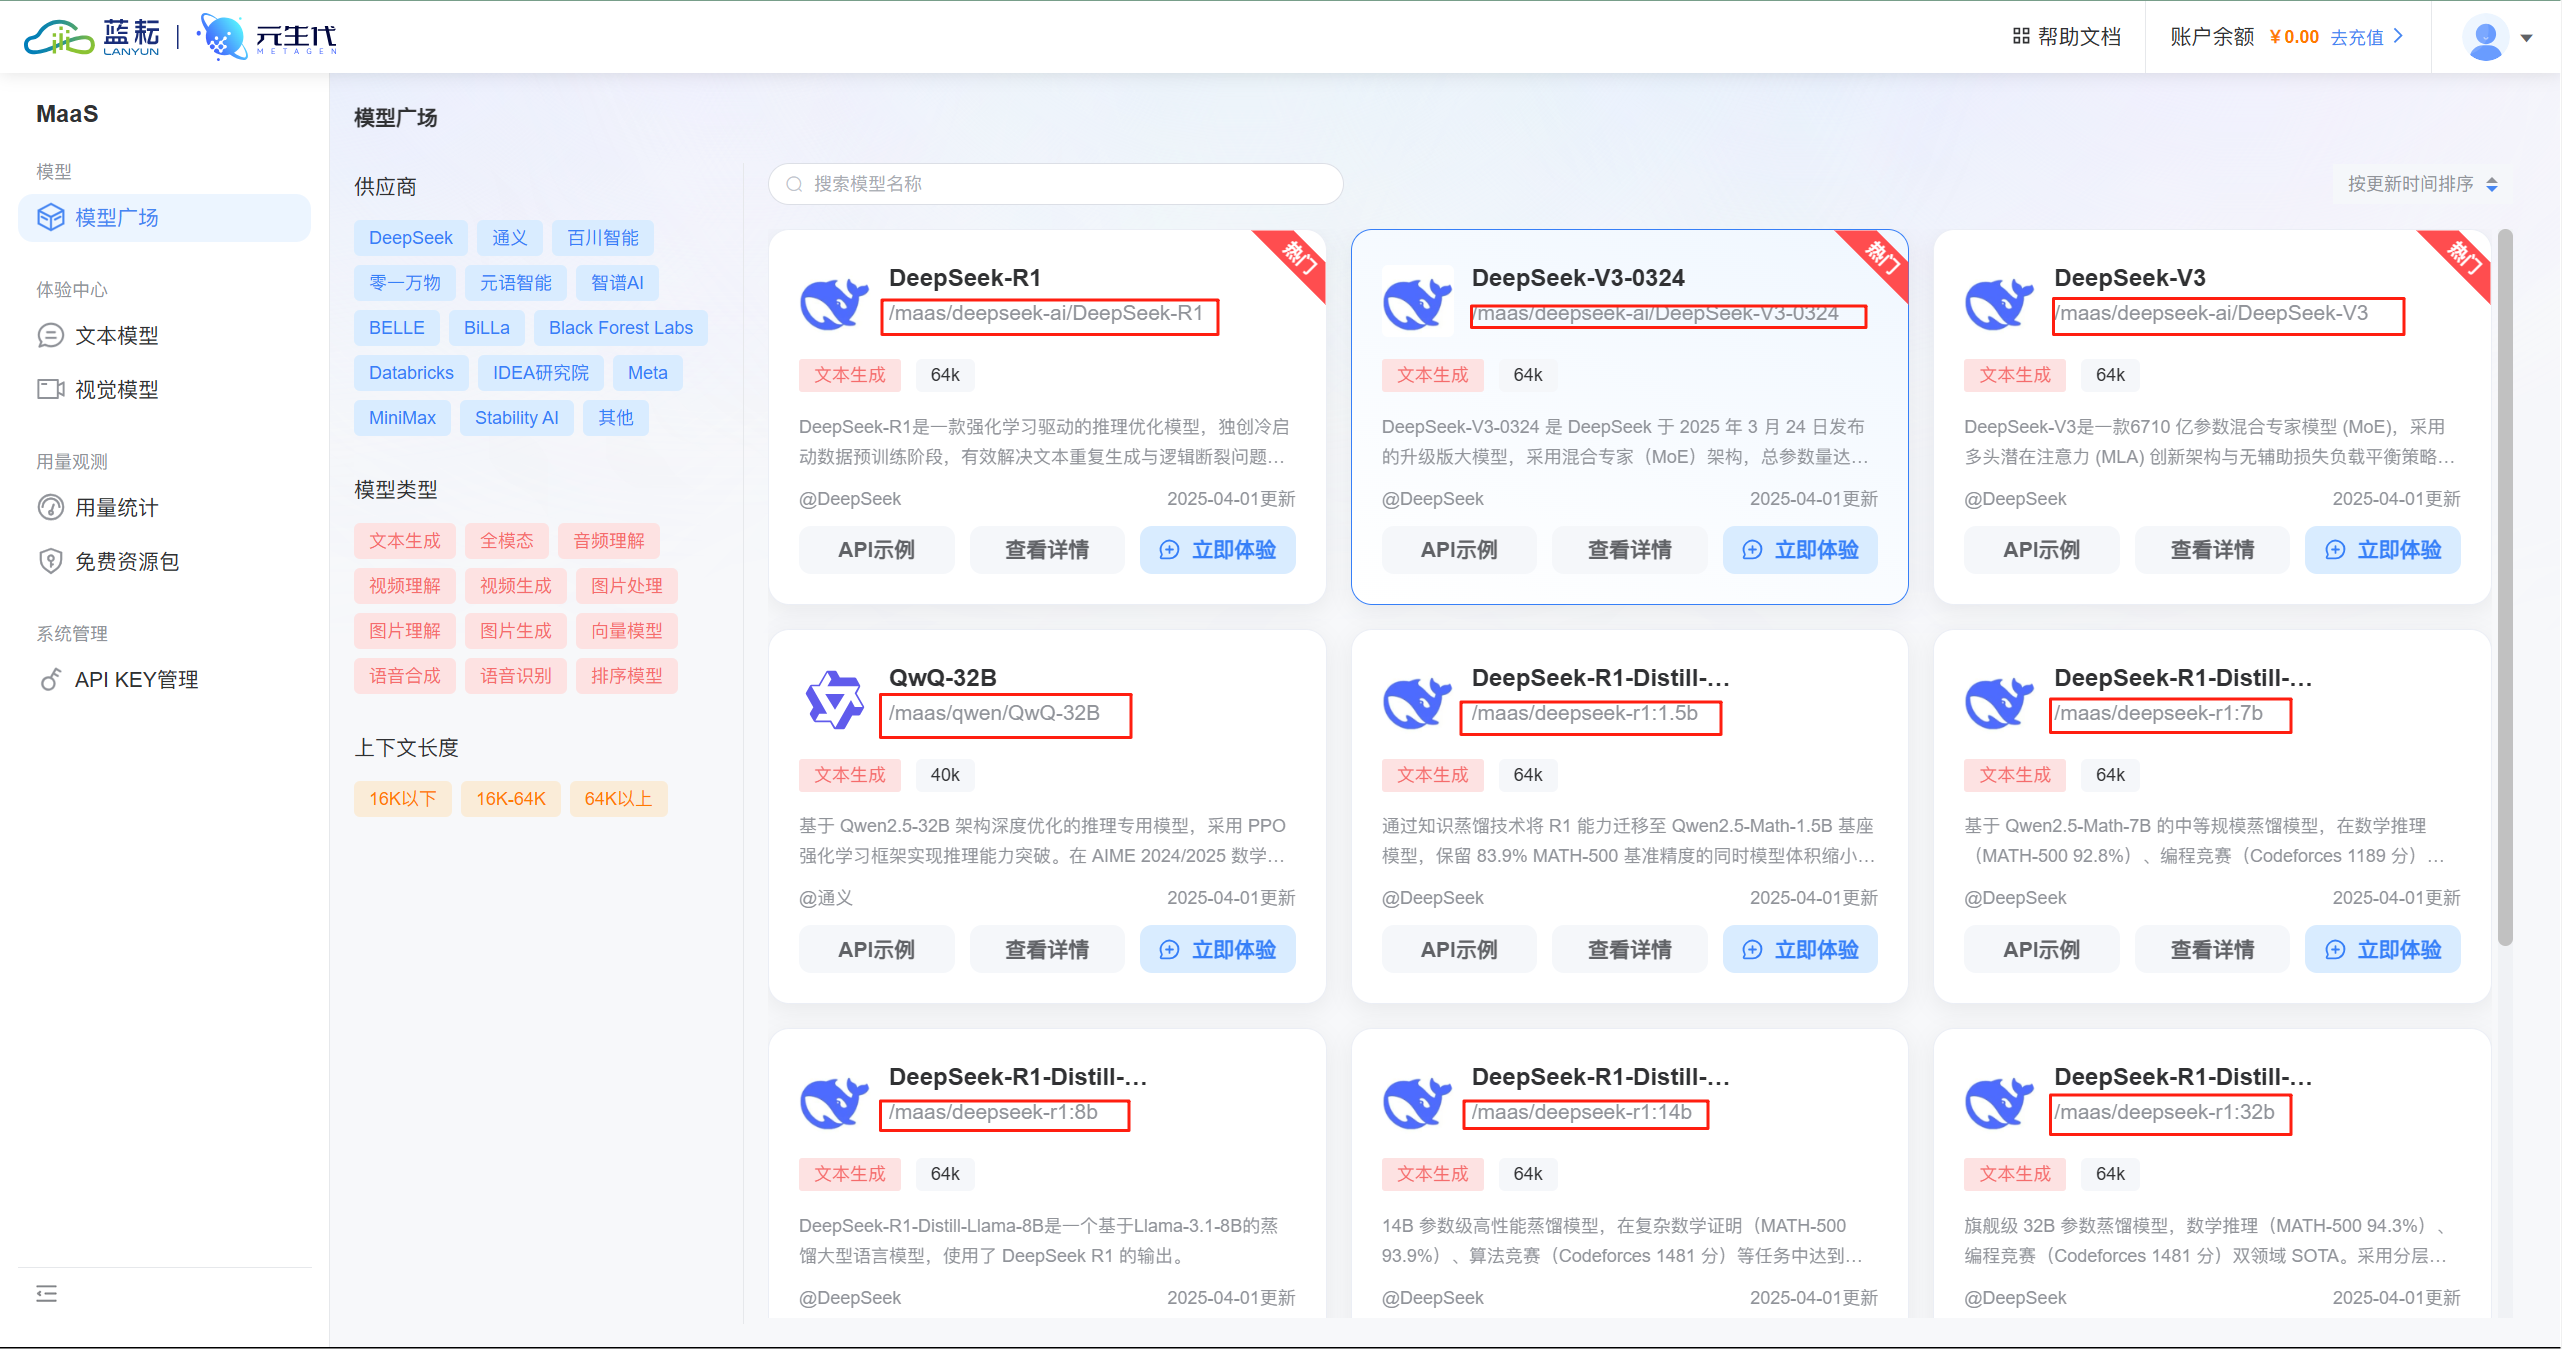
假如说我们要选择DeepSeek-R1模型的话,我们就定义model="/maas/deepseek-ai/DeepSeek-R1"就行了
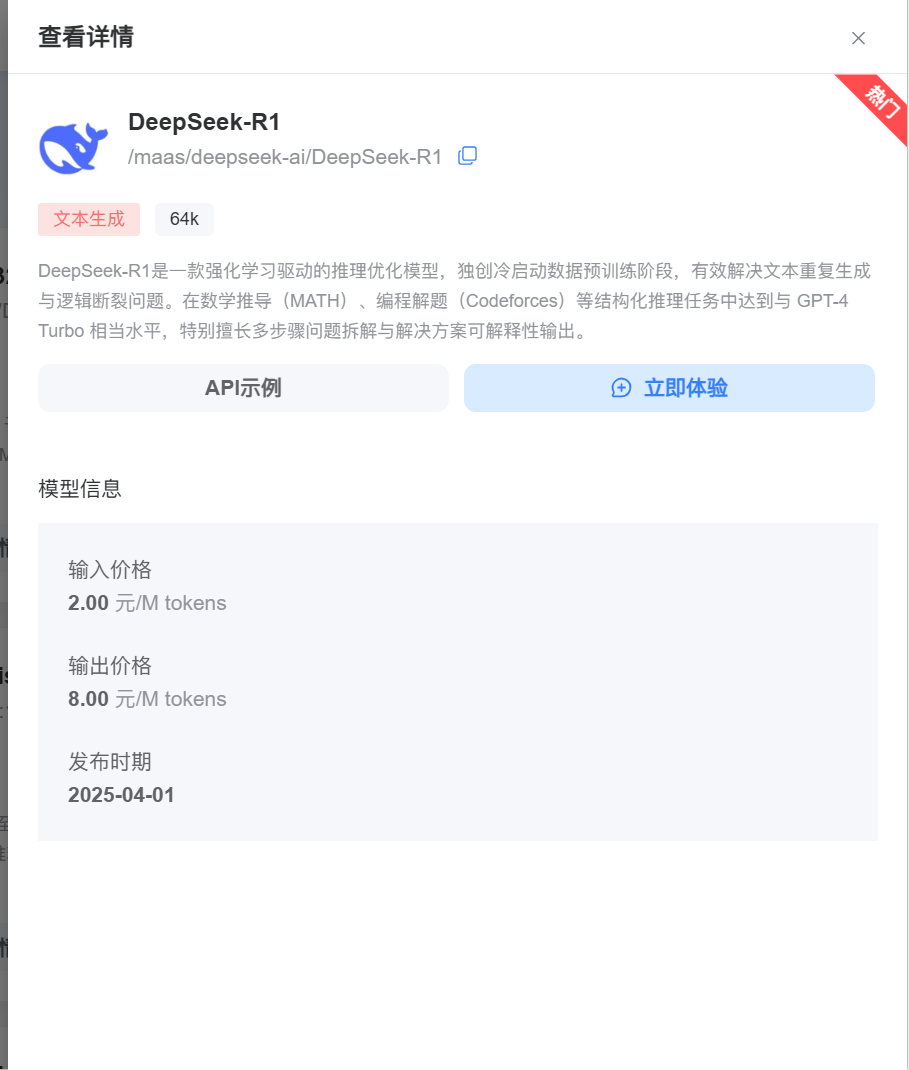
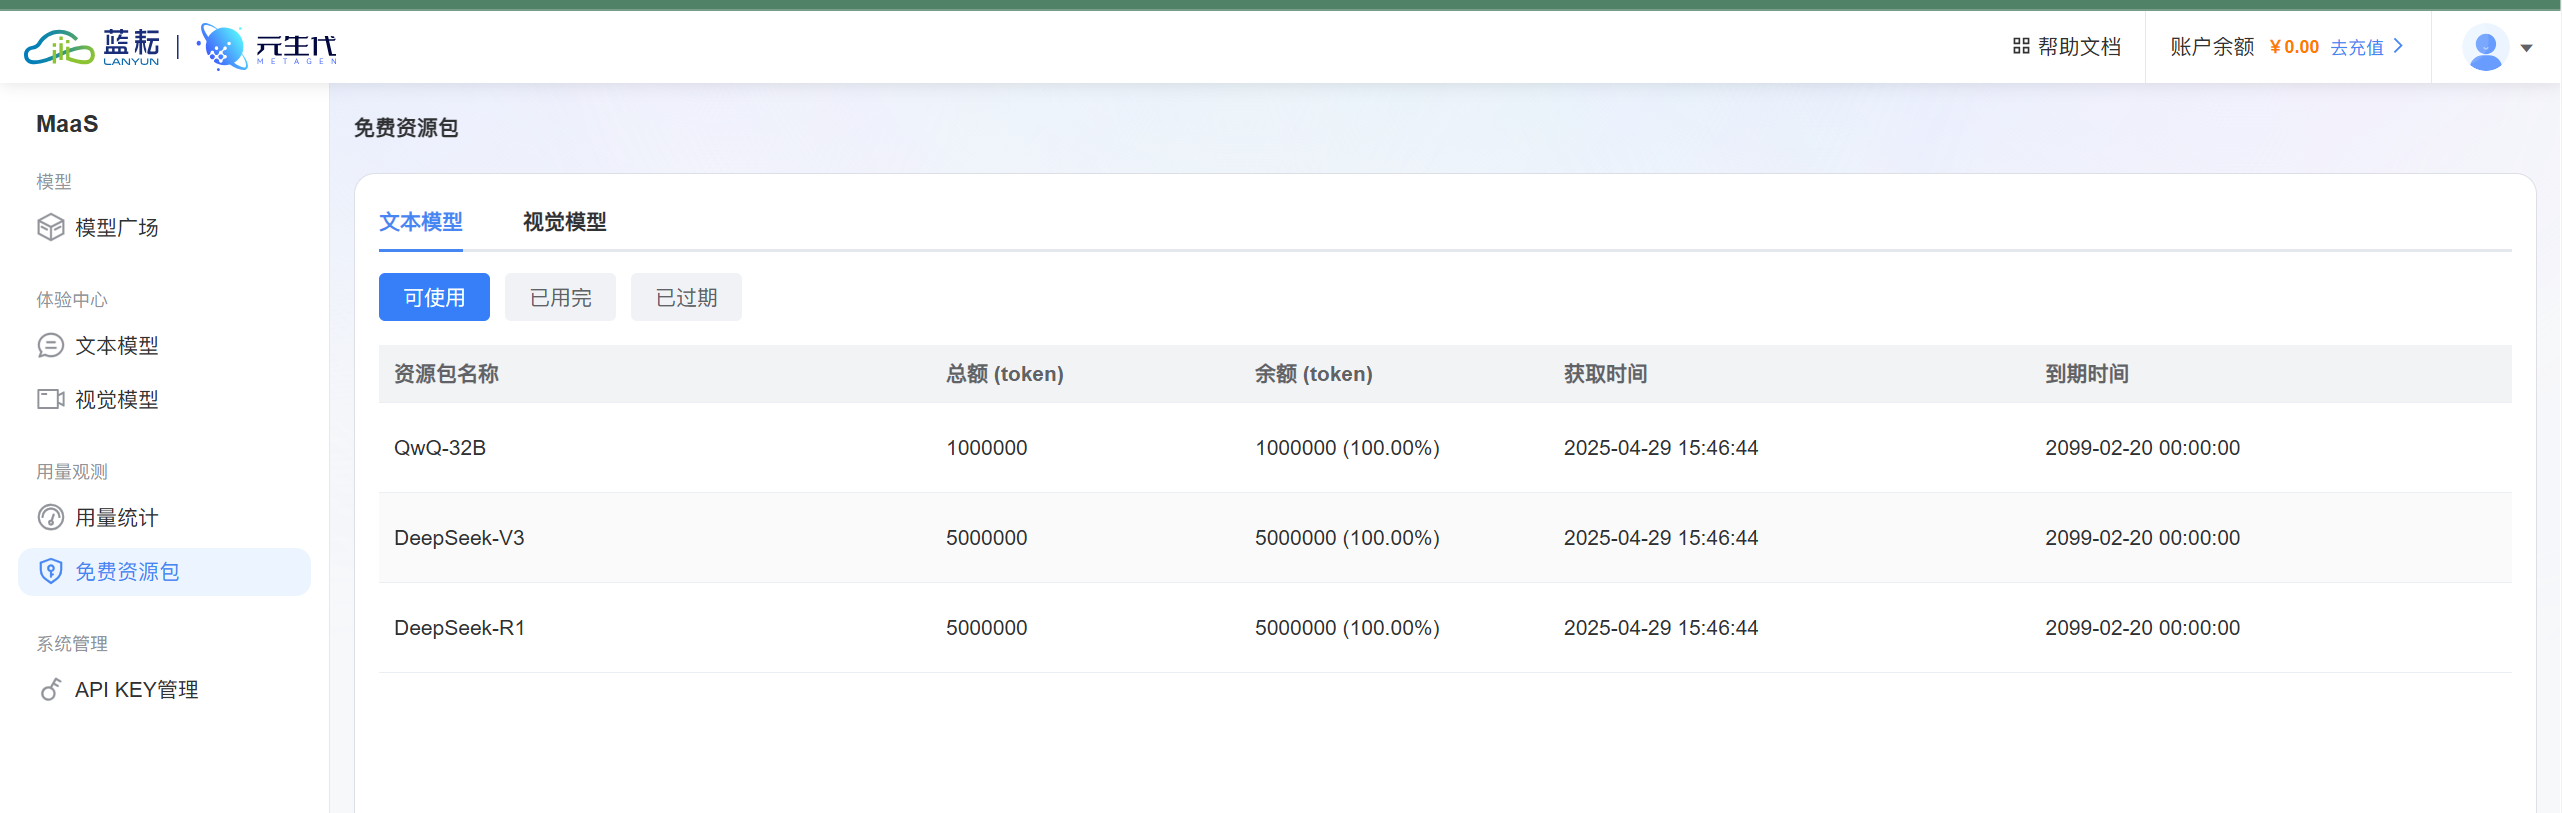
并且每个模型里面还有具体的模型介绍,tokens扣费啥的
这个时候我就得夸夸蓝耘平台了,我们在免费资源包这里发现QwQ-32B、DeepSeek-V3、DeepSeek-R1这三种模型都有大量的tokens额度,根本用不完,而且模型都是比较新的,随便调用
知道了这两个参数如何填写了,那么我们就可以开始调用了,但是在调用之前我们先在平台上使用下,感受下效果
在左侧的文本模型这里,选择最新的v3模型
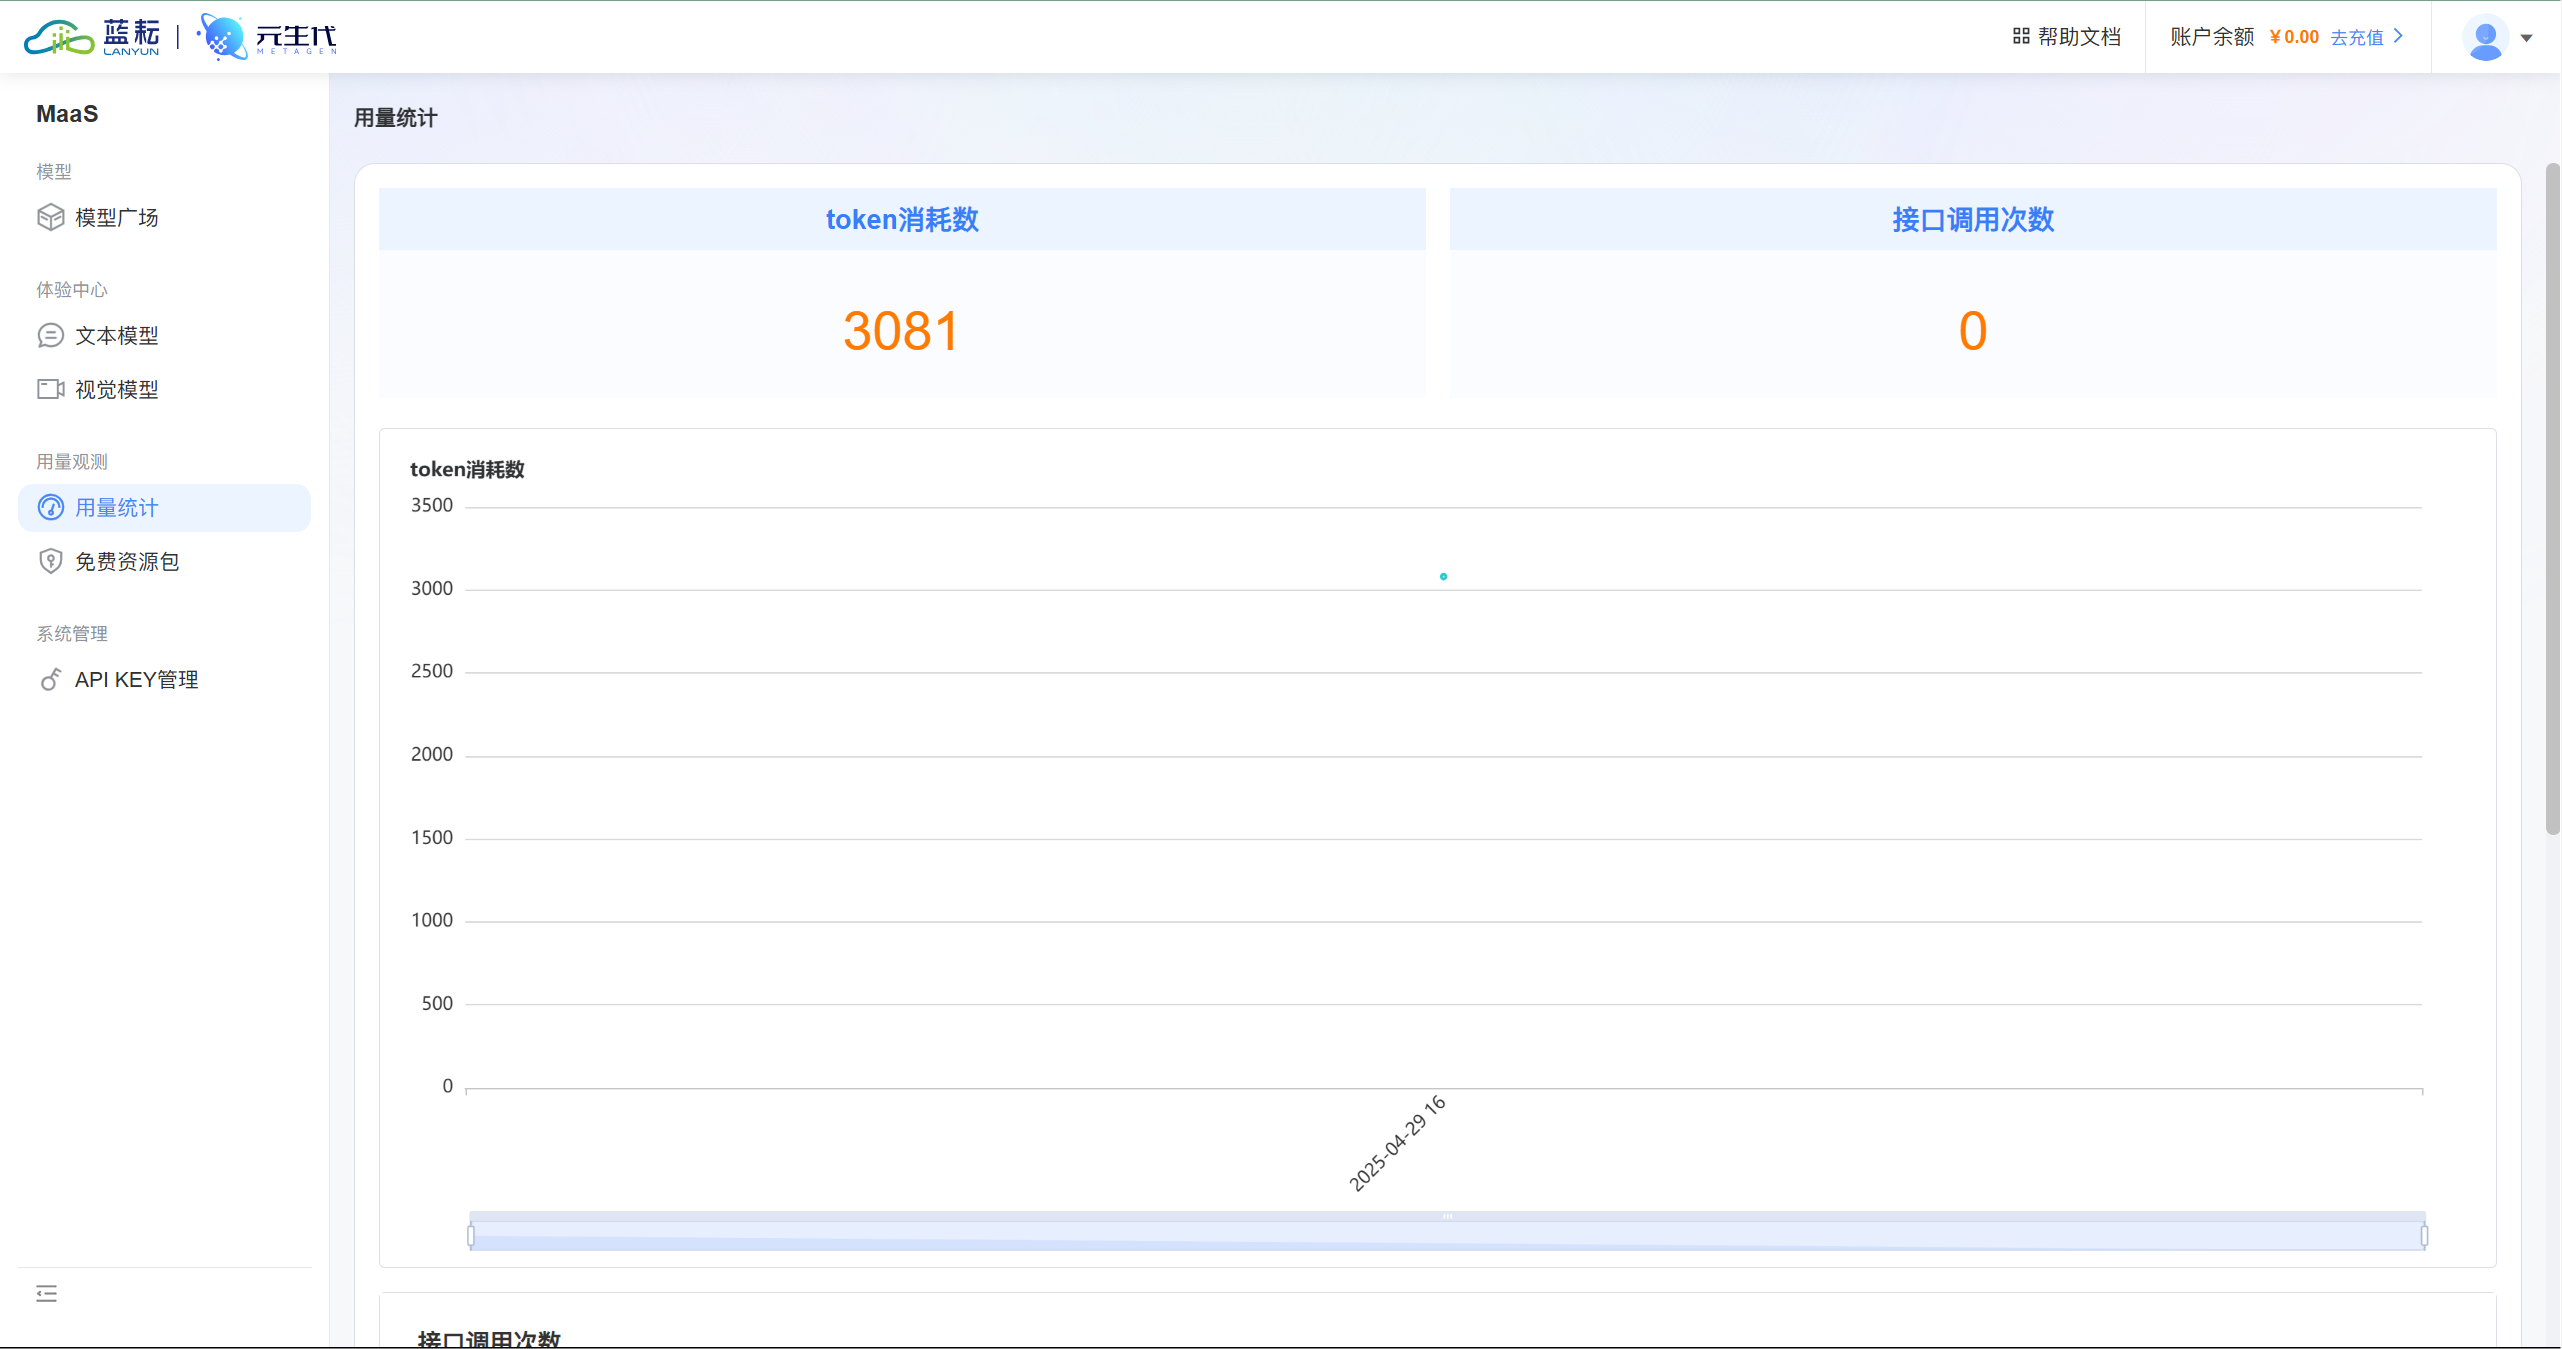
看起来效果还是蛮不错的

我们这里还是可以进行用量统计的,以线性图展示在我们面前
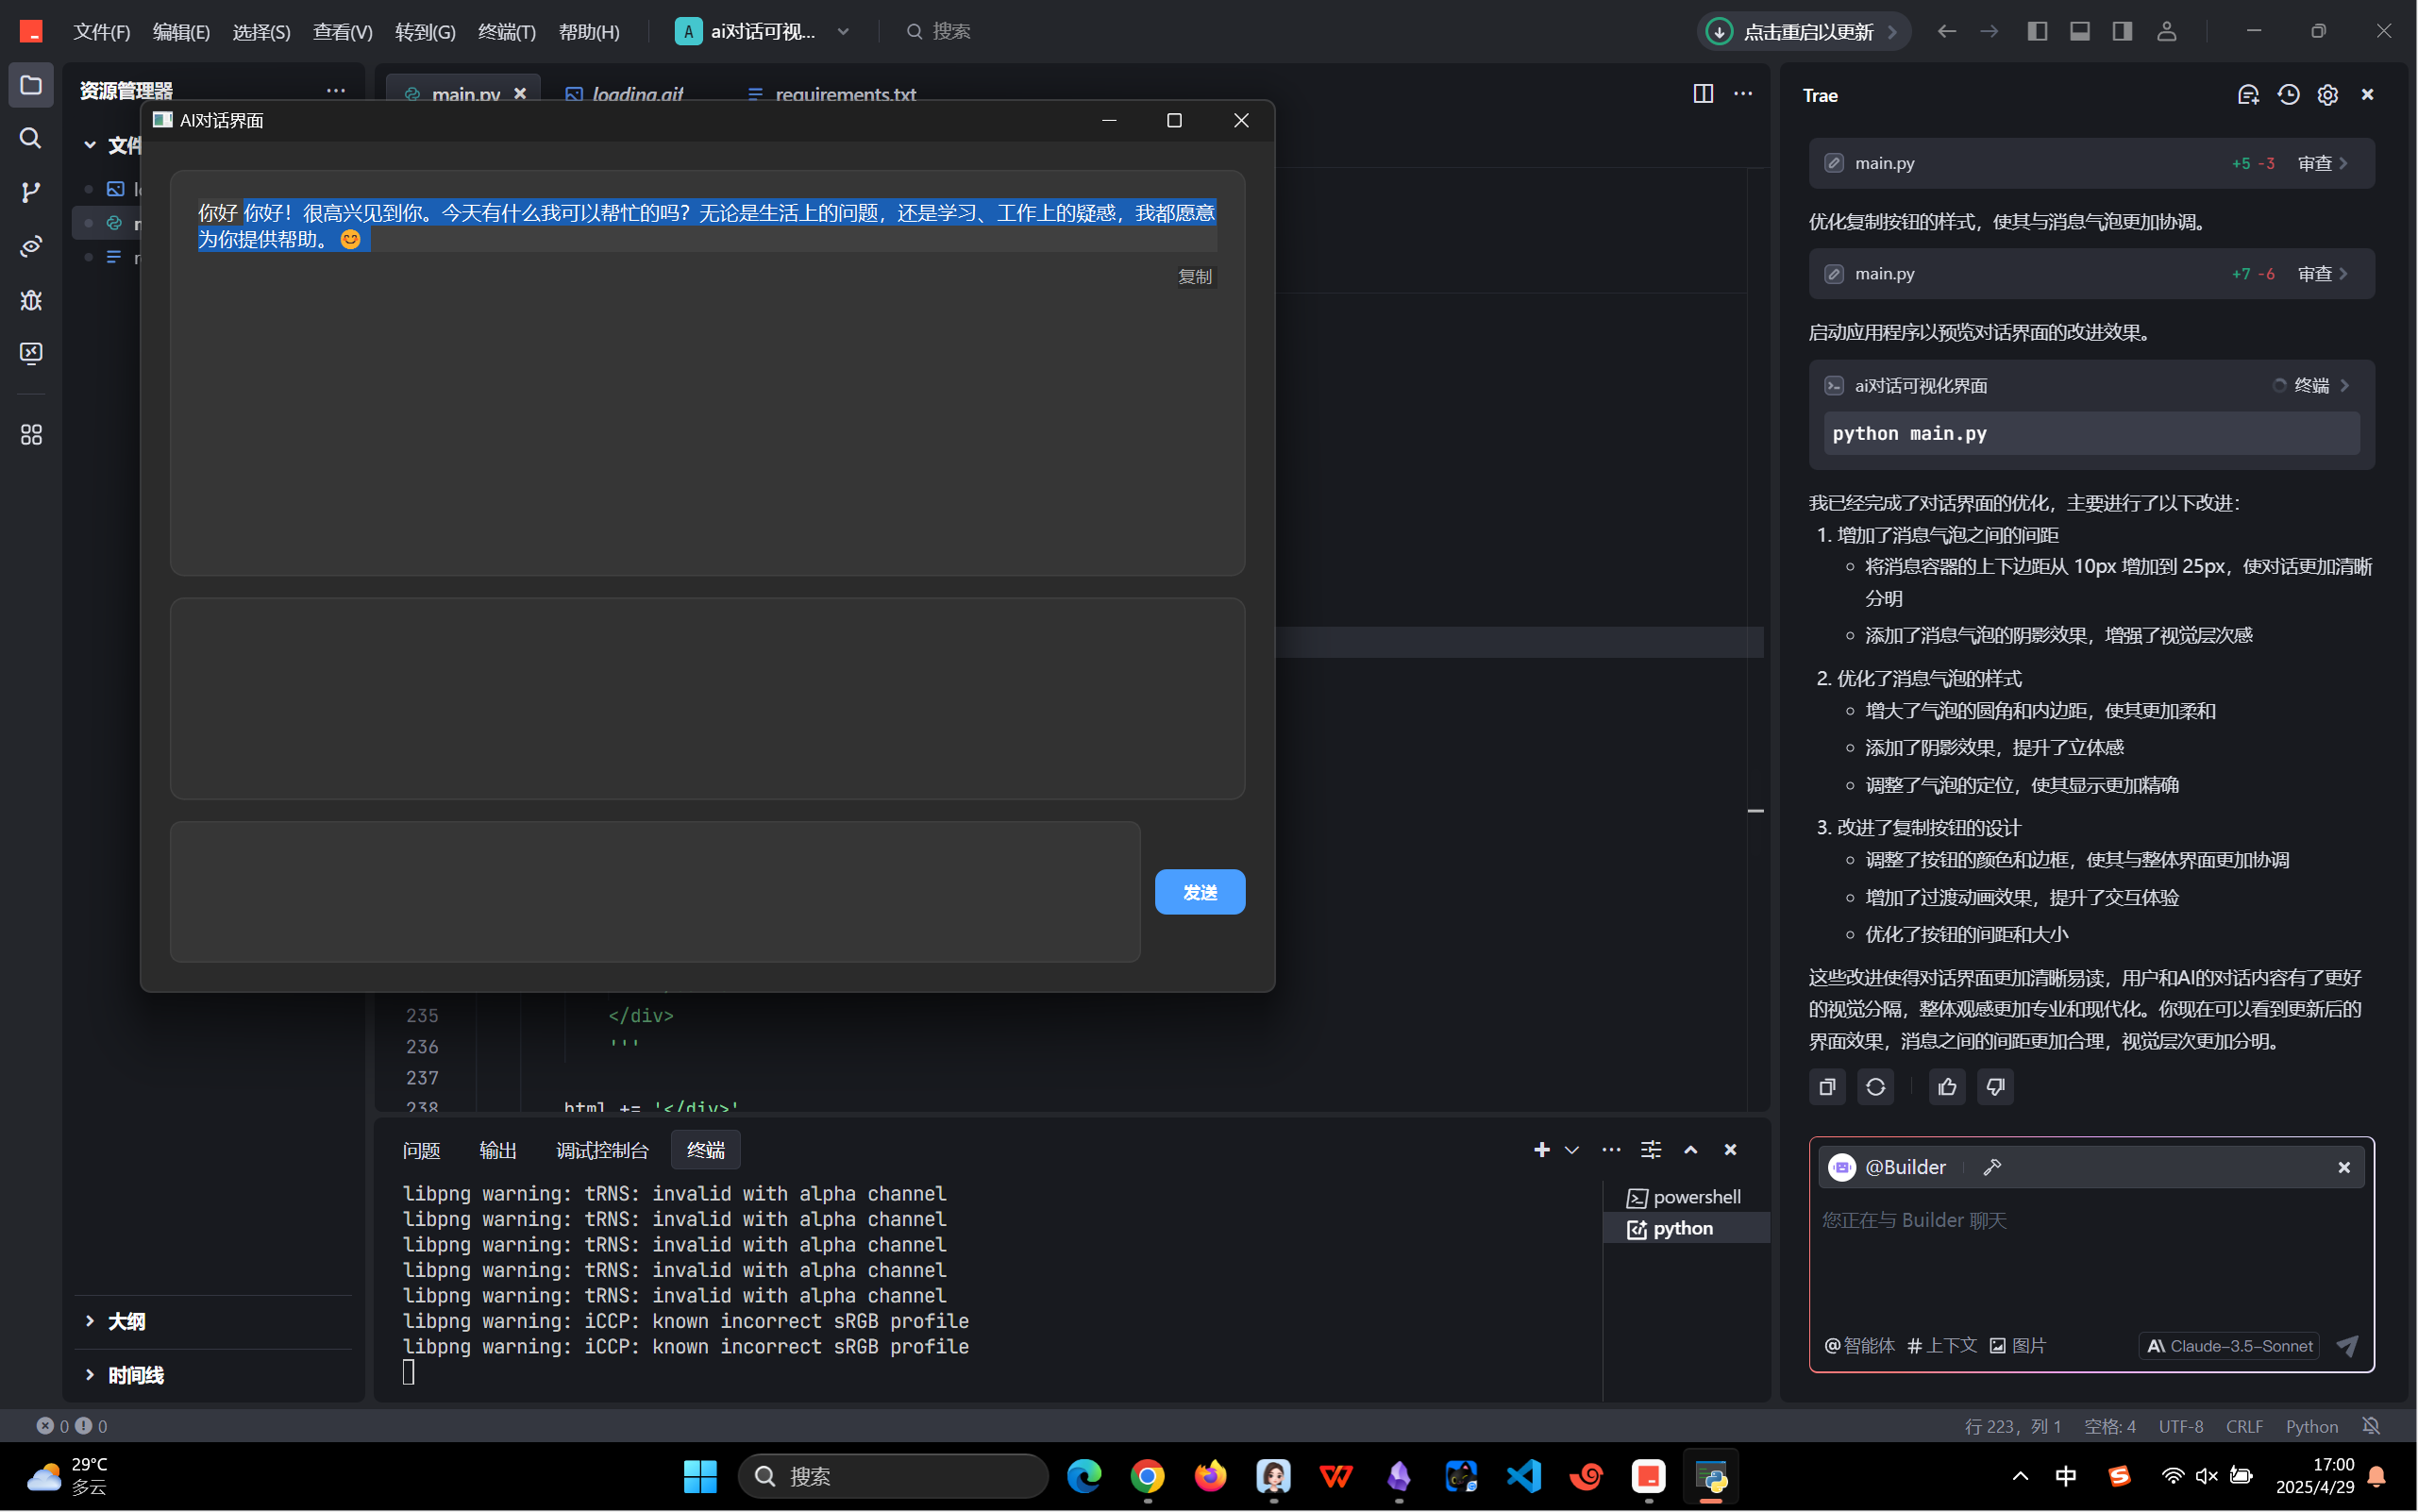
做一个ai对话可视化界面,和chatbox差不多的效果,能进行基本的对话就行了
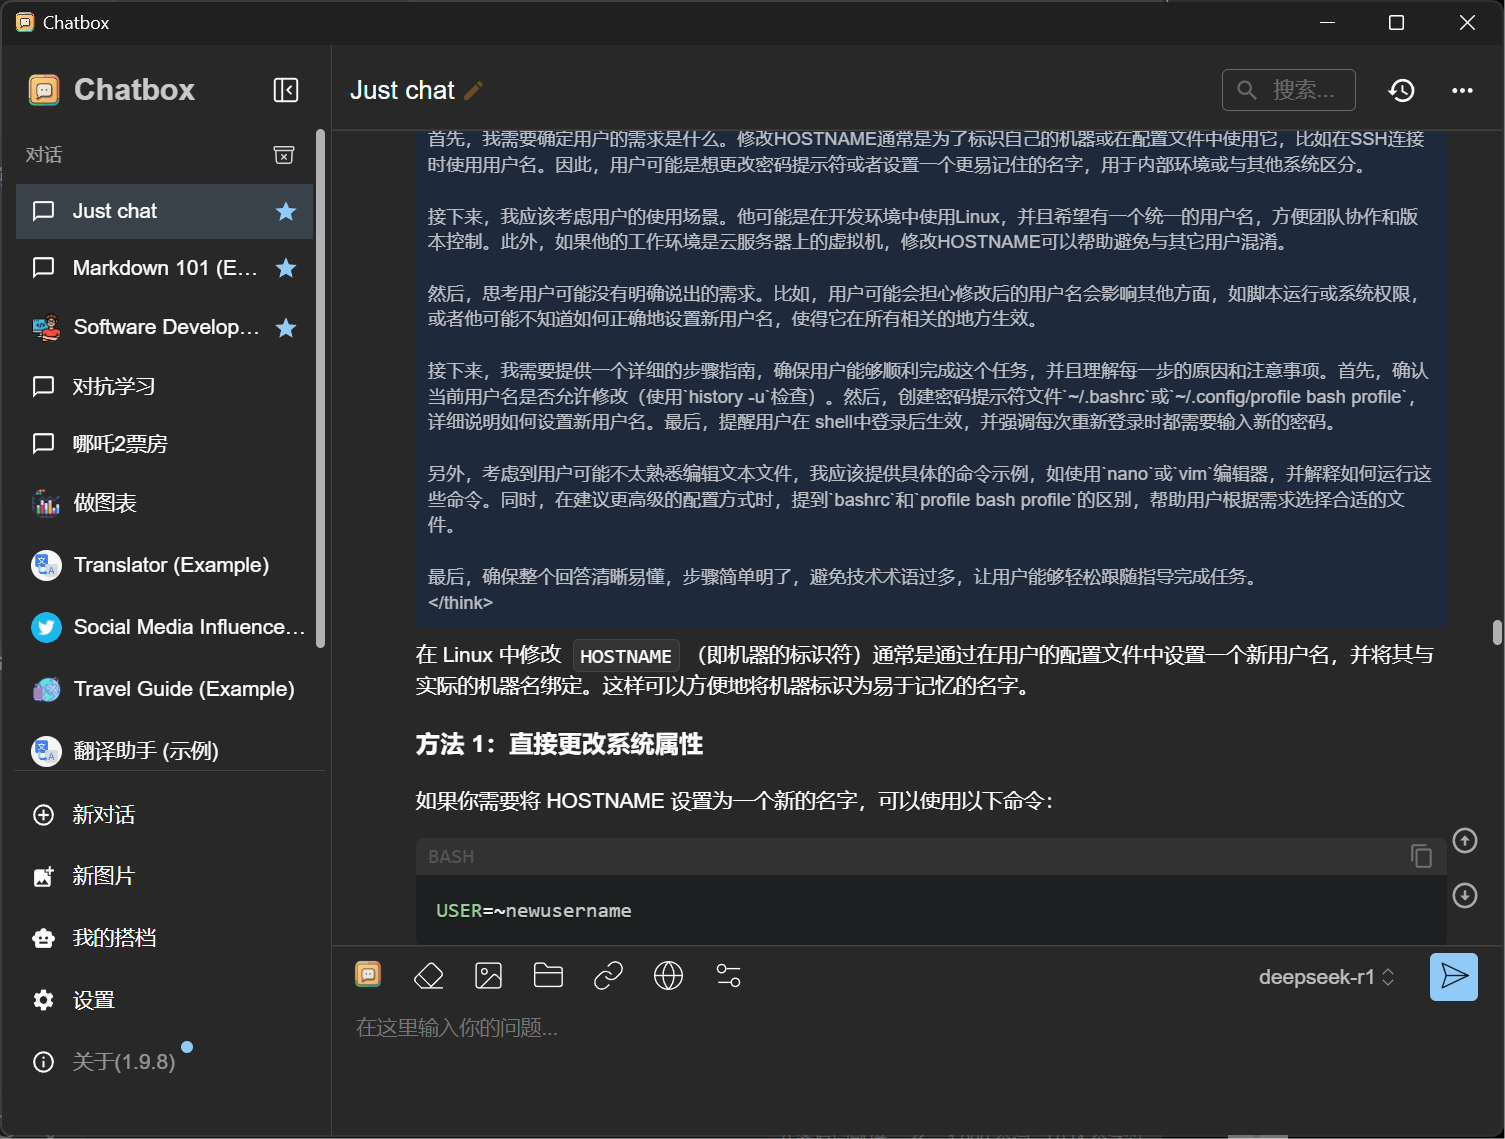
我们这里直接和trae进行对话,让他帮我生成效果
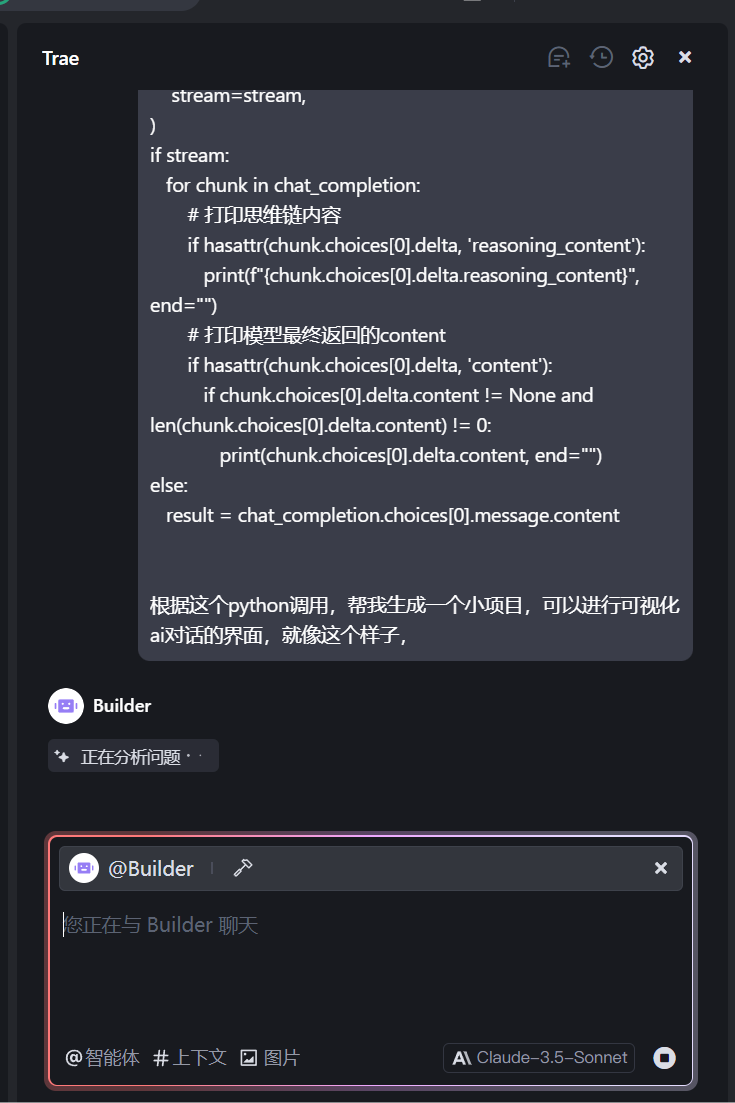
还是挺智能的
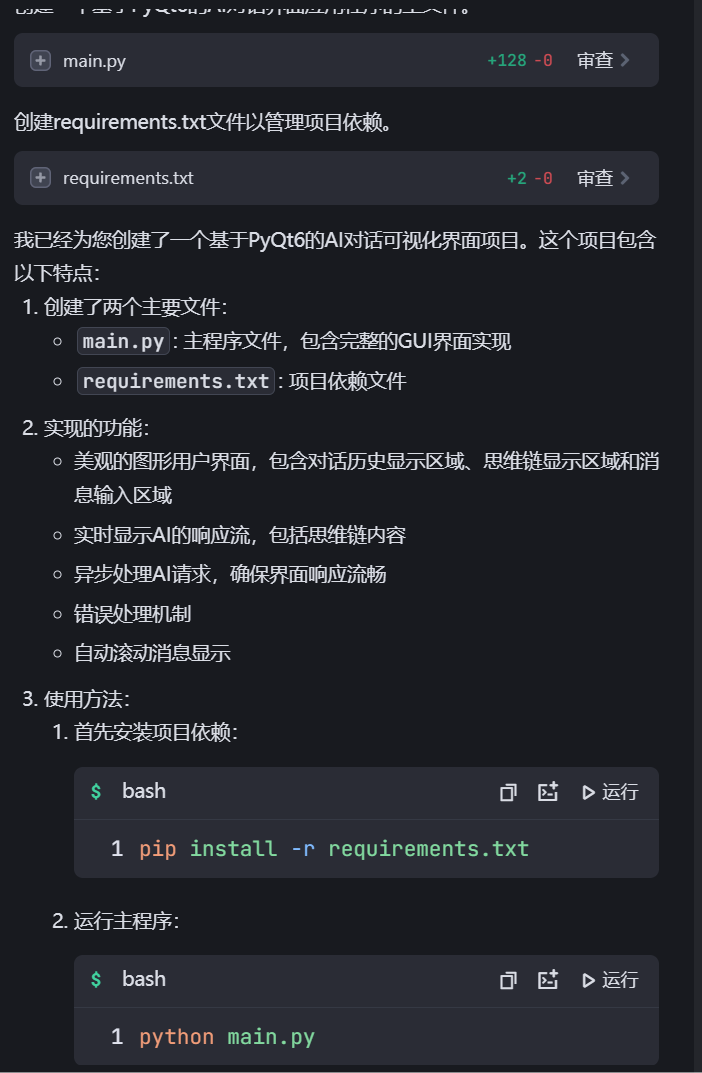
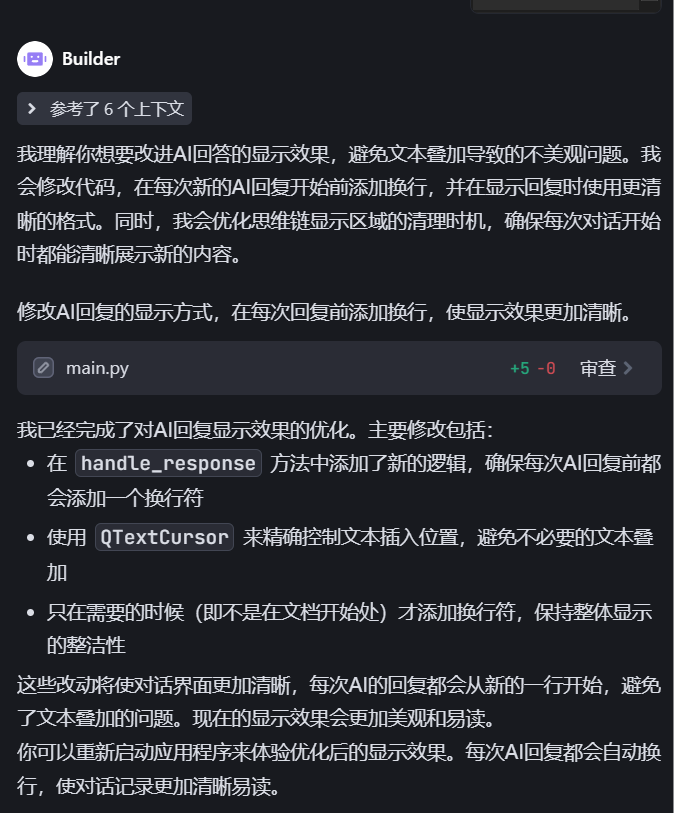
经过一系列的调用,最后确实能在本地进行一个ai对话机器人,这个程序的可改进点有很多,比如可以让用户和ai的对话隔开一点,并且图形化UI界面再好看点儿,加点机器人切换的功能(切换不同厂家的api)
实例代码如下:
import sys

from PyQt6.QtWidgets import QApplication, QMainWindow, QWidget, QVBoxLayout, QTextEdit, QPushButton, QHBoxLayout, QLabel, QFrame, QProgressBar

from PyQt6.QtCore import Qt, QThread, pyqtSignal, QSize, QTimer

from PyQt6.QtGui import QClipboard, QMovie

from openai import OpenAI


class ChatWorker(QThread):

    response_received = pyqtSignal(str)

    reasoning_received = pyqtSignal(str)

    error_occurred = pyqtSignal(str)


    def __init__(self, api_key, base_url, messages):

        super().__init__()

        self.api_key = api_key

        self.base_url = base_url

        self.messages = messages


    def run(self):

        try:

            client = OpenAI(

                api_key=self.api_key,

                base_url=self.base_url

            )


            chat_completion = client.chat.completions.create(

                model="/maas/deepseek-ai/DeepSeek-V3",

                messages=self.messages,

                stream=True

            )


            for chunk in chat_completion:

                if hasattr(chunk.choices[0].delta, 'reasoning_content'):

                    self.reasoning_received.emit(chunk.choices[0].delta.reasoning_content)

                if hasattr(chunk.choices[0].delta, 'content'):

                    if chunk.choices[0].delta.content:

                        self.response_received.emit(chunk.choices[0].delta.content)


        except Exception as e:

            self.error_occurred.emit(str(e))


class ChatWindow(QMainWindow):

    def __init__(self):

        super().__init__()

        self.is_sending = False

        self.initUI()


    def initUI(self):

        self.setWindowTitle('AI对话界面')

        self.setGeometry(100, 100, 800, 600)


        # 设置主窗口样式

        self.setStyleSheet("""

            QMainWindow {

                background-color: #2b2b2b;

            }

        """)


        # 创建主窗口部件和布局

        central_widget = QWidget()

        self.setCentralWidget(central_widget)

        main_layout = QVBoxLayout(central_widget)

        main_layout.setSpacing(15)

        main_layout.setContentsMargins(20, 20, 20, 20)

        # 创建滚动区域用于显示对话历史

        self.chat_history = QTextEdit()

        self.chat_history.setReadOnly(True)

        self.chat_history.setStyleSheet("""

            QTextEdit {

                background-color: #363636;

                border: 1px solid #404040;

                border-radius: 10px;

                padding: 15px;

                color: #ffffff;

            }

        """)

        main_layout.addWidget(self.chat_history, stretch=2)

        # 思维链显示区域

        self.reasoning_display = QTextEdit()

        self.reasoning_display.setReadOnly(True)

        self.reasoning_display.setStyleSheet("""

            QTextEdit {

                background-color: #323232;

                border: 1px solid #404040;

                border-radius: 10px;

                padding: 15px;

                color: #b4b4b4;

                font-size: 13px;

            }

        """)

        main_layout.addWidget(self.reasoning_display, stretch=1)


        # 输入区域

        input_layout = QHBoxLayout()

        input_layout.setSpacing(10)

        self.input_field = QTextEdit()

        self.input_field.setMaximumHeight(100)

        self.input_field.setStyleSheet("""

            QTextEdit {

                background-color: #363636;

                border: 1px solid #404040;

                border-radius: 8px;

                padding: 8px;

                color: #ffffff;

            }

        """)

        input_layout.addWidget(self.input_field)


        # 发送按钮和状态指示器布局

        send_status_layout = QHBoxLayout()

        send_status_layout.setSpacing(5)

        # 发送按钮

        self.send_button = QPushButton('发送')

        self.send_button.setStyleSheet("""

            QPushButton {

                background-color: #4a9eff;

                border: none;

                border-radius: 8px;

                padding: 8px 20px;

                color: white;

                font-weight: bold;

            }

            QPushButton:hover {

                background-color: #3b8be6;

            }

            QPushButton:pressed {

                background-color: #3178cc;

            }

            QPushButton:disabled {

                background-color: #666666;

            }

        """)

        self.send_button.clicked.connect(self.send_message)

        send_status_layout.addWidget(self.send_button)

        # 加载动画

        self.loading_label = QLabel()

        self.loading_movie = QMovie("loading.gif")

        self.loading_movie.setScaledSize(QSize(20, 20))

        self.loading_label.setMovie(self.loading_movie)

        self.loading_label.hide()

        send_status_layout.addWidget(self.loading_label)

        input_layout.addLayout(send_status_layout)


        main_layout.addLayout(input_layout)


        # OpenAI API配置

        self.api_key = "sk-3bjomhlbnrnx2utxzi7yw26i62cvnlx6bnecxv3gchq75o2y"

        self.base_url = "https://maas-api.lanyun.net/v1"


    def send_message(self):

        if self.is_sending:

            return

        user_message = self.input_field.toPlainText().strip()

        if not user_message:

            return

        # 设置发送状态

        self.is_sending = True

        self.send_button.setEnabled(False)

        self.loading_label.show()

        self.loading_movie.start()


        # 清空输入框和思维链显示

        self.input_field.clear()

        self.reasoning_display.clear()


        # 显示用户消息

        message_html = self.create_message_bubble(user_message, is_user=True)

        cursor = self.chat_history.textCursor()

        cursor.movePosition(cursor.MoveOperation.End)

        cursor.insertHtml(message_html)


        # 准备消息

        messages = [

            {

                "role": "user",

                "content": user_message

            }

        ]


        # 创建并启动工作线程

        self.worker = ChatWorker(self.api_key, self.base_url, messages)

        self.worker.response_received.connect(self.handle_response)

        self.worker.reasoning_received.connect(self.handle_reasoning)

        self.worker.error_occurred.connect(self.handle_error)

        self.worker.start()


    def create_message_bubble(self, text, is_user=True):

        # 创建消息容器的HTML

        background_color = '#404040' if is_user else '#1a5fb4'

        alignment = 'right' if is_user else 'left'

        # 构建消息HTML

        html = f'''

        <div style="text-align: {alignment}; margin: 25px 0;">

            <div style="

                position: relative;

                display: inline-block;

                max-width: 80%;

                background-color: {background_color};

                border-radius: 15px;

                padding: 15px;

                color: #ffffff;

                font-size: 14px;

                word-wrap: break-word;

                text-align: left;

                box-shadow: 0 2px 5px rgba(0,0,0,0.2);

            ">

                {text}

            </div>

        '''

        # 为AI消息添加复制按钮

        if not is_user:

            html += f'''

            <div style="text-align: right; margin-top: 10px;">

                <button onclick="document.execCommand('copy')" style="

                    background-color: #2b2b2b;

                    border: 1px solid #404040;

                    border-radius: 6px;

                    color: #b4b4b4;

                    padding: 6px 12px;

                    cursor: pointer;

                    font-size: 12px;

                    transition: all 0.2s ease;

                ">

                    复制

                </button>

            </div>

            '''

        html += '</div>'

        return html


    def handle_response(self, response):

        # 如果是第一次收到响应,初始化累积变量和计时器

        if not hasattr(self, 'accumulated_response'):

            self.accumulated_response = ''

            self.response_timer = QTimer()

            self.response_timer.setSingleShot(True)

            self.response_timer.timeout.connect(self.display_accumulated_response)

        # 累积响应内容

        self.accumulated_response += response

        # 重置计时器(每收到新内容就重置等待时间)

        self.response_timer.start(1000)  # 1秒后如果没有新内容,则显示累积的内容

    def display_accumulated_response(self):

        if not self.accumulated_response.strip():

            return

        # 创建并插入AI回复气泡

        message_html = self.create_message_bubble(self.accumulated_response, is_user=False)

        cursor = self.chat_history.textCursor()

        cursor.movePosition(cursor.MoveOperation.End)

        cursor.insertHtml(message_html)

        # 滚动到底部

        self.chat_history.verticalScrollBar().setValue(

            self.chat_history.verticalScrollBar().maximum()

        )

        # 重置累积变量和发送状态

        self.accumulated_response = ''

        self.is_sending = False

        self.send_button.setEnabled(True)

        self.loading_label.hide()

        self.loading_movie.stop()


    def handle_reasoning(self, reasoning):

        self.reasoning_display.insertPlainText(reasoning)


    def handle_error(self, error_message):

        error_html = f'<div style="color: #ff6b6b; padding: 10px; background-color: #2c2c2c; border-radius: 5px; margin: 5px;">错误: {error_message}</div>'

        self.chat_history.append(error_html)

        # 重置发送状态

        self.is_sending = False

        self.send_button.setEnabled(True)

        self.loading_label.hide()

        self.loading_movie.stop()


def main():

    app = QApplication(sys.argv)

    window = ChatWindow()

    window.show()

    sys.exit(app.exec())


if __name__ == '__main__':

    main()
总结
针对蓝耘的api调用操作,确实很方便,因为我们只需要改变两个变量就可以实现本地的调用操作,相较于之前使用其他平台的api,没有那么复杂的流程和文档,一眼就能看明白怎么回事,这个相应的速度也是相当的快的
用户无需深入钻研复杂的底层算法和模型细节,仅需按照 API 文档说明,进行简单的接口调用操作,就能利用平台强大的 AI 技术。
并且蓝耘平台的 API 支持多平台使用,无论是常见的 Windows、Linux、macOS 操作系统,还是移动端的 iOS 和 Android 系统,开发者都能顺利集成平台的 AI 服务
是否有我说的这么厉害呢?感兴趣的同学赶紧来试试吧
https://cloud.lanyun.net//#/registerPage?promoterCode=0131


 被折叠的 条评论
为什么被折叠?
被折叠的 条评论
为什么被折叠?
 到【灌水乐园】发言


